0K! Boys and girls, this is a good tutorial for anybody interesting in human skinning in 3D Modeling without the use of photos, because almost all of us are poor bastards that can't afford buying some ref images and must make some juggling to get top-notch results.
So, first things first... human skin is matte, opaque, and its color depends of the blood. Yes, it depends of the blood, if you check out a dead body; you'll see the flesh is gray once the blood is over (Go to a med school for a visit, it's the best place to get started for organic modelers).
Now, why is this important? It is important because this way you'll be able to create a skin gamma color depending of the character you're skinning, if red, you know what kind of pigmentation it will have: from dark brown to dense beige, i.e.
Anyhow, let's get started, I'll cover the theory basis on the way.
I won't be covering UV mapping extraction, but I'll state this clear, when texturing, always use as a base a default gray (RGB 111) tone of a lightmap mixed with an Ambient Occlusion map on top on multiply. This way, you'll have a gray tone that will work for your starting point. If you'll use it for unlited purposes, just use the lightmap. In this case, I'll use the unlited version because I'm a bad boy.
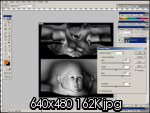
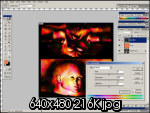
1. Make sure your map is completely on a grayscale. But, do not use desaturate or grayscale mode to do it, because this will delete our color information, that indeed is something we don't want. For that, we'll use the Channel Mixer, just be sure to check monochrome. Adjust it to your belief. In this case, I used this setting.
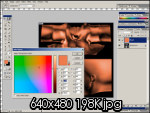
2. Now, here comes the fun, create another layer on top, this one will be your Flood color layer (This means: name it flood you idiot!) and fill it with a color you find attractive to your needs, since this is a human girl. Set it to overlay. I used this gamma of colors.
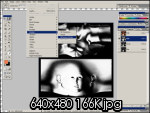
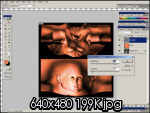
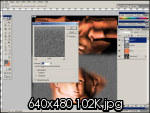
3. Now, duplicate your grayscale layer and put it on top of your Flood layer. This layer will work as the Scattering color layer (name it, being organized is very useful, especially if your file can get very heavy on layers) and apply on every channel a Difference Clouds filter (Filters->Render->Difference Clouds) then set it to overlay.
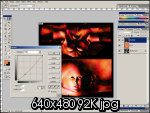
4. In the Scattering layer. Adjust the curves as needed, generally Input 65 to 75 do the trick and Output 60 to 70. We're doing this, because we need the colors to be saturated at first, so we can get a glance of the colors themselves.
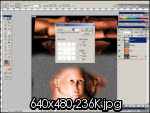
5. Then, set the Saturation to 60 (Press Ctrl+U)
6. Now, go to Adjustments->Brightness/Contrast and set the Brightness to 70 and Contrast to -85. This will make the weak colors blend with the background and the strong ones (especially red) to be softer, just how we wanted it. Now, this is why I call this one the Scattering layer, it simulates the Sub-surface Scattering method.
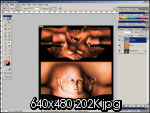
7. There are certain areas we don't want any red, so, we'll use the Dodge tool (midtones - exposure, depends of your tastes, but 50% is good enough) to make it go away. You can do this too to erase some dark areas if you want to. Or making other areas clearer in the Flood Layer, you know, for that effect of: "the sun doesn't touch you there"
8. Onto details, we have some really decent skin by now, Why not adding some shiny stuff? So, I'll cover how to add some hair. Create a new layer and paint the areas where you want hair in a tone of gray you want.
9. Apply a Noise Filter (Filters->Noise->Add Noise) be sure to keep it on Gaussian, and check monochrome.
10. Apply a Radial Blur Filter (Filters->Blur->Radial blur)
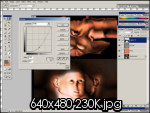
11. Set the Layer to Hard Light and then apply this settings on the curves (Ctrl+M)
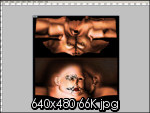
12. And done! That's how concludes my tutorial, you can now begin to add details. For example, I created some vector art tattoos I added on the file on a normal mode. For detailing, now you can get into the net and search for the parts you need, for example wrinkles or freckles and apply them on hard light mode, or ink over it... the possibilities expands a lot! As I say, this way you have learned how to create a somewhat realistic skin without photos, detailing... well, that's up to you and your drawing skills. I may continue with tutorials regarding certain zones and how to detail them. Good luck y'all!
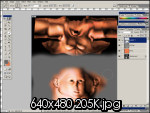


Looks good in the preview, but I can't help but think the lightmap is too strong and directional (one side is permanently shaded) for a texture. Perhaps if it's opacity/strength were lowered, and the light was made more even/centered.
Well, that depends mostly in how you set up your lights in your scenery.
Unless you're planning for the character to not even move...
In this case, I did that. If you want to have some good centered light, the best way is creating a skylight with an omni light in the middle, right on top. And on render, disable the shadow casting, that way you'll have gray areas in a very symmetric way.
Or you can use the dodge tool in shadow mode to correct those imperfections.
(buried)
LOL
Good job, but you did this on purpose to make people laugh.
perhaps, or just to give a hand for those who can't find a way to make some skinning.
Thanks for this!
This really helps out... I wonder why some people will laugh; worse things happen in Life Drawing 106 with nude bodies. O:
Can't wait for a GIMP tut.
fap fap fap fap fap fap fap fap fap fap fap fap fap fap fap fap fap fap fap fap fap fap fap fap fap fap fap fap fap fap fap fap fap fap fap fap fap fap fap fap fap fap fap fap fap fap fap fap fap fap fap fap fap fap fap fap fap fap
Done.
lol pervy guy...
BTW nice tutorial, but i make maps.
Typically, you don't want to bake lighting/shadow information into your textures, as you want the lights in your scene to do that - this is especially true with next-gen engines. Baking lightmaps in your scenes also means that your lighting is final and static You, at most, want to use an AO map slightly blurred.
You did well to fake the light scattering, but you are missing a bit of back-scattering. The ears especially should have some red back-scattering, considering that you have a rim light on the top/back of the shoulder - meaning that light should be penetrating the back of the ears.
Honestly, if you have access to a high-quality render engine like Mental Ray, I would recommend using the SSS shaders and bake that out for the base of your color. You can even export out the epidermal, subdermal, and back scattering maps to gain even more control in Photoshop for the color texture.
I didn't know that you could render to texture those, I'll give it a try, thxs.
Awesome Tut! thank you very mucho!
very useful ; )
Can it be done in Paint.NET?
Going to go try it out now!haha =)
Very nice tutorial. Good results, highly professional and easy to apply.