
In This Tutorial, I will be instructing you on how to create Bumpmaps for existing source textures;
What You Will Need:
- Crazy Bump - Crazybump.com
- GCF Scape - Nemesis.thewavelength.net
- Photoshop [Or Other Programme That allows you to open .VTF Files and Save them as other common formats E.G JPEG]
- A Good Sense Of Judgment
Now Then; Bumpmaps are a very good way of adding extra realism to your Source maps, The Bumpmaps Essentially adds an extra 3D layer of realism to your otherwise flat textures
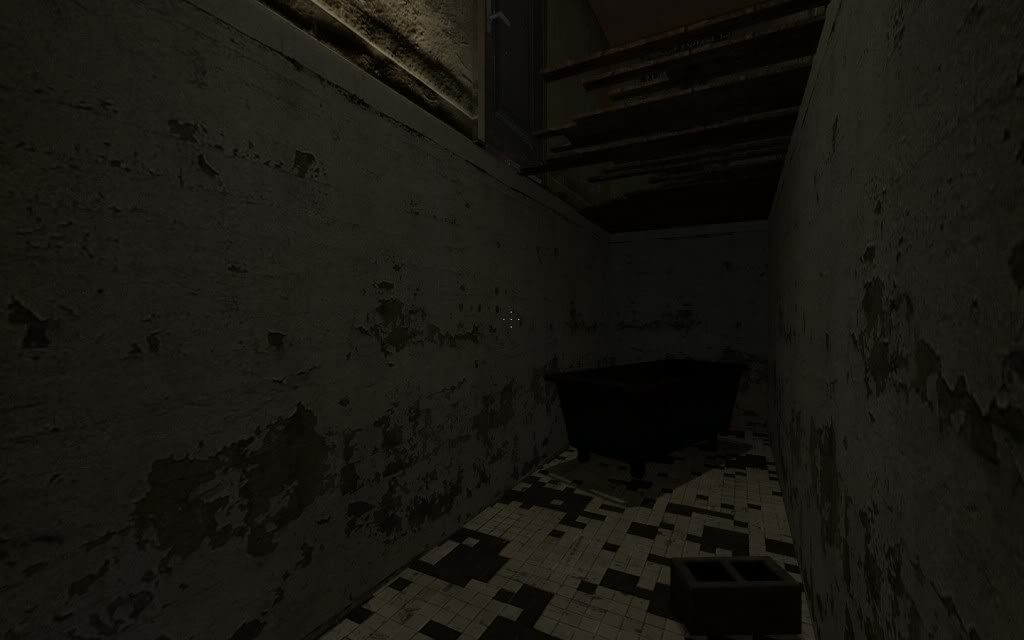
Without BumpMaps:
With BumpMaps:
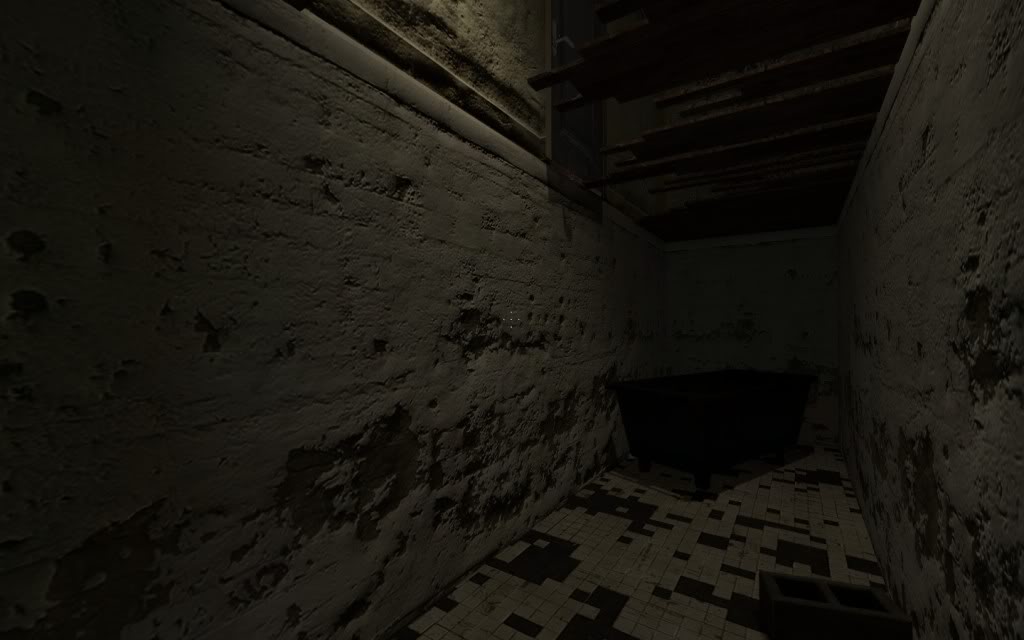
As You Can See, The Image With Bumpmaps Is Increasingly More Detail Than The Image Without Bumpmaps, And It Is This Level Of Realism That Helps A Game To Become More Realistic and Thus Create A More Realistic Enviroment
Now Lets Get Started;
First Off, I recommend finding your self a texture that would be ideal for Bumpmapping, To identify a
good texture look for the following things, A uneven texture I.E not completely smooth and A texture that in real life would have a lot of Depth I.E Has Paint Flaking off it E.T.C
The best way to find a good texture is to browse he texture library within the Hammer editor:

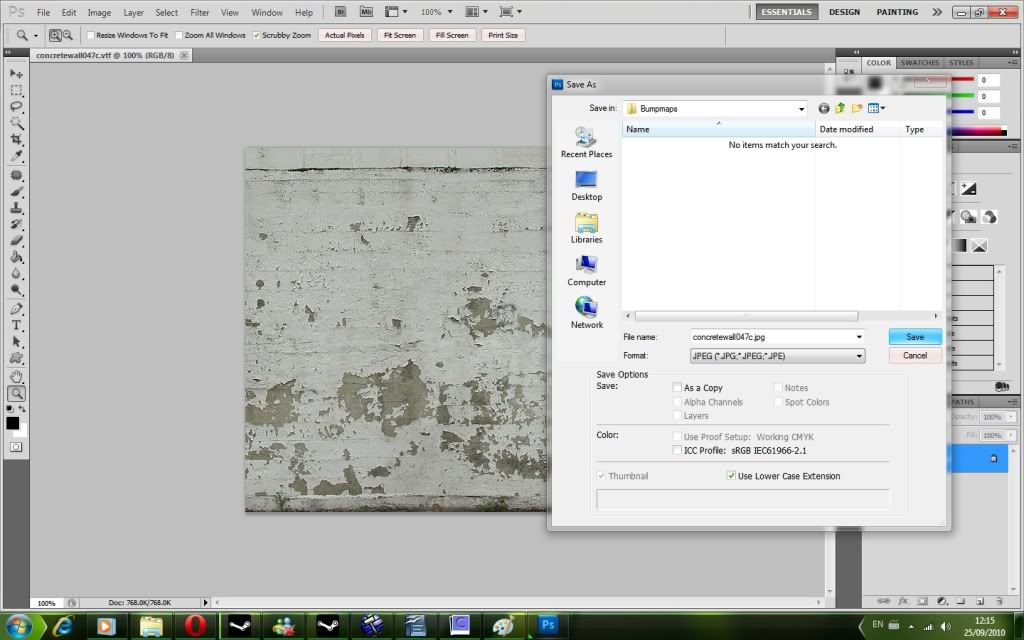
For This Example I Will BE using The Texture "ConcreteWall047c" Now Then You Need Make Make A Note of The File Path Which Is Visible Through The Face Edit Dialogue Box

Now Then, We Now Need To Open Up GCFScape To Locate Our Chosen Textures; Most Of The Materials A Stored In The "Source Materials" Package, After Locating Our Texture We Need To Extract it to A Folder,
1, Locate The File Path We Noted Down In The Last Step
2, Locate Our Texture
3, Extract The .VTF and the .VMT To Our Desktop
I Recommend Creating A New Folder On Your Desktop For This

The Next Step Is To Convert Our .VTF into a format that can be read by CrazyBump, I recommend converting it into a JPEG File. Simply Open The .VTF File and The goto File>Save As... And The Keep the original File Name Just Save it As A JPEG File
This Is Where The Real Fun Begins; First Of all Open the newly converted JPEG image In CrazyBump, CrazyBump will then give you a choice to select which image you think looks best, It should be obvious to you which one looks best [This Is Where Your Good Sense of Judgment Comes In Handy]
Once You Have Selected Which Image Looks Best, You should get a screen that looks like this:
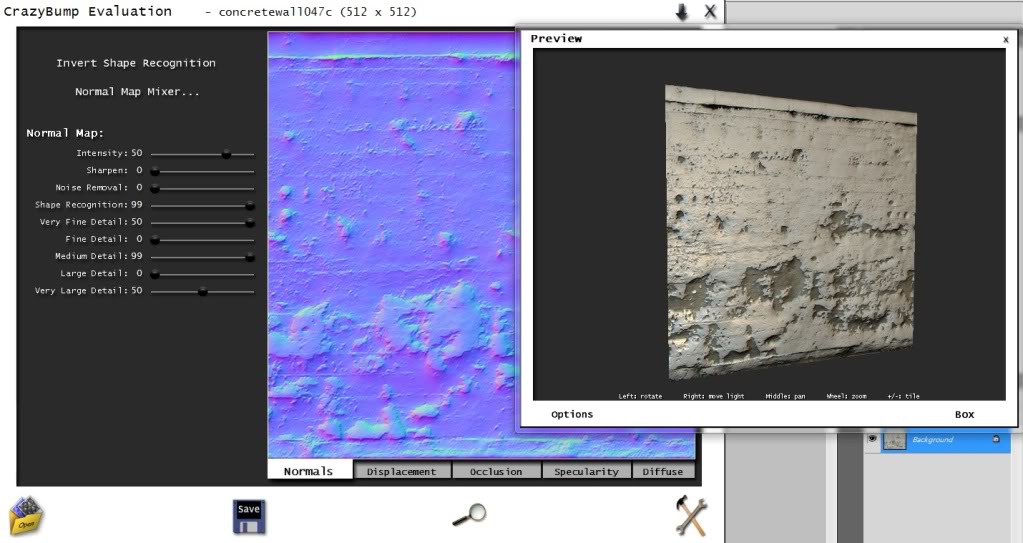
You Can now adjust the sliders on the Left side of the Image to increase or Decrease the amount of detail present in the Image, The Handy 3D Image Will Give you a Very good idea of what the finished result Will Look Like,
I Know there are many other tools used to create Bumpmaps, However Crazy Bump I Believe is the best
Now Then; Once you have decided what you Believe Looks The Best, Then It Is Time To save our Bumpmap Image, Click the Disk Icon on the bottom of the Crazy Bump Screen and Select "Save Normals To File..." And Save It As JPEG, Don't Worry About The File Name, This Doesn't Matter At The minute

Now We Have To Back To Photoshop and Open The Normal Map We've Just Saved, After opening we Need To Save It As A .VTF File
Please Make Sure To add "_Normal" to the end Of The File Name, So Fore example, If my Original Texture Was "Brickwall003a.VTF" Then I Will Save It as "Brickwall003a_normal.VTF"
The Normal Map MUST be saved as A RGBA8888 Format Or Else The Bumpmap May Fail To Work

Finally; What We Must Do now Is edit The Original .VMT File that we extracted with the image to include the bump map, For My Example this is the original code:
Original wrote: "LightmappedGeneric"
{
// Original shader: BaseTimesLightmap
"$basetexture" "Concrete/concretewall047c"
"$surfaceprop" "concrete"
}
Now We Need To Add a New Line Under "$Basetexture"
You Should Add "$Bumpmap" "FilePath\File_normal"
So For My Example; This Would Be The New .VMT Code
Edit wrote: "LightmappedGeneric"
{
// Original shader: BaseTimesLightmap
"$basetexture" "Concrete/concretewall047c"
"$bumpmap" "Concrete/concretewall047c_normal"
"$surfaceprop" "concrete"
}
All Thats Left to Do Now Is Copy The Original .VTF File, The Newly Edited .VMT File and The Normal .VTF File into the games materials directory and into the corresponding Sub-Folder
For Me This Would Be:
Steamapps>Username>Half Life 2 Episode 2>EP2>Materials>Concrete

And Thats it :D Your Bumpmaps should Now Appear In-Game and you will experience a overwhelming sense of happiness,
Be Sure To Check Out My other tutorials, Thanks Everyone!!


Thank you! Great tutorial...
Good tut, but many textures, such as the one in this tutorial, don't need too much bump mappage, and it isn't the best idea to advertise having that thick of a coat of paint on that wall, it's mainly used for concrete. Keep up the good work, though.
It's a good tutorial. I'll try it in GoldScr too.
(buried)
BWAHAHAHAHAHA that doesnt suport bump maps dummy xD
Check out Paranoia then, idjit
nice work
You sir, are a genious
Why Thankyou :D
Crazy bump is crazy
not bump maps but okay. (they're normal maps :D)
@elite879 LOL YOUR A GENIOUS TO
A good tutorial, but your end result is entirely wrong. But thats only in making the normal map. Crazybump is good for some things. bad for the thing you're doing. it constantly makes it wavy, which you are seeing in-game. If you did it with the photoshop filter, it would be correct. But again, both should be used, it just depends on what material. But good tutorial otherwise.
Good tutorial, but why put capital front letters on EVERY word?
It's really frustrating to read.
Sorry, Old Habits die Hard
I got that from scripting part of a game, I got so used to it I kept doing it for like a year....
Yeah, you've got to sort out all that capping. Otherwise it was a great tutorial and at last someone makes one with pictures. That not only helps illustrate what you're actually doing so the reader is on the same page but the textures are just so damn nice to look at.
wow
Thanks man ;)