Colour correction is used to adjust the colour of the game environment by altering the colour balance, curves and levels just like you would on a normal image editing program (For example: photoshop) the same basic principle applies here
Step 1: Create a new colour correction entity: call it correction
Step 2: Set the "Lookup Falloff Start Distance" and the "Lookup Falloff End Distance" to -1 these control the distance from the entity in which the colour correction is visible. For example, if you set the End Distance to 300. Then the colour correction will de-activate if you move 300 units away from the entity in the game. [-1 sets it so the colour correction i visible everywhere]

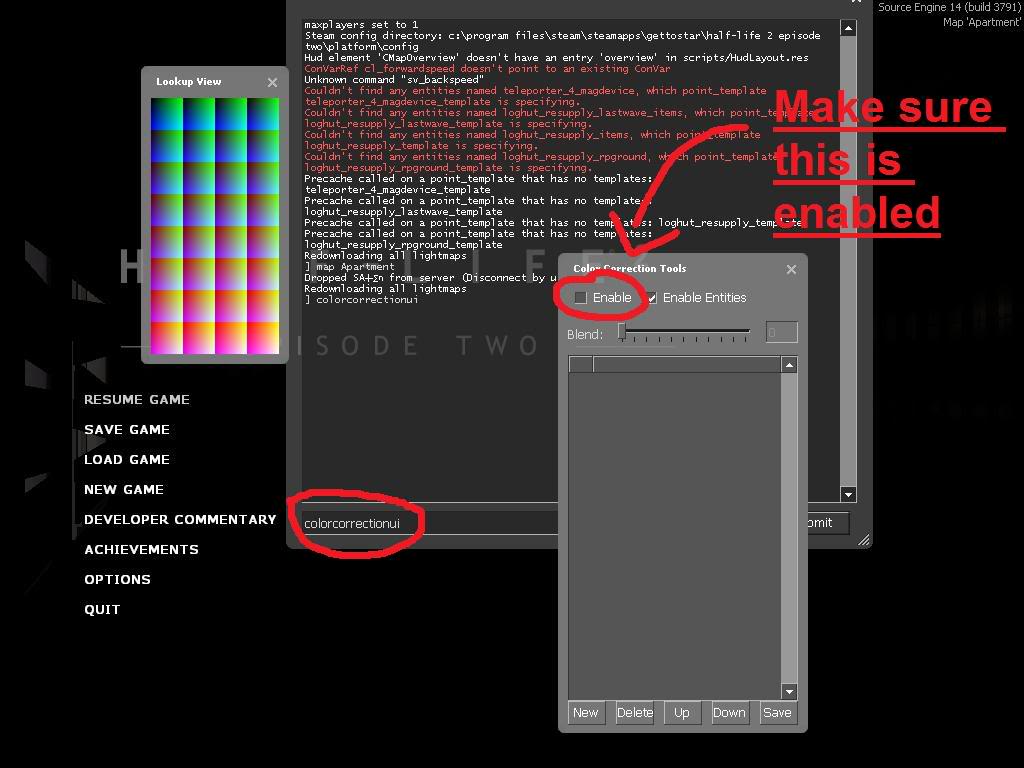
Step 3: Now compile your map: (make sure you have correction enabled in the video options)
Step 4: Open the developer console and enter "colourcorrectionui" (without the speech marks)
Step 5: A new window will then open make sure that the box that says "Enabled" is ticked, then select "resume game" from the main menu
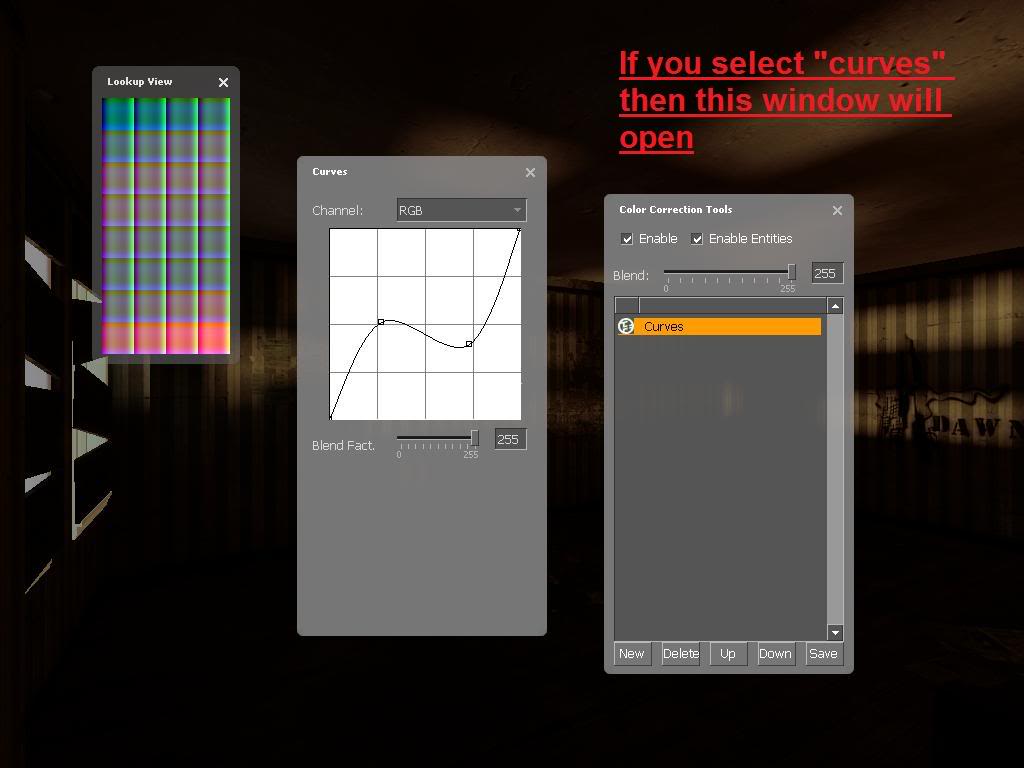
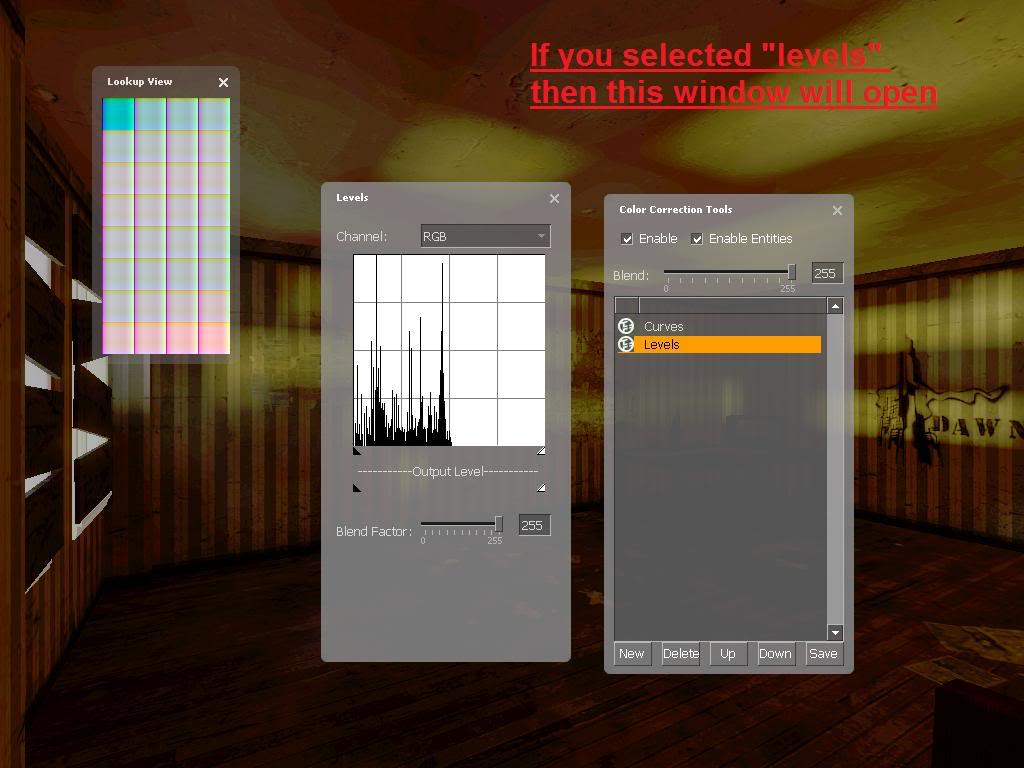
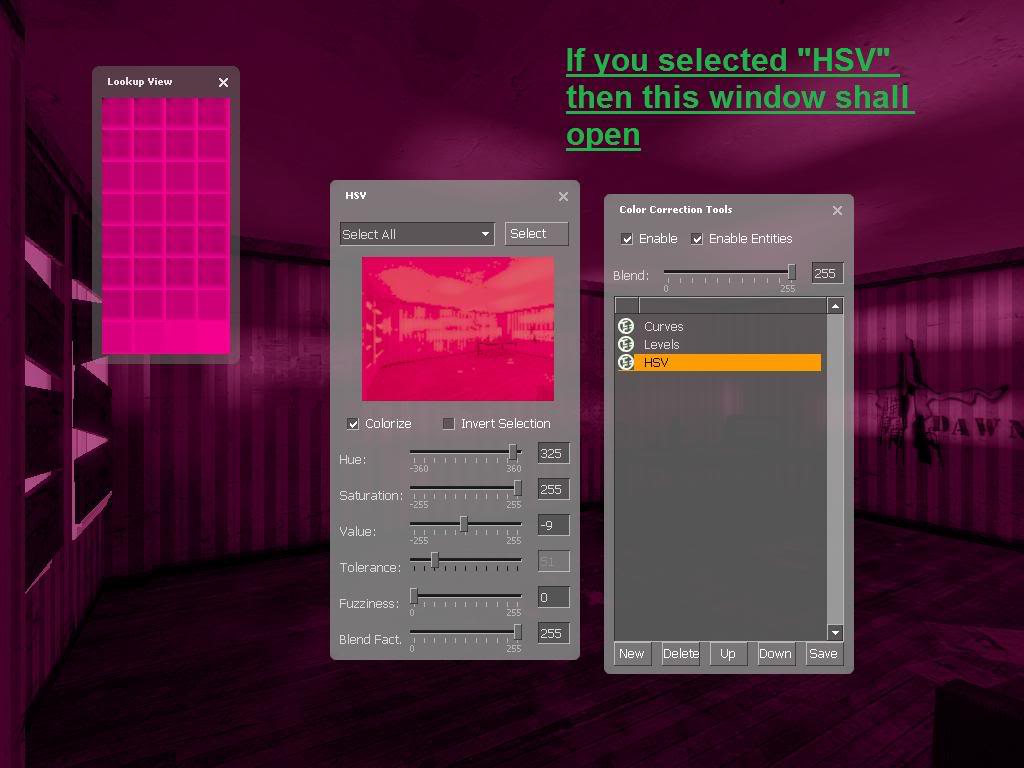
Step 6: This is the part that will determin the colour: On the correction window select new and choose from: Curves, Levels or HSV
Step 7: adjust the curves/levels/HSV to your desired effect. If you are editing HSV make sure that it selects all. For more info on altering the levels have a look here: Developer.valvesoftware.com
Step 8:Once you have adjusted the settings to get the effect you want: press save
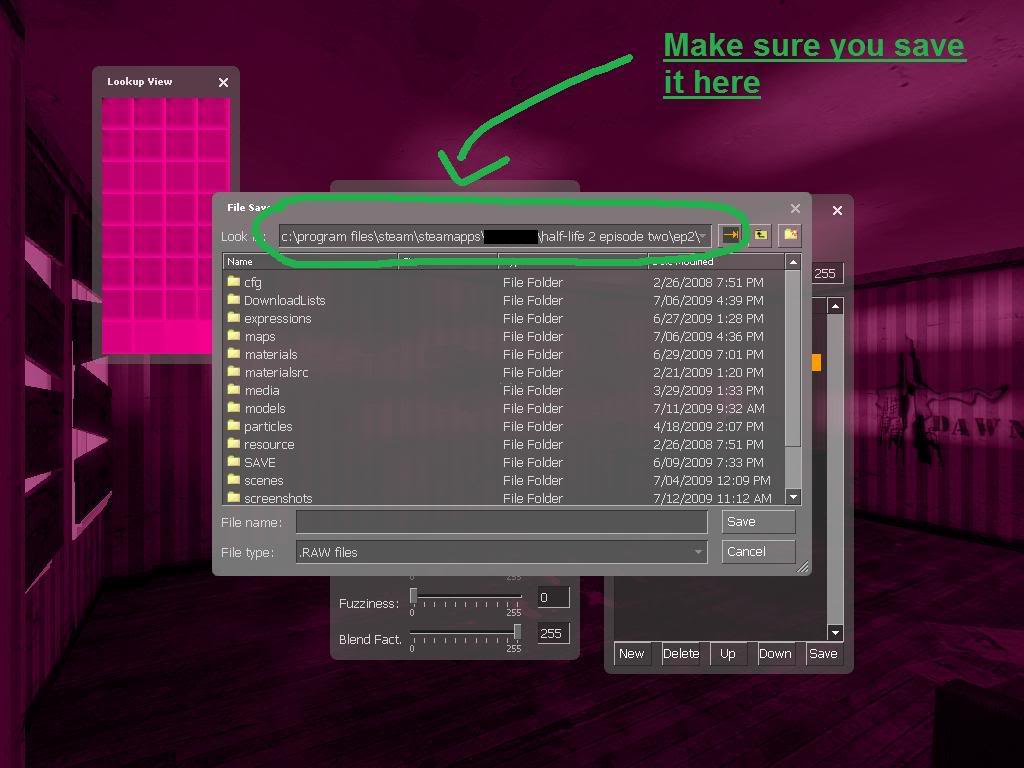
Make Sure you save it to this location![]()
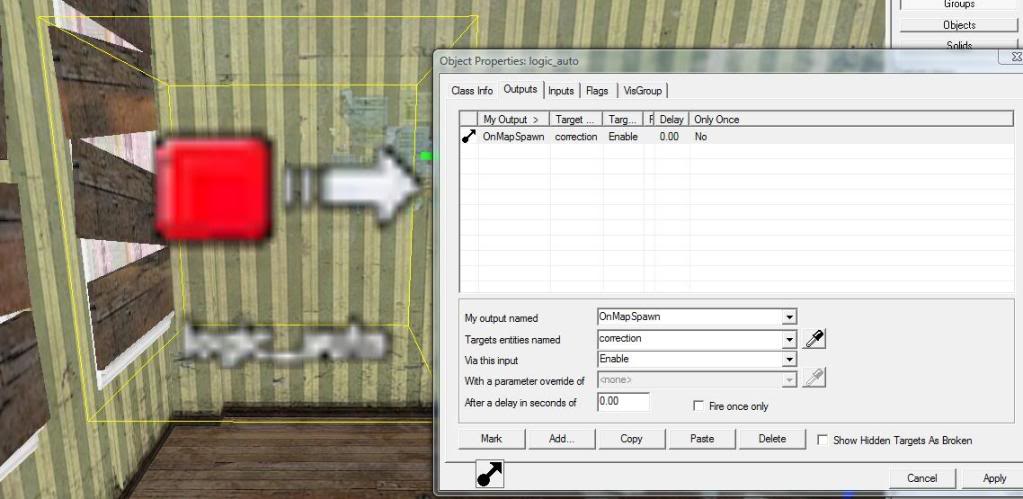
Step 9: Now quit the game and go back to the hammer editor and create a "logic_auto" and in the outputs section create a new output "ONMAPSPAWN > CORRECTION > ENABLE"
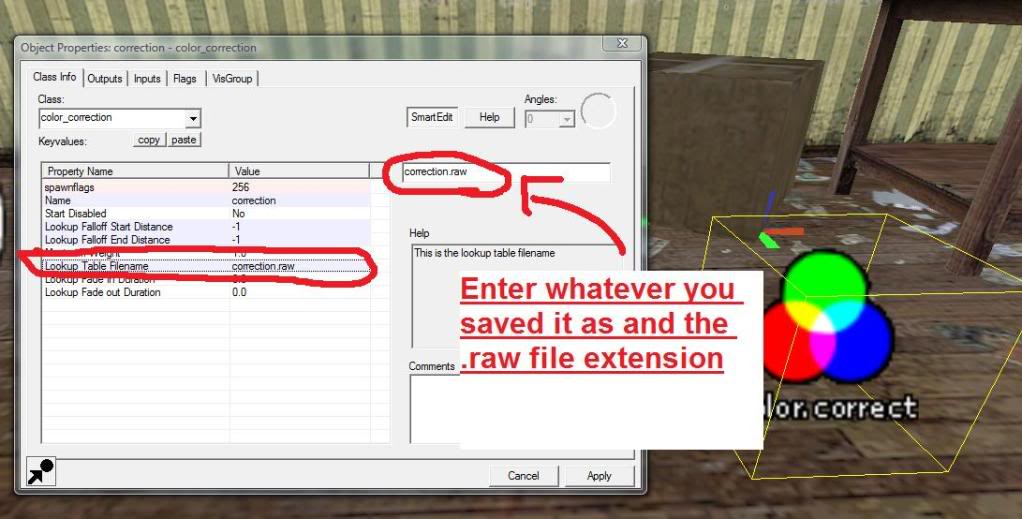
Step 10: finally go back the the colour correction entity and in the section that says "Lookup table filename" type in "correction.raw" or whatever you saved you .raw file as (without speech marks)
Step 11: now whenever you run your map the colour correction should automatically enable
CheckList;
If you are experiencing Problems then make sure that you have done all of the following, As these are common mistakes people make that result in the colour correction not working.
- Make Sure you INCLUDE the .RAW extension in the editor "lookup table filename"
- Have you Set the start & end distance to -1? this makes sure it is visible everywhere as mention at the start of the tutorial
- Have you saved in the Correct Location? By default the save location is different from the location the .RAW file needs to be in.
- Spaces? Make sure you have NO spaces in the .RAW file name.
- Spelling? The lookup table filename must be EXACTLY the same as the file name.
- American? Hammer editor uses the American spelling of the word "color" as you can see I have been using the British (The Correct Way) way of spelling "colour". This is the English Language, So please treat it with some respect.
If you STILL can't get this to work then just drop me a message at the end of this tutorial explaning the problem
Thankyou, Happy Modding


Neato!
I already knew how to do this though :P
Really informative tutorial though!
Nice and simple tutorial, very interesting for good ambiance in the maps.
Awesome I love you long time.
Always wanted to know how to do this correctly thanks a heap mate.
Great will come in handy
This is exactly what I was looking for. Thanks!
Whomever was assigned to construct this tutorial did an outstanding job!It's condensed ,comprehensive and very easy to follow.All tutorials
should be this easy to understand and use.
Wow nice one. This will help me out a lot thanks mate
Good tutorial! If I use color correction in a map, I'll put your name in the credits :D