Articles
Counter-intuitive Lighting
Lighting in video games works contrary to how you'd think. For instance, you're not taking sunlight, and darkening it as it gets into shadows via multipliers that reduce the color. Nope. Lighting works in layers that are added together, some of which can get cancelled out, which in turn reduces the overall light sum total.
Shadows are not created by light rays cast from a light source being blocked, they're created by rays cast from the ground being blocked.
So, first we have to forget what we know about light in real life in order to wrap our heads around video game lighting models. Then, once we know those basics, we can start to think about how light works in real life to simulate it in video games.
Basics
Basic lighting in 3D games follows a simple formula:
- light source color (RGB) * shadow + ambient light color (RGB)
RGB is Red, Green, Blue.. the primary color wheel of digital color (as opposed to art, which uses Red, Yellow, Blue). RGB values can be tracked many ways: integer 0 to 255, float decimals 0 to 1, hexidecimal, etc. But, you're tracking 3 values that create a color. (0, 255, 0) would be pure green. (255, 0, 0) would be pure red. And so on.
Light source color is anything that's casting light. So, a sun orb in the sky would cast a sunlight color that's bright and yellowish.
Shadow is a value of 0 to 1 to denote if an area is or isn't in shadow. Since it's a multiplier, 0 means it's shadowed, and the light source is cancelled out. Meanwhile, 1 means there's no shadow, letting the light source color add in.
Ambient light color is the color of shadows, added in to keep shadowed areas from being pitch black. In real life, light scatters and bounces all over the place. While direct light might be blocked by an object, creating a shadow, light bounces off other things into the shadow creating ambient light to let you see in the shaded area.

Shadows
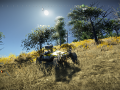
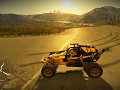
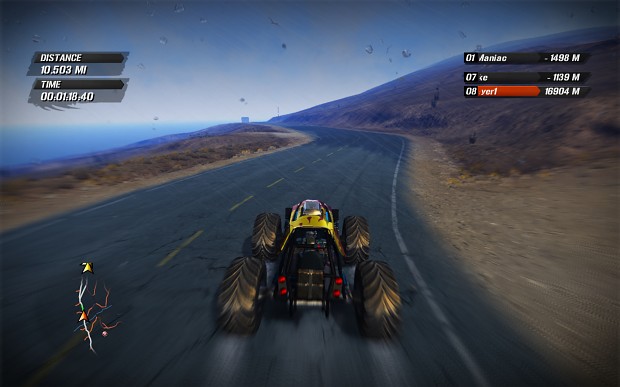
Shadows are often done with shadow maps, which Asobo utilized in FUEL. The shadow map is a grid overlaid on the scene, and each block in the grid casts out a ray towards the light source. If the ray is blocked by something (EG: it hits the side of a building or vehicle), the ray tells the game engine that it's been blocked and is "in shadow". This sets that block of the grid to either 0 or 1...shadowed or lit.
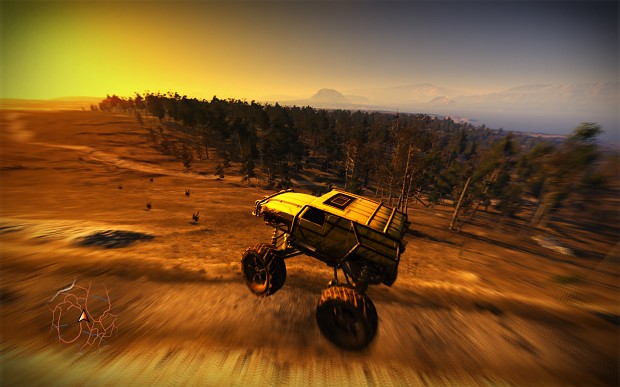
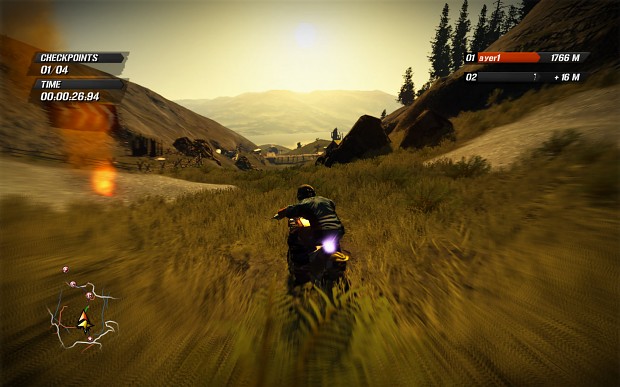
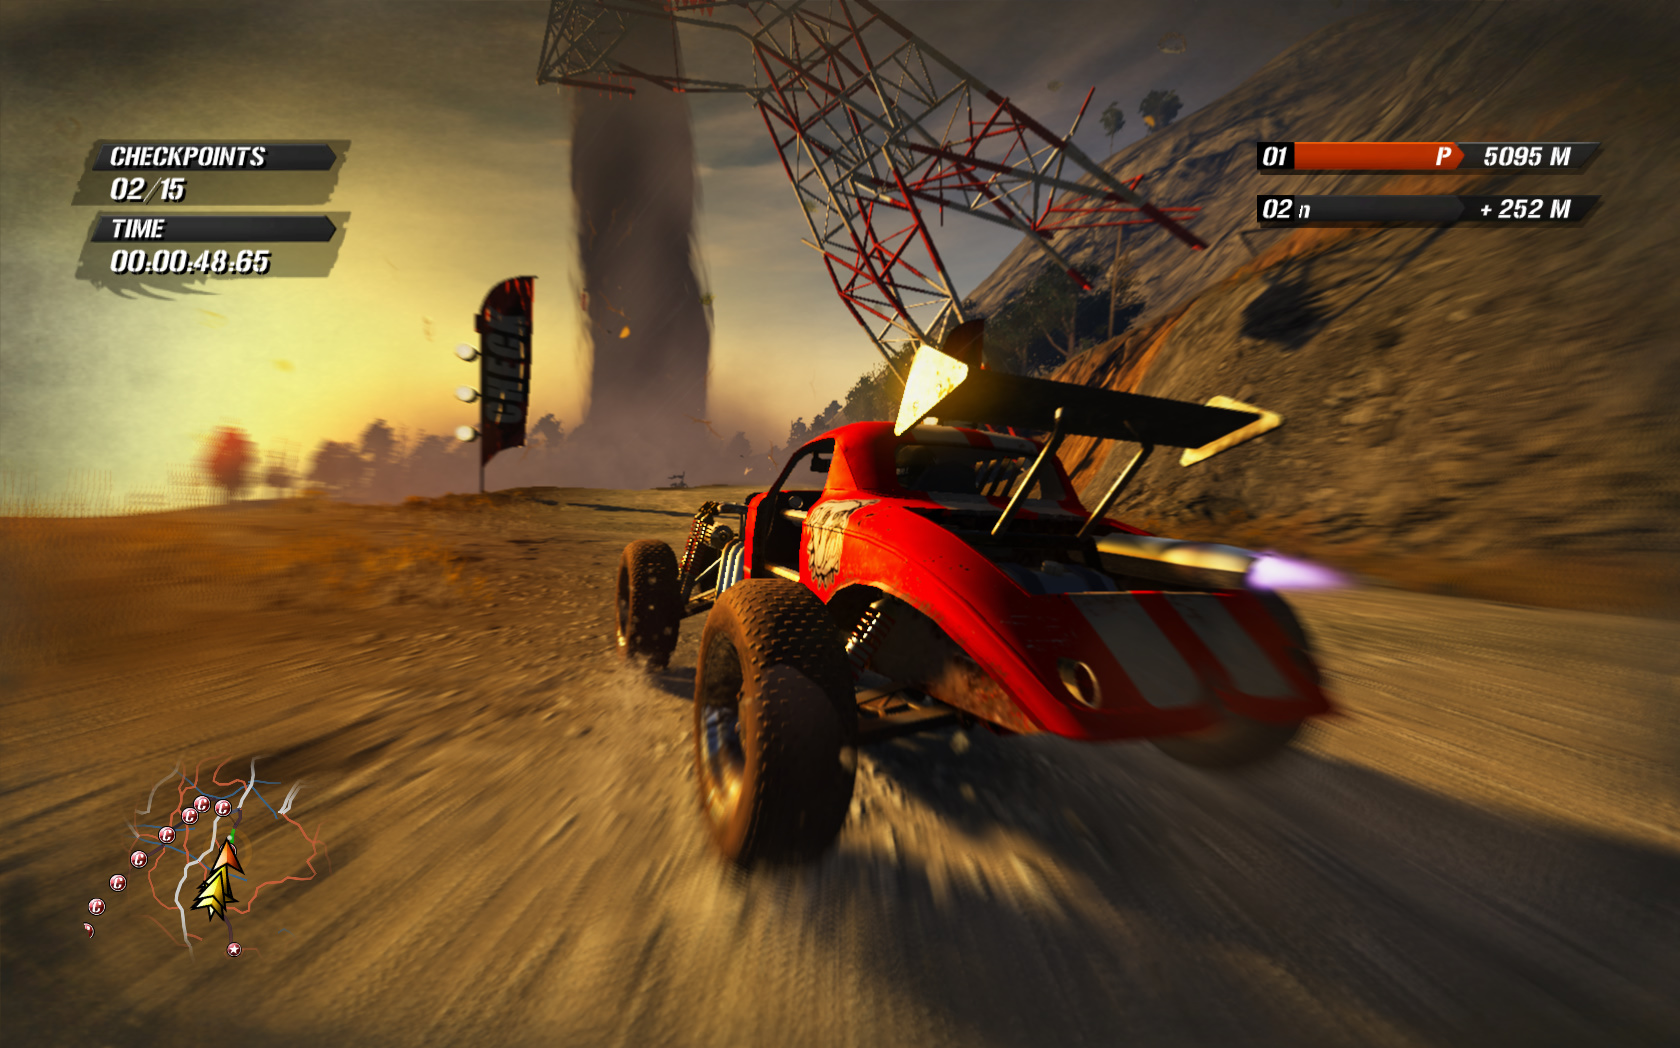
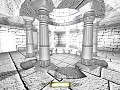
Since the shadows negate the light source, they create a darker area on the ground or object in the scene. But, they only darken the square blocks they create based on the size of the shadow map. So, you end up with shadows that have clearly defined, square edges.
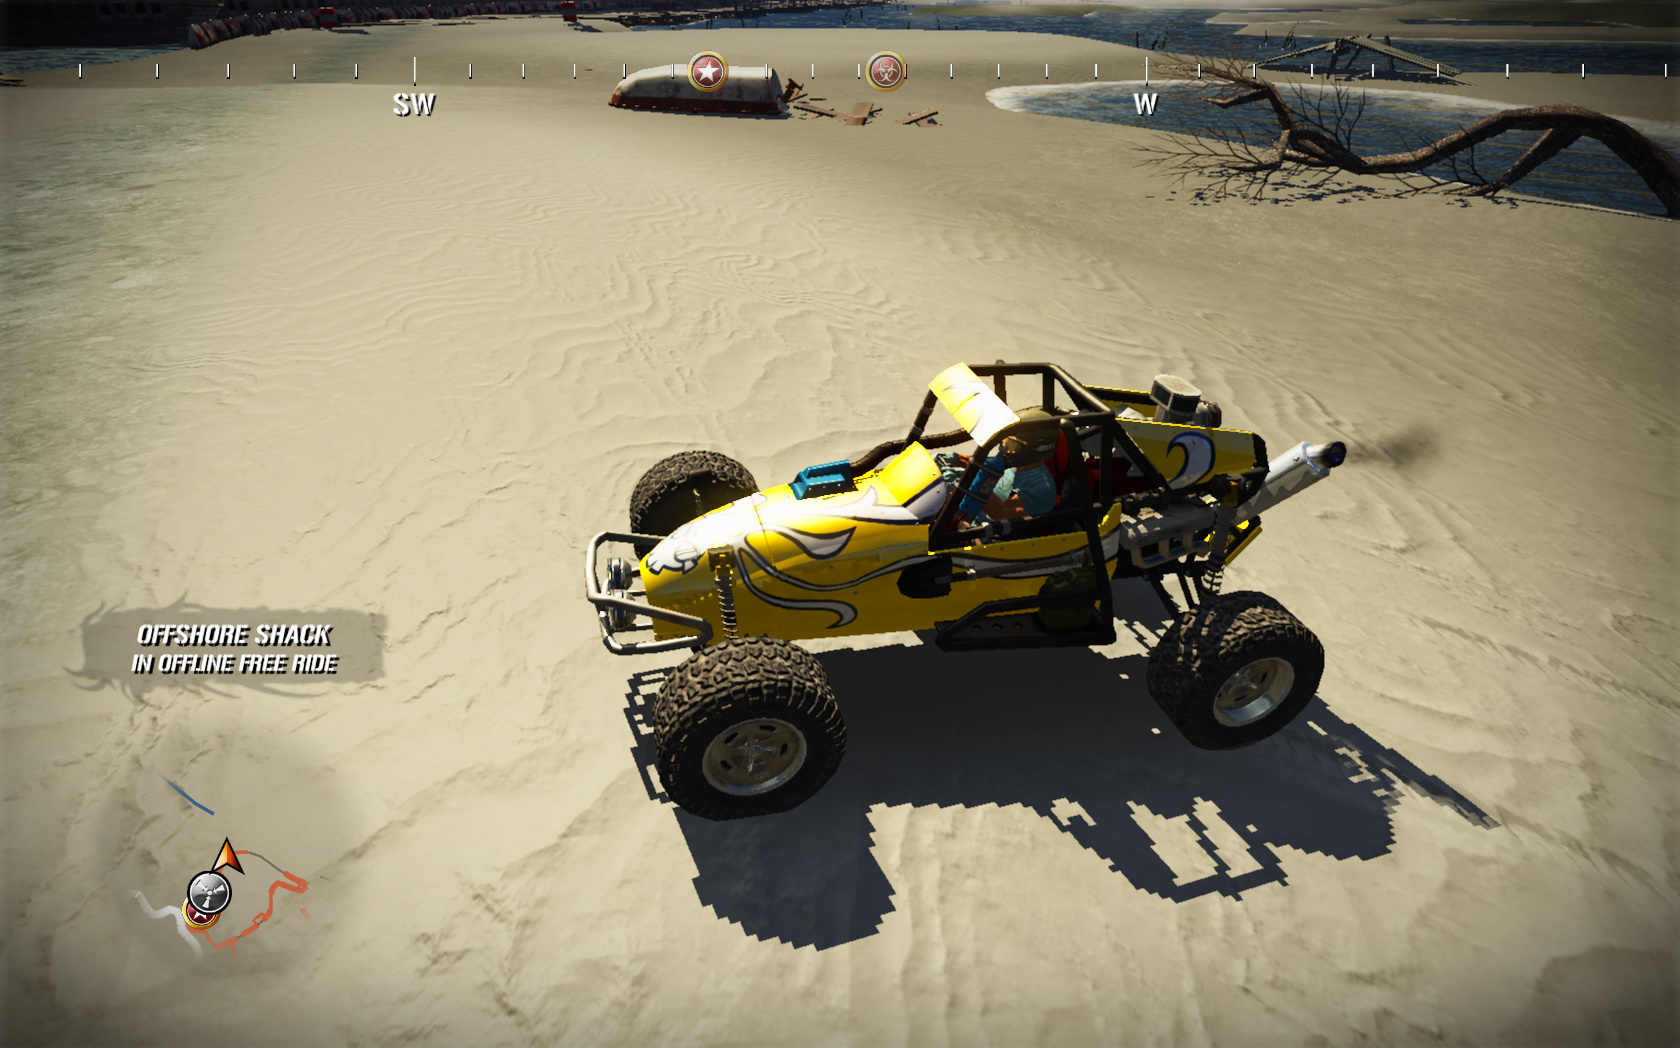
Image above shows the chunky edges of the shadows.
To work around this, you can increase the shadow map size. But, that means more ray casting, which is expensive to do. So, another approach is to use anti-aliasing to have pixels on the ground or object sample surrounding pixel shadowing and blend / blur together to try to fade the shadow edges. Since we're dealing with anti-aliasing algorithms, it can also get expensive. There's cheap bilinear AA equations that can sort-of blend edges, then more advanced methods like cubic blurs, poisson distribution blurs, guassian blurs, etc. The more advanced the AA formula, the nicer the blending, but also the more expensive the operation.
So, shadows are a balancing act. Do you increase the shadow map size, or use a more advance AA algorithm?
FUEL used a pretty low-res, chunky shadow map size, but, that's because shadows are expensive, and they had to make it run on 2009 hardware (PC, PS3 & Xbox 360) along with all the other cool graphics the game was doing.
They optimized the shadows by using cheaper bilinear AA on soft particle (smoke clouds, dust clouds) and more robust cubic blending on ground, vehicles, etc.
They started experimenting with Exponential & Variance shadowing techniques when FUEL was cut short and shipped off for sale. I tried experimenting with activating the code they had for that, but couldn't get it to work. Either I was hitting my level of incompetence (even while looking at white papers and powerpoints on the topic) or the game engine simply wasn't populating the variables in the shader to handle it.
Anyways, long and short.. with anti-aliasing applied, shadows go from boolean 0 / 1 to now becoming float decimals ranging from 0 to 1. Thus, on shadow edges, more of the light source can add in, while as you move towards full shadow, the light source is cancelled out more and more.
Ambient Occlusion
FUEL also added in Ambient Occlusion (AO). Ambient Occlusion is used to darken up spots in shadows to add more depth. The logic is that in tight corners or tucked-away areas, ambient light lighting up the shadow has a harder time finding a way into nooks and crannies. So, those spots would look darker. This creates volume and depth in shadows.
So, FUEL's lighting formula has another layer added to it:
- light color * shadow + shadow color * ambient occlusion + ambient color
In this case, ambient color now becomes the base lighting color to keep AO spots from being pitch-black.
The trick with AO is it can make things in light have a bit more depth, as well as make shadows have more depth. FUEL tried doing this by using a "sunlighting" function...
- shadow * ( 1 - occlusion * 0.1 ) + occlusion * 0.1
Basically, it was intended to try to add a bit of AO to sunlit areas to create a bit more detail. But, what you end up with is akward AO spots under vehicles outside of shadows that look odd. And, on vehicles, the AO texture map they used to add more AO detail to them would over-darken some things.
Another issue was AO was coming from 3 different sources:
- AO around trees due to tree canopy darkening areas under trees
- AO under vehicles creating a spot under them that darkens what's underneath them
- AO texture map for vehicles that overlays to add more AO detail to them
All of that had to add up and look right. So, a vehicle driving under a tree had to get AO from the tree applied to it, and also apply it's AO to the ground under the vehicle. In overcast skies, the AO texture map on vehicles over-darkened them and make them stick out a bit.
So, I decided to confine AO to shadows. To do this, I made a simple function...
ambient occlusion = saturate ( ambient occlusion + shadow )
Saturate clamps values between 0 and 1. If there's no shadow, then shadow would be 1. So, regardless of there was or wasn't AO, if we add 1 to the total, we'll get something between 1 and 2.. then saturate it back down to 1. This meant if AO was happening outside of shadows, it was cancelled out.. and thus only confined to happening in shadows.
Normal Maps
FUEL also used normal maps (sometimes called "bump maps") to add fake detail to textures without increasing polygon counts. This is what makes some tire treads look like they have nubbies, but if you lean the camera down and look at the top of the tire you'll notice it's perfectly flat.
Normal maps are cool, because they take the light direction into account, and make all the tiny details they provide track the light source in the sky to add nuances of fake shadowing.
Normal maps are textures that get pulled, then merged with the light direction via a dot product, like this...
- Normal.x * LightDir.x + Normal.y * LightDir.y + Normal.z * LightDir.z
There's a function in HLSL called "dot()" that makes this easy...
- dot( Normal.xyz, LightDir.xyz)
This creates the "light dot", and is multiplied by the light source to take normal maps into account as follows...
- light color * light dot * shadow
- + shadow color * ambient occlusion
- + ambient color
But, doing it this way, if light is blocked by shadow, then the normal maps are also cancelled out in shadow. This would make things flat-looking without their normal map details. So, you have to multiply the shadow color by the light dot as well.
- light color * light dot * shadow
- + shadow color * light dot * ambient occlusion
- + ambient color
Since both light & shadow colors are multiplying by the light-dot, we could rewrite the formula as follows:
- ( light color * shadow + shadow color * ambient occlusion )
- * light dot
- + ambient light
I experimented with that, but found it looked better to keep it like the other version above, where light dot was multiplying by light and shadow separately.
Two Phase Lighting
Since light dot, shadow and ambient occlusion are all single float values, you can pre-multiply those together as single calculations, then use the result to multiply by the 3-float color variables in order to reduce calculations.
EG:
- light color (float3) * shadow (float) = 3 calculations
- the result of that is a float3 * light dot (float) = 3 more calculations
But, if we do the following...
- light dot (float) * shadow (float) = 1 calculation
- result of that (float) * light color (float3) = 3 calculations.
So, by pre-multiplying the light dot, we save 2 calculations. That's 2 calculations per-pixel calling the pixel shader lighting model, so that adds up.
Since we need to multiply the light dot by shadow to block light, then ambient occlusion to block shadow, we just make a copy of the light dot and have two versions of it, one used for light and one for shadow.
- light dot = dot ( normal, light direction )
- shadow dot = light dot // make a copy
- light dot *= shadow // light blocked by shadow
- shadow dot *= ambient occlusion // shadow blocked by AO
- light color *= light dot // finalize light
- shadow color *= shadow dot // finalize shadow
- final color = light color + shadow color + ambient color
What Did Asobo Do?
I basically showed you what I came up with after a lot of research, trial & error. Asobo was doing something similar, but their formula ended up partially cancelling normals in shadows.
- light dot = dot ( normal, sun direction ) // using light direction
- shadow dot = dot ( normal, sky direction ) // using .. sky(?) direction
- shadow dot = sqrt ( shadow dot * 0.5 + 0.5 ) * 0.9 + 0.1 // ???
- light color = light color * shadow * light dot // finalize sunlight color
- ambient occlusion = sunlighting (ambient occlusion ) // merge AO with all
- shadow color = lerp( ambient color, shadow color, ambient occlusion )
- shadow color = shadow color * shadow dot
- final color = light color + shadow color
Whew.. ok, let's break this puppy down.
For starters, it turned out "sky direction" used in making the shadow dot.. was just light direction. I don't know why they called it "sky direction"; it wasn't a different direction vector. So, we can immediately replace it with the light dot.
Which is good, because it saves calculations making a shadow dot, which, in some cases they were using a TBN float3x3 matrix to do so, which meant they were needlessly doubling their light dot calculations by calculating the light and shadow dot separately.
The...
- shadow dot = sqrt ( shadow dot * 0.5 + 0.5 ) * 0.9 + 0.1
.. part was basically them adding in base ambient light directly to the shadow dot. What you notice when multiplying by a light dot is that it pitch-blacks / cancels things facing the opposite direction of the light source. So, to keep shadow-side stuff from being pitch-black, you have to add in the ambient light color.
They have an "ambient light" color, but they lerp (interpolate.. mix) it with shadow color via the ambient occlusion value (which they messed with to try to add a smidge of AO to sunlit areas).
Via testing, the ambient light color they piped in from the game engine .. was pitch black. So, it wasn't adding any base lighting color. Lerp'ing between the shadow and ambient color via the ambient occlusion is one way to get them to mix. But, that just over-complicates it. Lerp() is a more expensive operation then basic math.
- lerp ( ambient color, shadow color, ambient occlusion)
- shadow color * ambient occlusion + ambient color
The first one is a more expensive operation, especially since the 2nd one can get optimized in the HLSL compiler in MAD style (multiply and add). So, they're needlessly lerp'ing something that can get handled with basic arithmetic operations.
Since the ambient light color was pitch black, whoever coded the lighting in the shader noticed everything being pitch-black on the shadow-side.. so they came up with the ...
- shadow dot = sqrt ( shadow dot * 0.5 + 0.5 ) * 0.9 + 0.1
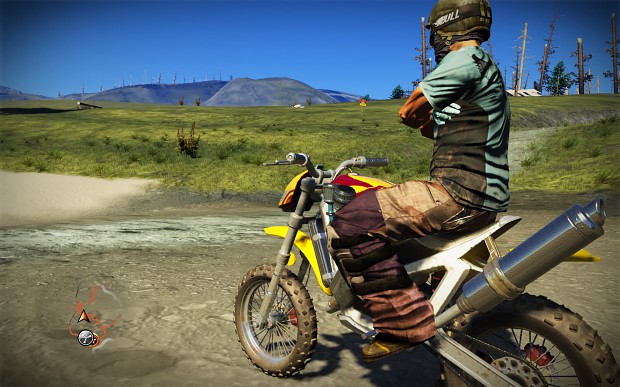
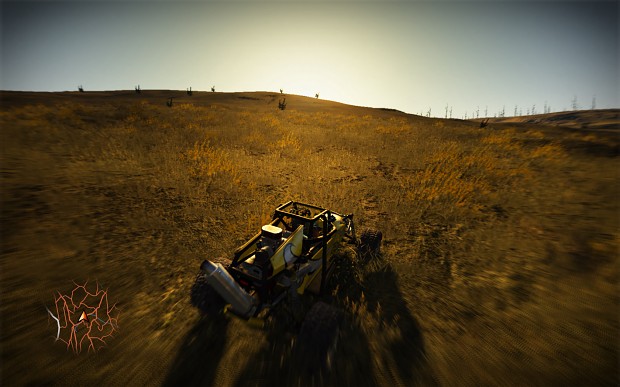
... as a hack way to add ambient color. But.. notice the first thing it's doing is cutting the dot in half! This means it's only using half the normal map's dot value for shadows. This was why the normal maps looked flattened out in shadows; their function basically cut it off at the legs.
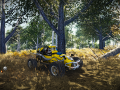
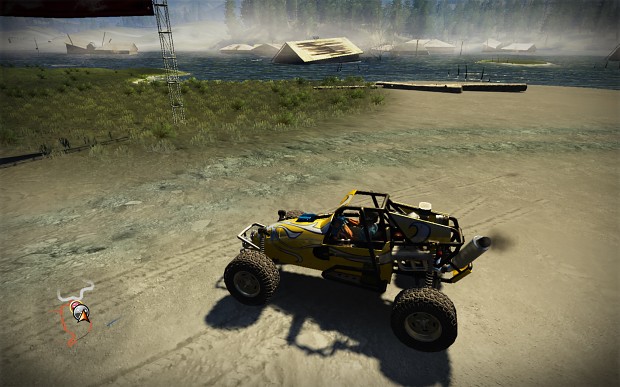
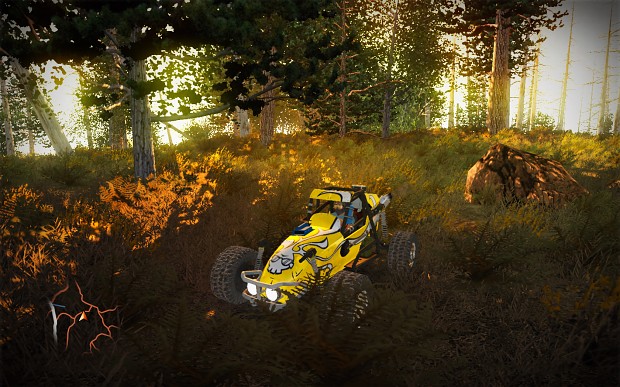
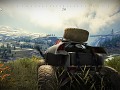
Image above shows original FUEL shaders vs. mine. Original shaders make the tires flat, undetailed and smudgy, because the normal map has been cut out so much via all the processing on the shadow dot. In my shaders, the shadow dot only cuts out ambient occlusion, so normal map shows up in shadows better.
Also, the shadow dot can be 0 to 1. So, if we simply do the math...
- sqrt ( 1 * 0.5 + 0.5 ) * 0.9 + 0.1
- sqrt ( 0.5 + 0.5 ) * 0.9 + 0.1
- sqrt ( 1 ) * 0.9 + 0.1
- 1 * 0.9 + 0.1
- 0.9 + 0.1
- 1
So, when not in shadows, we're multiplying shadow color by 1, adding in the full shadow color.
- sqrt ( 0 * 0.5 + 0.5 ) * 0.9 + 0.1
- sqrt ( 0 + 0.5 ) * 0.9 + 0.1
- sqrt ( 0.5 ) * 0.9 + 0.1
- 0.71 * 0.9 + 0.1
- 0.64 + 0.1
- 0.65
When in shadow, we're using 65% of the shadow color. So, shadows not only block sunlight, but this funky formula also causes shadow color to dull down to 65%.
You get an end result like this...
- Sunlit = 100% sunlight + 100% shadow light
- Shadowed = 0% sunlight + 65% shadow light
This is why the shadows in FUEL were so dark; the shadow color got hit twice:
- once negating out sunlight
- a second time by darkening shadow color
Fixing it
So, my corrections were...
- Only calculate light dot once, and use it for both light and shadow. This cuts down on calculations.
- Use the full light dot on light and shadows, so shadows have full normal maps showing up.
- Get rid of the odd ambient occlusion "sunlighting" function, because it was creating unnatural-looking brown hazes around trees and under vehicles on ground in full sunlight. This also reduces calculations.
- Replace the more expensive lerp operation between ambient color and shadow color with cheaper, basic arithmetic.
- Replace the game engine's global ambient color (which was pitch black) with my own value.
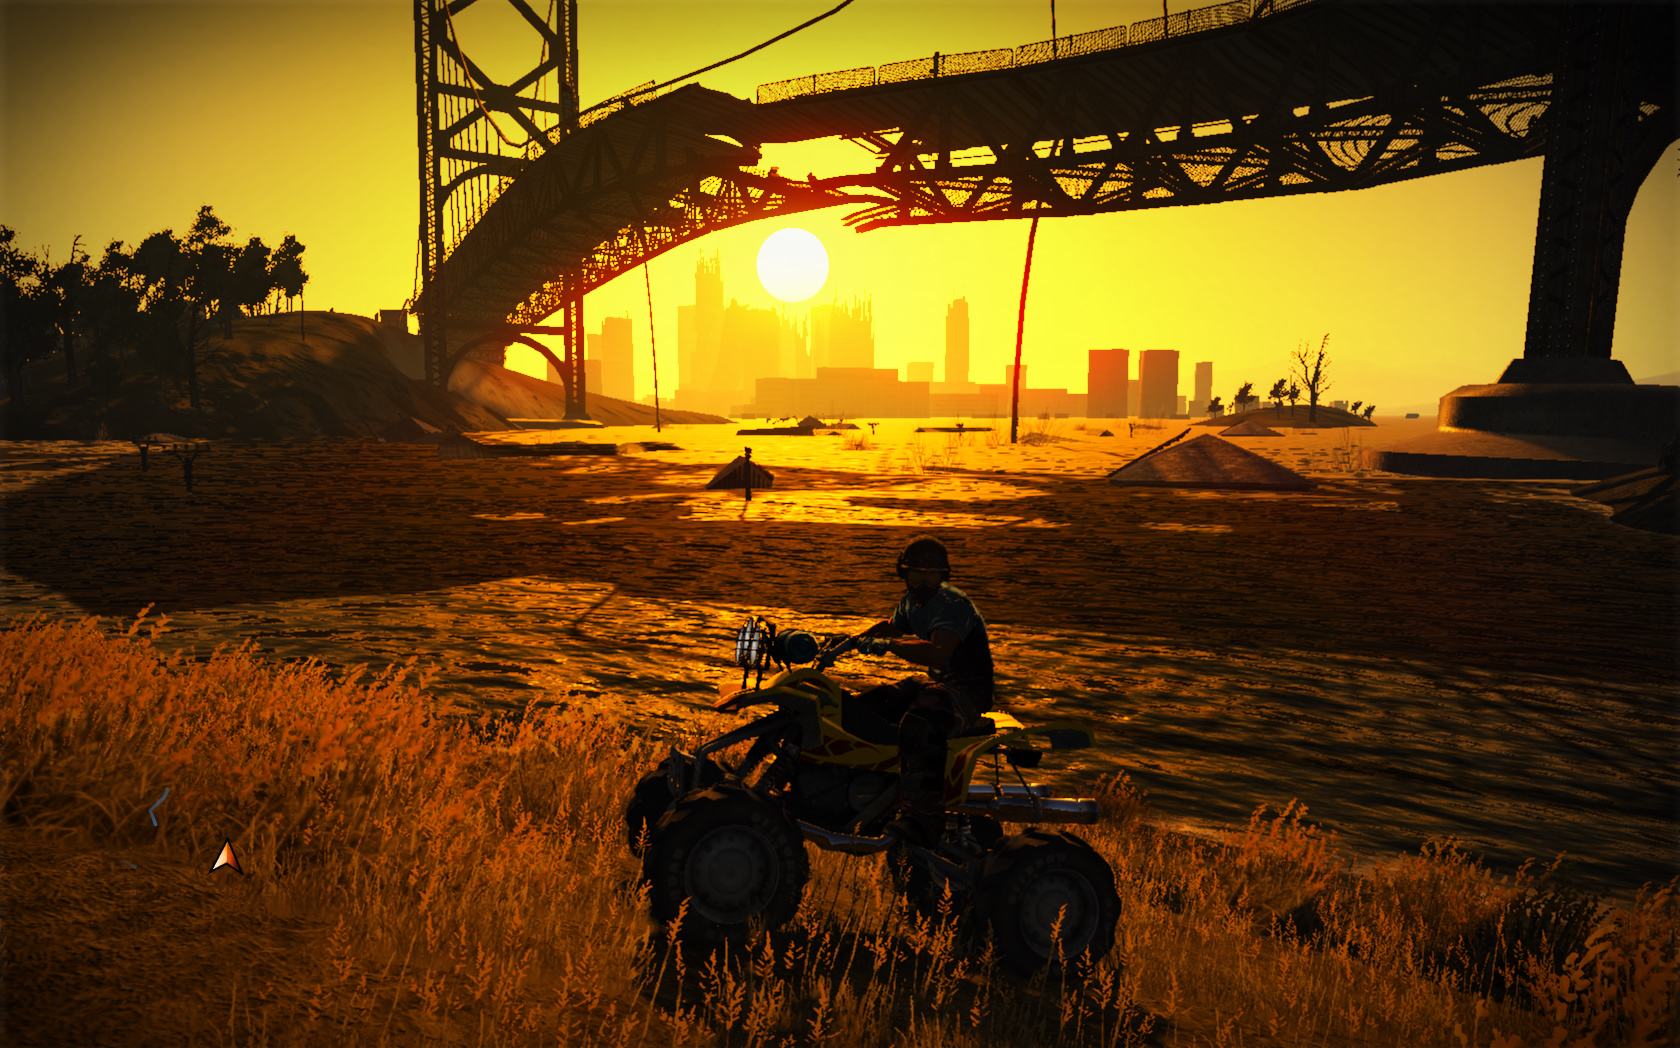
Environmental Reflections
FUEL uses cubemaps to add reflection overlays to things, like chrome mufflers, clear-coats on paints, reflection on surface of water. I also used it to add in the rain sheen during rain storms, and the slight amount to shadows for enhanced shadow detail.
The tricky part with adding environmental reflection is figuring out if you need to add it to the light colors or the texture / diffuse colors. For instance, to do chrome and clear-coats on vehicles, the reflection is added to the texture / diffuse color. For rain sheening, you add it to the light color, or else transparent parts on a diffuse color texture will look like glass panes. (EG: the haze on the lights of the checkpoint markers looked like glass panes when I added the rain sheen to the diffuse color. Worked properly once I figured out to add it to the light color instead.)
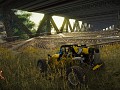
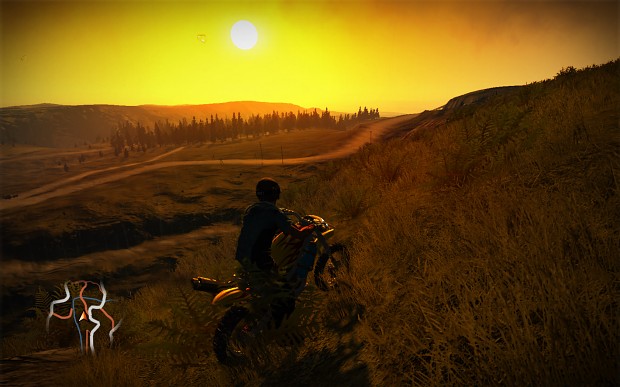
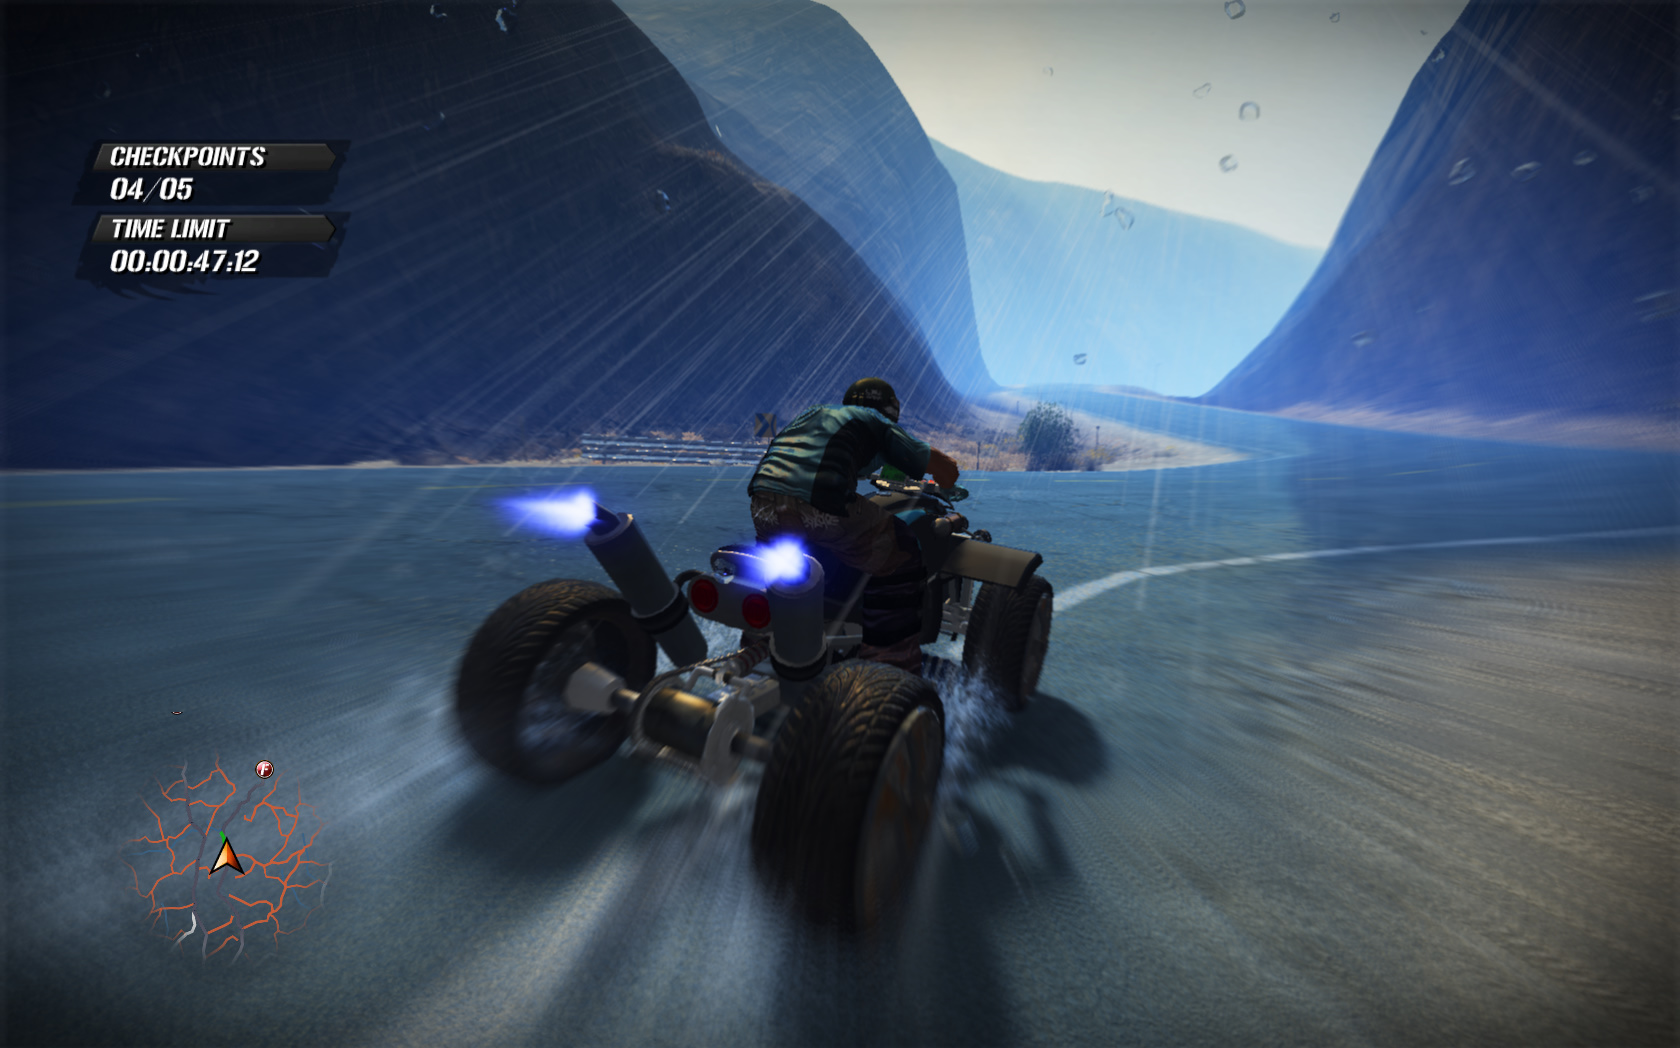
You also need to mix in specular materials mapping if possible to add in variations, then use a light touch to keep from over-chrome'ing things...
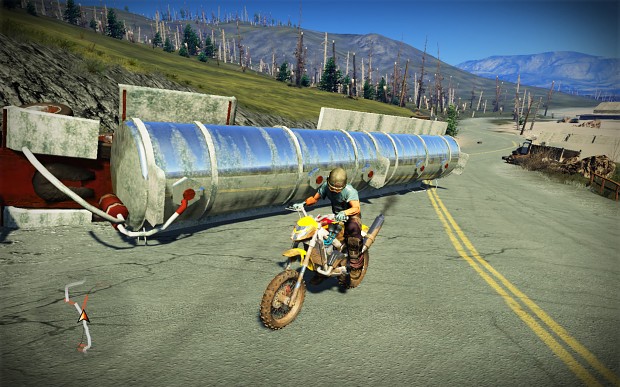
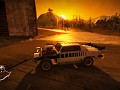
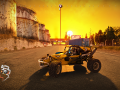
Original FUEL shaders over-did the chrome'ing / clear-coat on objects. Original FUEL shaders made the tanker trailer in the picture above fully-chromed, as if it was brand new. By toning down the chrome'ing amount, we let some of the underlying texture through. It now looks like a weathered wreck. The Valkyrie motorcyle originally looked like it had a chrome metal muffler. After toning down the chrome'ing, it turns out it's just a carbon fiber muffler with some clear coating. So, by letting a bit of the underlying texture through, we can add more detail to objects.
Enhanced shadow reflection is also an environmental reflection overlaid on things, but only in shadows. We apply it to both shadow and ambient colors, then run them through the lighting model to get occluded and dotted. The slight amount of reflection adds body and depth to shadows; buildings have highlights along edges and windows, while sand has shiny and dull areas around ripples.
Rain shine effects were tricky, because I had to figure out to add the environmental shine to the light colors, not the base texture / diffuse color of the object. Then it was a matter of figuring out do I add it to the final light color after it's processed, or to one or more of the light colors before they process. Turns out, it looks better by adding the reflection in to the sun and shadow light colors before the process. While I tone down the wetness in shadow color to 75%, the light processing algorithm will then apply dots and shadow / occlusion to things, mixing the rain sheen into the final light color and avoiding some unnecessary extra calculations.
Specular Shine
After light processes, you have the following final formula...
- object color = object color * final light color + specular color
Specular adds in the shiny spots on things where light reflects off. Certain objects have specular texture material maps, which make it where certain spots on them shine more then others. This is what gives a metal plate that has bevels and embossing in it more detail when shining, because it will reflect more light off the raised bevels and less in the embossings. And, if it's weathered, then rusty spots on it will be duller while other less-weathered spots will be shinier.
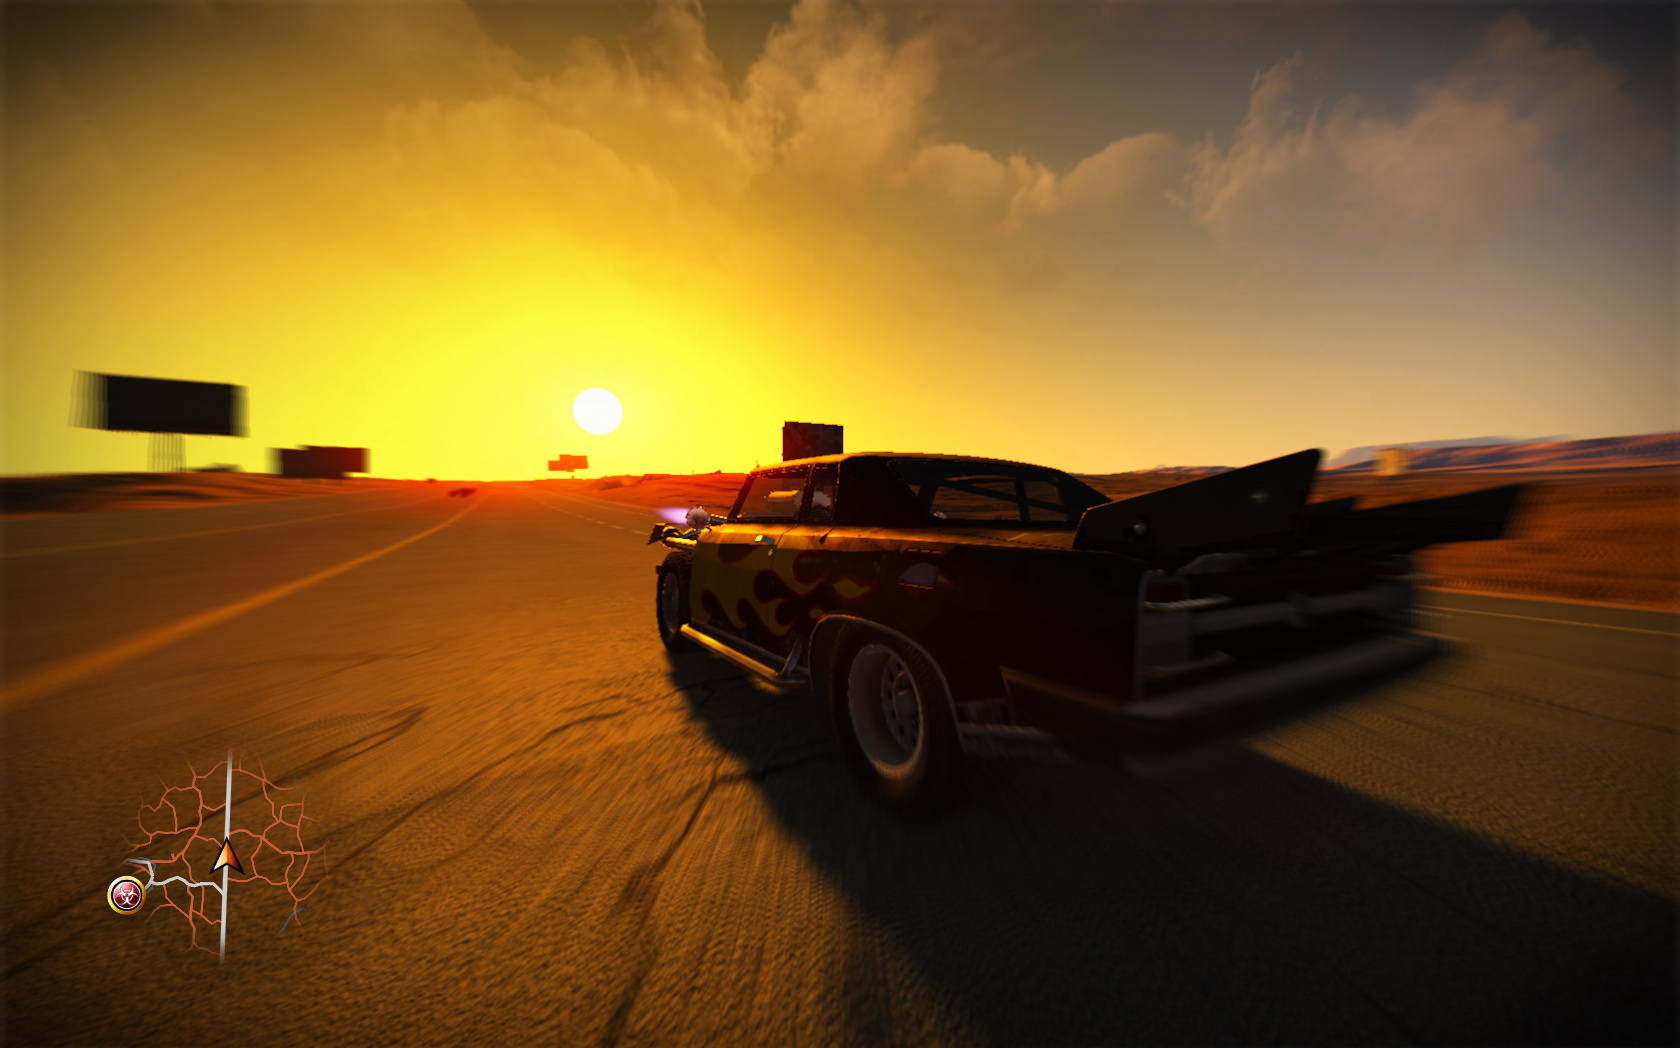
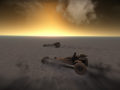
For shines across the country-side, Asobo came up with a formula that creates nice, long sunny trail when looking at the sun on the horizon. While the calculations are similar to the reflect() CG / HLSL function, if you replace their function with the reflect() you just get a blinn specular circle around player's vehicle instead of the long sunny trail. So, have to keep their sunny trail calculation.
However, they were calculating speculars as follows:
- specular color * specular dot * shadow * occlusion
.. so specular was blocked by both shadow & occlusion. This is unrealistic, because even in shadows there is light bouncing and scattering around in real life, which includes bouncing off of things and into shadows. This is why shadows are not pitch black, and also why surfaces in shadows should still produce speculars, just much less. So, in many cases I switched the formula to...
specular color * specular dot * (shadow * 0.8 + 0.2) * (occlusion * 0.9 + 0.1)
This would let a bit of specular seep through into shadows, and a little into ambient occlusion.
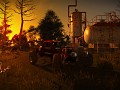
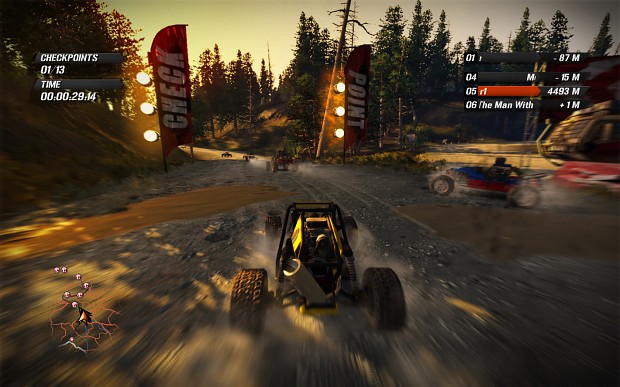
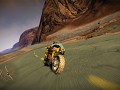
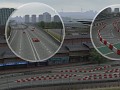
Original FUEL shaders blocked speculars from going into shadow. New shaders add a bit of them to simulate ambient light interacting with shiny / dull surfaces. Image above shows original shaders vs. my shaders. It's not perfect. The edge where the metal ground meets the building has a clear cut-off point of shine. But, it adds a bit more body to the final scene.
For water I used a little tweaking. Water is a special case, b/c the way light acts in water is different then air. Light refracts in water, can bounce off particles to make shadows lighter colored, etc. So, lighting on water had some tweaks to make shadows softer.
The final tweak to specular was in generating the specular dot. CG / HLSL has a built-in function called "lit()" that can take in a reflection dot vector and sun dot to generate a Blinn specular dot. So, I replaced some hand-written specular dot code with the lit() function.
Code Culling
Quite a few things were calling the pixel shader lighting model. Some didn't have headlights (which were added to light color), or ambient occlusion.. or even shadows. But, Asobo were calling the full lighting code they had by passing in placeholder values, like 1 for shadow and occlusion if something didn't have it. This just meant cycles were being wasted calculating something that wasn't needed.
So, once I sorted out the lighting model, I made overloaded versions that didn't process headlights or occlusion.
In some cases, like tornadoes and sand storms, I could make a copy of the lighting model for them, and greatly reduce it down since they weren't using a lot of the features. EG: tornadoes don't process shadows or ambient occlusion, so all of that could get ripped out.
Vertex Lighting
Some objects were pre-mixing lights in the vertex shaders, then passing them into the pixel shaders where they'd interpolate a sunlight color with a shadow color via the shadow variable that was determined in the pixel shader. So, then it was a matter of making sure those sync'ed up to the pixel-shader lighting model and colors.
In earlier versions of the shaders, I tried moving some things, like plants / grass, over to pixel-shader to see if I could make the lighting more robust. But, the coloring was off a bit. So, I chose to keep the lighting generation in the vertex shader.
But, I then needed to generate speculars for grass in order to do rain sheening, and also add grass to the "sunny trail" on the ground to help that stand out and look nice.
Grass / Trees didn't do specular by default. So, I had to find a normal map for them that could get used to create the specular reflection, and then the specular dot. They used a normal in the vertex shader, so I had to decide if I wanted to do the reflect() calculation in the vertex shader where it was cheaper, but could look tackier, or in the pixel shader, where it would be more expensive but possibly nicer-looking. Since grass is flat 2D billboard sprites, I could get away with pre-generating the reflection value in the vertex shader, and passing it into the pixel shader for final processing.
Wrapping Up
As you can see, there's a lot of moving parts. While it looks like I'm bashing on Asobo in this article, (IE: "what were they thinking?"), what I think was happening was Asobo was taking some rudimentary shader code, perhaps from a 2D game they made before FUEL, and were in the middle of making it more robust when CodeMasters told them to shove FUEL out the door for a summer sale instead of giving them until christmas.
So, the lighting model that ended up in FUEL may have been them learning as they went, just as I did, and was simply a placeholder until they could sort it out later. When working on code, you tend to do little hacks here and there that "work" for the time being, but you really do need to find a better way to do them for a final version. Asobo wasn't afforded that towards the end of FUEL's development. So, they shipped what they had.
Fake Specular Maps from Diffuse Texture
Textures TutorialUsing the dot product of the diffuse texture, we can create fake, grayscale spec maps for textures / surfaces that don't have a real spec map texture...
Easy Fresnel Lighting Effects to Enhance Your Game World
Textures TutorialHow to use simple dot products and fresnel function to come up with inexpensive lighting effects to enhance scenes in FPS games via sun-facing brightness...
Measuring FPS Performance (Beyond % Lows)
QA/Testing TutorialAvg FPS helps measure quantity, but Coefficient of Variation is a better measure of smoothness then % Lows.
Files

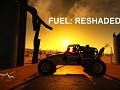
FUEL RESHADED v5.1 (2024 Mar 26)
Effects GFX* Added rimshine to trees, ground, grass, tire tracks * Added "specular in shadow" to vehicles and trees again * Rain now boosts the color of things while...
FUEL RESHADED v5.0 (2024 Feb 01)
Effects GFX 2 commentsLong time, but messed with shaders some more. Think I've reached limit of what I can do with them: * figured out a better, simplified, nicer-looking basic...

FUEL: RESHADED v4.6
Effects GFX 3 commentsv4.6 (Jun 09, 2021) optimized PBR, tweaked fake specs, boosted vehicle shine, headlights kill night time specular shine
FUEL: RESHADED v3.0 (2020 March 05)
Effects GFX 1 commentRe-worked the FUEL shaders to include rain effects, better lighting model, enhanced shadows, better AO, optimized code by pushing pixel calc's to vertex...
Post a comment
Profile
X
Tags
Embed Buttons
Link to FUEL: RESHADED by selecting a button and using the embed code provided more...


Wow. This article really helped me in general understanding of how realtime 3d rendering works. Thanks man, this was so helpful beyond anything that has to do with this game :D
where is the file?
Very interesting article, GJ! 👍
Just beautiful work! Really, hats-off to you dude. Really well done. I was legit fascinated while reading the stuff too. Very well done.
wow thanks! I did not wanted a mod that changes any gameplay stuff but just fixed/finished all graphical effects that asobo could not.
I think in default game, even textures are not at highest settings.
Thanks a lot! that game deserves this
You did great work here. Such a shame the game can only be bought second hand by now.
Hey man, just wanted to drop a comment and give you props not only on the mod but the really well written and detailed explanation about it all. Thanks!