The Source engine is able to make surfaces seem shiny or reflective. While it will not fully mirror the environment, it will still make the texture seem nicer and more realistic. In this tutorial I'll show you 2 ways to create reflective textures.
Step 1.
For this tutorial I want to create some shiny metal. First I open Photoshop and create a quick metal-like texture. Make sure it's 512x512 px and saved either as BMP, PNG or TGA. Call it "cleanmetal" (without quotation marks).
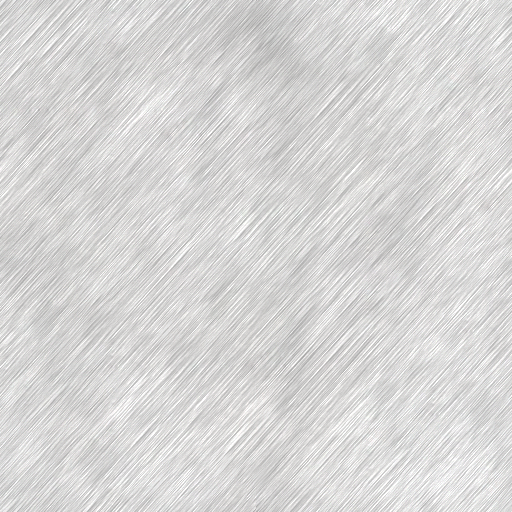
Click here for full texture
Step 2.
Open VTFEdit and go to File -> Import and open the texture. Use the default settings. They should look something like this:
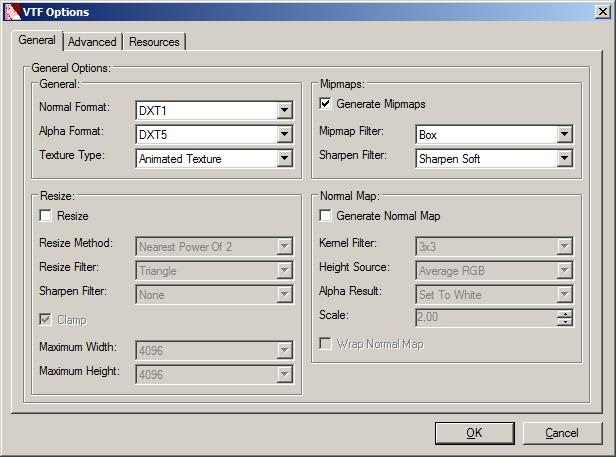
Then go to File -> Save As and save the file as "cleanmetal.vtf". Place it somewhere where you can find it.
NOTE!
From this point, there are 2 possible ways to make the texture seem reflective. I'll start with Method A: through Normal Mapping.
Step 3, Method A:
The Source engine will require another texture to calculate the reflection of the light. We will do so by creating a Normal Map (Bump Map). Open VTFEdit and import the BMP/PNG/TGA again. Now use the following settings to create the Normal Map.
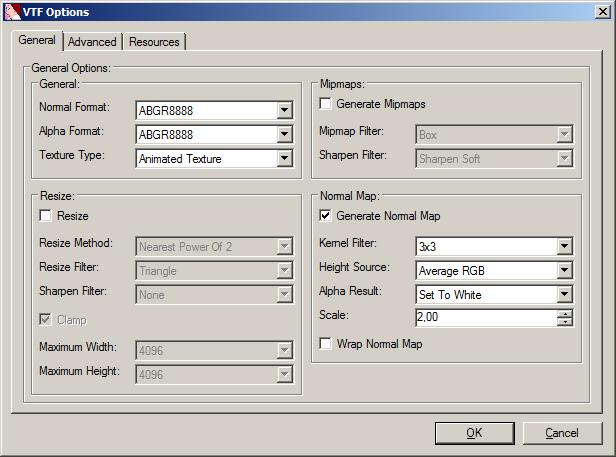
Click "Ok" and VTFEdit will automatically create the Normal Map (purple). Now go to File -> Save As and save this as "cleanmetal_env.vtf".
Step 4, Method A.
Go into the ..\materials folder of the game/mod you are working in. Create a new folder called "metal". So if you're working in CounterStrike Source, you'll end up with: "..\Steam\steamapps\youraccount\counter-strike source\cstrike\materials\metal\". Copy "cleanmetal.vtf" and "cleanmetal_env.vtf" into this folder.
Step 5, Method A.
Source can't use these textures without a VMT file. This file designates the properties and paths of textures. Open Notepad (or any other simple text editor) and copy+paste the following lines:
{
"$baseTexture" "metal/cleanmetal"
"$bumpmap" "metal/cleanmetal_env"
"$envmap" "env_cubemap"
"$envmaptint" "[ .3 .3 .45 ]"
"$normalmapalphaenvmapmask" "1"
}
Now save the file as "cleanmetal.VMT". Make sure the VMT extension is correct and it's not a TXT or a DOC file.
NOTE!
This concludes method A. I will continue with Method B. If you are already pleased, skip down to Step 6. I advise you to try both methods, since they'll give you interesting different results.
Step 3, Method B.
Method B also requires an extra texture, but an Environment Map Mask. Open Photoshop or another editing program and create a new image. This image needs to be filled with just a shade of gray. The darker the gray is, the less it'll reflect. The lighter, the more it'll reflect. Make sure this gray block is 512x512 and saved as BMP/PNG or TGA. Call it "cleanmetal2_env".

Step 4, Method B.
Now open "cleanmetal2_env" into VTFEdit (File -> Import). Use the default settings (check Step 2) and hit OK. Now save this as "cleanmetal2_env.vtf".
Step 5, Method B.
Now go into the ../materials/metal/ folder and copy "cleanmetal2_env.vtf" into this folder. Now duplicate "cleanmetal.vtf" and "cleanmetal.vmt" and rename them to respectively "cleanmetal2.vtf" and "cleanmetal2.vmt". Open "cleanmetal2.vmt" and erase everything, then put the following lines in:
{
"$basetexture" "metal/cleanmetal2"
"$surfaceprop" "metal"
"$envmap" "env_cubemap"
"$envmapmask" "metal/cleanmetal2_env"
}
Save the file. Make sure all the files are in the ../materials/metal folder.
Step 6:
Now we've created 2 types of reflective textures. Time to put them in the game. Open Hammer and create a hollowed cube with a light and info_player_start entity inside.
Now create 2 pillars: one with the "cleanmetal" texture and one with "cleanmetal2". In front of the pillars you should put a env_cubemap entity. In the properties of the env_cubemap, you can set the Cube Map Size to 256x256. This will look great, but will also be slow. You'll end up with something similar to this:
Save the map as "reflect_test" and do a FULL HDR compile.
Step 7:
Load up the game/mod and make sure the console is enabled. For the best effect, make sure all video settings are on High/Enabled. Then open the console (~) and type "map reflect_test". When the map has loaded, go into the console again and type "buildcubemaps". The game will start rendering the cubemaps and then reload the map. If it doesn't reload, manually restart the map.
The Result:
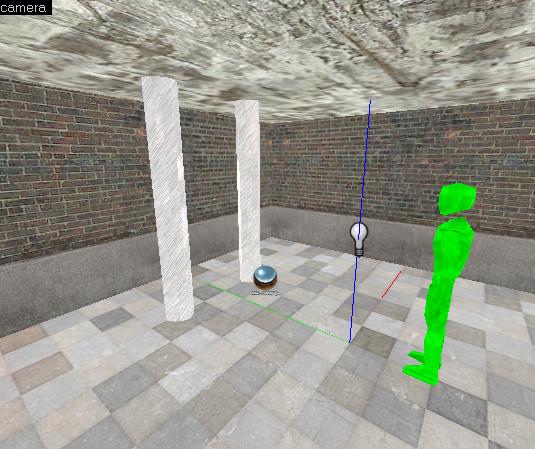
If you've done everything correctly, you should see the following effects:
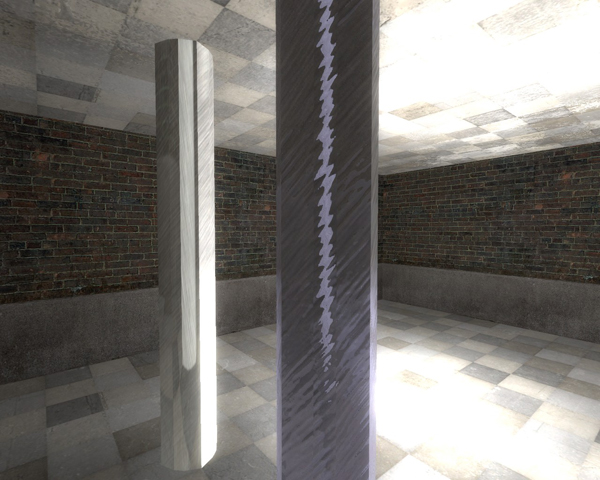
The pillar to the left is "cleanmetal2". The gray envmap will give it a smooth reflecting surface. On the right we see the bumpmap effects of "cleanmetal". This would be perfect for metal with details or dents.
The most important part is to put a env_cubemap entity near any reflecting surface. Without the cubemap there is no reflection. The cubemap size in this example is 256x256. If you set it to anything lower, the building of the cubemaps will be faster, but the reflection will be less sharp. Everytime you recompile the map, you need to rebuild the cubemaps.

Very Helpful, thank you.
I edited metalgate001a.vtf and nothing glows.
I have tried many different ways to get it to work, but there is no specular and the normal map does not work.
The normal map for the floor tiles works.
Do textures that have transparency information, like metal gates and metal fences, not work with normal maps or speculars?