3D Artists Group
Arts & Literature
Are you a 3D artist? Are you looking for some inspiration? Do you just want to collaborate or know who your fellow ModDB artists are? Doesn't matter what application you use or how you do it... if you're a modeller, animator, skinner or looking at getting started with 3D, then this is the group for you!

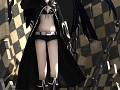
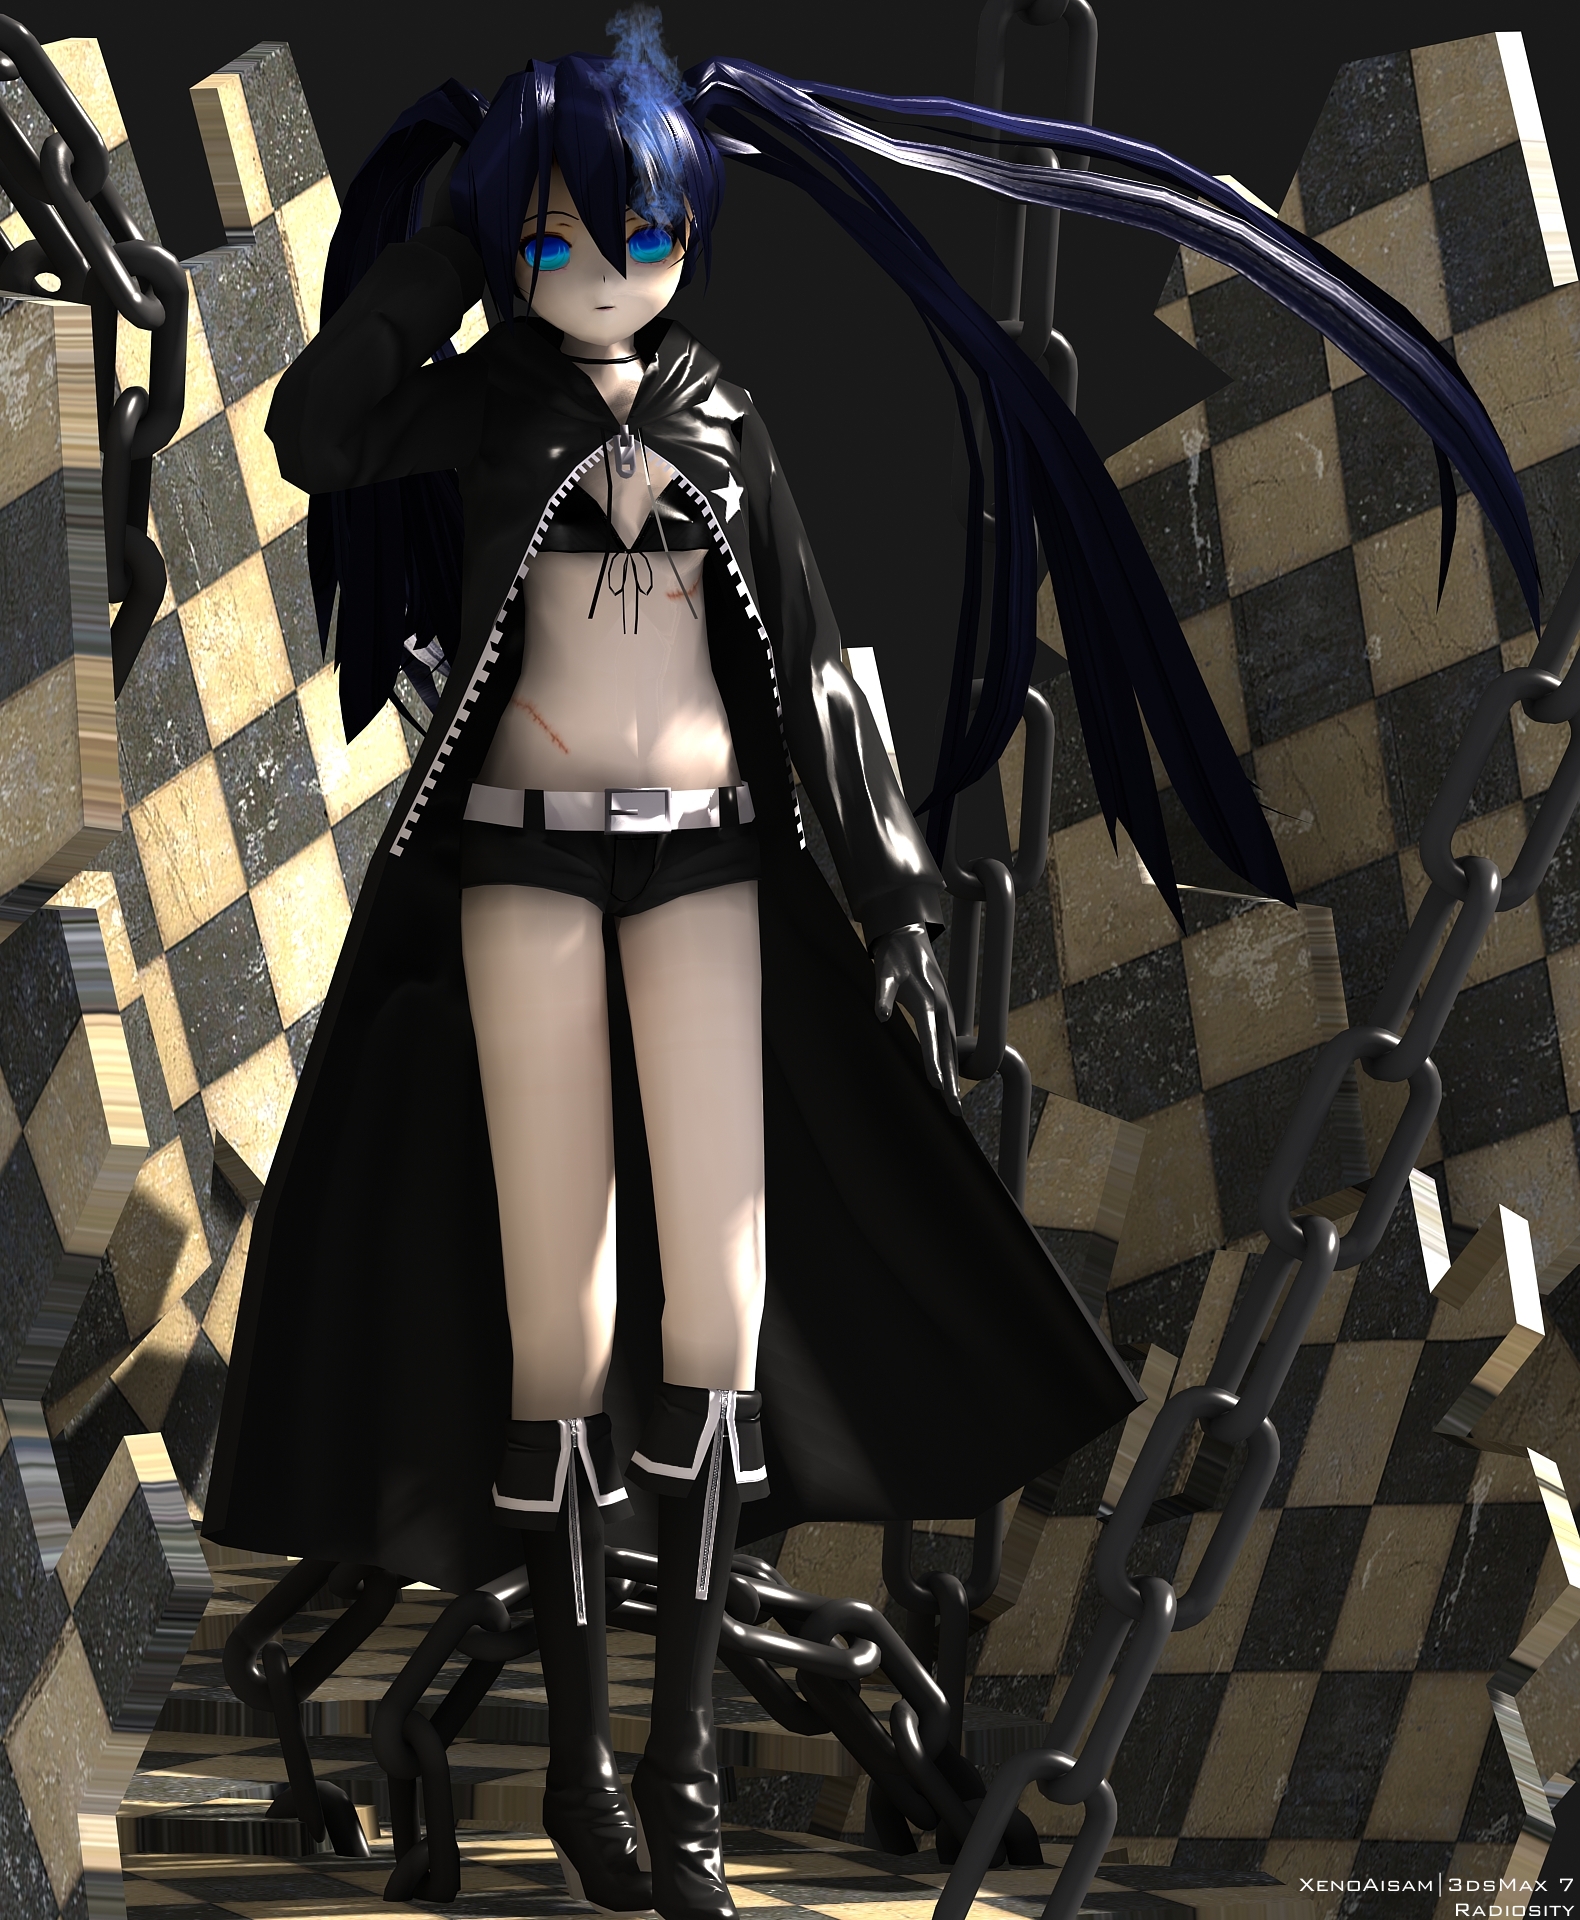
Black★Rock Shooter
(view original)

Post a comment
Description
please watch the video here:
Holy Crap that's some nice lighting!
Bottom right the wall-ish thing requires rotation. :) still a great pic
Amazing... :O Very nice modeling :)
i dont like the head :/ but i love basicly everything else!
You could benefit a lot from some subtle color variation. all the clothes and skin as it seems, are one color or tone. Great model though :)
There is some great lighting going on here, but in all honesty, not much else.
Those floor panels have been ripped straight from Half Life 2 which in my opinion seems quite lazy, either that or you used them because you lack in the texturing department, which from looking at everything else would be true.
Her feet are rather small to the rest of her body, which ok yes, I get that it's a manga type character, but still, they are too small.
I'm not having a go, it's quite a nice image, but that grey background seems to kill the overall feel for me, maybe put something there?
its a good model but it isnt my cup of tea
Wuhu. Again some sey anime model :D
Oh, and the "Chains" seems like plastic, they dont scream METAL for me, they scream PLASTIC , might be because theyre too dark and to "glossy" and they dont seem to reflect anything?
err... thank you for all comments and critiques :P
i hope i can learn more from it XD
I really think the texture on your model is pretty bad. I can easily spot the belly botton as a chamfered edge, her legs as cylinders without smoothing groups on the knees, bad shadow drawing because of poor added smoothing groups on her face (check the shadow on her cheek) due to the render to texture+plain color scheme.
Nice lighting I must admit, but your texturing really needs work.
Here are some tips for you (you can do this in both gimp or photoshop):
1. Use a lightmap for texturing as a base (background) layer.
2. Use an occlusion map in multiply over the lightmap layer.
2. Create a new layer (call it flood), fill it with the skin tone you want and set it to overlay on top of the occlusion map layer.
3. Duplicate your lightmap layer and move it over the flood layer, then apply a difference cloud filter on every channel (RGB channels) of the duplicated layer, set it to overlay. Call it scatter
4. On the Scatter layer: Adjust the curves (31, 75 ussually works), hue/saturation (saturation 80 can do the trick), brightness/contrast (40, -70) to set the layer on some brightness method giving you more refinement of color for your texture.
5. Use the desaturate (the black dot with a stick in photoshop that's with the burn tool on photoshop) to add more whitening to your texture in certain areas such as hands, feets and buttocks, why not?
6. Play around to get better results.
I'll see if I can post a full tutorial regarding this method I use to texture my models when needed.
err sorry i didn't use photoshop.. i use corel photo-paint~
but this is low poly model~
Low poly, high poly doesn't care the size of polys when you're getting into smoothing groups and texturing.
i really like it