Hello everyone, this is my first tutorial so go easy on me please and if you have questions leave them in the comments or p.m. me. Many of you asked me help with the process of making humanskins for the game; I'll do my best to teach you what I learned in this 2 months of exporting.
This is petty much a noob tutorial and if you want a more complex (but much more time consuming tutorial, go here Moddb.com).
Let's start right away!
1) What do you need?
- One of the MOW games with the editor installed so that you can test and use your skins. Editor is found in the game folder or if you use Steam I believe you can access it when launching the base game.
- One of the following 3ds Max versions: 2008, 2009, 2010, 2011, 2012, 2013, 2014, 2015. I suggest using newer versions of it like I do in this tutorial (I''ll use the 2013 version).
- The plugins for the correspondent 3ds Max version you have installed on your PC; I trust the VK community because they are awsome people and MOW modders, but if you feel safer to scan the plugins do so. Vk.com . The plugins can be installed by putting the files in your 3ds Max plugins folder (if you have problems with this passage contact me because I may remember incorrectly on how I installed my plugins). You can check if you installed correctly by opening 3ds Max and clicking on File>Export , then use the scroll menu of the file extensions and see if there is the .MDL file extension, like this:
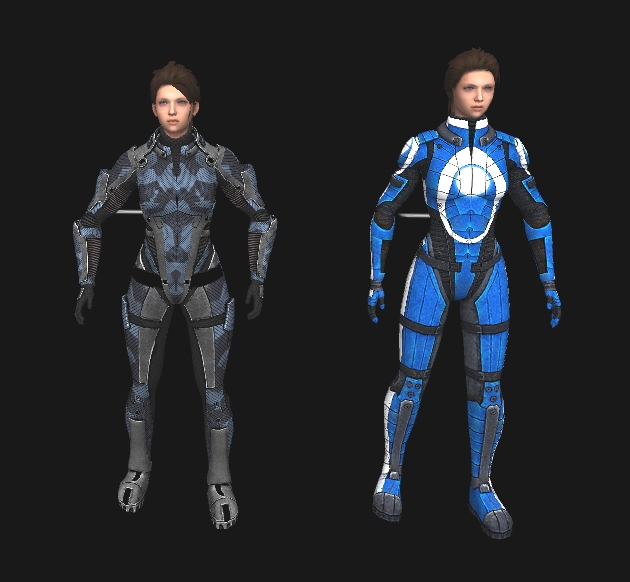
- A 3d model to export: download one from the web or make one from scratch.
- Samples that you will need to overwrite to make the work simple; you can download human samples from either this 2009 plugin Moddb.com (the example you'll need is in the folder samples) or from this community site (http://glit.clan.su/news/sborka_modelej_iz_modov_fieria_gold/2015-03-08-105), the links you see are of various game ready files from mods; every mod listed there for download has humanskins examples (and other stuff too).
NOTE: if you choose to use as samples the ones from the community site, note that you are not allowed to export them and claim them as yours, please respect Glit and his collaborators.
2) Setting up the model correctly:
Ok, now that you have everything set up let's open 3ds Max and start the real work. Once you open it you'll get this interface:
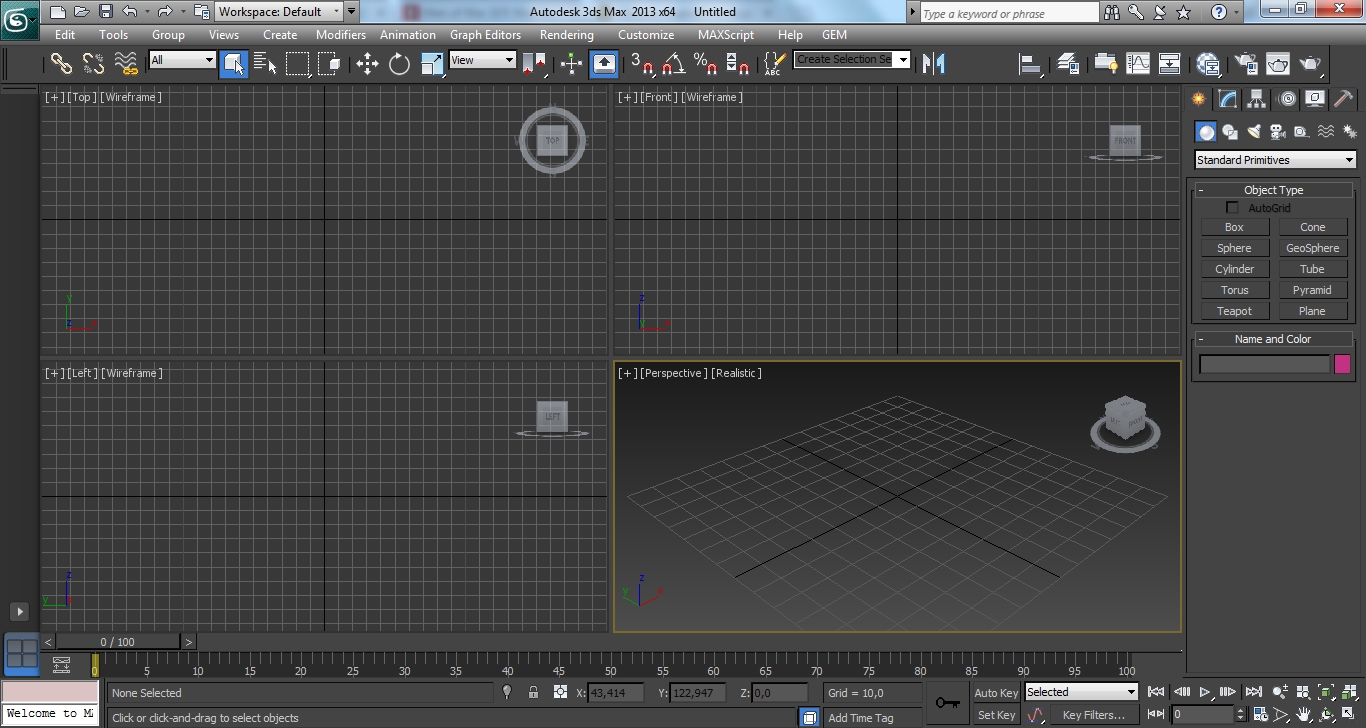
Pretty basic and intuitive concept; you have the 3 views (top, left and front) and a perspective; the cube on the top right of each section lets you choose from what angle you see the grid. You can zoom in/out of one perspective by selecting one and clicking the "Maximize Viewport Toggle" button, in the far down right corner of 3ds Max's interface.
Let's open one the model you wish to export; this can be simply done by dragging the model from its folder on your pc to the 3ds Max interface, like so:
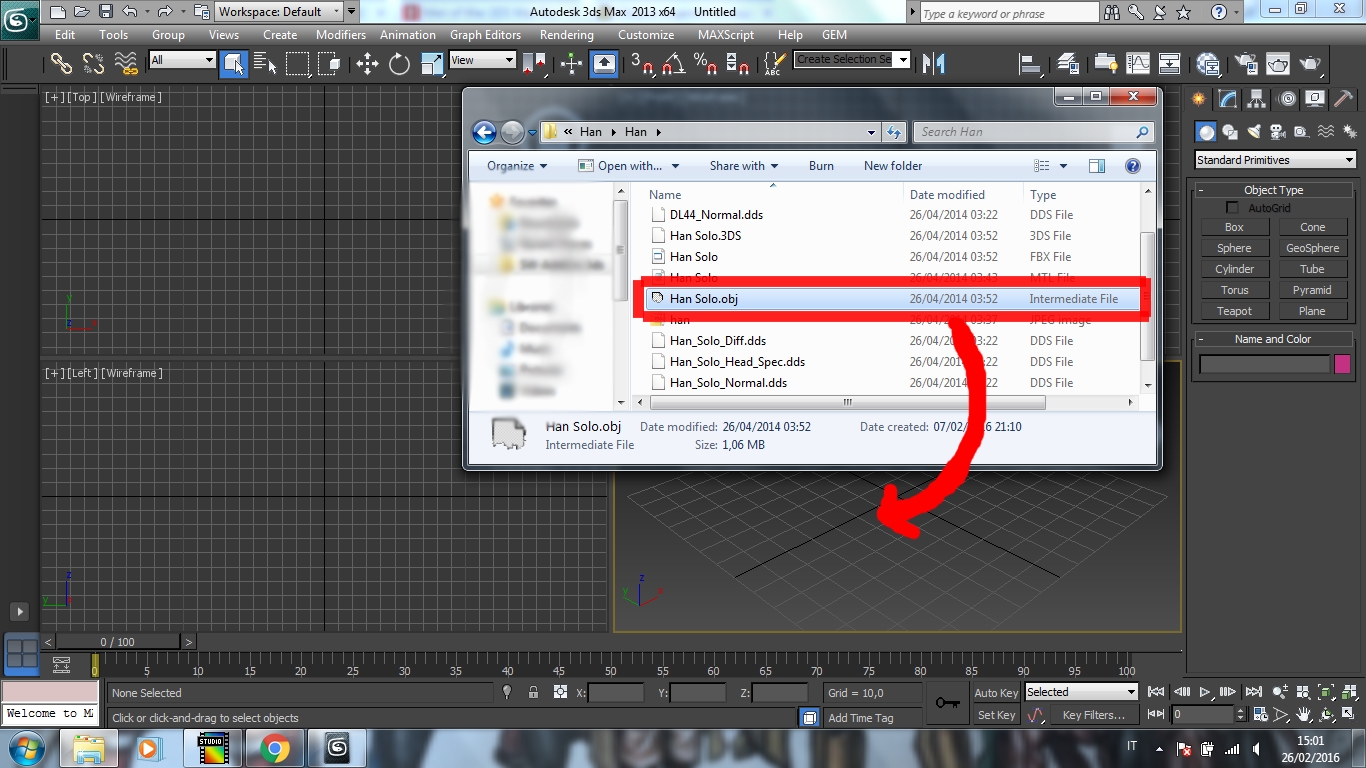
If you are on an old 3ds Max version you may need to Import (if it's not a .3ds file) the model by clicking on File>Import (select the correct file extension).
Now move the model trying to center it to the grid (even if it's not centered that's ok), using the "Select and Move" button, and you'll be able to move the model with the world's axis, like so:

The model needs to be only 1 object, that means that if you have multiple pieces like feet, arms etc.. you'll need to attach them, but I'll show you later how to do it.
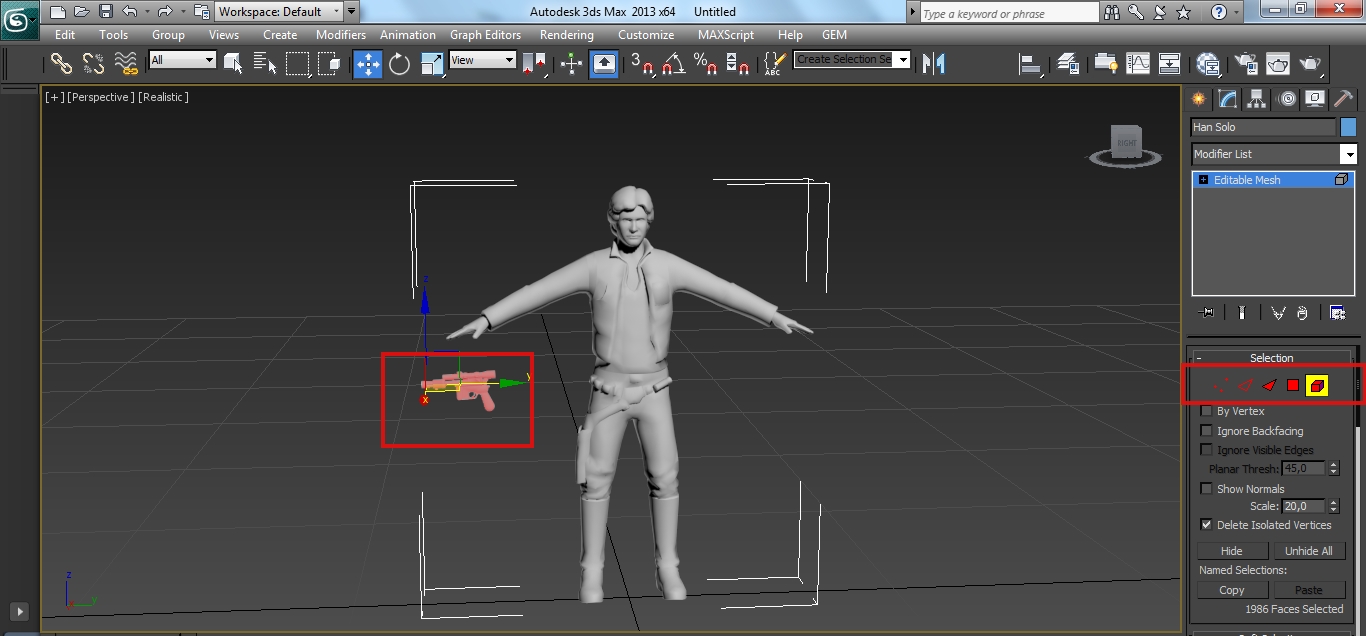
I'll now delete every part of the model that I don't need, like Han Solo's gun, to do so, select the model (if you didn't select it do so by clicking on it) and click on the little blue arc on the right, on top of "Standard Primitives", that is named "Modify".

A new subsection, in the same area of the previous one, will pop up:

Now select one of the 4 red colored options: vertex, wdge, face, polygon or element. If you have one model with may separated parts like me (weapon and main body then maybe used the "Elements" option, while if you have a more comapact model the use the vertex or one of the other options); make sure that only the bodyparts (legs, arms, head, torso etc..) remain. Delete the unneeded parts (using CANC), to select multiple parts (it's easy to make a mistake because of the rectangle selection) hold CTRL and select the parts you want to delete.
Click on "Editable Mesh/Poly" to quit from the editing selection.
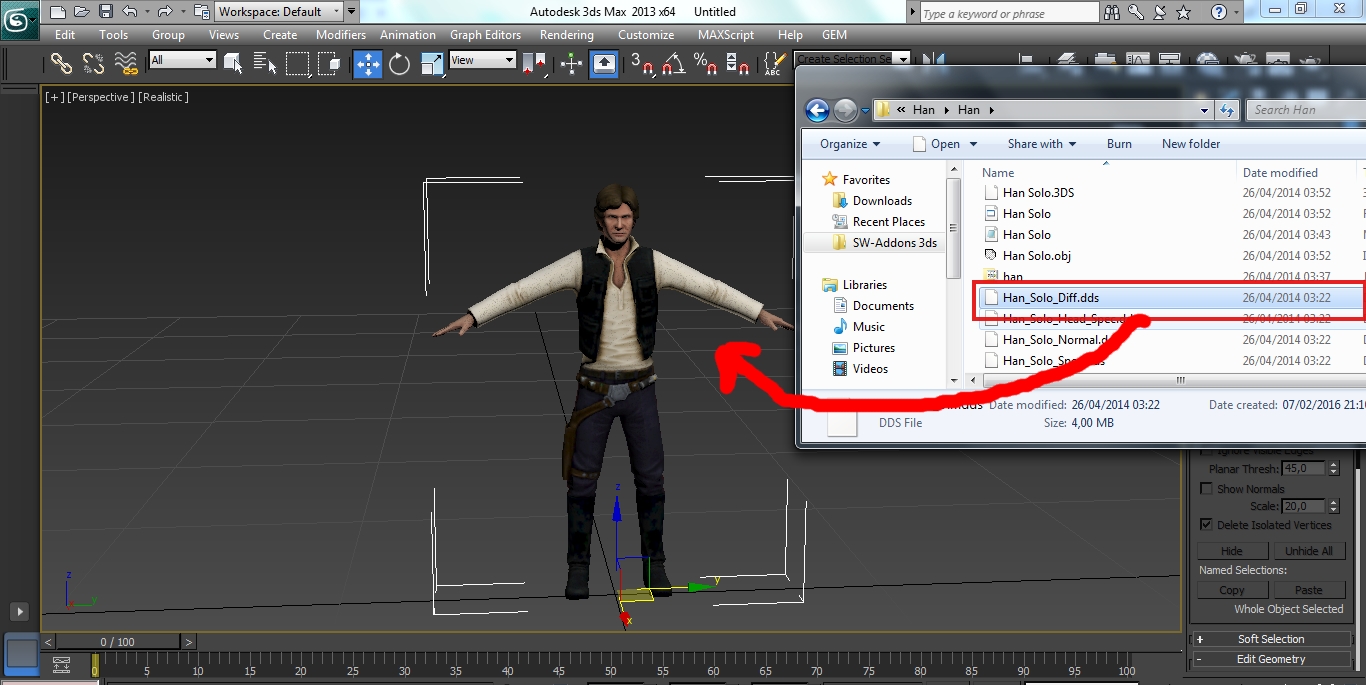
Now onto the textures, drag and drop them from the model's folder on the model parts itself. On older versions of 3ds max you need to use the Material editor, but I don't know how to use it that well, so sorry.
I also don't know how to apply the bump and spec textures, they give better effects to the model but like I said, I do not know how to apply them, sorry again.
Now, if you see that your model is composed by multiple separated parts (feet, hands, head etc...), simply select one part (usuallly the biggest) and go into the "Modify" tab, like before, and use the menu to find the "Attach" function, click on it and attach the minor parts to the one you selected.
The model is ready to be rigged!
3) Rigging:
Now navigate through your pc to one of the samples you downloaded, select it and drag it in the 3ds Max interface, you'll be asked if you want to Open, merge or XRef the file; select the Merge function.
If you are using an old 3ds Max version simply do this process by clicking on File>Merge and select the sample you want to merge.
In this case I merged the gb_com file from the 2009 Exporter tools, but any model set up like that will be good. Move the merged things next to your model like this:

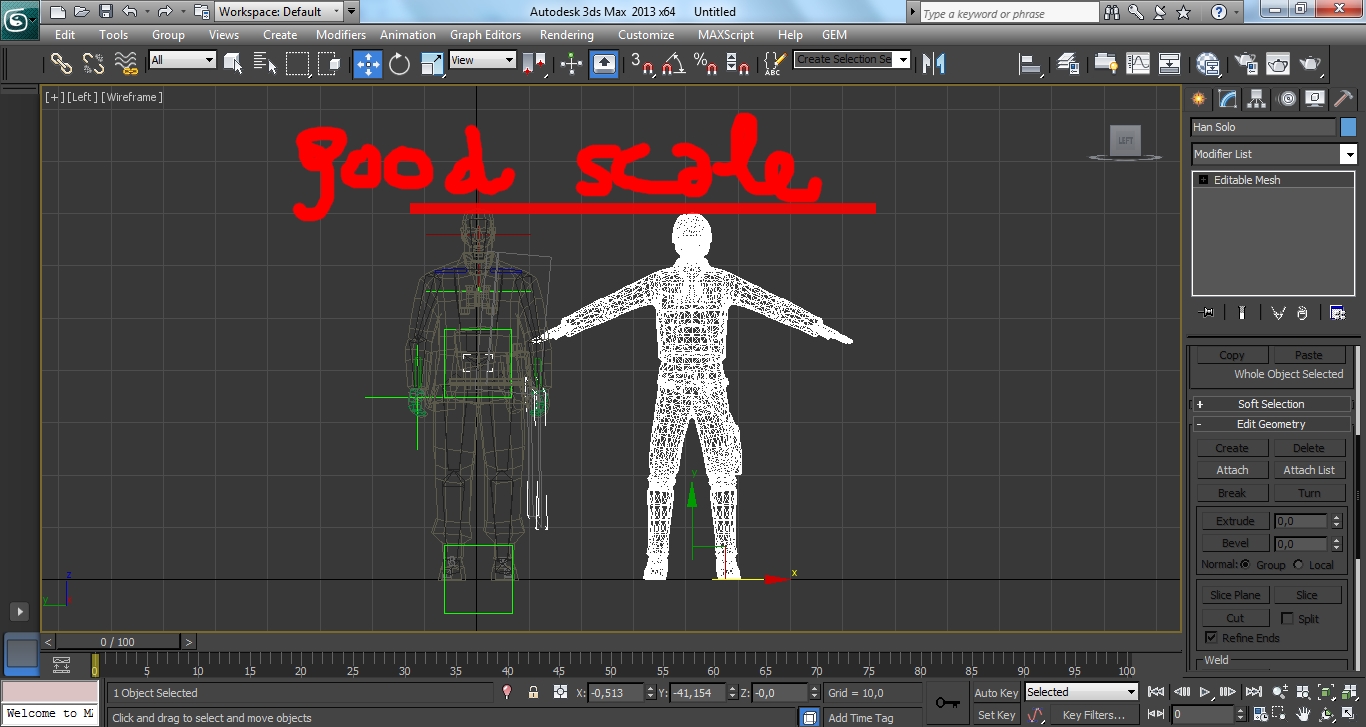
As you can see my model of Han Solo is completely out of scale compared to the MOW eady model; that can be fixed using the "Select and Uniform" scale in the top; click on your model and then on the scale button (use the middle scale like shown in the image). Use the other perspectives to see if the model is good in scale compared to the merged skin.


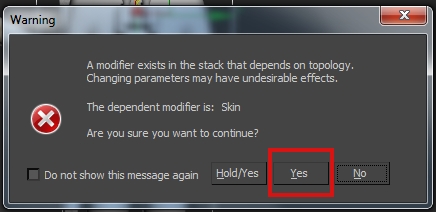
When you have reached a good and uniformed scale, click on the "Select Object" button (same area of the scale and move buttons). Select the sample model (called "Skin" in the gb_com sample), then go in the "Modify" tab and click on "Editable Poly" .

You'll get this warning, click "Yes"
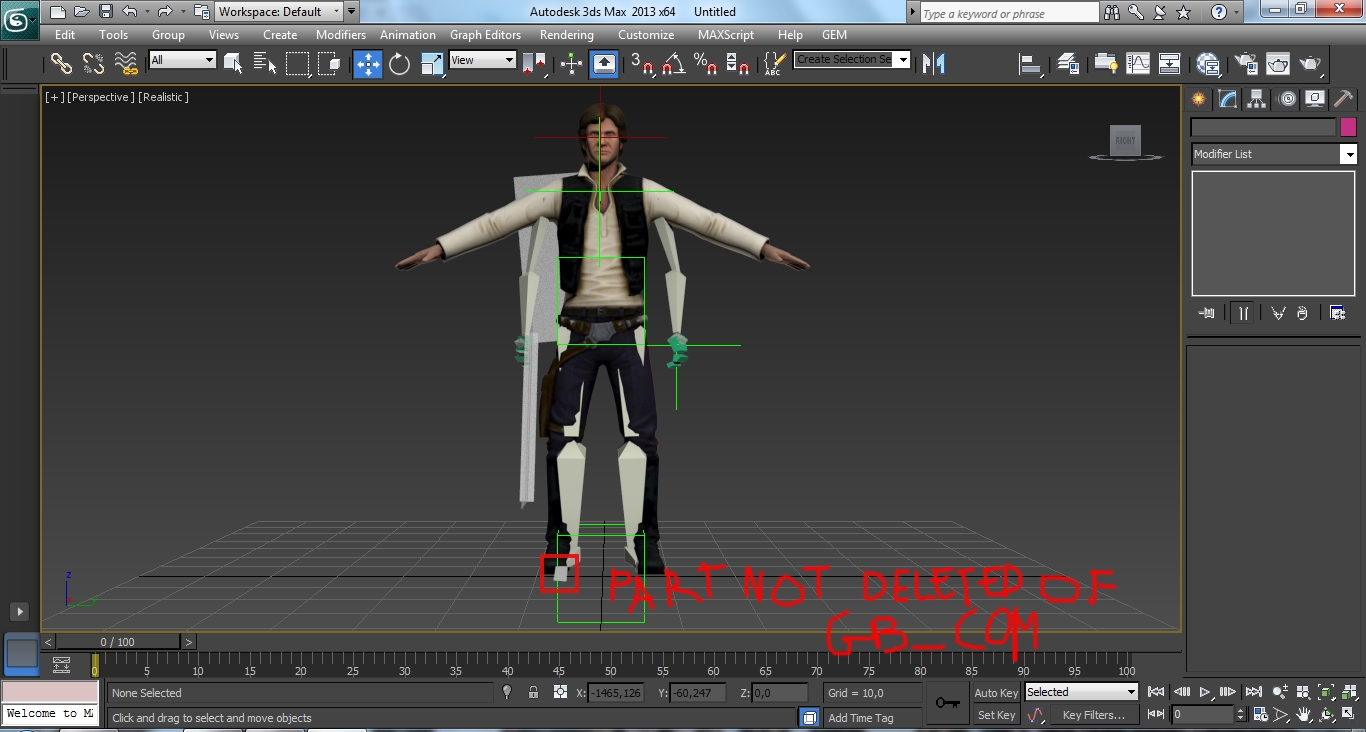
Then click the "Vertex" button and start deleting part of the skin until you leave only a little part like the front foot. After you left the little part of the model click on "Editable Poly" to quit from the editing selection. Select your model and try to position it so that is centered (at least in body and head) with the "android/skeleton" thing you got from deleting the skin, use all the perspectives to be as precise as possible.
Ok now comes the nasty part, get the custom model's parts onto the android; use the "Modify" tab to move the Vertex on the skeleton, follow this video for better understanding of what I mean Youtube.com
After you have managed to get the model in a good position and as precise as possible to the skeleton, select the part that you didn't delete of the already rigged skin; then go to Modify (again say YES to the warning) and scroll down to attach, then select the custom model; hit the "Elemnt" red button, select the remaining part of the gb_com and delete it, then quit from the "Editable Poly".
Now you need to use the animation bar (down) and its commmands to see that the model is now attached to the previous skin, hit the skip button (like on an Ipod/TV controller) and you'llsee your model in a T position and with stretching polygons (those wierd triangles), the more you are precise in the positioning and getting the model's arms on the android, the less stretching polys you'll have in this passage:


Now select the partially rigged custom model you just did and hit "Skin" in the right tab (under the "Modify" command): now scroll down until you see "Vertices", tip that and then scroll a bit more down and you'll see the bones list, you need to adjust the model's parts to the bones to get rid of the stretching polys, like in this video is showed Youtube.com
Help yourself by turning the camera around (top section where there are the scale/move buttons) and by using the animation bar.
Once you are done with this part select the basis (green cube) hit right mouse button, go to Object Properties, then User defined properties and change the entity/humanskin/random name to entity/humanskin/(your new name of the model).
Hit File>Export (select .MDL) , tell the exporters to export everything (geometry, textures etc...) , (bitmaps and model must go in the same :C folder, remember to check the exporter pop up menu and see if they correspond) then hit export again and you'll find the model in :C/Thegame.
If you have questions leave them down here, watch the video before asking cause it helps a lot!


Thank you for the tutorial! :D I still have one question where do you get the models? Do you create them yourself? or do you get them from somewhere? I don't know if this was answered or not if it was then I am sorry for wasting your time. Anyway thank you again for the tutorial I really appericate it! :)
P3dm.ru or tf3dm.com
Only these sites you know ?
Nice man. This is really cool, thanks :D
No problem, hope that everything I wrote is correct and that you can make some custom models and post their pics here!
Thanks for the tutorial .. however Everything's not perfectly working for me :
- When I select the skin ( "riggin" part ) I only get editable mesh and no editable poly , I still manage to move the model to the skeleton , but it breaks all the animation part
- The exporting plugin is a bit ... hard to handle when you don't know a word in russian :D For now , it only gives me errors everywhere ^^
Editable Poly and Editable Mesh are the same thing from what I noticed (I'm no 3ds Max expert). You can go in the Modify tab, click on the Modifiers scrolling list and select Ed Poly if you wish. If you want to delete part of the already skinned model, select Vertex (in the Editable Mesh/Poly) and delete part of it.
You can get the exporting plugins in english in the AS 2 folder (if you have AS2).
Hope I have answered you, if you have anymore questions, make them!
hello thanks for the info i just want to ask since im using the 2019 version plugin doesnt work do you maybe have them or know someone that does because i cant export the model as .mdl
i cant get the mdl extension to work, and i already put that plugins in the right place....
Try to drag and drop them on the interface while having 3ds max opened.
I tryed that , but not work
yeah i can't get the plugin to work either, is there any updates on this?
or do we need to install an older version of 3ds max, maybe 2013 perhaps.
if the GEM Exporter tool plugin for 3ds max from VK does not work for you, just download another version of 3ds max. I started with 2015 but it does not work so I downloaded 2016 version and it works fine.
If you don't want plugins in russian you can find english ones somewhere in your AS 2/CTA folder (they are not present in fhe folder of FOW/MOW/AS 1).
I have a question
How do you edit a model that's already in Men Of War in 3ds Max? I can't import the .mdl or .ply files?
Sorry for the late response, there are no importers available.
Also are there any guides on importing objects?
Sorry for the late response again, look here for some guides on objects/weapons: Moddb.com
If you need more examples (of basically everything) read my articles: Moddb.com
can't import or export to MDL.... I put the plugins and everything.. yet nothing works. plz help. (I'm using Max 2015) 2016 and 2014 didn't work either
If you want to Import a .MDl you have to Decompile it first, Use Crowbar: Steamcommunity.com
Also What version of 3ds max are you using?, 2015 doesnt work for some reason but I know that the 2016 one works for sure, Just drag the .dle files into the plugins folder and you should be set
I keep getting an error whenever I try to export it says Node 'MyModel' should contain 'Model' or XModel' Parameter!. Am I missing something, or did I just skip a step?
Cadnav.com
Artist-3d.com
Grabcad.com etc...etc
Free3d.com is good 2 but you must create a free acount
Anyone know how to change the muzzle flashes of small arms? I'm trying to get a rifle to have the shotgun(musket) flash from the original men of war, which is still in the fx files.
How you get the bones to go into the T pose
Where can I get 3d max?
just a quick question could you technically import models from lets say tom clancy's endwar?
This comment is currently awaiting admin approval, join now to view.
I wanna play
can i change the 3D Max to another lighterw?
you should try this : All3dfree.net
download without any registered.
3D max can I use the student version?
yes
Could you make a video create the character?