
MAX PAYNE
Welcome!
I'm using this opportunity to tell you everything I've learnt about modding for Max Payne, or at least, everything of importance that I can remember. I'll mostly be talking about model work using Milkshape 3D, but there's other things I'd like to mention too. Hopefully this little "guide" will be useful if you are interested in starting a Max Payne mod, or you would just like to play around with the game, much like I do. Alright, let's begin!
First of all, i'd like to talk about mod "structure", basically how the game "reads" a mod. Max Payne uses a very simple procedure. When you load up the game, you'll be presented with a pre-launch screen where you can adjust graphical settings, screen resolution and that type of thing. There is also a drop down box called "Choose Customized Game". This is where you can choose a Max Payne mod to play. This box will be greyed out and unusable unless you have some .mpm (Max Payne Modification) files in your Max Payne folder, usually located at "C:\Program Files\Max Payne". Most mods that you download will usually be an .mpm file inside a .zip or .rar, usually accompanied by a readme text file with instructions on how to add it to the correct directory.
An .mpm file is basically just like a .zip file. It's a compiled set of folders, containing custom models, textures, sounds, music, and anything else the modder has decided to edit or add in Max Payne. You'll notice that inside the Max Payne folder, there are some files called "x_data.ras, x_english.ras" etc. These .ras files are practically identical to .mpm files, except they are the default files loaded by the game. Now this is where the mods come in to effect.
Max Payne's game files start in a directory folder called "data". This is the starting point for the game, and the mods. If you are playing with a mod activated, Max Payne will use the default files from the .ras files, unless if comes across a duplicate or is told to use or do something else in the .mpm file. For example, if you loaded up the game, it would load Max himself. His model is called "Payne_Max_L0.KFS" and is located in "data\database\skins\max_payne". If the game found or was told (using scripts in text files) to use a different model, it would use the one from the .mpm, and not the .ras. If I created a custom model and called it "Payne_Max_L0.KFS", then placed it in the correct directory in my .mpm file, the game would use my model instead of the original.
This way, you don't have to directly overwrite the game files, and mods can be much smaller. The game simply checks for custom models/textures/sounds/music in the .mpm, if there are none, it uses the originals from the .ras files. I hope you can understand that, but it's usually easier to decompile a mod (i'll get to that in a second) and have a look how it works for youself. Don't steal the mod's content though!
You build a mod using a data folder placed inside the Max Payne folder, this way you don't have to compile your mod each time you need to test something. To use this method, you simply run the game without any mods selected. The game will detect that there is a folder called data and treat it as a mod, this saves a lot of time too. Compiling and decompiling mods is achieved by using a program called RASMaker (supplied with the game, under MAX-FX Tools), or MaxRas (from filefront or similar websites). I prefer to use MaxRas, as it uses a simple graphic interface then does all the hard DOS work in RASMaker for you. I won't explain MaxRas here, as it comes with instructions in the download. If you have any questions about it though, feel free to PM me and ask.
On to the models. I mentioned Max's model earlier, "Payne_Max_L0.KFS". The game uses three different file formats for handling models in the game. ".kfs" files for player models, ".kf2" files for weapon models, projectiles, skyboxes and keyframe animations and finally ".skd" for skin data, such as the location of a models textures. You can see that Max's model is a ".kfs" file because he is a player model. He also has an ".skd" file, "PAYNE_MAX_L0.SKD" which contains his skin data so the game knows where to load his textures from. In this case, it's "max_payne\textures".
Now that i've explained that, you should take a look at a decompiled "x_data.ras". I export mine to "C:\xdata" for easy access. This way you can see all the models in the game and how they are layed out. If you were simply going to replace an enemy model, "data\database\skins\C1_All_Johnny\doe_johnny_l0.kfs" for example, you would make a folder called data inside the Max Payne folder, then another inside it called database, then another called skins, another called C1_All_Johnny and this is where you would place your custom model, called "doe_johnny_l0.kfs", because this is "Johnny"s model. This way the game will load your custom model instead of the default one. Again, this probably seems very confusing, but after a bit of practise you'll see how it works.
Time for the modelling itself. This was the hardest part to learn for me, it took several years before I eventually got the hang of it, mostly because I hadn't used a 3D modelling program before. It helps if you do have at least some knowledge of how models work, vertices, bones, materials etc. before you attempt custom models. I used Milkshape 3D 1.7.8. for my Classic Payne and Max Freeman mods, I suggest you find the same version as I cannot guarantee my advice will work if you use a different one, but it shouldn't be too much of an issue if you can't.
Luckily, Max Payne is one of those games that uses one skeleton for all the models (except for rats). If you have Milkshape open, we can have a look at it. Click File > Import > Max Payne KF2/KFS/SKD..., then navigate to your unpacked x_data.ras, find "data\database\skeletons\default_skeleton\anim\Widepose.kf2" and import it. If you don't see anything, click on the "Joints" tab on the very top right of Milkshape, then click on "Show Skeleton". You should now see the Max Payne skeleton. If you just see a mess of blue lines, click File > Preferences, then the Misc tab, and change the Joint Size to "0.025000". Hit OK and everything should be looking good.
In the joints tab, you should see all the joint labels of the Max Payne skeleton, Pelvis, Torso, Neck, Head etc. There are also joints for Max's jacket, JfUR, JFLR, JfUL, etc. but Max is the only character to utilise these, since the other characters don't have jackets that move around like Max's. You'll only need to use these if your custom model has an open jacket and you want it to wave around in the wind.
Hopefully you know how to rig models, but if not i'll give you a quick crash course. I always start with "Toe-L", the front part of the foot of the left leg. Simple, isn't it? Simply click that joint, select the vertices you want then hit "Assign". "Foot-L" is not the whole of the left foot, simply the back/heel of it and the rest of the vertices that haven't been assigned to the toe. "Toe-R" and "Foot-R" are the same, just for the right foot. "LoLeg-L" is the calf of the left leg and "UpLeg-L" is the thigh. Same for "LoLeg-R" and "UpLeg-R" for the right leg. "Pelvis" is pretty self explanatory, select to about half way up the body, or wherever seems logical on your model. "Torso" is the top half of your models body. Inbetween "Pelvis" and "Torso" is where your model will bend, so try and find a point that looks good, somewhere closer to the pelvis than the shoulders usually looks good, it all depends on the shape of your model and any accessories he/she has on them.
For "Head", you select the head of your model and the top vertices of the neck. Assign the lower vertices of the neck, usually a "ring" shape, to the "Neck" joint. This should make your model move his head around whilst keeping his neck attached to his torso. With a bit of practise you'll get the hang of this.
The arms are similar to the legs. "UpArm-L" is the top of the left arm, connected to the torso, and "LoArm-L" is the bottom of the left arm, connected to the left hand. Same goes for the right arm. "Hand-L" and "Hand-R" are as simple as they sound, just assign the entire individual hand to the corresponding joints. You'll notice the "Gun" joint attached to the "Hand-R" joint, this is where the handles of all the guns will be located, so if you try and have your models hands "grasp" this circular joint like they are holding a gun, it should look correct in game, you can always make adjustments later if it looks out of place. Line up the left hand with the right to help align with things like the pump shotgun barrel.
Save your model, and we can import an animation to test it out. "Run.kf2" is a good one because it utilises all the joints of the skeleton. Simply click File > Import > Max Payne KF2/KFS/SKD... and chose "Run.kf2". Click the "Anim" button on the bottom right of Milkshape then hit the play button and you'll see your character running on the spot. Looks good, right? This way you can see if your joint assignments need any major adjustments.
If everything went well, you will want to try it in game! Doing this is easy once you get the hang of it. Hopefully you know which model you want to replace, we'll still use C1_All_Johnny to avoid confusion. Make sure all your vertices are assigned to at least one joint, check this by clicking "SelUnAssigned" in the joints tab. Also make sure that at least one of your textures is named "Face". This is quite important, because the game will try to run scripts that are targeted at a models "Face" texture joint, and if it can't find one, it will crash. Now click File > Export
> Max Payne KF2/KFS/SKD..., and navigate to your data folder inside the Max Payne folder. Save the model as "doe_johnny_l0.kfs", the extension is important otherwise Milkshape will give you a warning error.
Now here's the important part!
Milkshape has an annoying little setting on the Max Payne exporter. Major thanks to Maddieman for helping me out with this. We are exporting a player model, so you may see that "KFS/SKD" is already selected and hit Ok, but don't! Max Payne will crash when you try to use the model. Why, you ask? Well, Milkshape has support for Max Payne 2 modding too. Unfortunately, this is activated by default, so you need to disable it before you export your model. Click on to "KF2 Format" then untick "Max Payne 2" and click back to "KFS/SKD". Now you can export. You should now have a "doe_johnny_l0.kfs" and "doe_johnny_l0.skd" inside your data\database\skins\C1_All_Johnny folder. Milkshape makes the .skd for you when it exports the .kfs, so you don't need to worry about that.
Don't head in game yet though, I know you're excited. First we need to stop the game from randomising the texture of our model. You see, we have replaced an enemy that has several textures called "TextureSets". This way the game can use the same enemy model, but give him different faces, for added variety in gameplay. We don't want this for our model, because we're only using one texture. I don't know how to make custom sets, so if that's what you want, I can't help with that. To stop the game from doing this, you need the text file of the character you are replacing. Check in the uncompiled x_data's "skins" folder for the "C1_All_Johnny.txt" file, and copy it to your mod's "skins" folder.
Open this text file up and get ready to scroll down a bit, i'll explain something while we're here. Look for this part in the file:
[LOD] // LOD 0
{
[Geometry] ExportData = doe_johnny_l0.kfs; SkinData = doe_johnny_l0.skd;
Distance = SKIN_LOD_FAR;
EnableBoundingSphere = TRUE;
BoundingSphereRadius = 1.90;
EnableBoundingBox = FALSE;
}
Most of this is useless information to you, but notice the "ExportData" part. This is the model that the game is going to load when it needs to use Johnny. See it's set as doe_johnny_l0.kfs? We called our model that anyway, so it will use ours. You can replace these strings with anything you like. For example, in my Max Freeman model my Johnny model uses this:
[LOD] // LOD 0
{
[Geometry] ExportData = terrorist.kfs; SkinData = terrorist.skd;
Distance = SKIN_LOD_FAR;
EnableBoundingSphere = TRUE;
BoundingSphereRadius = 1.90;
EnableBoundingBox = FALSE;
}
I had a model called terrorist.kfs/skd in the Johnny folder and the game used this information to load it instead of doe_johnny_l0.kfs/skd. You can also load a model from a folder "above" Johnny's by using this command: "..", for example..
[LOD] // LOD 0
{
[Geometry] ExportData = ..C2_All_Buck\arctic.kfs; SkinData = ..C2_All_Buck\arctic.skd;
Distance = SKIN_LOD_FAR;
EnableBoundingSphere = TRUE;
BoundingSphereRadius = 1.90;
EnableBoundingBox = FALSE;
}
This will move up to the "skins" folder, then into the C2_All_Buck folder, and load the arctic.kfs/skd. Get it? If not, like everything else, just keep practising and you'll understand. Anyway, back to the TextureSets. Scroll down to the very bottom of the C1_All_Johnny.txt file and you should see this:
[TextureSet]
ExportData = Doe_Johnny_Set02.kfs;
[TextureSet]
ExportData = Doe_Johnny_Set01.kfs;
[TextureSet]
ExportData = Doe_Johnny_Set04.kfs;
[TextureSet]
ExportData = Doe_Johnny_Set03.kfs;
[TextureSet]
ExportData = Doe_Johnny_Set05.kfs;
That's them. Delete those to stop the game from trying to use other textures. Save your C1_All_Johnny.txt file and load up the game, the tutorial level has loads of Johnny models, so use that.
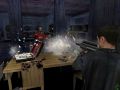
Hopefully now you can see your custom model, shooting at you!
I've only briefly read through this, so if you have any questions about anything, please feel free to ask me. I'd also appreciate any advice on how to improve this little retrospective guide, as it's the first i've ever written. I hope whoever reads it finds it useful and helps them understand the process of using custom models in Max Payne.
Cheers for reading.
Ben "Zom-B" Wilson.


Absolute hero back in 2009 saving my butt in 2023 thank you!