Pseudo Normal Maps for Gold Source Engine
So, let's assume you have this really good 3D model, high polygons, few 1024x1024 (or bigger textures) and you have those really good normal maps for all of the textures. You know the normal maps make the models even prettier... Assuming that the engine that you would like to use the mode for supports Normal Maps... What happens if the engine in question does not support normal maps?
I'm obviously speaking about Half-Life 1 Engine here. For the purpose of this topic, I'm not going to look at any 3rd party implementations like XASh 3D or hacking tools that load 3rd party dlls into the game ( you know this can get you VAC banned right?)
So for the Gold Source (Half-Life 1) developers, this is a hard pill to swallow...
The 1024x1024 or bigger resolution textures can be UV Chopped following my tutorial, into size supported by Half-Life 1 engine.
In this tutorial, I will show you a technique I call "Pseudo Normal Mapping". I came across of it by chance while I was playing with texturing tools and experimenting with textures.
So what you will be needing here:
3D model with normal maps (I will use as example something from Half-Life 2) - Take a note that I'm NOT going to show you how to port models in this tutorial. There are plenty of other porting tutorials.
-
Paint.Net - I'm using version 4.2.12; still any version should do)
-
PhotoFiltre Studio X - I'm using version 10.14.0 - I really love that program, and there are a lot of things that you can do with it.
So let us start.
- Get your Diffuse map texture and your Normal map texture and open them in PhotoFilter Studio X. Actually, As you can see, I'm using a custom Combine Soldier skin, that I intent on * UV Chopping and compiling later on for Half-Life 1 player model. (Still, let's focus on our task here).
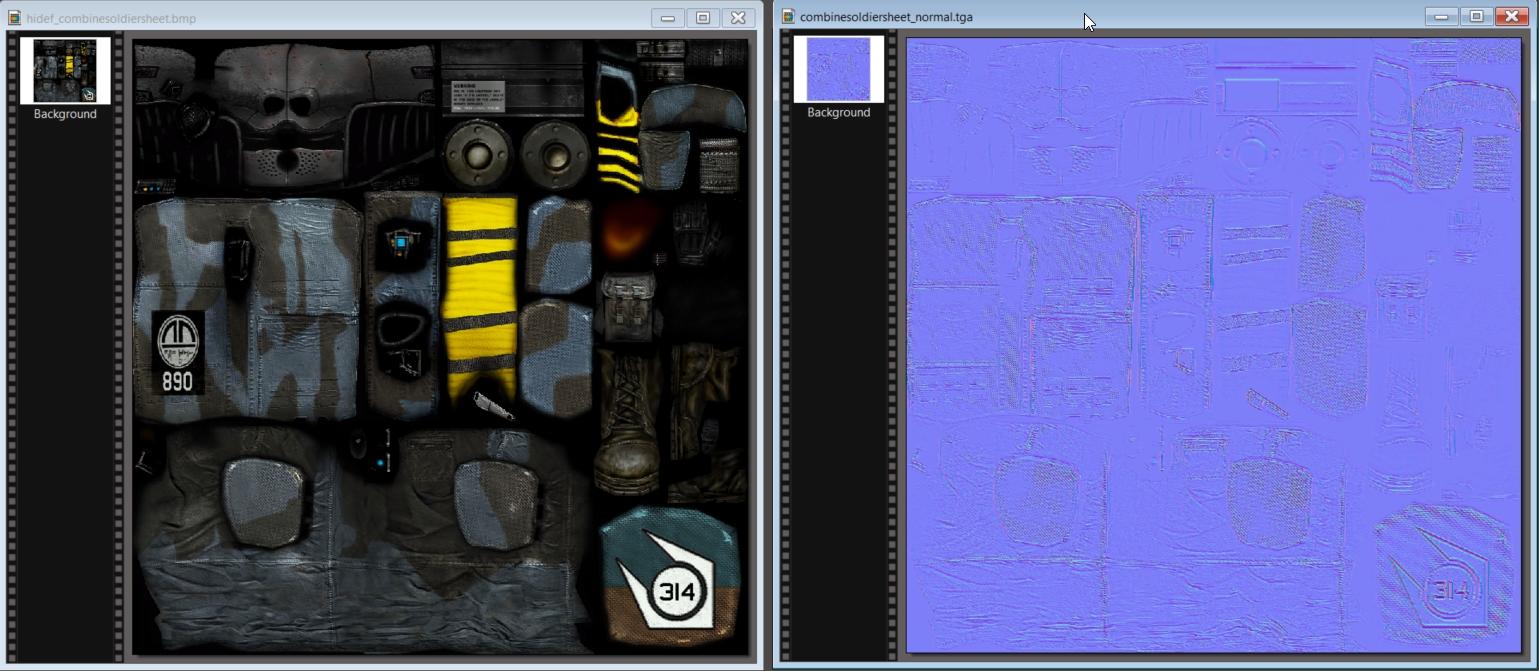
Figure 1: Combine Soldier Diffuse & Normal maps
- So, at this point I'm going to edit the Normal map. As you can see it in Figure 2, it's blue... and I don't actually need it that color... In PhotoFiltre, go to [Filter] > [Color] > [Grayscale], a dialog box called [Grayscale] will appear.
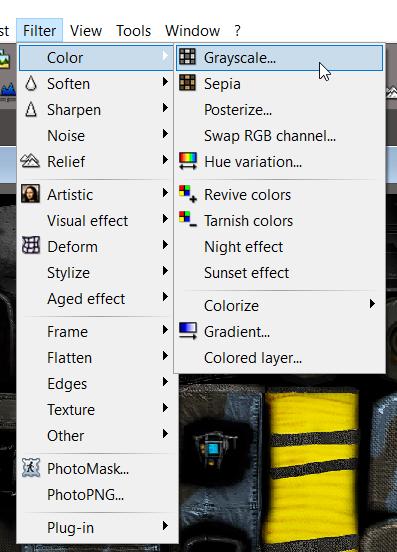
Figure 2: [Filter] > [Color] > [Grayscale]
I suggest you to put the tick mark on [Direct preview] so you can see in real time how the new image will look, and to chose from the available options. Personally, I use "Minimum" , still depending on the situation you might need to use another filer.
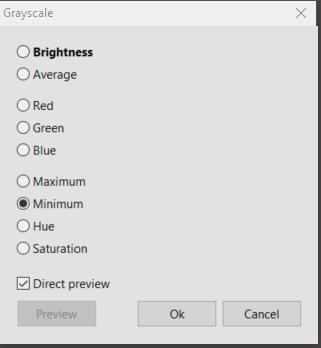
Figure 3: Grayscale Options
- So let's look at our Grayscale version of the Normal map, ah perfection.
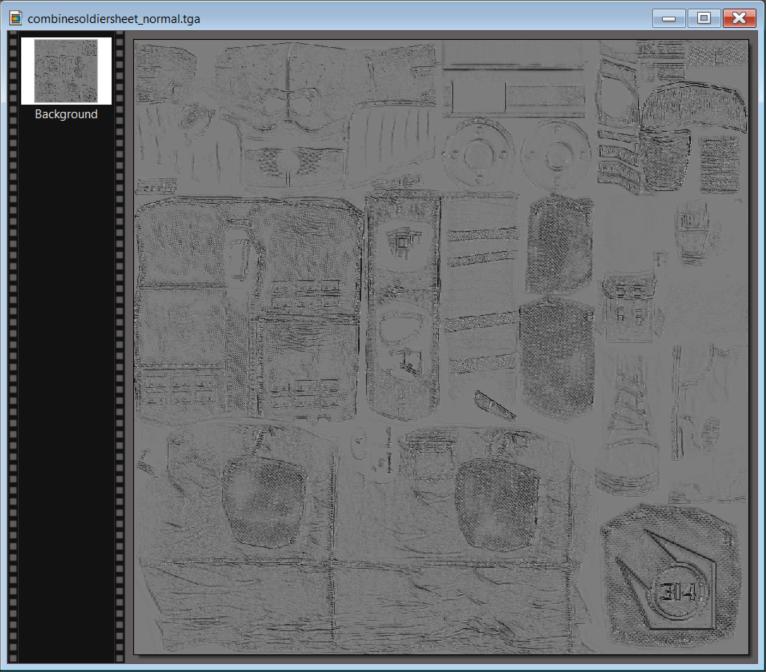
Figure 4: Grayscale Normal Map
- Copy the Grayscale version of the Normal map, so you have it in your buffer, and open the Diffuse map in Paint.Net. Then click on [Edit] > [Paste Into New Layer] (Ctrl + Shift + V, if you're into shortcut keys).
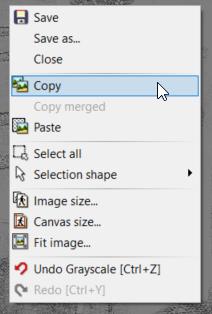
Figure 5: Coping the Grayscale image
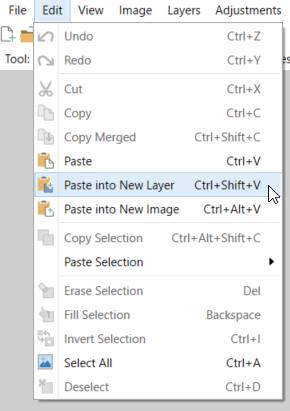
Figure 6: [Edit] > [Paste Into New Layer]
- Ok, now we see the Grayscale image as a new layer, but that's not what we're after. Go to [Layers] > [Layer Properties]
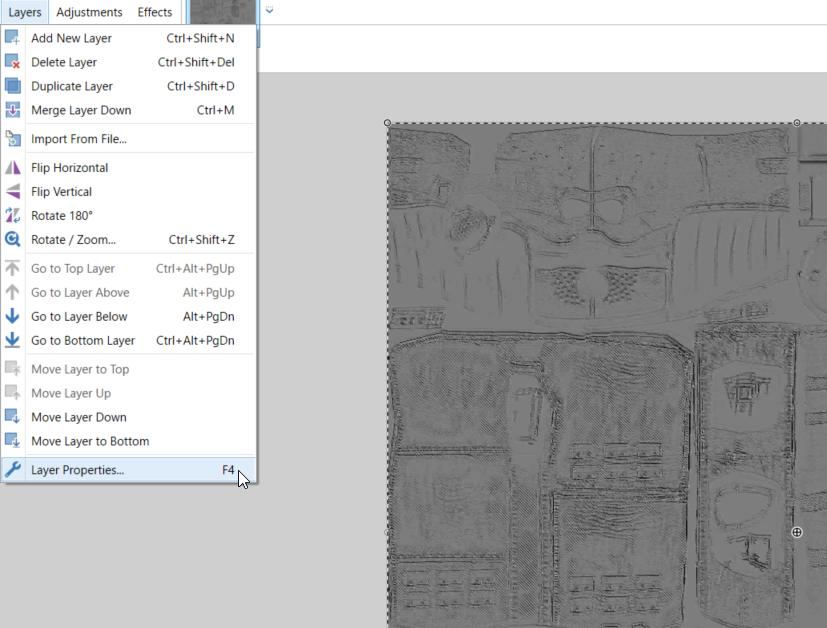
Figure 7: Layer Properties
From here make sure [Visible] is ticked on, and then go play with the [Blend Mode].
On my opinion the best one for what we plan to do is [Overlay], in some situations, you might use something else. For example [Color Dodge] or [Multiply] can be used as well (depends on the texture).
Tip: You can compare how the original texture looks like versus the edited one by toggling On / Off [Visible] tick mark.
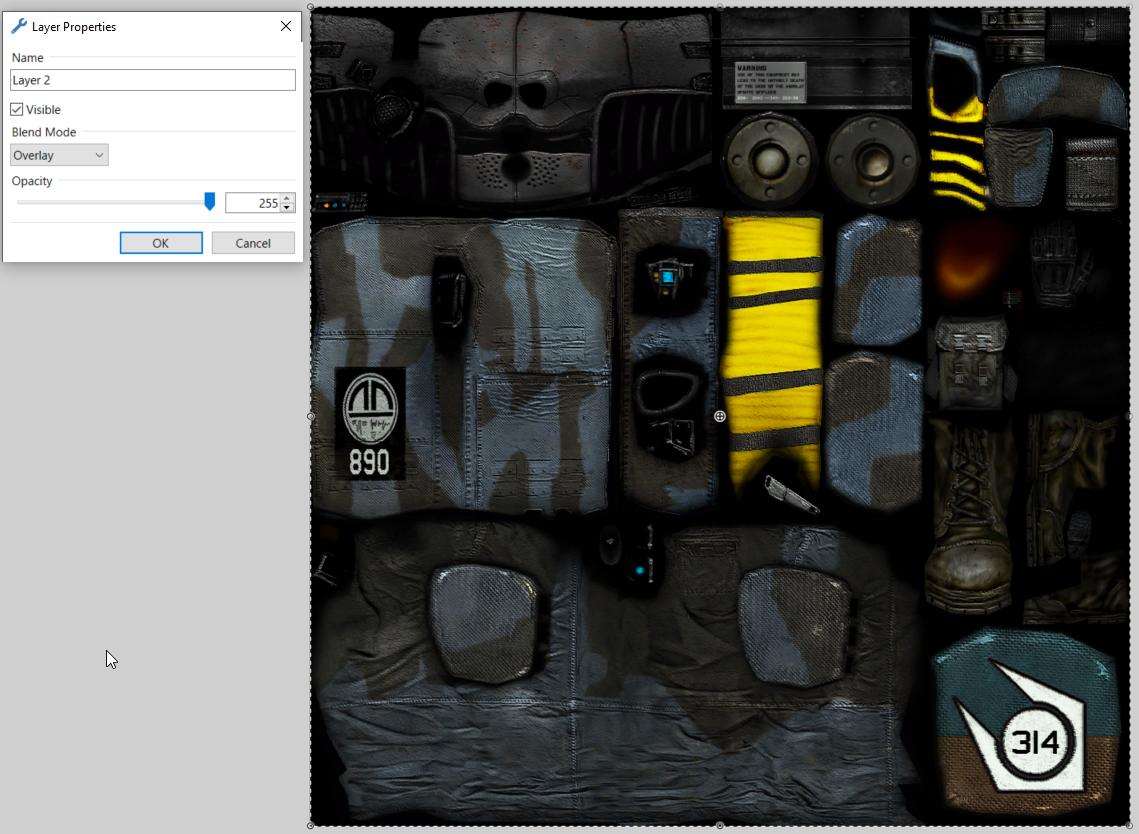
Figure 8: [Layer Properties] > [Blend Mode] > [Overlay]
When you're happy with the result, click [OK], then [File] > [Save As] and save the new image. For example as .bmp since I'm going to be using it in Half-Life 1. You will have to Flatten the image, since .bmp format does not support layers (you don't need layers anyway).
Well that was it.
From the left side you have the original image and on the right side you have the edited one. I will put some close up shots of different parts of the texture here for comparison.
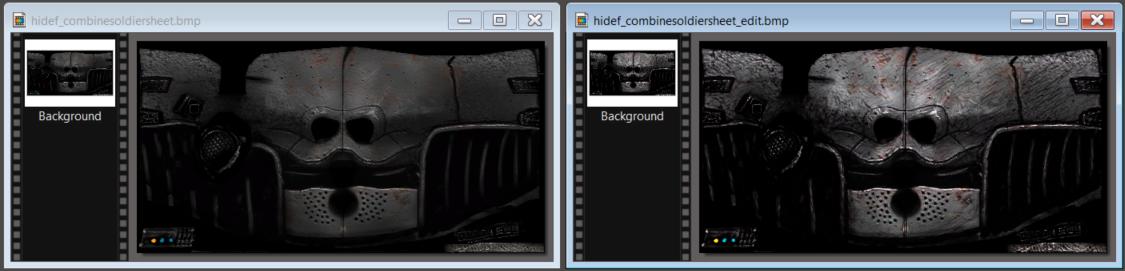
Figure 9: Texture comparison
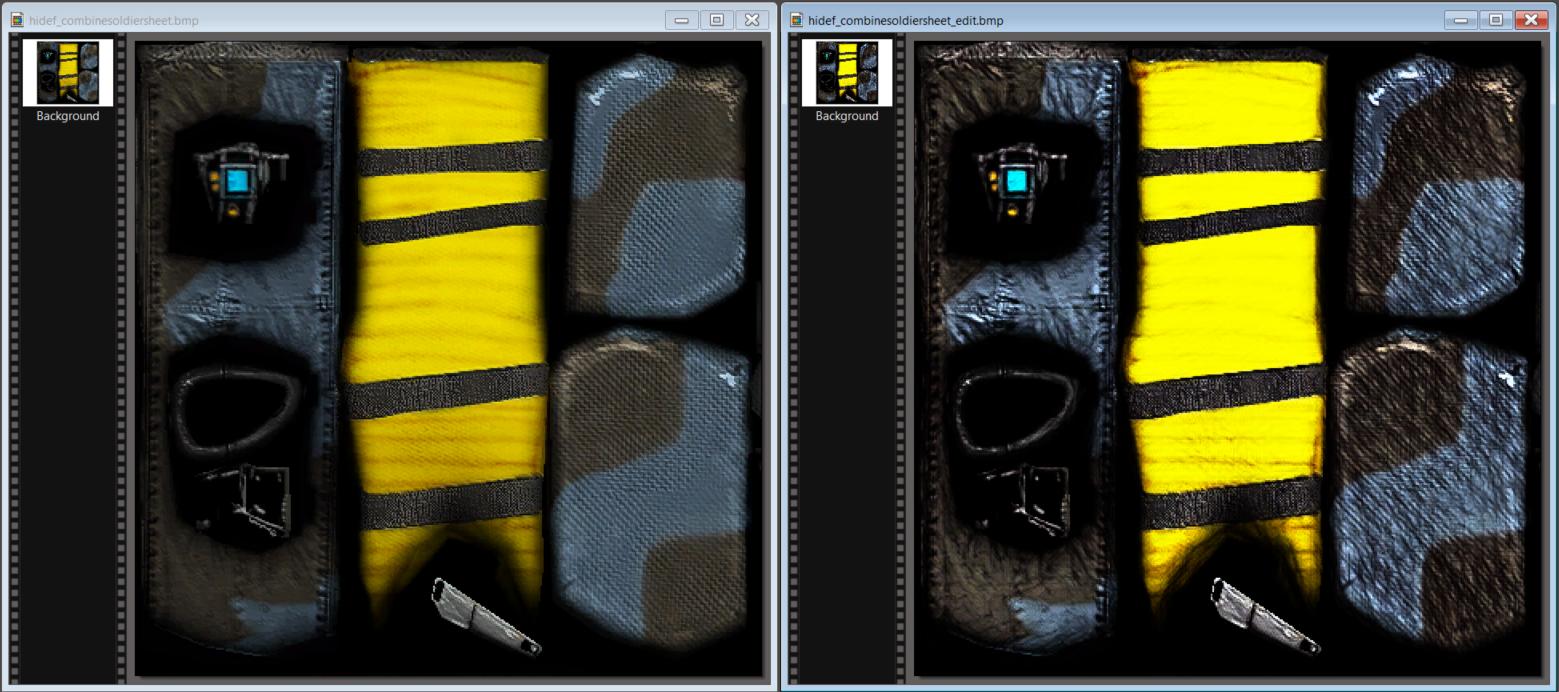
Figure 10: Texture Comparison
Here's another comparison of the normal Barney face texture on the Left, compared to EP1 Normal map applied texture.

Figure 11: Barney Head vs Barney Head with EP 1 Normal map
- As a bonus, I will show you how to quickly apply Camouflages or other patterns on top of textures.
I will be using the same method - Paint.Net > [Edit] > [Paste into New Layer], however the new layer will contain my pattern/camouflage texture.
Then from the [Layers] > [Layer Properties] you can play around until you are happy with the result. For this situation, you should also play with the [Opacity] parameter, not just with the [Blend Mode].
Here are some examples of reskins I did this way:
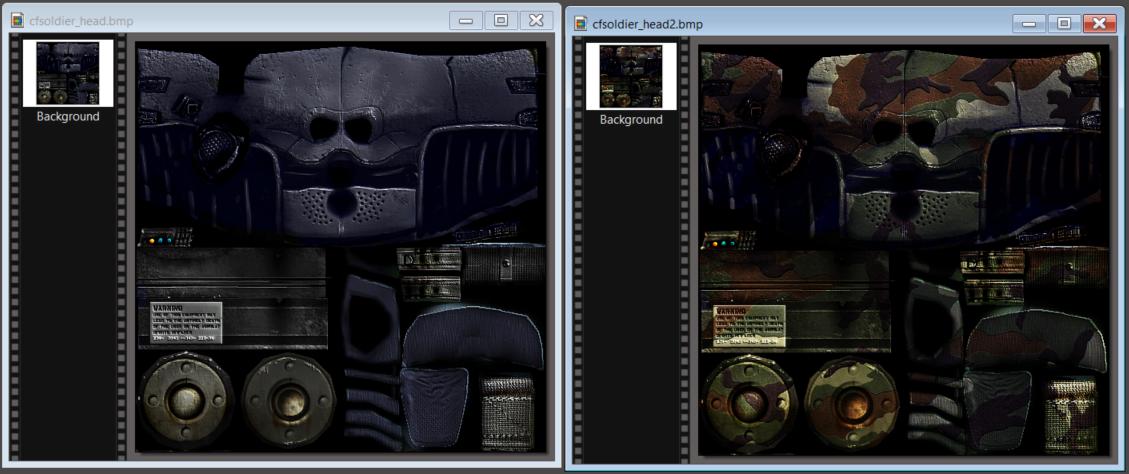
Figure 12: Combine Head and Camouflaged Head
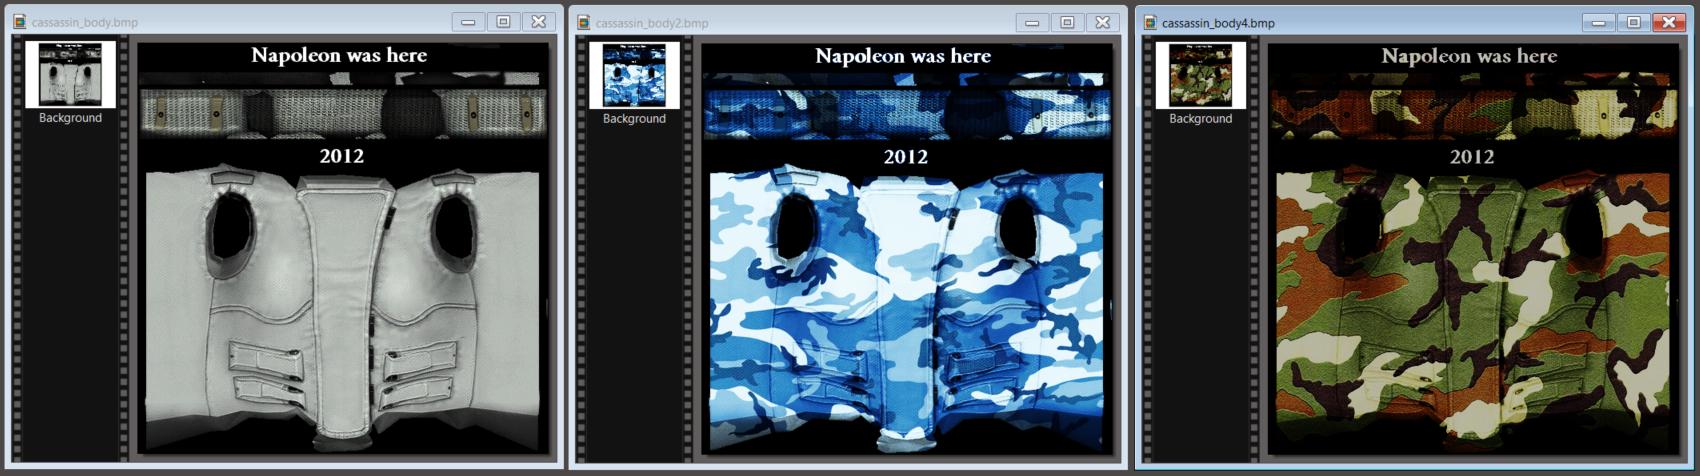
Figure 13: Combine Assassin Torso and Camouflaged variants
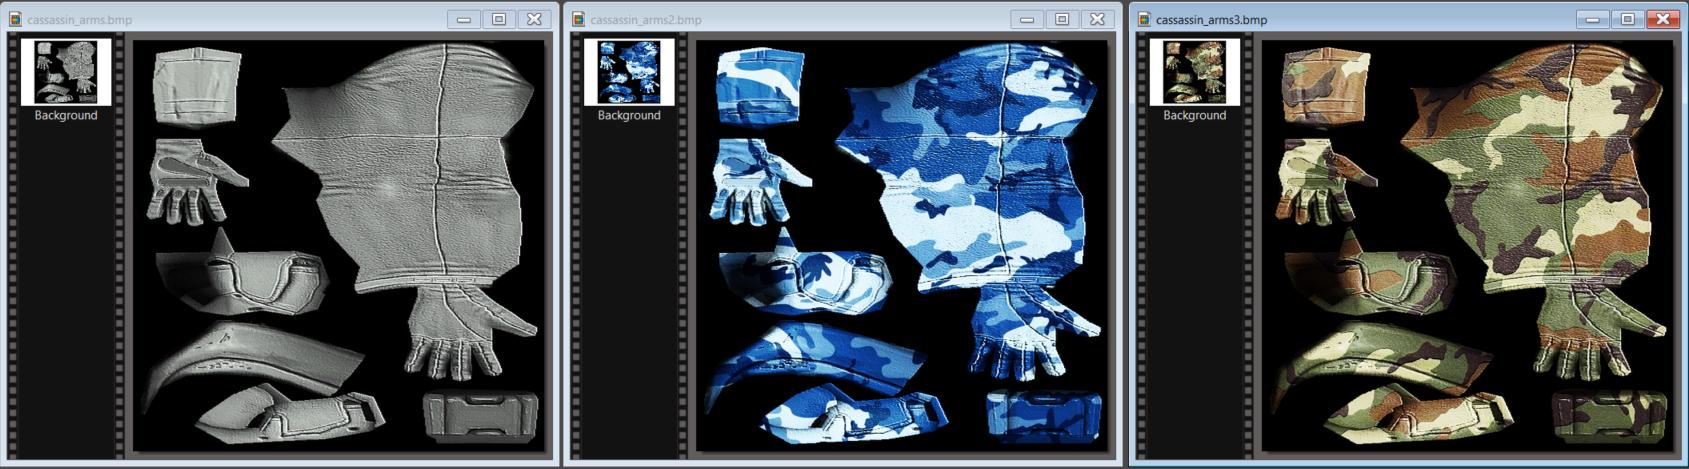
Figure 14: Combine Assassin Arms variations
Possibilities are endless. I hope you will find this tutorial useful.
If you don't like something, MOD it!
Napoleon was here at some undisclosed time in 2021…


Interesting method, and described well, thanks!