Hello!
Here I show you how to create roq. video files with the help of ffmpeg. I myself used this to change the Intro to RTCW for my Mod.
Things you need:
- ffmpeg (please look up a tutorial on how to install and use ffmpeg)
- A video editing software that allows you to set the size and frame rate of the video, as well as the sampling rate of the audio. I use After Effects in this tutorial.
Of course you can also edit your video with ffmpeg. It is only important that your video has the following values after encoding:
Resolution: 512x256
Frame rate in whole numbers (critical!): 24fps, 25fps, 30fps (no NTSC standard like 23,976 fps or 29,976 fps!)
Audio in stereo with 22.050hz (mono tends to sound choppy and pitched down in the game)
The codec I use is uncompressed AVI with UYVY 4:2:2
After that you can use ffmpeg to convert the files into a roq video file.
But now to the tutorial with After Effects:
Step 1: Open your video in after effects. Make sure that the frame rate of the video is integer! Framerates like 23,976 or 29,976 are not supported! I myself can confirm that frame rates like 24, 25 or 30 are supported. You can set the frame rate of your footage in After Effects with a right click on the file, then on Interpret Footage, Main.
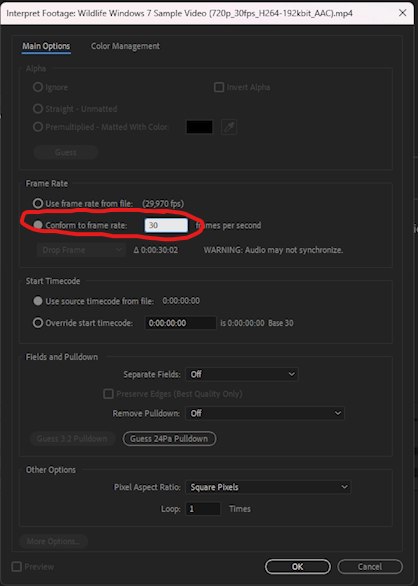
Always use the next higher value! For example 29.976 to 30. Otherwise you get a slow motion. WARNING: One thing that occurs by duing this is, that video and audio are not synchronized anymore. The higher the difference between the original value and the conformed value, the more this will be noticable. If your video is longer, or is in a high frame rate, please use a different software like Premiere, Virtual Dub or ffmpeg to comfort your footage!
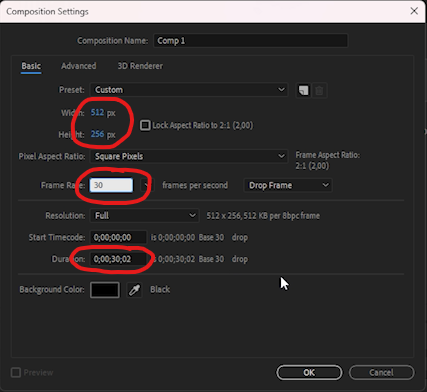
Step 2: Create a composition with the size 512x256. The pixel ratio of Roq video files must always be divisible by 2 (power of 2). Make sure that the length of your composition is long enough for your video or make it exactly as long as your video.
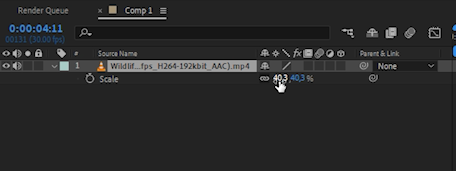
Step 3: Drag your video file into the compostion and scale it down to fit into the resolution. You can use the shift key while scaling to maintain the size ratio.
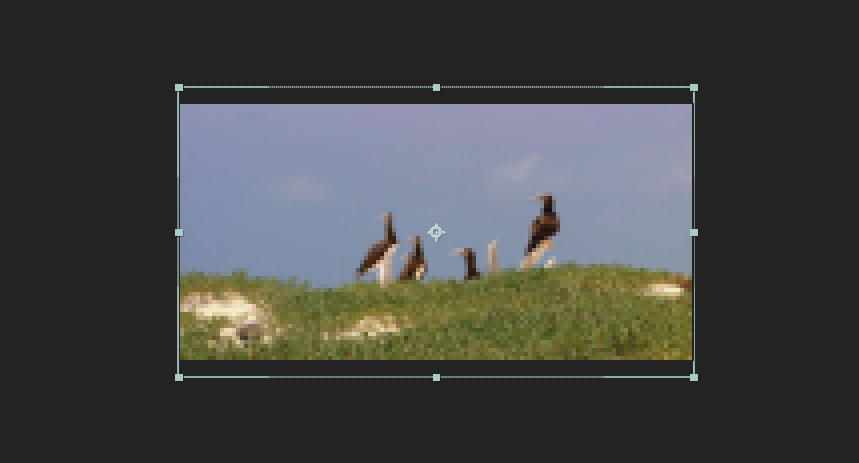
Or simply scale it down by pressing the S key while your file is selected in the composition, then klick on one of the 100% and drag your mouse to the left to decrease the values.
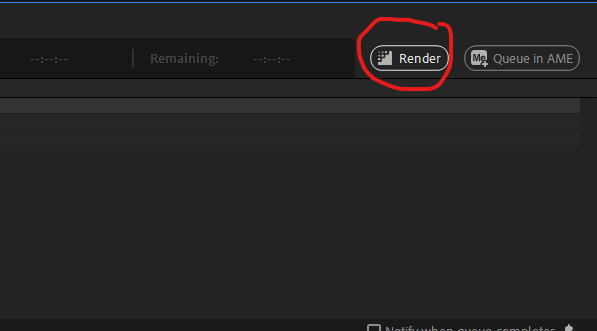
Step 4: Export your video by pressing File -> Export -> Add to Render Queue. In the Render Queue klick on the blue setting next to "Output Module" and use the following Settings:
Click on Format and choose AVI. Under Format Options select Uncompressed UYVY 422 8Bit. Make sure your Audio is set to 22,050 kHz and Stereo! Mono tends to create a bug that will make your audio sound choppy and pitched down once it's converted into a roq file! Press OK to confirm your changes.
In the Render Queue set your Output Folder by clicking on the blue setting next to "Output to:". Name your file, save it and click Render.
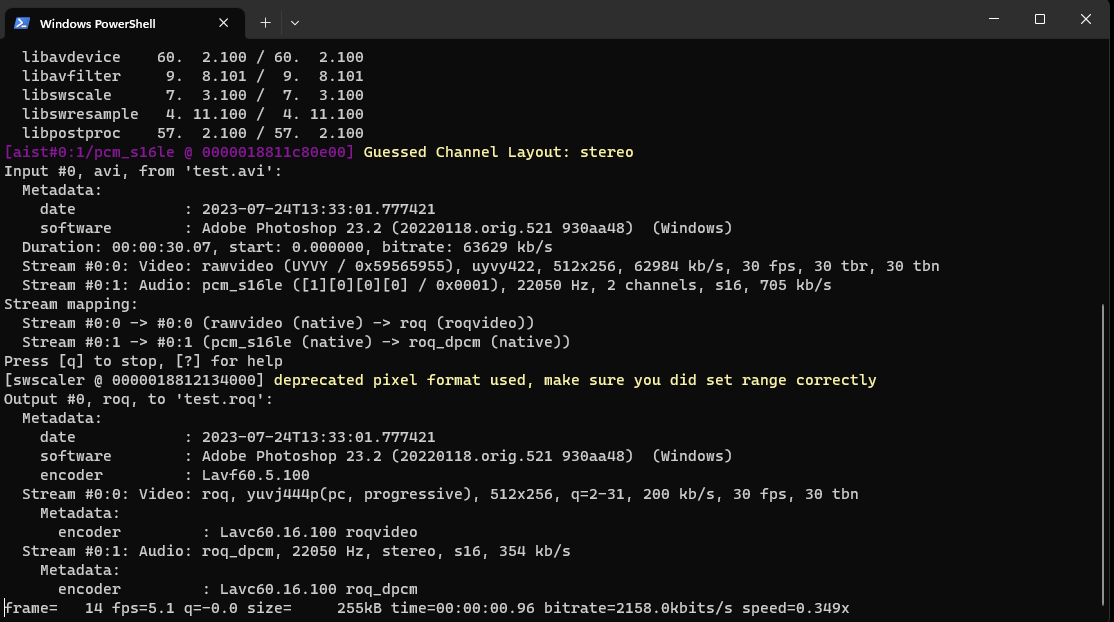
Step 5: Once your video is rendered go into the folder you choose. Now make a right click somewhere in the folder and select "Open in Terminal" or go to "File" and choose "Open in Terminal".
In the terminal type in "ffmpeg -i YOURFILE.file_extention OUTPUTNAME.roq"
Of course change "YOURFILE.file_extention" to match your file. In my example it's test.avi and test.roq. The .roq at the end of the second name tells ffmpeg to create a roq file.

That's it! Now ffmpeg should create a roq file. Depending on your CPU, framerate and length of the video this can take a while.
I hope this tutorial is helpful to anyone who wants to create a roq file for Quake Engine!
Thanks for reading!


Thanks^^
Your're welcome :)