I've been doing loads of polishing on my level for Off Limits over the past few months and as I crawl closer to the finish line I wanted to record the steps I take when polishing certain areas, assets and also improve performance while doing so. With this I hope to share some of my experiences I've encountered over the years.
For this tutorial I used Half-Life²'s Source editor HAMMER, 3DSmax 2011 and Photoshop CS4.
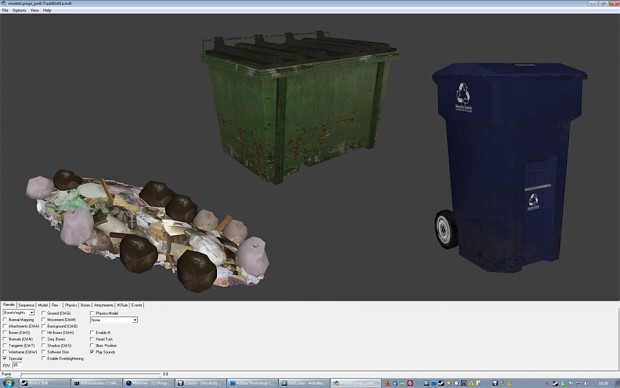
I want to convert prop_physics_respawnable objects I used from the Half-Life² database into prop_statics. This because physical objects take more ent_data than regular prop_static objects. Most of my physical objects in my level were garbage bins. While converting them I also wanted to add garbage bags for some extra detail and cluster them into large groups to save on draw calls.
Here you see the original Half-Life² models I used as garbage bins and the extra model I plan to use for the additional trash.
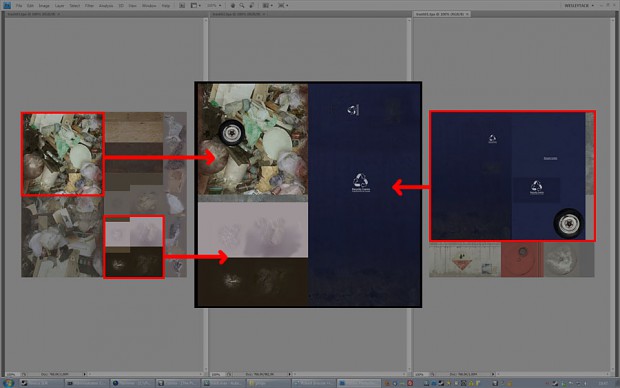
A lot of the Half-Life² assets have UV layouts that could be optimized. I checked if I could combine two materials into one, this to save up on texture memory. In this case I saw the option to combine the blue garbage bin together with the garbage bags I wanted to add for extra detail. So in affect, this extra detail wouldn't cost me a thing except for a few extra polygons (but I removed some from the original models that didn't add anything and wont be missed). The first thing I did was combine the materials in Photoshop in a new UV layout scheme where I plan to overlap more of the blue garbage bin on the right side and have the extra detail on the left side.
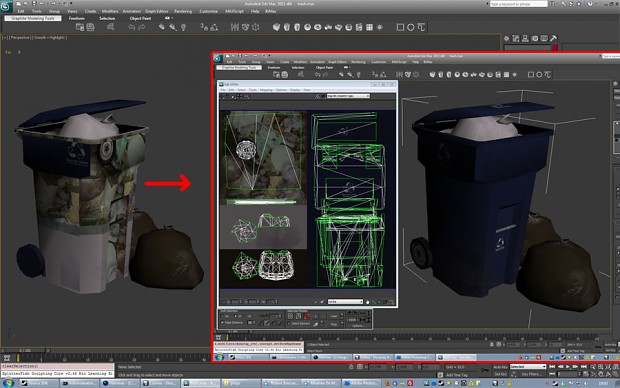
After importing and cleaning the original objects I attached the new material on it and as shown below the new texture coordinates are incorrect. This is because I need to reassign the correct polygon ID to those objects in 3DSmax and re-UV map them to fit the new material. As you can see the new detail is something you didn't have with the original Half-Life² assets.
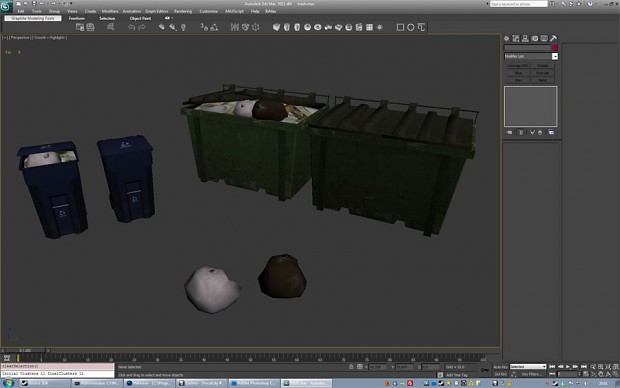
Here you can see all the variations I made with the objects I was using in my level plus added details.
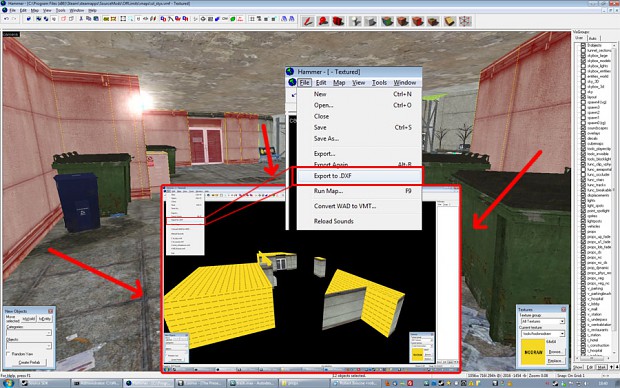
The next step is to combine these objects into a cluster. Because all objects now use the same material I can multiply them and save on draw calls in-game. To do this I select the BSP where the objects are placed against, in this case the walls are all I need. I then copy/paste them into a new file, where I can export the files contents into a .DXF file.
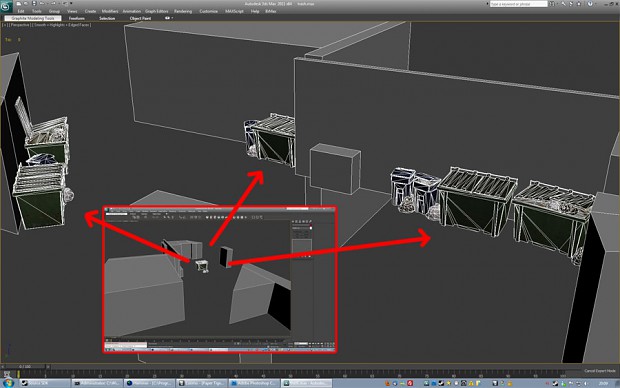
Now in 3DSmax you import the .DXF file, align it with the objects in your scene and make sure the center pivot is somewhere in the middle of the finished cluster. Now with the variations I made I can place the objects where I had the prop_physics_respawnable objects in-game before. So in this case I replace 11 objects to 1. This small update alone will reduce 10 objects and save 2% entdata. This may not seem much, but in a huge level as the one I'm working on it can reduce the entity number by 100+ and shave 30% off of your entdata.
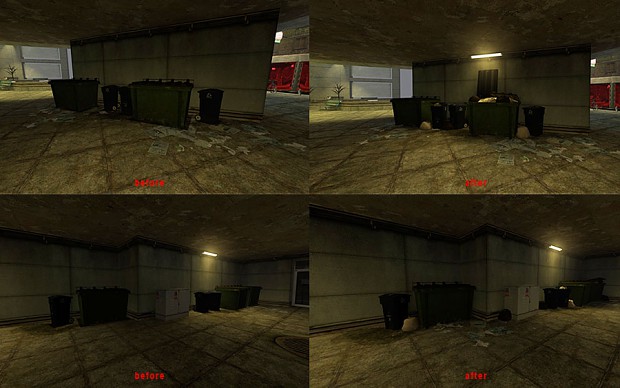
So in the end I reduced the polygons on the original objects (as some Half-Life² objects have too many details in all the wrong places), by doing this it enabled me to add more visual details such as the extra garbage bags and trash. I use more detail on the same material (saving texture memory). I clustered multiple objects into one (saving on draw calls). This all adds up to some important improvements that make a level run and look better in the end. Also by using a cluster system as this you are capable of having the same object reappear in-game multiple times but it will never look exactly the same as you can move, rotate, adapt objects inside each cluster to your liking.
A little warning though, clustering isn't always a good thing. When your level is inside with dense corridors and lots of twists and turns single objects will be occluded out and not rendered. If you were to cluster objects in this case looking in a corridor would also render the cluster behind each turn and not occlude it out. So clustering is only good for large open areas where you have the same objects multiple times in view.
If you have any questions about a certain part of this tutorial please let me know in comments and I'll address them when I can or update this tutorial if needed.
You can find more on my website: www.wesleytack.com


I saw I shouldn't have posted this as news as we have a "tutorial" section... oops (fixed now) :)
looking good, I'm no modeler, but I bet this helps a lot of people
+3Ds Max this mod is gonna be crazy. This tutorial also helps thanks:D
What have you used for decopiling/porting models from mdl to 3ds format?
because i have heared what here could be some problems with decopiled models.
I'm want to start to lear how to make models and I thought what this kind of stuff (mixing existing content in a new one) is pretty nice to start from.
[Sorry about bad grammar or any other kind of mistakes]
mdldecompile
Chaosincarnate.net