
I am writing another tutorial to expand on the first tutorial I made about creating a room.
Ok so in this tutorial we will be giving our room:
- A Window
- A Door
- and a skybox
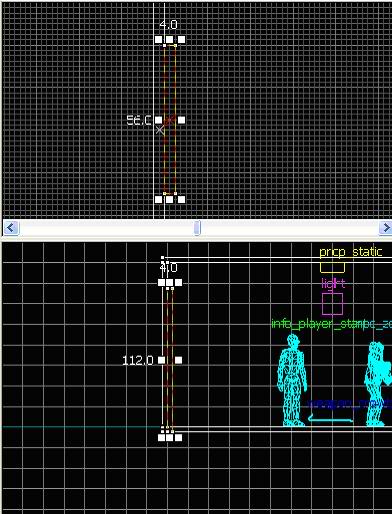
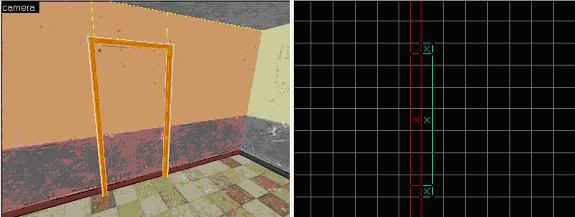
Ok lets get started then. Were going to add the door first. Using the Block tool  drag a brush that's 56 units wide 4 units thick and 112 units in height.
Your brush should look like this:
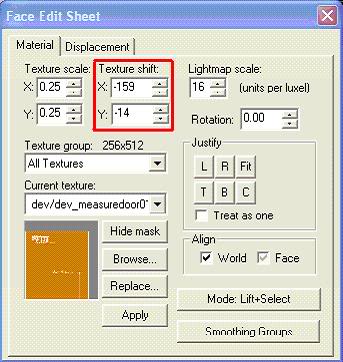
With your brush selected, click the Toggle Texture Application tool
Click "Browse..." and in the filter type in "dev/dev_measuredoor01"
You will get an orange door texture this is so we can line up our brush and make the correct cuts to have a nice frame.
Click "Apply"
You might notice your texture is not aligned with the brush properly, this is an easy fix. Click the Toggle Texture Application tool again and just play around with the "Texture Shift" part of it until you got it right.
Ok now we have the dev texture lined up we can start cutting out the frame. Select your door brush and select the Clipping tool 

Make sure your grid is on the smallest grip possible. Adjust it by pressing "[" or "]"
Now make a cut 4 units into the frame like seen above. Your brush has to be all white. If it has any red it will cut the piece off rather then just making a cut into it. For example see below.
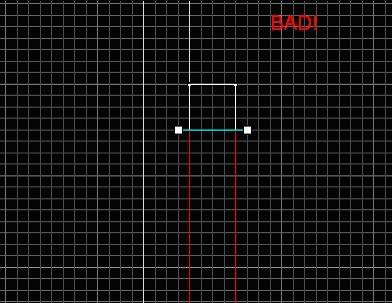
to get rid of that read press Shift+X until its gone and then press enter to make the cut.
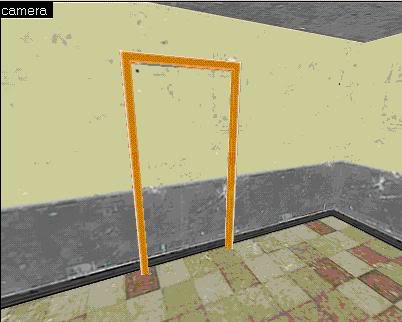
Repeat this step on the other side of the brush and in the side view make a cut 4 units down from the top. Now we have a door frame. Using the Selection tool select the brush in the middle and delete it.
You should now have a door frame that looks like this:
Select a wall on the room, you will notice the entire room gets selected we don't want that. Press ctrl+U (control+U) to ungroup it and now you should be able to select individual walls.
Ok now we need to make the cut on the wall for the door, using the Selection tool
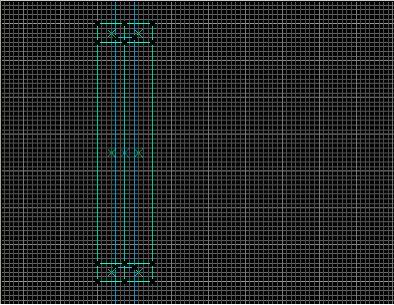
Select the wall the frame is on, using the frame as a guideline make 2 cuts where the inside of the frame would be (See example below)
ok now is the side view make a cut beside the cut you made for the frame (see below)

Now, using the Selection tool select the middle brush again and delete it. Now you have a doorway.
Select all three parts of your door frame. Hold shift and drag a new one and put on the other side of the wall.
Make the outsides of each frame skinnier so that the door will fit properly. (See below for example)
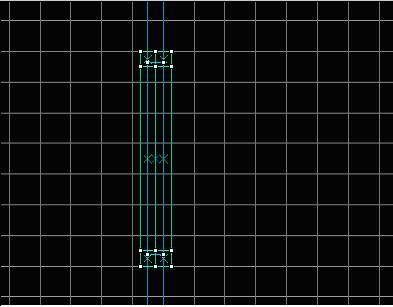
Connect the insides on the 2 frames so that there isn't a gap (See above)
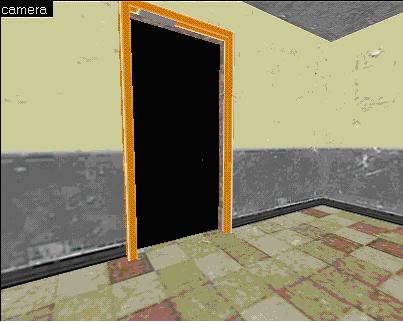
Ok now we need to change the texture on this door. Select all parts of the door frames and click the Toggle Texture Application tool  Click "Browse..." and you should in the filter search "door" find the door you want to use and double click it. Click "Apply" and your texture will now be on your frame. The texture I used was metal/metaldoor008a
Ok now we need a door to go in the frame. Using the Block tool drag a brush that's 48 units wide 4 units thick and 112 units in height. This should fit in the door frame perfectly. click the Toggle Texture Application tool and use the texture shift settings to line it up right. (see below for both examples)

Ok now we need to make this door open able. So with your door selected go to "Tools>Tie to entity"
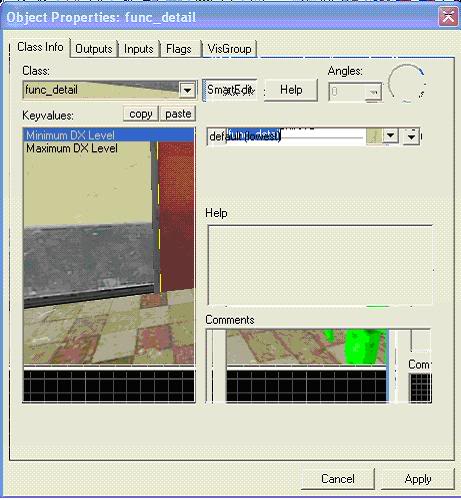
the window above will appear (For some reason it is transparent when I take a SS but in editor it isn't)
Where it says "Class" change that to a "func_door_rotating" and click "Apply"
You will now get a blue sphere on your door and that is what we just created it allows the door to open.
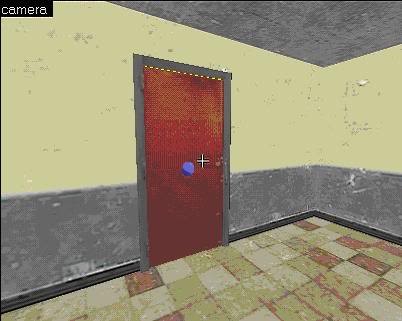
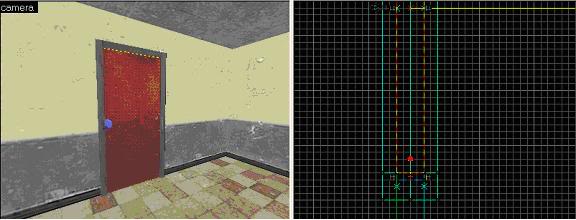
The blue sphere we created acts as a hinge. Wherever we put that sphere is where the door will rotate from, so n this case we want to put it on the opposite side on the handle. That will look like the picture below.
Ok if we compiled right now our door would open and everything would work so lets move on to the window.
Ok using the using the Block tool drag a brush to whatever size you want your window to be. For my window I used 48 width 8 thickness and 40 height.
Using the Clipping tool cut a square out of the middle by making cuts 4 units away from each side.

ok now select the piece in the middle and delete it.
Now we need to select the wall behind it and cut out the window opening like we did with the door
Ok now delete the middle and you have a untextured window.
So we need to give this a texture. Select the Toggle Texture Application tool and click "Browse..." search wood in the filter and find one you like. (you can use any texture you want, go ahead and search concrete or tile and see what you can get looking good on your window)
Ok now we got a textured window. And we need to add a skybox.
Make a big box that goes over your whole map.
My box was 1200x1200x1200
Press ctrl+H to hollow, set it to -4 again.
Select the Toggle Texture Application tool and click "Browse..."
In the filter type in "tools/toolsskybox" apply this to the box and it should now be tiles blue texture.
Compile map the same way we did it in part 1 and go ahead and run it. Thanks for reading this tutorial.


nice to see people doing these tutorials :) good job
i want to see optimization of a complex map. there isnt enough about it out there
See here: Student.ru.nl
Brilliant, look forward to your lighting and optimization tutorial
Ya I def could do lighting next
Great Stuff... the more tutorials the more great mods we can get out there ;)
I have always read that using the clipping tool is a bad idea, and in general, a sloppy way to map. It makes a mess out of simple geometry. I recommend just using simple brushes to make the doorway. Many experienced mappers believe that using simple brushes in addition to the Vertex Manipulation tool is the preferable method to using the Clipping tool.
Depends on the mappers ability's. Skilled level designers that know how the engine works (optimisation wise) are able to use the clipping tool without a problem. It only becomes an issue if somebody who doesn't know anything about visleaves and the such, start clipping absolutely everything and generally not func_detailing odd shaped geometry.
Nice tutorials mate, should help a lot of people out!
the door function does not work. help?
I too can't get the door to work
Developer.valvesoftware.com
you have to toggle show helpers to see the origin, then you may have to change the axis in flags section, or reverse dir may do the trick as well.
Hi super BeginnersMod!
A rather short and simple tutorial.
I feel like that I've just dipped my big toe in the ocean, the first simple step to swimming with whales.
Thanks!
I found the first part of this tutorial direct and informative, but I'm feeling like I have to guess what to do in this second part, especially when it says "Make the outsides of each frame skinnier so that the door will fit properly. (See below for example)"
and then the image and
"Connect the insides on the 2 frames so that there isn't a gap (See above)"
How do I connect these? Am I using the cutting tool for the first part on the side view? I'm not getting the same screenshots but the connect part was unexplained so I can't progress any further :[
You need to work on your tuts some more man, this is kinda hard to understand, like how do I know where to cut and what windows ur in, like you should redo your guide/guides.
I like how you're trying to help out and etc but if I can't understand the door section then I will not understand the rest, I had to guess on how in your last guide to fix my textures since you said them either wrong and or never mentioned about the "Fit" button in some parts.
I like this tutorial alot it helped me very much but here is something i figured out the hard way. For the door when you are making it a func_door_rotating go to flags and select open on use/touch or the door will not work.
Nice tutorial but i used the carve function to create a door frame. It's easier for me.
when ever i create the door (the first step) and hit enter it just disapperes.... Help please? :)
Argh, now i did make my door open able :) by using "New func_door + USE rules" or "use open" in "flags". doesn't matter wich one thats doing it, but it works with both on :)
my door didn't work! nooooo!
This comment is currently awaiting admin approval, join now to view.