Created by developers, for developers. U3D aims to give you the tools you need to stand up your game quickly, then experiment with and iterate on your game's design.
Free and open source
No royalties, no fees, no obligations, no strings attached. All the power to you and your team.
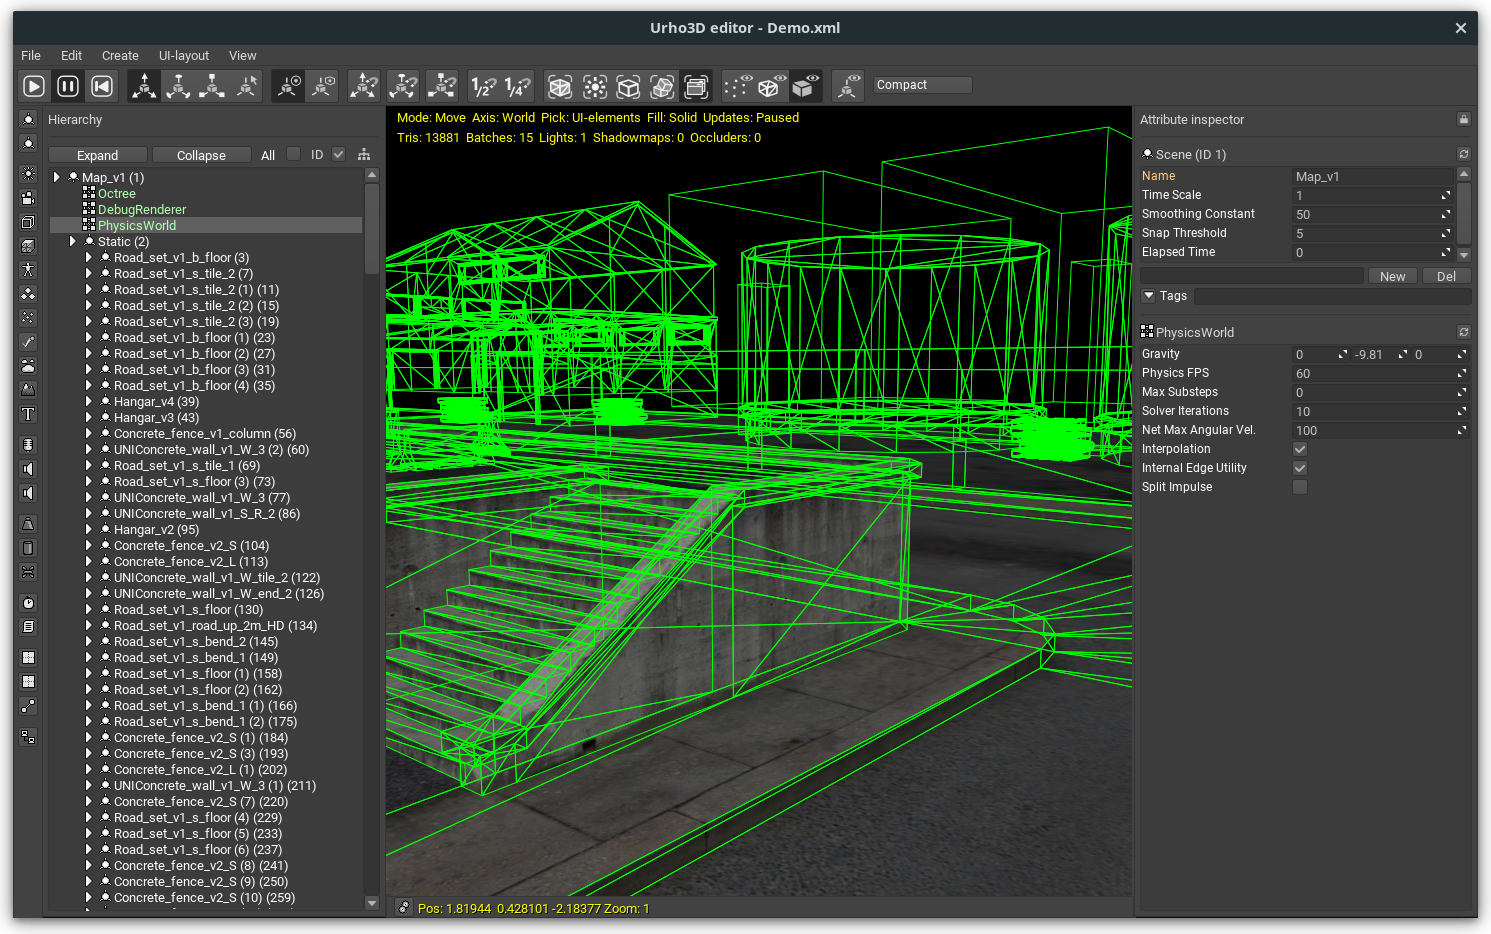
Built-in Editor
U3D and it's cross-platform suite of tools put the power to create stunning experiences at your fingertips. Visually create and manage scenes, materials and terrains.
Asset Workflow
Import files from any Digital Content Creation tool using industry standards such as FBX, DAE and glTF, as well as community favorites like MD5, IQM and MD3.
Multiplayer Made Easy
Bandwidth, latency, and packet loss are primary concerns among anyone looking to make a multiplayer games. Built on top of SLikeNet (RakNet), U3D gives you the power to create robust simulations.
Powerful Scripting
Build with AngelScript and Lua. The built-in editor is powered by AngelScript, allowing you to easily customize your workflow. Native code is only used for low-level modules like rendering, physics and sound.
- Cross-platform support: Windows, Linux, macOS, iOS, tvOS, Android, Raspberry Pi (and other generic ARM boards), and Web with Emscripten
- Powerful and configurable rendering pipeline, with implementations for forward, light pre-pass and deferred rendering
- OpenGL, OpenGL ES, WebGL and Direct3D11
- All-in-one editor built with ActionScript, allowing you to easily customize the editor to your game needs
- Two scripting languages available for creating game logic: Lua and AngelScript
- UI, localization and database subsystems
- Component based scene model
- Skeletal, vertex morph and node animation
- Point, spot and directional lights
- Cascaded shadow maps
- Particle rendering
- Geomipmapped terrain
- Static and skinned decals
- LODs
- Automatic instancing
- Software rasterized occlusion culling
- Post-processing
- HDR and PBR rendering
- 2D sprites and particles that integrate into the 3D scene
- Task-based multithreading
- Hierarchical performance profiler
- Scene, object and prefab load/save in binary, XML and JSON formats
- Keyframe animation of object attributes
- Background loading of resources
- Keyboard, mouse, joystick and touch input
- High-performance math library
- Physics powered by Bullet and Box2D
- Networking powered by SLikeNet
- Pathfinding and Crowd Simulation via Recast/Detour
- Supported images: JPEG, PNG, TGA, BMP, PSD, GIF, HDR
- Compressed image support: DDS, KTX, PVR
- Import virtually any 3D file format via Assimp
- 2D and 3D audio playblack, Ogg Vorbis and WAV support
- TrueType font rendering
- Built as a single external library, can be linked statically or dynamically
Design Goals
- Productive: Do not reinvent the wheel. Engine should reduce development time. Less yak shaving, more game making.
- Fast: Compile and run fast. Parallelize when possible.
- Modular: Only use what you need. Flexibility for power users.

Articles
The character controller physics of the Quake 3 Arena game engine are responsible for handling the movement and collision detection of the player character. These physics are designed to simulate the movement of a first-person shooter (FPS) character in a 3D environment, and are based on a combination of kinematic and dynamic physics.
Some of the key features of the Quake 3 Arena character controller physics include:
- Step height: the character can step up onto surfaces that are up to a certain height, allowing them to climb over obstacles.
- Slope limit: the character can walk on surfaces that are inclined up to a certain angle, but will slide down steeper surfaces.
- Gravity: the character is affected by gravity, so they will fall if they are not standing on a solid surface.
- Air control: the character can adjust their horizontal velocity while in the air, allowing them to make mid-air jumps and control their landing.
- Friction: the character's movement is affected by friction, so they will slow down on slippery surfaces and come to a stop on rough surfaces.
- Collision detection: the character's collision shape is used to detect collisions with the environment, so they will not pass through solid objects.
The character controller physics in Quake 3 Arena are designed to create a fast-paced and dynamic gameplay experience. The physics allow the player to perform a variety of movement techniques such as bunny hopping, strafe jumping and circle strafing, which is a set of techniques that allows players to move and dodge in a very fast and precise way. Overall, the character controller physics of the Quake 3 Arena game engine are designed to provide a smooth and responsive movement for the player character, allowing them to navigate the game world and interact with the environment in a believable and realistic way.
Here is a tutorial on how to create an U3D game with a playable first-person character and first-person camera, using the Quake 3 character movement physics:
Create the physics world and character controller
- In the Application class, add a new PhysicsWorld component to the scene. This will be used to handle the physics simulation for the character controller.
- Create a new CharacterController component and add it to the scene. This component will handle the character's movement and collision detection.
#include <Urho3D/Urho3D.h>
#include <Urho3D/Core/CoreEvents.h>
#include <Urho3D/Engine/Application.h>
#include <Urho3D/Engine/Engine.h>
#include <Urho3D/Physics/PhysicsWorld.h>
#include <Urho3D/Physics/RigidBody.h>
#include <Urho3D/Physics/CollisionShape.h>
#include <Urho3D/Physics/KinematicCharacterController.h>

using namespace Urho3D;

class MyApp : public Application
{
public:
    MyApp(Context* context) : Application(context)
    {
    }

    virtual void Start()
    {
        // Create the scene
        Scene* scene = new Scene(context_);
        // Create a physics world component
        PhysicsWorld* physicsWorld = scene->CreateComponent<PhysicsWorld>();
        // Create a character controller component
        CharacterController* characterController = scene->CreateComponent<CharacterController>();
    }

    virtual void Setup()
    {
        engineParameters_["FullScreen"] = false;
        engineParameters_["WindowWidth"] = 1280;
        engineParameters_["WindowHeight"] = 720;
    }
};
- In the CharacterController's Start function, set up the character's collision shape, rigid body, and kinematic character controller.
class CharacterController : public Component
{
public:
    CharacterController(Context* context) : Component(context)
    {
    }

    void Start() override
    {
        // Create a capsule collision shape for the character
        CollisionShape* shape = node_->CreateComponent<CapsuleCollisionShape>();
        shape->SetSize(Vector3(0.5f, 1.0f, 0.5f));

        // Create a rigid body for the character
        RigidBody* body = node_->CreateComponent<RigidBody>();
        body->SetMass(80.0f);
        body->SetCollisionShape(shape);

        // Create a kinematic character controller
        kinematicCharacterController_ = node_->CreateComponent<KinematicCharacterController>();
        kinematicCharacterController_->SetRigidBody(body);
        kinematicCharacterController_->SetCollisionShape(shape);
        kinematicCharacterController_->SetMaxStepHeight(0.5f);
    }

private:
    KinematicCharacterController* kinematicCharacterController_;
};
In this code, a new CharacterController component is created and added to the scene in the Application class's Start() function. In the Start() function of the component, a capsule collision shape is created and set to the character's rigid body, and a KinematicCharacterController component is created and set to the character's collision shape. The max step height, which is the maximum height that the character can step up, is set to 0.5f.
Add the character's movement controls
- In the CharacterController's Update function, get the input from the player and use it to calculate the character's move direction.
- Use the kinematic character controller's Move function to update the character's position based on the move direction and time step.
class CharacterController : public Component
{
public:
    CharacterController(Context* context) : Component(context)
    {
    }

    void Start() override
    {
        //... previous code for collision shape, rigid body and kinematic character controller

    }

    void Update(float timeStep) override
    {
        Input* input = GetSubsystem<Input>();

        // Get the move direction from the input
        Vector3 moveDirection = Vector3::ZERO;
        if (input->GetKeyDown(KEY_W))
            moveDirection += Vector3::FORWARD;
        if (input->GetKeyDown(KEY_S))
            moveDirection += Vector3::BACK;
        if (input->GetKeyDown(KEY_A))
            moveDirection += Vector3::LEFT;
        if (input->GetKeyDown(KEY_D))
            moveDirection += Vector3::RIGHT;

        // Normalize the move direction
        moveDirection.Normalize();

        // Use the kinematic character controller's Move function to update the character's position based on the move direction and time step
        kinematicCharacterController_->Move(moveDirection * timeStep);
    }

private:
    KinematicCharacterController* kinematicCharacterController_;
};
In this code, the Update function gets the move direction from the input and normalizes it to ensure that the character moves at a consistent speed. The kinematic character controller's Move function is called and passed the move direction multiplied by the time step. This moves the character's position based on the move direction and time step.
It is important to note that the move function of the kinematic character controller uses the character's collision shape and the collision information from the physics world to move the character. This way, the character will respond correctly to collisions with the environment.
Add the first-person camera
- Create a new Camera component and add it to the scene.
- Position the camera at the character's head and point it in the same direction as the character's forward vector.
- Set the camera's near clip and far clip distances to appropriate values for a first-person camera.
        // Create a camera component and set it as the viewport's camera
        camera_ = GetScene()->CreateChild("Camera")->CreateComponent<Camera>();
        GetSubsystem<Renderer>()->SetViewport(0, new Viewport(context_, GetScene(), camera_));

        // Position the camera at the character's head
        camera_->SetPosition(node_->GetPosition() + Vector3(0.0f, 1.0f, 0.0f));

        // Point the camera in the same direction as the character's forward vector
        camera_->SetDirection(node_->GetDirection());

        // Set the camera's near clip distance
        camera_->SetNearClip(0.1f);

        // Set the camera's far clip distance
        camera_->SetFarClip(100.0f);
Set up the input handling for the camera and character
- Add input handling for the character's movement and camera's movement in the Application class.
- Bind the input events to the appropriate functions in the CharacterController and Camera components.
    virtual void Start()
    {
        //... previous code for creating the scene, physics world, and character controller

        // Subscribe to the key down event to handle character movement
        SubscribeToEvent(E_KEYDOWN, URHO3D_HANDLER(MyApp, HandleKeyDown));

        // Subscribe to the mouse move event to handle camera movement
        SubscribeToEvent(E_MOUSEMOVE, URHO3D_HANDLER(MyApp, HandleMouseMove));

        // Subscribe to the mouse button down event to handle mouse inputs
        SubscribeToEvent(E_MOUSEBUTTONDOWN, URHO3D_HANDLER(MyApp, HandleMouseButtonDown));

    }

    void HandleKeyDown(StringHash eventType, VariantMap& eventData)
    {
        using namespace KeyDown;

        int key = eventData[P_KEY].GetInt();

        // Send the key down event to the character controller
        characterController_->HandleKeyDown(key);
    }

    void HandleMouseMove(StringHash eventType, VariantMap& eventData)
    {
        using namespace MouseMove;

        int dx = eventData[P_DX].GetInt();
        int dy = eventData[P_DY].GetInt();

        // Send the mouse move event to the camera component
        camera_->HandleMouseMove(dx, dy);
    }

    void HandleMouseButtonDown(StringHash eventType, VariantMap& eventData)
    {
        using namespace MouseButtonDown;

        int button = eventData[P_BUTTON].GetInt();

        // Send the mouse button down event to the camera component
        camera_->HandleMouseButtonDown(button);
    }
Add collision shape for the environment, if you want to be able to walk around.
- Create a CollisionShape component for the environment and attach it to the root node of the scene.
        // Get the root node of the scene
        Node* rootNode = GetScene()->GetChild("Environment", true);

        // Create a collision shape for the environment
        CollisionShape* environmentShape = rootNode->CreateComponent<CollisionShape>();
//... previous code for setting the shape and size of the collision shape- Add the necessary physics properties to your environment, such as friction, bounciness, etc.
        // Get the rigid body of the environment
        RigidBody* environmentBody = rootNode->GetComponent<RigidBody>();
        // Set the physics properties of the environment
        environmentBody->SetFriction(0.8f);
        environmentBody->SetRestitution(0.1f);
        environmentBody->SetRollingFriction(0.1f);
        environmentBody->SetAnisotropicFriction(Vector3(1.0f, 1.0f, 1.0f));
With this tutorial, you have the basic structure for a first-person game with a playable character using Quake3 physics in U3D. You can add more features such as jumping, crouching, shooting, and more by adding more functionality to the CharacterController and the environment.
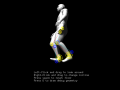
Getting started with Inverse Kinematics in U3D
Server Side Coding TutorialInverse Kinematics (IK) is a technique used in game engines and animation software to control the movement of a character's joints in a more realistic...
Post a comment
Mod SDK & Community
Built a game for U3D and want to support mods? Try mod.io, a cross-platform mod SDK created by ModDB which makes it easy to get a mod community up and running in-game. Currently seeking games to integrate and promote

X
Tags
Embed Buttons
Link to U3D by selecting a button and using the embed code provided more...


You may also like
FPS Creator X10
Commercial
Unreal Engine 4
Commercial

RAGE
Proprietary
Raycasting Game Maker
Public Domain

WOLF RPG Editor
GPL

ZDoom
Public Domain