Tutorial Description
This tutorial explains the things that need to be done before really beginning creating a scene. So, it explains the very bases, and it's on bases that the rest of the work will rely on.
In this Tutorial, you'll learn about :
- New Scene : Create a Scene and your first actor
- Channels : Create a Channel for each specific tasks, and learn why you should create more than one
- Models : Associate a Model to an actor and manipulate it
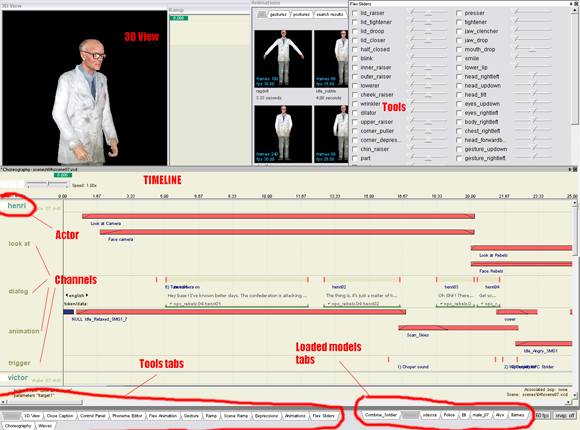
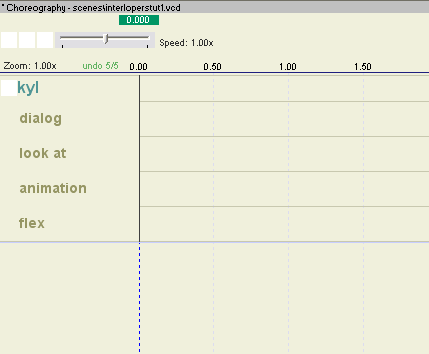
An overall look of the tool :
New Scene
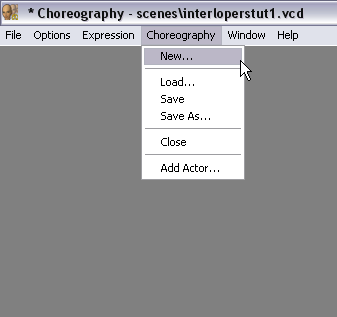
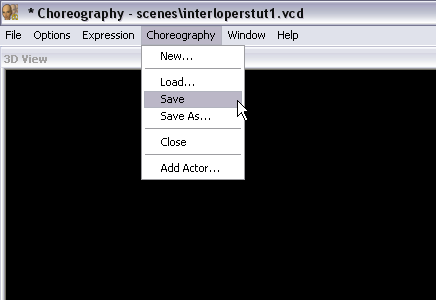
1) Click on Choreography > New...
2) Save your scene wherever you want and give it the name of your choice. Notice it has to be in your yourMod\scenes\ folder.
3) Choose a name for your first actor
The name you give to your actor has its importance since it should be the same name as the NPC's name in Hammer.
I call him "kyl'".

Note : If you don't know yet what his name is going to be in-game, you can use the keyvalues "!target1", "!target2", etc...
In Hammer, the logic_choreographed_scene has multiple "target" values you can fill with the name of the actor in-game.
If your actor is the player, use the "!player" keyvalue. This way, the source of the sound will be the player himself.
Good, we now have an actor !
Channels
Now you should think about what is your actor going to do in this scene.
Let's consider that "kyl'", my example actor is going to say something, look at something, animate its body and animate its face.
For each of these points, I like to use a seperate channel.
It's really important if you want to keep a good visibility on what's happening in your scene.
Let's do it :
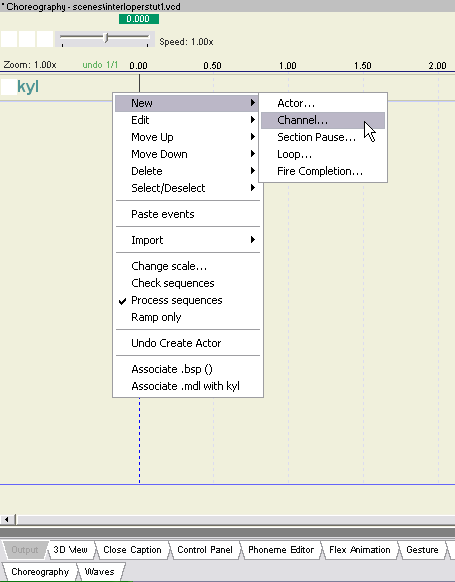
1) Right Click on your actor > New... > Channel
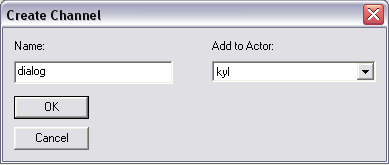
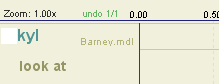
3) Name it "dialog" and associate it to you actor.
The "dialog" channel is the most important of all channels since dialogs are really the spine of your scene (unless you just want to create animations) : the whole content of your scene will rely on them.
4) Do the same with the following channels :
- "look at" : will contain "Look at", "Face actor" and "Move to" events
- "animation" : will contain "Gesture" and "Sequence" events
- "flex" : will contain "Flex Animation" events
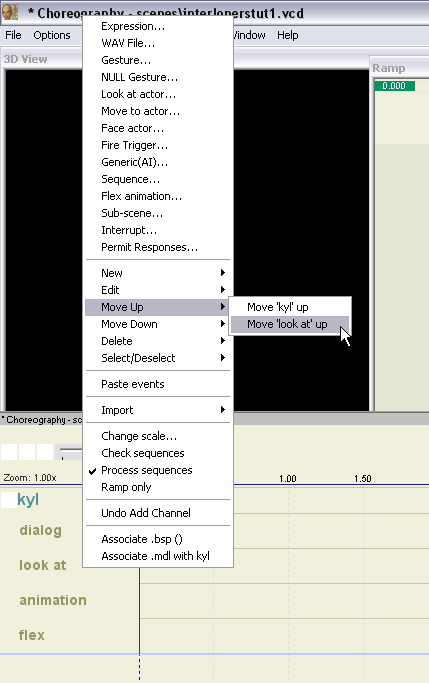
Note : Now that's personnal, but I like to have the "dialog" channel bewteen the "look at" and "animation" channels since they're both based on the dialogs. So, I move the "look at" channel up.
Right click on the "look at" channel > Move Up > Move "look at" up
5) Save your work.
CTRL+S doesn't work, so make sure you click on Choreography > Save.
Good ! We now have all our channels prepared !
It should look like this :
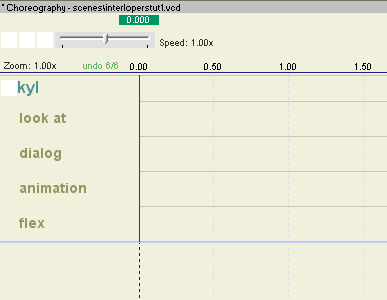
Actually, the Channels organization is really up to you. Create, name and place them as you feel the most comfortable with.
Models
In Faceposer, as in Hammer, each actor is represented by a Model.
Let's Learn how to manipulate them.
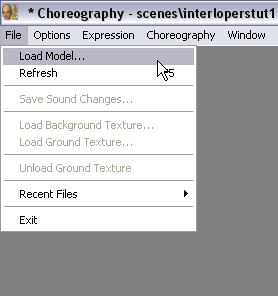
1) Click on the menu File > Load Model...
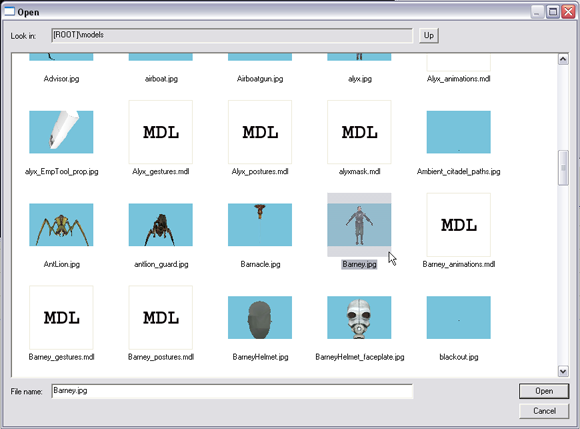
2) Select a NPC model for our actor.
Scroll down to see the model's images in JPG format.
Select an image.
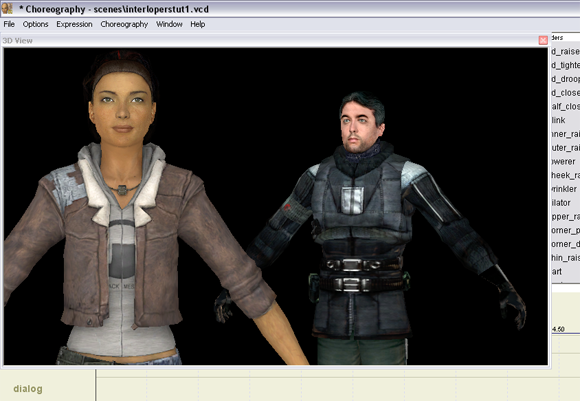
I chose "barney.mdl".
As you do that (and wait a little for all its properties and animations to load), you'll see the model appear in the 3D Model window.
If you don't see the window, or if you close it by accident and want to make it appear again, click on the "3D View" Tab in the bottom left of the screen.

There are a few things you need to know about what is possible to do with this 3D View window :
- a) Zoom :
Right Click on the model > Forward / Backward with you mouse
b) Move
SHIFT + Left Click on the model > Move around the 3D Model window
c) Rotate Z
Left Click ON the model > Move Left / Right with your mouse
d) Rotate Y
Left Click away from the model (on the black background) > Move Left / Right with your mouse
d) Light
CTRL + Left Click > Move around the 3D Model window
Note : Now, what if you have multiple actors and models ? How can you tell wich model should animate when one actor is saying or doing something ?
You will need to tell Faceposer which model is associated to which actor.
In order to do that :
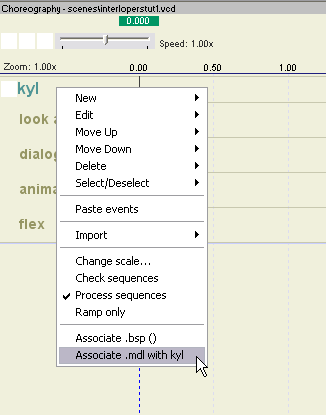
1) Right Click on your actor > Associate .mdl with kyl (or wathever actor name you've chosen)
2) Select one of the opened models
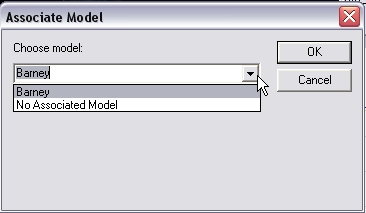
You now have a model associated to your actor.
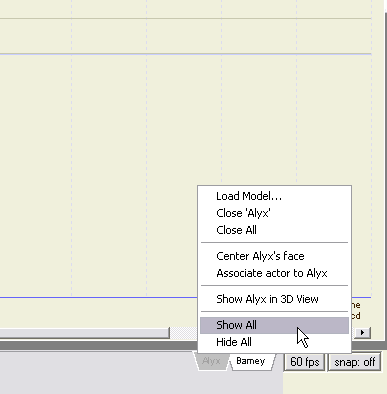
Note : It's also possible to show ALL models at the same time in the 3D View.
To do so :
1) You need to have more than one model loaded.
Load as many models as you want by clickking on File > Load Model...
2) Right Clickk on the model's name Tab at the bottom right side of the screen > Show all
Here's the result :
Well, now with your workspace properly set, you're ready to dig in deep... really deep.
Until then, enjoy and have fun !
Cheers
Kyl'


Hey, I've tried using faceposer before. I followed some tutorials, but when it comes to recognizing the sound and recommitting the sentence it never works. From what I've seen on discussions, it has to do with a Vista incompatibility error. I use Vista. Do you know of any way to get around the sound recommitting error?
That's a Source engine/Vista bug that has yet to be fixed. As of now, you need to sync the lip movements to the sound manually by adding and adjusting phonemes.
Alright, thanks for letting me know. I'm glad I'll still be able to use it, even if its manual.
If you look at my blog I tell you about how to make it work.
Moddb.com
You need the Microsoft speach SDK, you'll find the link there.
Faceposer is a nice little programme great tutorial.
Thanks a lot, dabbling around aimlessly was fun but this looks like it could go in a direction =D
my face poser will pop up, and then a pop up message comes up and says faceposer has stopped working, any help
I really don't know whether my question is irrelevant to those already posted here. I just want to learn how to develop an animation file with blend. How can I get the full-fledged guideline to work with blend. I just want to prepare educational lesson-plan for geography, biology etc. please help me.