Fast pace cellshading flying action. Soar the skies as you take on the most vicious enemies above the ground. Experience an airborne adventure in an all new art style that will take you to something different and exciting. With the possibility to add just about anything you can imagine into the game, the sky it's not the limit. It's just the beginning.

Forum Thread
  Posts  
Terran Texture Tiles (Games : Vector Thrust : Forum : Mod Support : Terran Texture Tiles) Locked
Thread Options
mittsommerschnee
mittsommerschnee Vector Thrust α/β Tester
Aug 8 2012 Anchor

What format does new terra tiles need to be in for new maps and trees? eg; sizes, colour depth, naming convention, etc.

Edited by: mittsommerschnee

--

Noli Timere Messorem
Aug 13 2012 Anchor

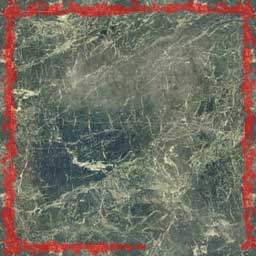
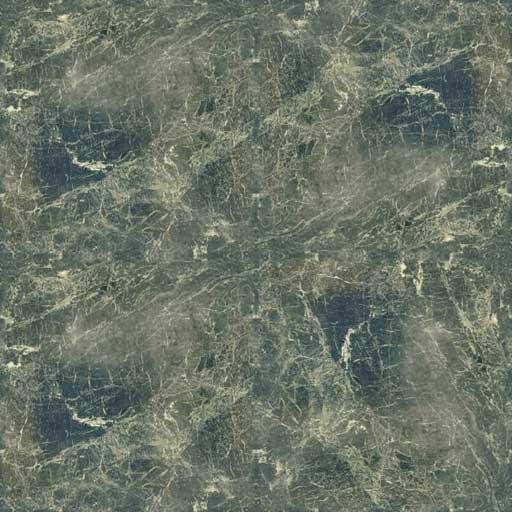
Sorry for the delay.

First the size conventions:

For terrain tiles is 512x512
(saving in dds, DXT1 for tiles with no transparency and DXT5 with transparency)
Single textures 1024, 512 or 256
For skyboxs is 512x512
For tree textures it can be 512x512(high) 256x256 (medium) 128x128/64x64(low)

As for naming convention:
Using one as an example

“Desert_SM_25_M_1”

The naming structure is :
[Tileset name]_[terrain initials]_[percentage of coverage]_[Size]_[Variance]

For this tile set the terrain initials are:
S->Sand
M->Mountain
F->Forest
V->Vegetation
R->River
W->Water
U->Unique

The percentage of coverage it is not actually exact, it is just a simplification:
0-> covers no corner
25-> covers one corner
50-> covers two corners
75-> covers three corners
252-> covers two opposing corners

The size can be:
S->Small
M->Medium
L->Large

Using this three images as an example:

Small, medium and Large respectively.

In the “Desert_SM_25_M_1” it means, the texture belongs to the desert tile set, where it is the first texture where the base is Sand and has 25% of coverage with mountain texture with medium size.

But it can be more than two terrain types, like this texture:

“Desert_SMF_25-50_1”

It has Sand, mountains and forest, and the mountains is 25% (one corner) and the forest is 50% (two corners)

And that’s all the basic information, later this could be added as a quick tutorial as some other in the forums that may become lost later on.

Aug 13 2012 Anchor

Can you give us a look at how you arranged all the different variations before splitting them up? I'm trying to get an idea of how you made sure everything was seamless while dealing with all those combinations.

mittsommerschnee
mittsommerschnee Vector Thrust α/β Tester
Aug 14 2012 Anchor

Ah thanks Times that's helped alot, now I can try and get my map working.

--

Noli Timere Messorem
Aug 15 2012 Anchor

Before making all of these variations, it is important to create good base textures (like sand, forest, etc).
The most difficult part in creating the good texture is making one that allows to be stacked seamlessly together even if the other tiles are mirrored or rotated.
So, using this texture as an example:

The first step is to select a corner of the texture, starting from the middle to the end:

(The red overlay represents the selection)
Notice how the end in the corner is chamfered, making an angle of 45 degrees

Copy that selection and mirror it and select the result afterwards.

Copy & paste this new selection in all four sides.

With the original in a layer bellow visible, it appears like this.


Now select the pixels touching the sides with a soft transition to the inside.
If using phosothop, follow these steps:
Select/All,
Select/Modify/Feather (1 pixel),
Select/Inverse
Copy that selection to another layer and hide it for now.

Now select the layer with the frame we have created and select the zone that makes transition with the original.
Making a selection that is smooth and irregular works better.
After selecting it, delete that selection.

Finally activate the 1pixel border over the top of everything and the result this.

Testing out the pattern in a simple tile:

One last tip, while it is fine as an example, try to have the original texture be the most uniform in color as possible.
As we can see, in this texture, the darker spots make the tile be easily identifiable.

Reply to thread
click to sign in and post

Only registered members can share their thoughts. So come on! Join the community today (totally free - or sign in with your social account on the right) and join in the conversation.