Fast pace cellshading flying action. Soar the skies as you take on the most vicious enemies above the ground. Experience an airborne adventure in an all new art style that will take you to something different and exciting. With the possibility to add just about anything you can imagine into the game, the sky it's not the limit. It's just the beginning.
| Posts | ||
|---|---|---|
| Photoshop skin template tutorial | Locked | |
| Thread Options | ||
| Jan 11 2014 Anchor | ||
|
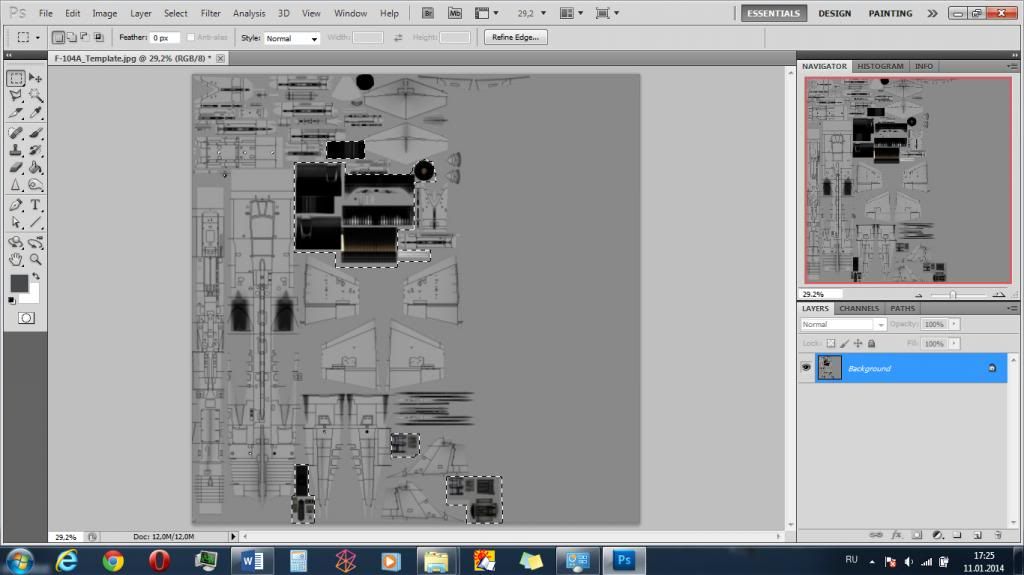
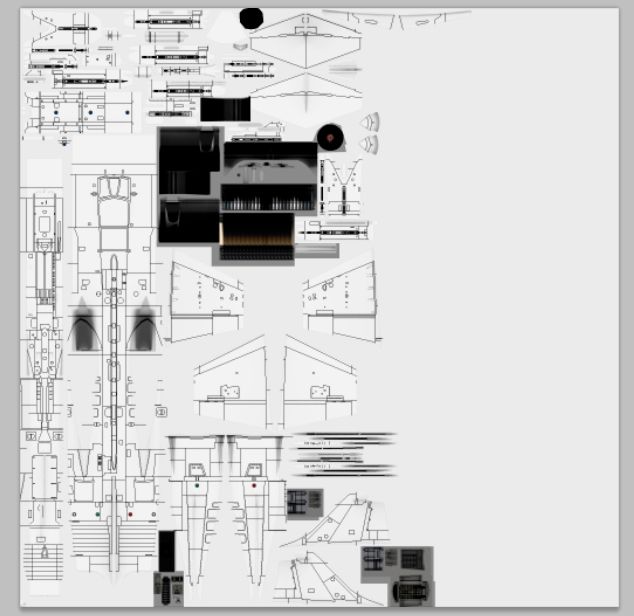
szboudreau01 asked me if I could share my skin template making method with everyone, so I'm making this tutorial. First thing first you're going to need Photoshop or any other image editor that good at working with layers. I recommend getting latest Adobe Photoshop. You can find it at the Pirate Bay or other warez site. Take care to download cracked version of Photoshop, not the portable one, since you're going to need to install at least one plugin. Then get nVidia Texture Tools for the Photoshop. For this tutorial we'll be using F-104A template file.
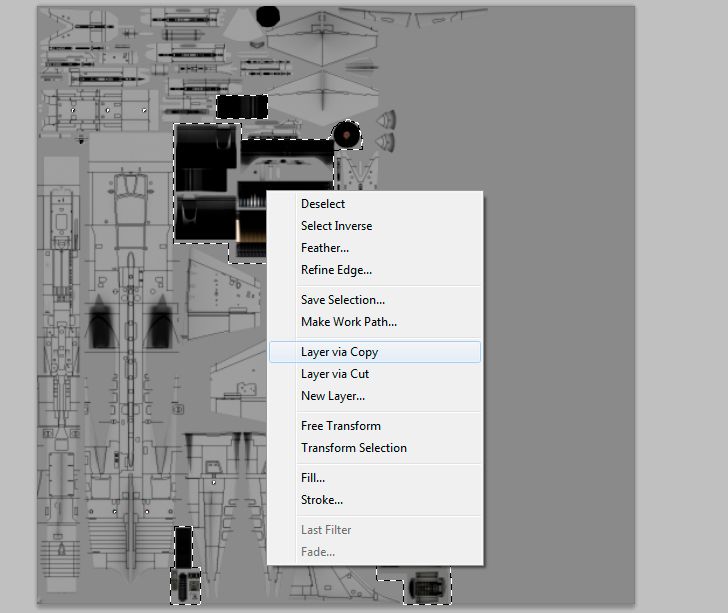
Right click on the selected areas and then use Layer via Copy. You'll get new layer. I usually name it "stuff". Now you can properly save the file, so you won't lose any changes.
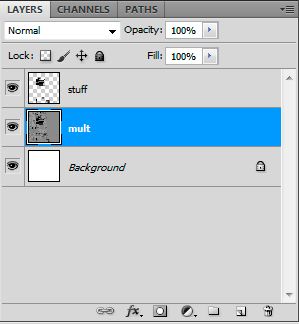
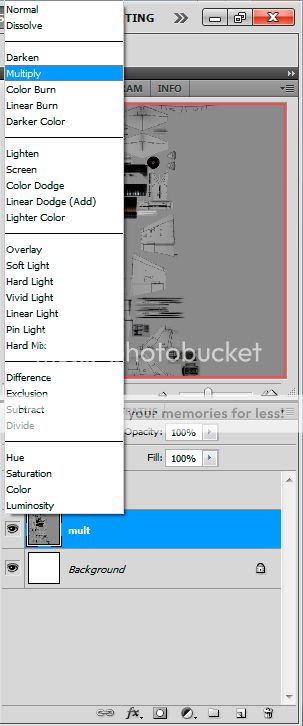
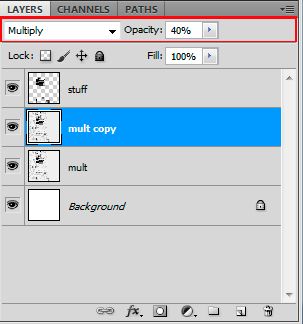
Now set "mult" layer properties to "multiply".
Then go to Image>Adjustments>Brightness\Contrast. Set them to Brightness +90-100, Contrast -50, so the layer appears almost white.
You might want to make additional brightness adjustments on both the "mult" layers. Play with the settings until you find the shade of white satisfying. In this case, I chose to add +70 to brightness at each of "mult" layers.
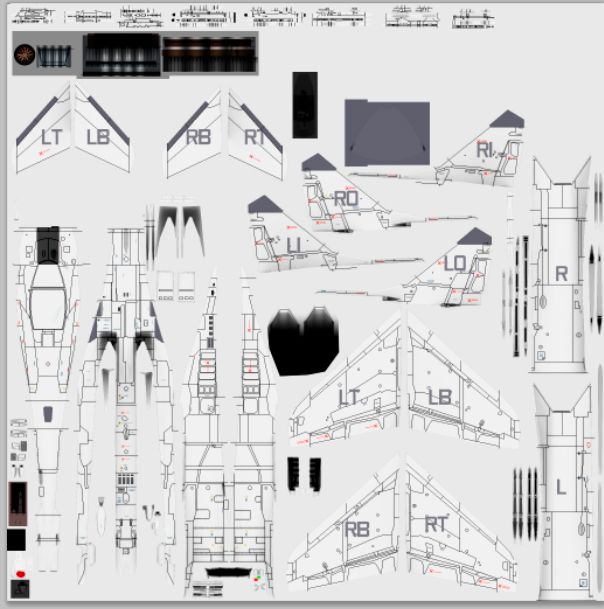
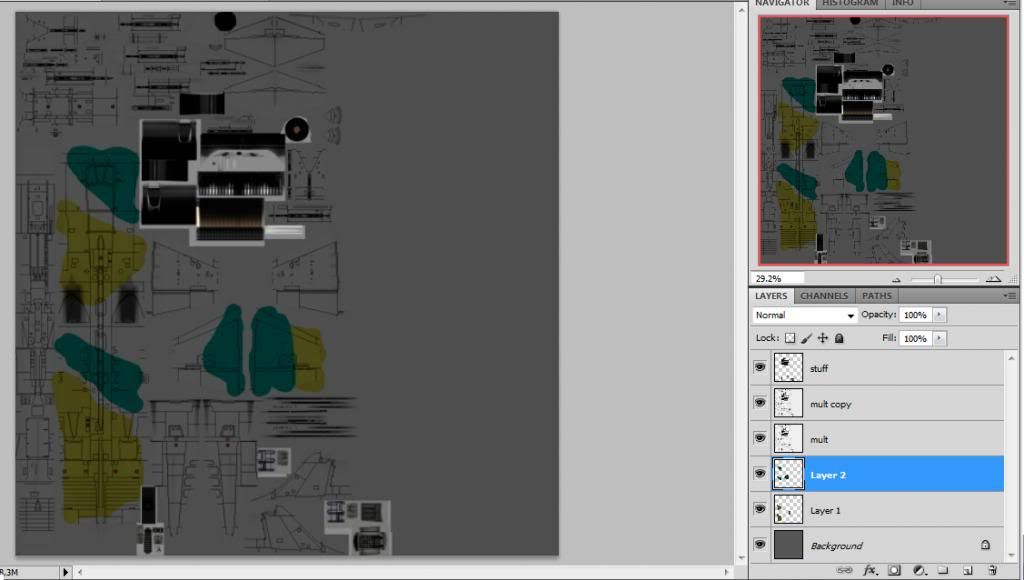
Save the file. Basic template is complete. This is, for example, my MiG-29(9-12) template. When you color, put all the colors on background or additional layers, located between background layer and "mult" layers. If you're doing scheme that uses many different colors it is a good idea to put every color on a separate layer. It makes editing a whole lot easier. Country roundels and squadron insignia also go below "mult" layers.
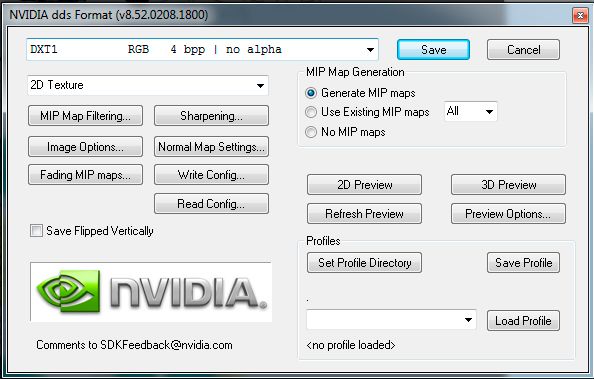
The texture is saved as .dds file. VT uses simple DXT1 textures. Beware that sometimes saving of .dds file takes about 20-30 seconds. The Photoshop did not freeze.
You'll need to add a .skin file for it to work. It's a plain text file, containing the texture information. Each plane has one for the default texture, so copy it in your work folder and edit the name for the skin (the MenuName sting) and the name of skin file (Solid_1_Difuse sting). Do not edit others. (Unless you're planning to get a new specularity map for additional glow effects). The .skin file must be put into the same folder as the .dds file. Editing of the .skin file. Feel free to ask questions. Edited by: John_Silver |
||
| Jan 13 2014 Anchor | ||
|
Great tutorial John_Silver! |
||
| Jan 14 2014 Anchor | ||
|
But why do you do this instead of just applying an overlay filter to the regular template? |
||
| Jan 14 2014 Anchor | ||
|
I think someone mentioned that the way overlay behaves leads to different results between programs like Photoshop and GIMP. Edited by: SpootKnight |
||
| Jan 14 2014 Anchor | ||
|
That was me but this doesn't look like that solution, the tutorial doesn't even use gimp and says to pirate photoshop. Edited by: bornloser |
||
| Jan 15 2014 Anchor | ||
I will post it in the tutorial section later, after other uses has given their advices and criticism. It's my first more of less serious tutorial and I want to polish it a little first.
The color is more correct this way, when you use Overlay you'll need to put a few layers above to put the required color. This way you can, for example, take the textures Nergal01 has ripped in a neighbour thread and transfer color directly to your custom skin with Eyedropper tool only. It's going to be about 95% accurate. (Depends of how much effort you put in balancing the template colors).
I'm not really familiar with GIMP, and this tutorial clearly states that its a Photoshop-only. Also, besides me being anti-copyright and pro-piracy (am an evil Commie from Siberia, after all), I believe that PS is ridiculously overpriced. Not everyone has that kind of spare money, especially to spend on making skins for the game. Edited by: John_Silver --
|
||
| Dec 18 2014 Anchor | ||
|
another thing you can try is having base layer with the template image, a duplicate layer on top of that with the the filter set to multiply, and then a white overlay on top of that. Then you merge those 3 layers to get your multiply layer that you can paint under. |
||
|
|
Dec 18 2014 Anchor | |
|
I am learning a bit about GIMP ( 2.8 ) to see if I can make a tutorial mainly to help those who use that program only. The process is very similar to this tutorial in fact. A lot simpler than I expected. Edited by: Raptor_101 |
||
| Dec 18 2014 Anchor | ||
|
I really ought to clean this up and put it in the tutorial section properly. --
|
||
|
|
Dec 18 2014 Anchor | |
|
Would it better to put it to Steam guides tab instead for more coverage? -- anon wrote: 'anon' wrote: Now I shall use this 'Vector Thrust Threshold' to measure how awful your product is |
||
| Dec 19 2014 Anchor | ||
Edited by: John_Silver --
|
||


Only registered members can share their thoughts. So come on! Join the community today (totally free - or sign in with your social account on the right) and join in the conversation.