If you wish to discuss modding Quake 4 or any other Id Tech 4 based game I recommend joining the Id Tech 4 discord here.
Introduction
This tutorial is a sequel to my previous one on importing a static mesh located here. It is highly recommended you go through that one first as many of the same principles are repeated. Everything in this tutorial will apply to other Id Tech 4 based games such as Doom 3 and Prey 2006.
This tutorial will go over how to import a custom rigged mesh. Which you can use to make weapons or characters for the game. This tutorial was created in cooperation with Valkyries733 who provided the screenshots and tools needed to get this to work. Many thanks go out to him.
What you will need
Rigging the model
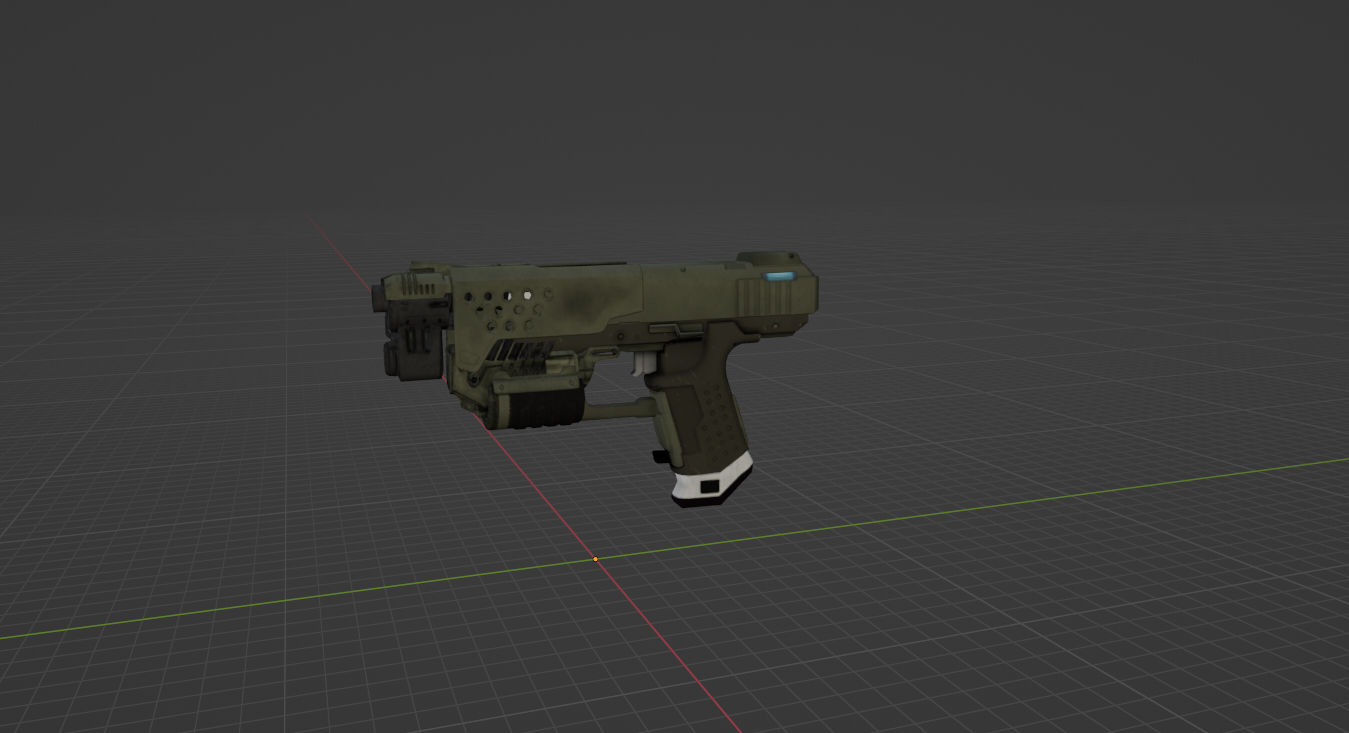
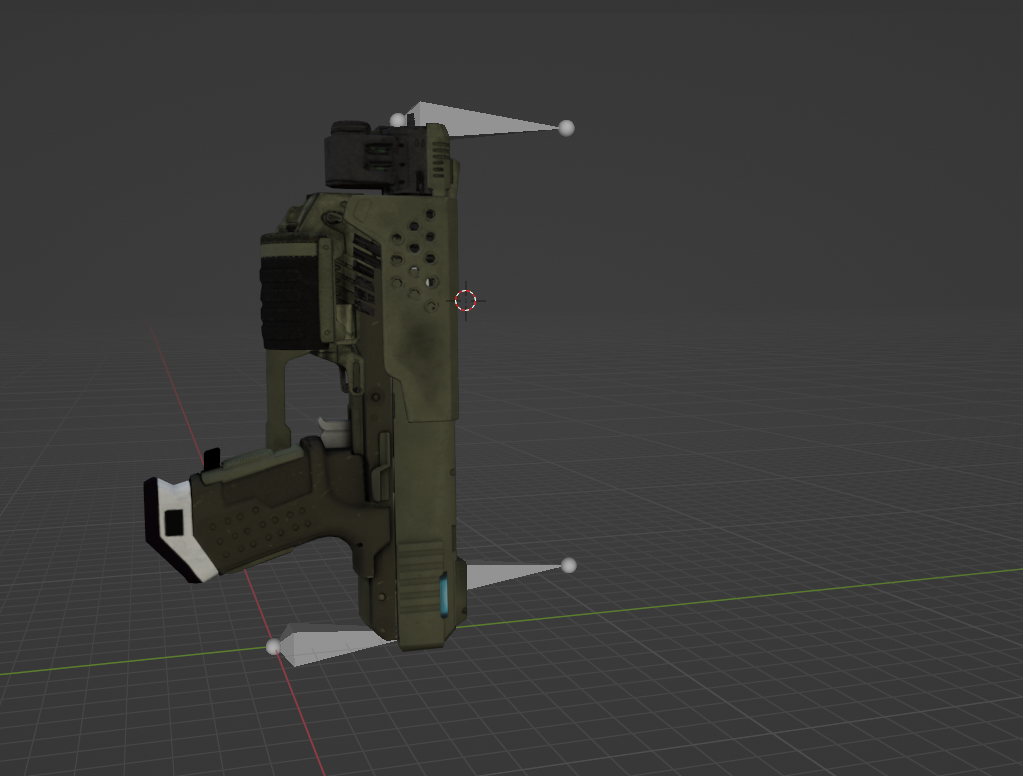
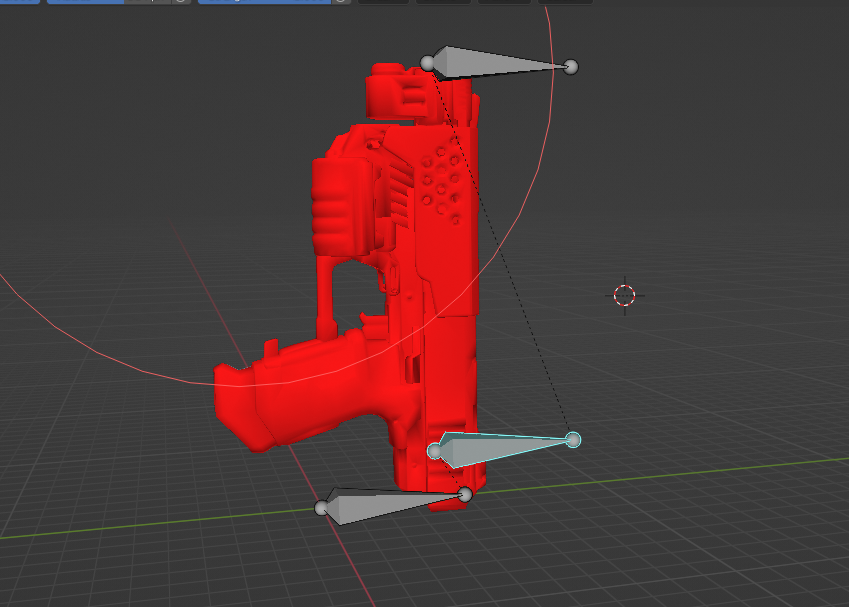
For the purposes of this tutorial we're going to replace the Blaster's world model. Since it's a fairly easy model to replace and has very few bones. All of the same principles will apply to any other model, such as a first person weapon model or a character model.
First let's get our preferred model into Blender.
Next we'll need to import the vanilla Blaster model into Blender. You can do that the same way you imported the Crate from the previous tutorial. Just extract the model from the files. If you aren't replacing an existing model you don't need to worry about this.
Next we'll need to line up our model with the existing one. This'll make it so it's positioned the same way. This is extra important if it's a weapon model like this one as it gets held by the player character.
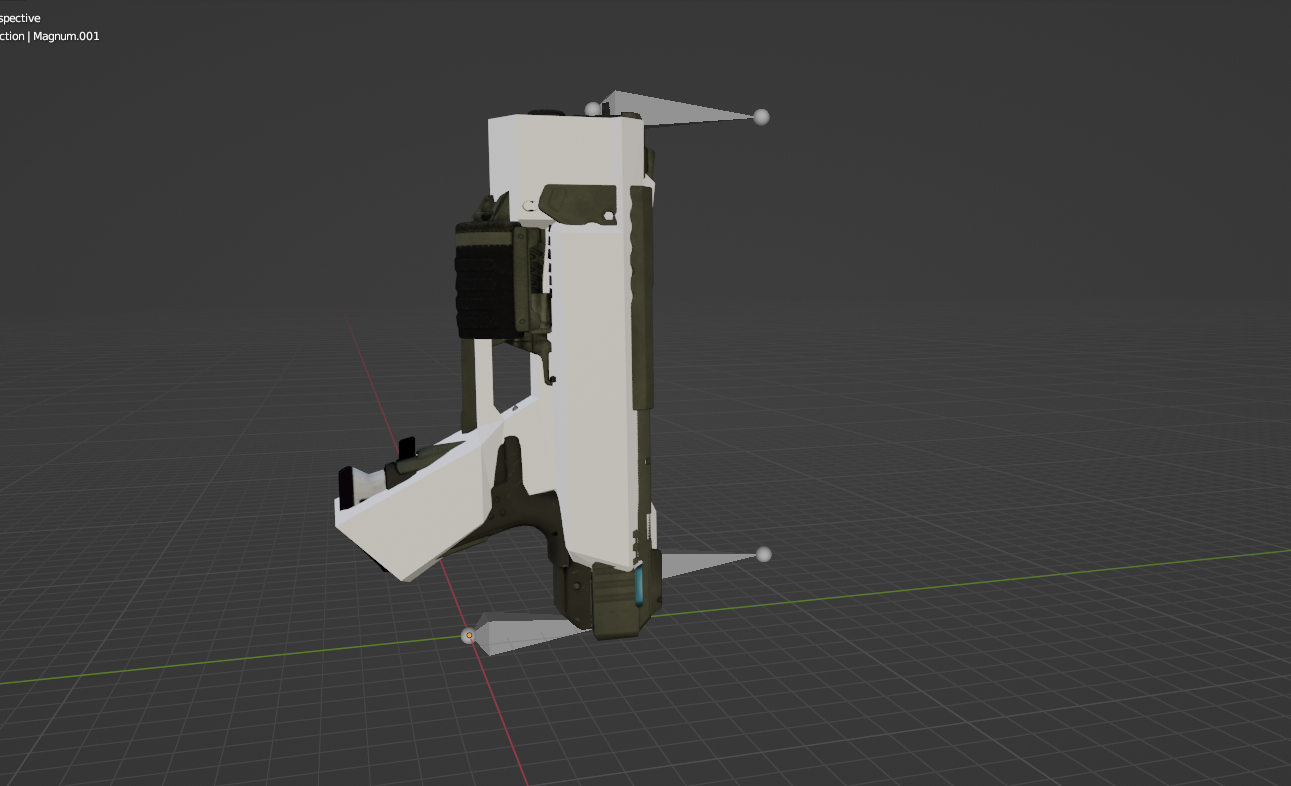
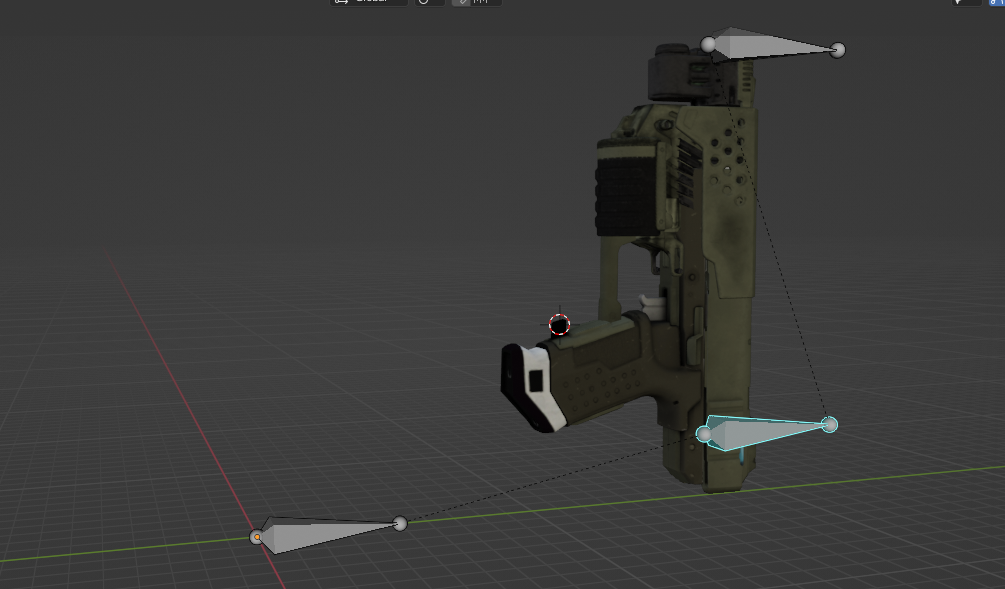
Next we'll need to parent the new model to the old one's armature.
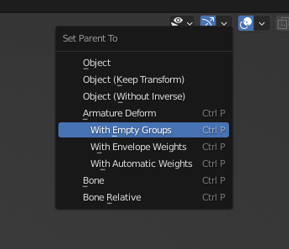
you can select the new model, and then the armature, and then use "CTRL P" to open this menu. You want to use the "With empty groups" option.
Now the new model is on the old model's rig. You can delete the old model now.
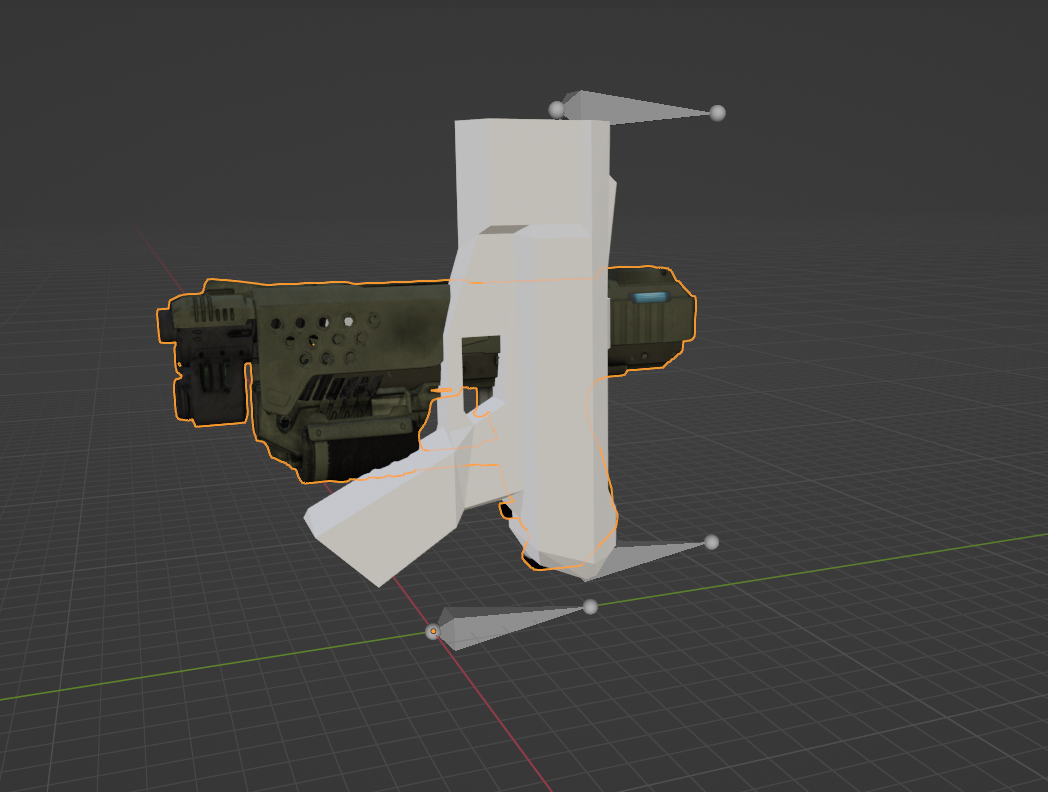
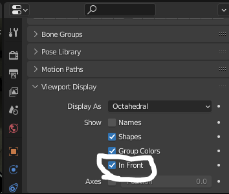
Next we'll want to be able to see the bones through the mesh. We can go down here under armature properties and choose the "in front" option. This will make the bones always render in front of the mesh.
Weight painting the model
Now it's time to weight paint, the Blaster just has an origin bone, a gun bone, and a muzzle bone. The muzzle is used for effects, and the origin is just the origin. We're going to want to weight paint it to the stock_joint bone. Go into weight paint mode, select the bone, weight paint everything. Make sure you get everything
Now that everything is painted, move the bone to see if any geometry gets left behind. If geometry gets left behind it's because you missed something.
Setting up materials
So, now. With MD5Meshes the materials HAVE to be separated. If you have multiple materials on one object it'll just choose a random material and make the entire object have that
Go into edit mode, and press CTRL P
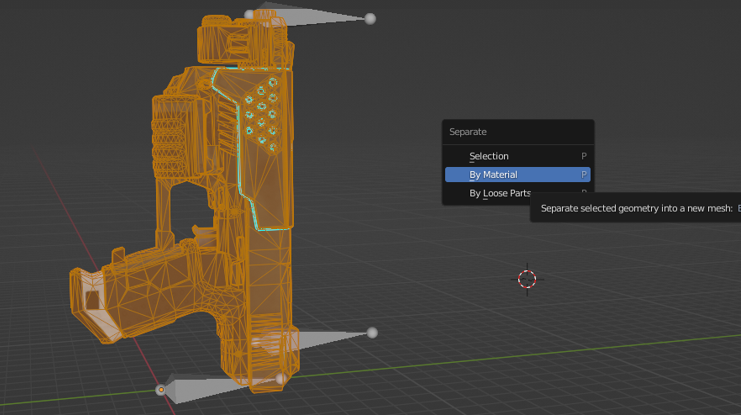
Choose "By Material". This separates the model into multiple models based on how many materials are on it. If you only have 1 material this isn't needed
So now everything is separated.
Exporting the model
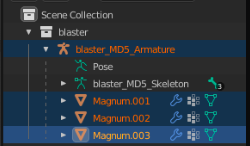
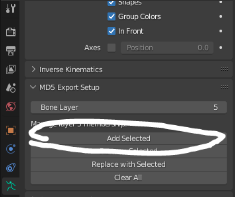
With MD5meshs, you have to have the armature and the meshes under the same collection. If you don't you will get an export error. Before we're ready to export, go into pose mode and select all of the bones. Once the bones are selected, choose the "add selected" button underneath the "MD5 Export setup" tab. If you don't do this, it may refuse to export. Add it to layer 5, as that is the default layer.,
Now we can export. Select the entire model and go to file > export
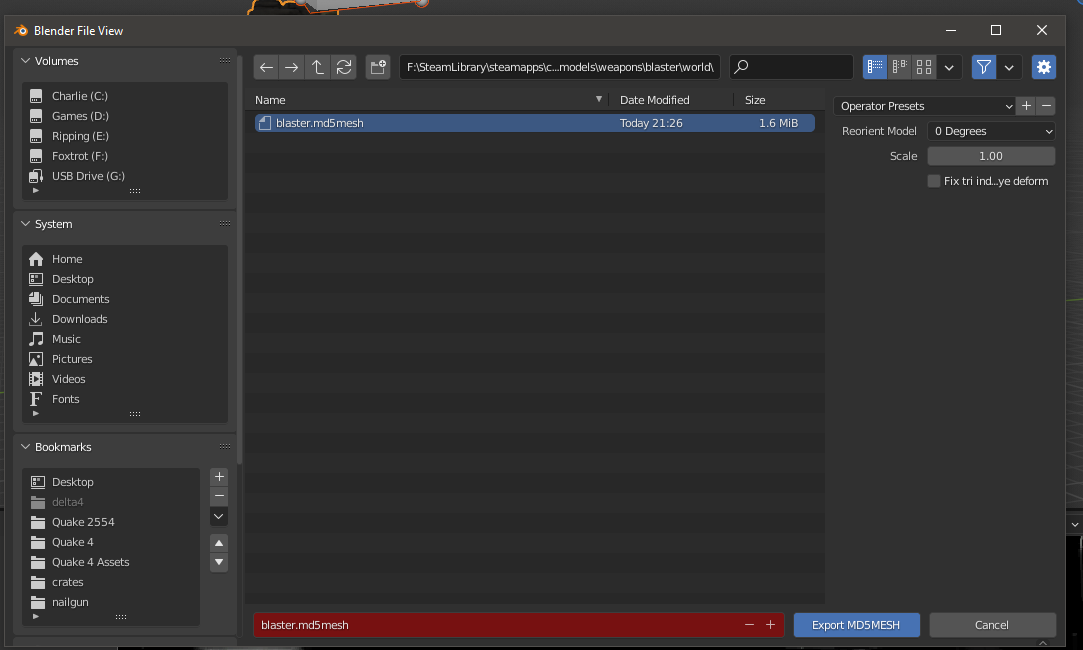
For the sake of this example, I'm replacing the quake 4 blaster world model with my world model. So I'm going to save over the original file with the exact same model path.
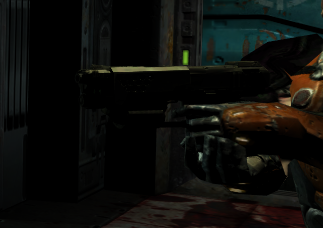
And there you go, in-game.
Troubleshooting
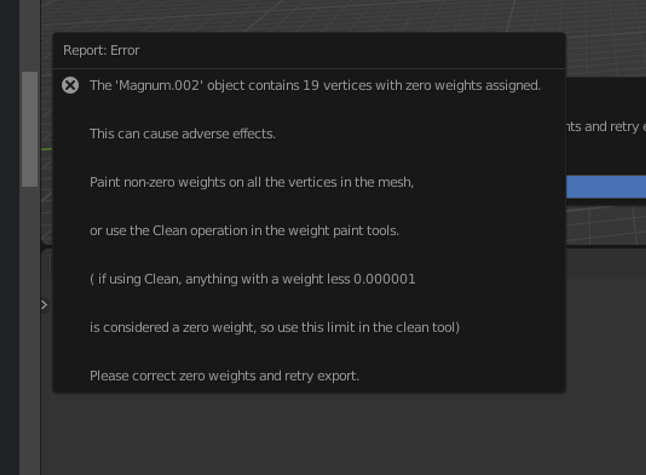
If your model is hitting you with this error. The entire model isn't weight painted. Move the origin bone around and see if any geometry gets left behind. Drag it far away from the origin point and if you see it turn into spaghetti then not everything is weighted.
If you've ensured the model is fully weighted, and you still get the error. You can instead do this:
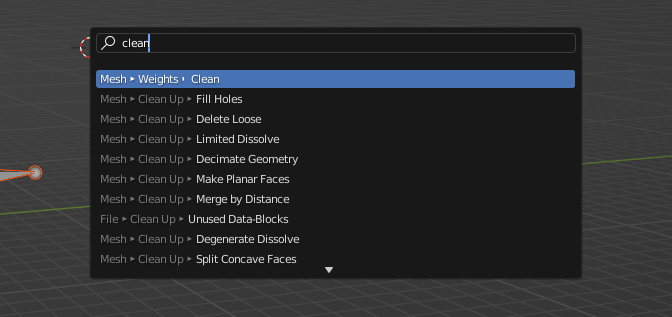
In edit mode, use the search function to search for "clean". You're going to want to choose the Mesh > Weights > Clean option. What this does is automatically weight paint unpainted vertices, all you have to do is set a tolerance.
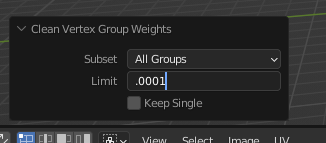
This menu will pop up. You want to use the subset of "All Groups" and set the limit to ".0001". This will paint any screwy vertices that may be preventing you from exporting the md5mesh. After this, you should be good to export the mesh.
Conclusion
Now you know how to import a custom rigged mesh. If you wish to discuss modding Quake 4 or any other Id Tech 4 based game I recommend joining the Id Tech 4 discord here.