Mimicking Beast Lighting in Mirrors Edge
By stealthclaw (aka Faparith).
Ok hi, in this tutorial I will hopefully show you how to
get similar lighting effects to the Beast lighting system. Unfortunately, the
Beast lighting system wasn't included with the Mirror's Edge editor so if you want
to get similar effects to official ME maps you will need to use the Unreal Engine 3
lighting system. But note this is one of my first tutorials so some parts might not be clear.
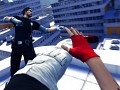
Here you see two pictures from ME that show some of the lighting effects
you will learn how to mimic.
A scene from ME with Beast lighting.
A highlight of one of the effects of Beast lighting. (colour bouncing).
Now to start the actual tutorial.
1: Start the Mirror's Edge Editor and create a new map. In the map change
the builder brush properties to X:1024 Y:256 and Z:512. Check the
"make hollow" box, and set the wall thickness to 16. Then click build,
and after that click the csg:Add button. And tada, you should have a
hollow cube to work with! Use the mouse to move your 3D view inside
the box you just made, and make sure you click the "unlit" option so
you can see the walls before you add a light.
2: Next open the generic browser (View->Browser
Windows->Generic). Then with the generic browser open, go to the
File->Open... menu option. Select "All Files" from the drop down
box, and browse to your ME install folder. Then go to
"TdGame\CookedPC\Interiors\i_Maintenance.upk" and click open. That
loads up the package containing the textures that we will be using.
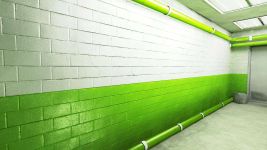
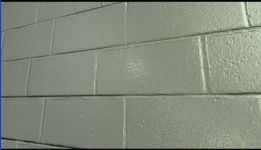
3: Now in the 3D view, select all four walls (hold the control key to
select more than one thing at once). Then go back into the generic
browser and select the material "M_BricksLarge_01". You can use the
binoculars button to search for it, and you may need to go to the
Interiors category (on the left side of the Generic browser), right
click i_Maintenance, and select "Fully Load". Now when you look back
at the 3D view the walls should look similar to the picture at the top
of the page. While in the 3D view, look at the roof. Then hold the
"L" key and click on the roof. This will place a normal point light in
the scene. You will probably need to move it down a little bit so it
does not clip through the roof, otherwise your room will not be lit.
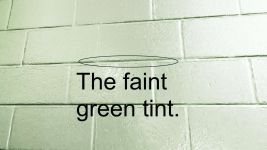
4: Now that we have our scene ready we can start to add those fancy
lighting effects. :) For this, look at the scene, and notice that the
most prominent colour you see is green. This is the colour that will
be reflected on the white bricks. Now I'm going to show you the easy
and basic way to get the green effect. Add another light to the scene
and position it in the middle of the hall. Now double click the light
to open the properties window. Expand the "Light" and "LightComponent"
tabs and scroll down to the brightness option. Change it to 0.5. Then
uncheck all the boxes that say something about casting shadows and
scroll down to the light colour option. Click the arrow button to it
select a colour from the scene, and select the green part of the wall
(make sure the light colour option shows a green colour now). Now
we're almost done! All that's needed is to adjust the brightness of
the first light we placed. Select it and change its brightness to 0.25.
5:Now to build the level and test. Select the Build->Build All menu
option. Once the build is complete, right click on the floor in the
3D view and click "Play from here". Now you can check out the results:
Not quite as good as Beast (why else would DICE use it),
but fairly decent I think. This tutorial only shows the basics, and if you want better
effects you might try using spot lights, directional lights, or TdAreaLights. These can be
accessed through the generic browser under the "Actor Classes" tab and "Light"
category. You can also experiment with the different properties like brightness, and see if
you can get better results. I hope to revise this later and add more about
directional lights and such.
Please feel free to contact me if you have any questions.
Thanks to Blizzard for spelling and grammar corrections.