
In this tutorial, you will learn how to create wooden towers which collapse when a nearby fuel barrel is detonated; as seen in the canals of City 17. This tutorial assumes intermediate knowledge of Hammer.
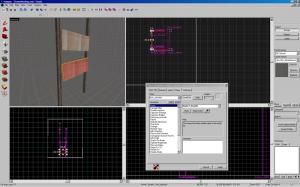
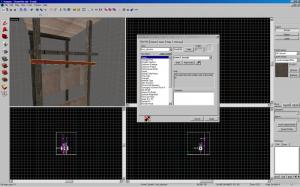
Firstly, create a basic room. I’m not going to go into detail about this, but it should be about 500 units tall. Next, create a tall, thin brush, textured with an appropriate wood type texture, in the middle of the room.
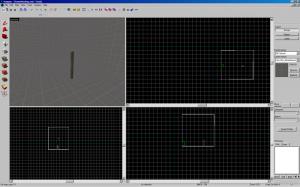
Create another one next to it. It can and should be of a slightly different length.
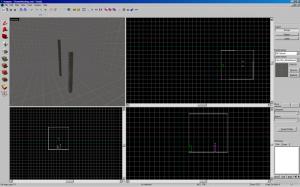
Create additional wooden brushes on top of the first ones. The length of them should even out at the top, making the two stacks the same height.
Group the two brushes together (select, tools+group). These are your support poles.
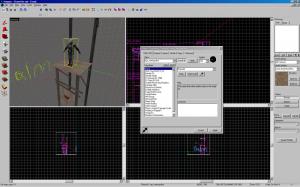
Tie the brushes (select and press control+T) to “func_physbox” entities. (These are basically “func_breakable”s )
Change the following properties of each of them:
Name: “tower1_boards”. (Yes, they all have the same name.)
Strength: 10
Material Type: Wood
Click the “motion disabled” flag.

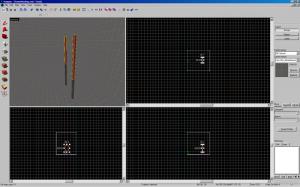
Next, create two more brushes ties to “func_physbox” entities in between the two poles, as if attached.
They should be textured with a different wood texture, something like “wood/woodshelf008a”. Set the same properties as you did for the poles, even the names. Also, select the “motion disabled” flag, as before.
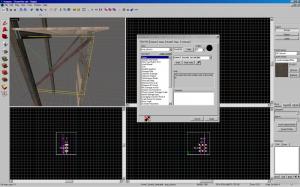
Create two more “func_physbox” brush grouped in a lopsided cross type shape, as in the picture.
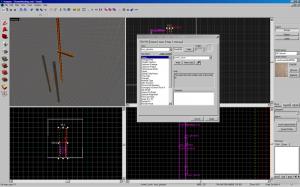
These should be a little less than half as tall as your wooden poles. This will be the first of two struts for the tower. They should have a metallic type texture, like “metal/metalpipe003a”. Change the following properties:
Name(s): “tower1_struts”
Strength: 0 (It won’t break)
Material Type: Glass
{Set the motion disabled flag as before.}
Create another “func_physbox” brush strut. If you want, it can have a funky little extra part attached to the top, as in the picture.
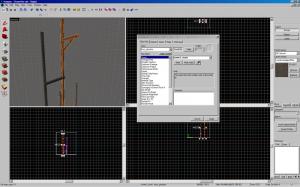
Make sure that the protruding crossing part from the first strut touches the second, as if they’re attached together. Assign the same properties and the same flag as the previous strut.
Create two wood textured “func_physbox” brushed atop the wooden poles, and resting on the edge of the bridging piece of the two struts.
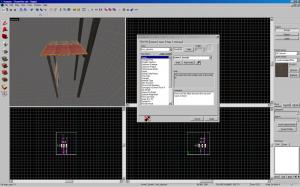
This is the platform that the Combine (or whatever) will stand atop of. Give it the same properties (including name) as the wooden support poles.
Create two more “func_physbox” brushes as little supports holding the poles together.
They have a wooden texture, and can be slightly lopsided. Assign them the same properties (and flags) as the support poles, including the name. (Yes, I know this is getting repetitive. Bear with me please.)
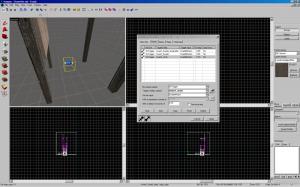
Now for the last two boards: create two “prop_physics” entities and set their world models to “models/props_debris/wood_board01a.mdl”. Place them as if they’re attaching the support beams to the struts, diagonally, (see picture).
Name them both “tower1_boards_breakable”. No other property needs changing, but make sure that you click the “motion disabled” flag.
You’re now finished building the tower. Run the map and see if it holds up. If any part of the tower falls down, it’s because the “motion disabled” flag isn’t checked. It should be easy to fix.
[page=The Logic_Relay and Fuel Barrel]
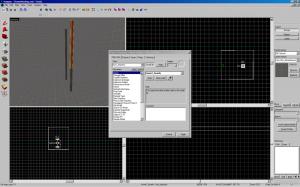
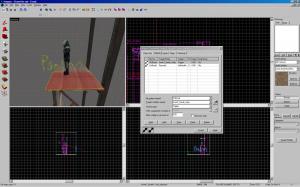
Once you return to Hammer, create a “logic_relay” entity anywhere (preferably near the tower).
Name it “tower1_break_relay”. Set the following outputs for it:
My Output Named: OnTrigger
Target Entities Named: tower1_boards_breakable
Via This Input: EnableMotion
After a delay in seconds of: 0
My Output Named: OnTrigger
Target Entities Named: tower1_struts
Via This Input: EnableMotion
After a delay in seconds of: .10
My Output Named: OnTrigger
Target Entities Named: tower1_boards
Via This Input: EnableMotion
After a delay in seconds of: 0
But what will trigger the “logic_relay”? Well…
Select each of the wooden sections of the tower and assign them the following output:
My Output Named: OnBreak
Target Entity: tower1_break_relay
Via This Input: Trigger

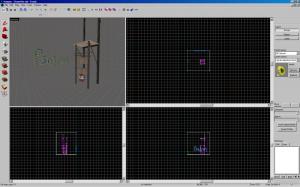
For the barrel, create a “prop_physics” entity underneath the tower. Set its “World Model” property to “models/props_c17/oildrum001_explosive.mdl”.
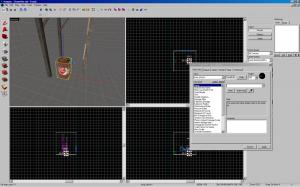
Finally, you're going to add a metrocop on top of the tower. His health will be automatically set to 0 when the tower collapses, so it won't look strange.
Create an "npc_metropolice" on top of the tower. The only property you need to change is his name. How about Reynold? Make sure that the "Mid-Range Attacks" flag is checked as well.
Return to the outputs of your "tower1_boards" and add the following:
My Output Named: OnBreak
Target Entity: Reynold
Via this Input: SetHealth
With a Parameter Override of: 0
You can do this with additional boards, or the barrel if you wish.
You’re done!
The Finished Tower
But guess what? Go to your entity tool, and set the “categories” section (above “objects”) to “Prefabs Hl2.” Now select “collapsing_tower” . Place it like you would any entity. Boom. Bypass the entire process. Yes, the tutorial was kind of unnecessary when you could have used the prefab, but seriously, it’s good practice, and it’s good to know how this stuff works.
For questions or feedback, feel free to email (hambandito@gmail.com) or PM me.
-Psalm


isn't there already a premade version in the editor?
never mind, i just read the conclusion. another great tutorial, whats next?
thanks great but larger images would be good to
this can be applied to any collapsing tower/building you want, too.