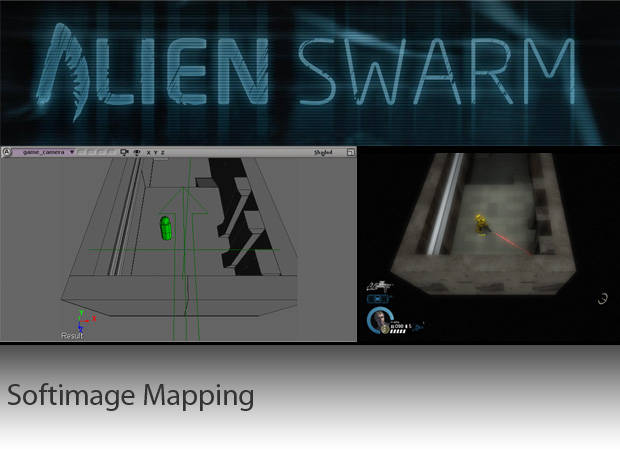
Available free of charge, Alien Swarm thrusts players into an epic bug hunt featuring a unique blend of co-op play and squad-level tactics. Along with the game get the complete code base for Alien Swarm that features updates to the Source engine as well as the SDK. Also available free of charge, is Autodesk's Mod Tool version of Softimage.
Among other things, Softimage can be used to import and export to the VMF map file format that the Source Engine uses. This has a few pros and cons compared to working with Hammer.
Pros:
+ Extensive modeling toolset makes it easier/faster to build geometry to the desired scale
+ Having the map in your modeling program makes it easy to get props to the exact size required
Cons:
- Geometry only; you still have to use Hammer for Lighting, Texturing, Optimization, Scripting...
- It's easier to make changes in Hammer after you've already began to Texture/Light/etc
Thankfully Hammer isn't so painful when it comes to things like texturing, so with this in mind if you're familiar with Softimage or Modtool, it should be very easy to block out your level before getting into the Hammer-specific portion of the process.
Camera:
From the wiki:
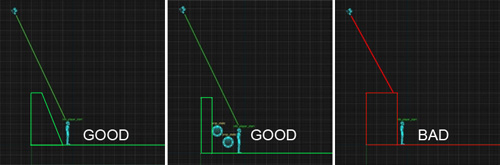
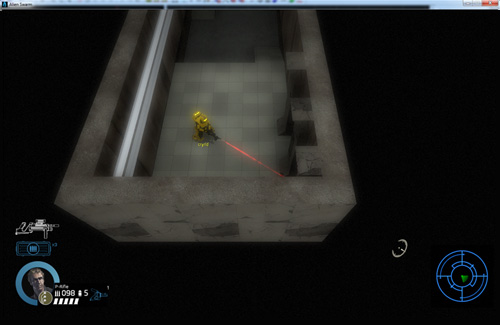
The camera in Alien Swarm has a 60 degree tilt that gives a better perception to the level and helps with immersion, but it does make it harder to aim and can also cause visibility problems if your level isn't designed with this in mind. Most common visibility problem is player getting obscured by the south facing wall in game.
- Make sure your walls are ~ 160 units in height. This height works best for camera visibility while being high enough to make the levels feel like they have walls.
- Tilt your south walls. This allows the camera more visibility over the south wall.
- Add enough low decoration decoration to all your south walls to prevent the player from getting close up against the wall.
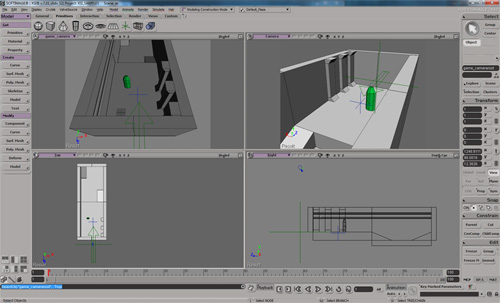
It's actually not that hard to set this kind of camera up in XSI. To begin, I just created a cylinder. You can adjust the initial parameters to create a 60 defree angle, and I found a radius of 480.5 seems to give a vertical height of about 416, which is what the camera's height seems to be above.

Then create a new camera (I renamed it to game_camera), and snap the camera and interest into place. I gave it a Field of View of 75 degrees to better match the in-game camera, and set it to hidden-line-removal or shaded mode. It's important that nothing gets changed from here on out, so I created a null directly underneath it to act as a parent. Once this is in place, right-click the camera and interest in the explorer and lock it on all levels (you can always unlock it if you need to change the shading mode or something).
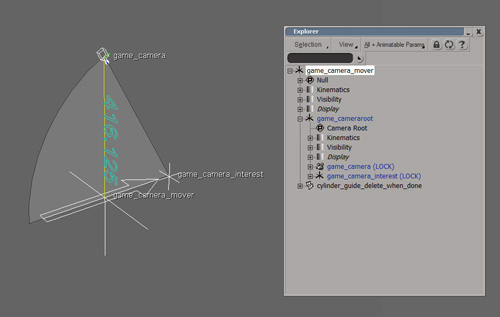
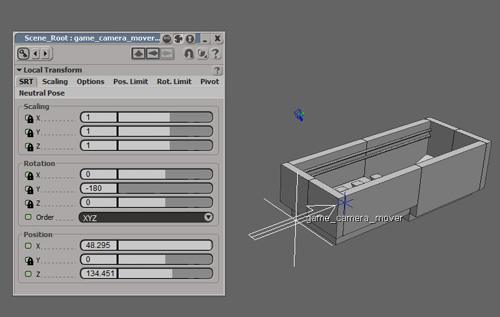
To prevent further unwanted adjustments, I also selected the mover-null, hit ctrl+k, and locked all the scale and rotational values, along with the the y-axis (once it is zero'd-off, that is). Now by moving the null I can move the camera like in the game, without worrying about it changing height, tilt, or rotation. The viewport can now be set to use this camera, making it pretty much WYSIWYG.
Alternatively you could try creating the 75'fov camera, deleting the interest, rotating it to the 60' tilt and translating it 416 units in height. Values would still need to be locked in afterwards, so the set up is still the same.
Misc:
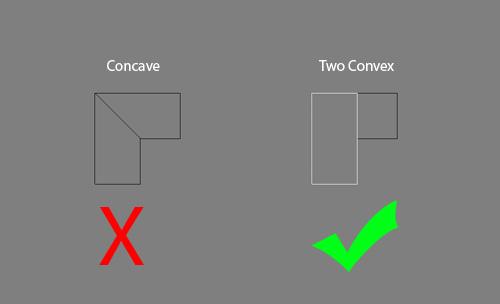
You're going to want to keep all your shapes convex and solid (water-tight/no open edges) as if they were a brush in Hammer.
This means you're going to end up with a lot of meshes in the scene, so I find it helps to keep things organized by parenting the brushes to a null, in order to help isolate them from other props or measuring guides.
This makes it easier to select the brush geometry, and freeze off the transforms prior to export (and to help prevent you from exporting the other objects by mistake).
Measuring Units:
1 Unit in Softimage = 1 Unit in Hammer. For more information about various tools for measuring props and maps for the Source Engine in XSI, see this tutorial


Um its easier to to this in hammer :P
Depends. For me - not really.
If you're used to working in Hammer and have never touched a modeling program, it wouldn't be worth the switch. Otherwise Hammer has very basic modeling tools available (and what I would call absolutely horrible viewport navigation toolset in comparison). Anyone familiar with working in a 3d app like Softimage could flesh out a map in it much faster and with greater ease than trying to do the same in Hammer. There are listed cons to this method; being harder or slower is simply not one of them.
by viewport do you mean the camera perspective? I've frankly had -no- problems using it (frankly, I've found Unity 3.0's editor camera the most difficult to use.)
As to the concept as shown in the tutorial -- this would be even better if it were for something like Star Wars: Battlefront 2. Some of the best maps in that game are just modeled (and I understand Softimage is supported, although you need to have something like 5.2 or older to modify most of the animated assets that are already in the game).
wow didn't even know that you could use Softimage xD
WOW THANKS. I've been working with softimage for the past couple of days. Didn't know you could do this!
I have problems on exporting the level - Hammer removes half of my meshes on opening. Any suggestions?
You have to keep the shapes convex like brushes in Hammer (it will remove meshes that are concave). So if you have an L-shape, you'd need to split it into two convex models.
Willmuto.com
I've now edited the tutorial to include an example