Tutorial written by Ricebug. Mirrored here for archival purposes. Note his example file/textures have been lost to time, however all of the images for this tutorial were preserved.
Acft Maint, Pt 2: Sky Box
Based on Q3Radiant Build 201
Part 2 in a Series, by Ricebug
In our last tutorial, we roughed out a cargo aircraft--it's not quite there yet. And before we do the hangar, thought must be given to the environment in which we want our level to exist. This tutorial will focus on creating a custom sky for that purpose. We'll create a "skybox," reminiscent of those done in Quake2. Then we'll add movement to the sky. Unlike Q2, however, where we brought down the Entity dialogue and entered env & skyname, skies are done all with shaders.
Skies are tricky business in Q3A. The axiom, "what you see is what you get" doesn't apply. It takes a lot of tweaking and getting intimate with your graphics software.
1. Setting Up
1. Under the baseq3 directory, create a sub-dir called env. (Short for 'environment'.) This is where we will put the six textures required for the skybox.
2. Also beneath the baseq3 dir, there should be a textures sub-dir, with a sub-dir called hangar. If you followed along in the first tute, this directory should already exist.
3. For the textures, grab the file here. The hangarsky.tga must go in baseq3/textures/hangar, while the other tga files go into the baseq3/env folder.
With everything in their place, we're ready to create the shader script that will make our sky box
2. Skybox Shader
1. Open up your fave text editor, drag your mouse over the following text, and copy them into the editor.
textures/hangar/f_line_sky
{
qer_editorimage textures/hangar/hangarsky.tga
surfaceparm noimpact
surfaceparm nolightmap
q3map_globaltexture
q3map_lightsubdivide 512
q3map_surfacelight 100
skyparms env/fline 256 -
}
2. Save the file into your baseq3/scripts dir as hangar.shader. Don't forget to add it to the shaderlist.txt.
3. I'm not going to go into detail on each of the parameters, since other writers have covered this territory before. I have highlighted two lines above, which bear some comment. The qer_editorimage textures/ command still confuses some people. To clear it up:
-
This line is so you can see the texture in the EDITOR, not in the game.
-
It can be a picture of your mother, a white square, with "sky" written on it. (Remember the generic yellow-and-white square that represented any of the Q2 skies? Same principle.)
-
The hangarsky.tga texture, however, will be used in the game when we add our "movement" effects. So we really don't want mom's face plastered like some ghost floating outside of our hangar doors.
4. The skyparms env/fline 256 - tells the rendering engine that there are some textures in the env folder, all beginning with the word fline (short for flightline). The '256' is how tall the box will be, although I've typed a zero and didn't notice any difference. The dash following the 256 says, "There ain't no near box." (The 'near box' apparently is never used in Q3A.)
The naming conventions for env files bear some attention. Apparently, as soon as the compiler sees the underscore (_) character, that, and everything following is "ignored." When I named my six sky files f_linebk.tga, f_linert.tga..., etc, the parser only read the 'f' character, expecting to find the bk, ft, lt, rt, up, & dn appendixes after the "_". Consequently, they were not showing up in the game. When I renamed the files fline_xx.tga, however, the problem went away. In Q2, the underscore wasn't even required. In Q3A, uniformity has laid down the rules for how we name our files.
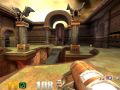
5. Go ahead and build a small test room and make the walls and ceiling, using the hangarsky shader. You should see a miserable, gray flightline, badly done by Yours Truly.
3. Adding Some Moving Mists
Not very impressive, was it? Leave the art to the artists, I say. What we'll do now is add that layer seen in most of the Q3A skies: transparent, moving clouds. This will accomplish two things: (1) It will add life to our world; (2) It will detract the players from the sloppy artwork done on the skybox. Here's the complete shader script that will do this:
textures/hangar/f_line_sky
{
qer_editorimage textures/hangar/hangarsky.tga
surfaceparm noimpact
surfaceparm nolightmap
q3map_globaltexture
q3map_lightsubdivide 512
q3map_surfacelight 100
skyparms env/fline 256 -

{
map textures/hangar/hangarsky.tga
blendFunc add
tcMod scroll .002 .001
tcMod scale 1 1
tcMod turb .1 .1 .1 .1

}
}Here's where the game will actually use the hangarsky.tga to create the rolling fog. Make sure you're running the game in 32-bit color mode to get the full effect.
The tcMOD scroll speed parameters are set to give us a very slow movement.
The tcMOD scale is set to display the graphic at its fullest size. The smaller these numbers, the bigger the graphic will display in the game. The bigger these numbers, the smaller it will appear. A setting of 3 3 will start to show a tiling effect of the graphic.
The tcMOD turb numbers are set to give us a push-pull-shrink-stretch effect evenly across the board. Since we want our environmental "fog" to have subtle movement, numbers larger than this will turn the fog into an unrealistic boiling, seething mass. Using very small numbers, the player will "know" there's movement, but he'll have to stand still and look to verify it. Unfortunately, his opponents will shoot him for "taking pictures."
Leave your shaderscript open and run the text editor with the game. You don't need to re-compile each time you change a shader script. This is a good way to check out how the tcMOD parameters will look in the game. Simply make the change, save the script, and use Q3Build to "Play" the map. (The current plugin version of Q3Build can be be launched as a stand-alone application for this purpose.)
4. Last Words
While others are taking the easy way out by using Q3A's killsky, you can start using custom skyboxes to give your maps something more original. The hardest part is creating the graphics. I would strongly recommend getting SkyPaintGE ('GE' means Gamer's Edition). Combined with just about any paint programs, SkyPaint makes creating skyboxes easy, and it automatically names your files with the correct orientation.
I must confess that I scarfed Papa Bongo's bongosky and made it a grayscale image for the purposes of this tutorial.