[page=Requirements]
Be sure that you've got:
- The full Qme version (the shareware one doesn't want to save a model file with 20+ frames)
- Frikqcc compiler
- QuakeC sourcecode
- Grunt model
- A painskin for the model
[page=First steps]
A Standard Quake QuakeC mod directory tree looks like that:
Quake - Your Quake1 Directory
- insert_a_name_here - your mod directory
- | - Progs - the models directory
- | - Sound - the sounds directory
- | - Src - the uncompiled sourcecode directory (no need to include it in a release)
- | - Maps - directory with your compiled maps
- | Progs.dat - the compiled sourecode file, generated by the compiler
- \ ... - other miscelaneous things
Set up a painskin directory inside your Quake 1 directory. Make two subdirectories inside the painskin directory: src and progs. Unpack the FrikQCC compiler and the QuakeC sourcecode into the src directory, and copy the soldier.mdl file into the progs directory.
[page=Adding a painskin to the soldier model]
In the next step, we'll add a new skin to the normal soldier model.
Start up Qme 3.0 and load the soldier.mdl file into the program.
In the upper-left corner of Qme, there should be an available skin list for the model. It should look like that:
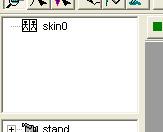
Click with your right mouse button on the list, and import the new painskin into the model. If the new painskin will appear over the original skin, move the painskin below it. Save the file. The model's painskin will be in the slot 1, and the normal soldier's skin will be in the default slot 0.
[page=Adding the new painskin code to the soldier]
Every .qc file in the QuakeC Sourcecode is like a normal text file, just with a different extension.
Open the soldier.qc file with wordpad or notepad, and find the army_pain function - it should be somewhere in the center of the file. The army_pain function itself is called every time the monster is hurt by something, ex. the player, or an other monster. Basically its purpose is to randomise the pain animation, but it'll also check the soldier's health amount and change the skin to the damaged one in our small mod when needed.
Add this just under the r variable declaration:
if (self.health < 15) // if the grunt's health gets under 15
   self.skin = 1; // change the grunt's skin to the slot 1 skin
Close the file. Compile the code with the FrikQCC compiler (frikqcc.exe).
[page=Ending]
Make a shortcut to your Quake executable (i recommend using a modern source port, like DarkPlaces) and add "-game painskin" as a command line parameter.
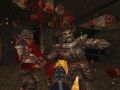
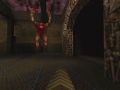
Start up Quake using the shortcut, and experience the new thrilling and brutal mod you've just made for the always living classic :)


Why not use QuakeME 2.3 instead?
Ftp.sunet.se
erm... i didn't know about it :paranoid:
Great turorial XD