Wilderland Rising: A Guide to the Kingdom of Rhovanion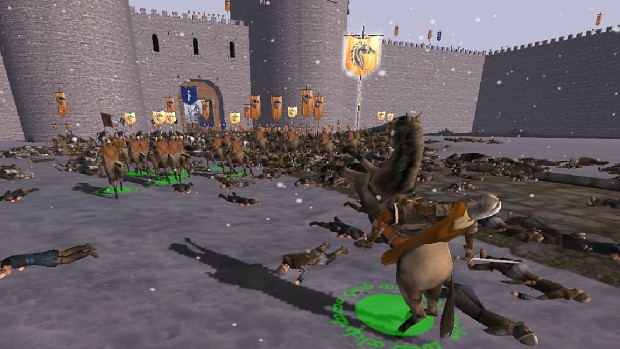
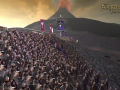
Above: rallying the troops for a defense before the gates of Dale.
Rhovanion joins the Beorning Chiefdom on the bottom rung of Northmen realms in the Dominion of Men. Both factions are relatively poor and undeveloped, and both command just 3 provinces at game start (Dorwinion has the fewest, with 2, but Dorwinion is a trade income powerhouse). But while the Beornings are at least shielded by the surrounding forests, mountains, and rivers, Rhovanion is exposed to attack from all directions.
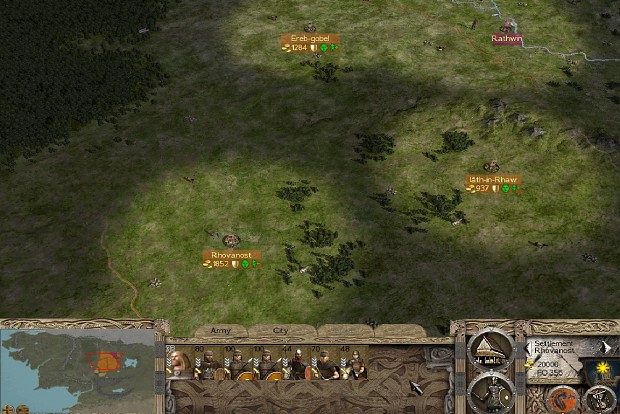
Above: Rhovanion's starting position. Note your Scout agent, in position near Dorwinion (hint, hint...)
Rhovanion's strategic vulnerability is exacerbated by its military … uniqueness. Put simply, Rhovanion's troops are not built for taking punishment in melee. Play them like a typical faction, with a battle line of infantry flanked by a few units of cav and backed by a sprinkling of missile troops, and you'll lose, or at best win a pyrrhic victory. You'll have to finesse every unit in battle to gain maximum advantage, rely on your skirmishers, and keep a tight rein on your cavalry if you hope to win with minimal losses.
So Rhovanion is a faction for players who enjoy unpredictability on the campaign map and who prefer to experiment tactically. It's also a faction that, in my opinion, certainly deserves its “Laughing at Live Dragons” difficulty designation.
Victory for the Kingdom means taking 20 provinces, including 3 immediately adjacent settlements that are held by independent peoples (rebels) at game start: Mid-deeping, Lith Morchant, and Braig Estolad. You have a choice, then, of how to approach your campaign as Rhovanion: grab these necessary settlements early and stay out of wars with major factions as long as possible, or push hard against your more organized neighbors from the very start.
The latter course of action is suited to an aggressive player, and is probably the surest path to victory. If you can pull off a devastating initial attack, you can quickly gain momentum against an AI faction and secure your position. Neighboring factions at the beginning of the game can all be found to the north and east: Dale, Dorwinion, and the Dwarves. Of these, Dorwinion is the likeliest target. Their units are similar to yours, making battles a relatively straightforward affair, and with some luck you can score a knockout blow in the early years by taking their capital, Belegant. In addition to being considered a Homeland for you (making it much easier to develop), Belegant is an incredibly wealthy and productive town, and with its pre-built high timber walls it is easy to defend. Take it early, hold it, and develop it – then connect it to a trade network and watch the mirian flow.
Even though Dorwinion's other settlement, Rathwin, is closer to you, it's worth the risk of bypassing Rathwin entirely and making straight for Belegant. Once you threaten their capital, the armies of Dorwinion will typically ignore your lands and scramble to defend Belegant, or try to take it back from you. Once you've beaten them in the field, you can take Rathwin at your leisure, or leave it as a buffer between you, Dale, and North Rhun.
Because make no mistake – Dale is extremely likely to attack you, regardless of your diplomatic overtures. The Bardings of Dale begin the campaign at war with the Chiefdom of North Rhun, and due to their strong alliance with the Dwarves this war often lasts for some time. But they'll still find the opportunity to take a swing at other likely targets – and this means you, especially if you've extended your frontier with Dale by taking Rathwin.
Dale's provinces count as Fiefdoms for you, making them a reasonable target, but not so attractive as Dorwinion's lands. Of course, it doesn't quite matter, since you'll need to take them anyway if (when) you end up at war with Dale. And Dale's lands offer something else for a desperate king of Rhovanion: the ability to train Retainer Longbowmen. Available at the highest-tier Military Development building (Hosting Halls), these archers out-range and out-damage your own Rhovanion Hunters – which is excellent, since ranged units will play a major role in your forces.
As noted above, Rhovanion's military is not designed for prolonged melee. Over the ages, the people of Rhovanion have been variously conquered and enslaved; their victories have often relied upon stealth, sudden uprising, and hit-and-run tactics. The “Wilderman” bloodline that is so prevalent in your family members reflects this, granting bonuses to campaign movement speed and cavalry command. In battles, then, your units will want to wear down their opponents at range, skirmish to tire them out, spring tactical ambushes, and master the hit-and-run cavalry charge.
It is no surprise, then, that perhaps the most important native units for Rhovanion are the Foresters and March-wardens – from the bottom and top tier MD, respectively. Foresters are skirmishers, with deadly javelins but little staying power in melee. Still, at 80 men per unit they can entangle other units at need (especially enemy riders), giving your own cavalry time to get into position for a deadly charge. The March-wardens are your war-winners. It may seem strange to say that of a relatively no-frills medium cav unit, but March-wardens are the heaviest cavalry available to Rhovanion, and they have the speed and charge to do great damage to most enemy troops – as well as the armor and defensive skill to take relatively few losses in melee. This means you can let the March-wardens fight for longer than you'd feel comfortable with your Scouts, without having to retrain them nearly as frequently.
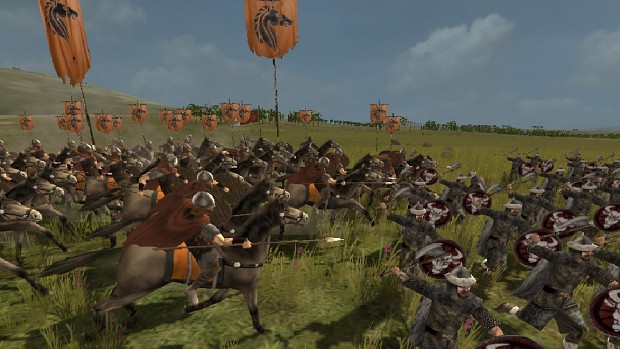
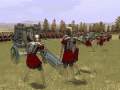
Above: March-wardens strike an Easterling flank.
The requirements for March-wardens are steep. You'll probably want to dedicate Rhovanost to training March-wardens and little else, lest you drain the population. Population loss is a huge problem for Rhovanion, since most of your troops are so fragile and will require retraining after most battles – hence the focus on ranged units and tough riders. (You will also need to invest in building lines that increase population growth, such as markets and herbalists.)
Units of secondary importance include your basic bowmen (Hunters) and Scouts. Since it's unlikely that you'll be able to train March-wardens in great numbers until late in the campaign, you'll have to rely on Scouts for support. These riders lack a shield, and are vulnerable to arrows and... well, everything, really. Choose your charges carefully, and ensure their spears are lowered when they make contact with the foe – if not, pull them out and try again. Using your Scouts effectively is complicated by the fact that your infantry troops are not strong enough to act as a proper “anvil”. So you must get your Scouts out and around the enemy flanks quickly, so they can make their charges before your infantry starts taking heavy losses.
Another good use for Scouts is as an anti-cavalry force. Send several Scout units to charge into enemy riders; their spears can do surprising damage, even to enemy generals. But use care when sending them after archers or skirmishers. Many ranged units in DoM are not as “soft” as you might assume, and it's difficult to pull off a really devastating charge against units that are skirmishing away from your cav.
However you use them, you'll want plenty of Scouts in your armies (stiffened by as many March-wardens as you can afford). Aim for 6 units of Scouts or more in a stack – there's little point in bringing just 2 units to a battle, since Scouts must work in tandem to isolate and charge enemy units from multiple sides.
Members of Rhovanion's noble houses ride into battle as well. These Rhovanion Nobles are a hybrid unit, armed with spears for the charge and javelins for ranged work. They are not as durable as some bodyguard units, so make good use of their javelins before engaging. And take careful note of your commanding general's traits, especially those that affect hit points. You don't want an Over-bold, Under the Weather general leading a glorious charge that ends in his death and the routing of your forces. If you use your general in combat, have him accompany March-wardens or other riders.
Melee infantry for Rhovanion includes Spearmen and Axemen. I confess I have little experience with the Axemen. The Spearmen are 100 men per unit, with a nice and symmetrical upkeep of 1 mirian per man – the perfect garrison troops. They can also be of use in battle, especially as a way to occupy enemy riders or weak soldiers like the Easterling Warband, but they will take heavy losses. The Axemen are 80 men per unit – armed similarly to the Axemen of Rhun, but fewer in number, lacking the latter's Warcry ability and less sturdy in melee. Building your army around your infantry will result in heavy losses even when you win – and that requires more retraining, which drives down population levels and income.
One exception here is the Vassal Axemen, available to you in Rhun's provinces. A copy of the Axemen of Rhun, these troops are worth considering for regular duty in your armies. While they are stronger than anything similar you can train, they are a second-tier unit for Rhun, so don't expect miracles. Still, should you find yourself advancing into the East, they are worth the infrastructure requirements.
To see these units in action, we'll look at an example of a mid-campaign battle between Rhovanion and Rhun. The battle takes place somewhere south of the Sea of Rhun, in open and flat terrain. Such battlemaps are a mixed blessing for Rhovanion – on the one hand, open terrain is good for cav. On the other hand, your ranged troops would benefit from some hills, and your infantry might prefer the cover of woods in order to attempt an ambush or two.
My forces in this battle consist of the following:
- 1 family member (FM), with good combat traits
- 4 March-wardens
- 4 lighter riders (a mix of Scouts and mercenary riders available in Rhovanion)
- 4 archers (a mix of mercenaries and Hunters)
- 4 Foresters
- 3 melee infantry (2 Spearmen and 1 Axemen)
Note that the Foresters (and archers, at need) can act as melee infantry in a pinch.
The enemy forces are predominantly melee infantry, with 8 Axemen of Rhun, 7 weaker spear units (Easterling Warband and Nomadic Watchmen levied in Khand), a unit of Easterling Skirmishers, and a couple of Eastland Raiders (light cavalry), one of which acts as captain.
Despite having more units present, we are outnumbered in this battle.
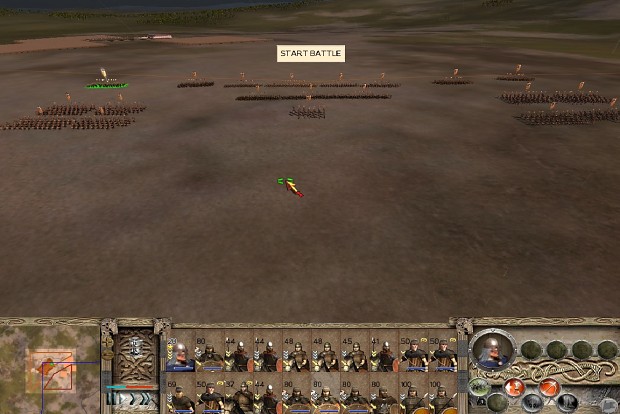
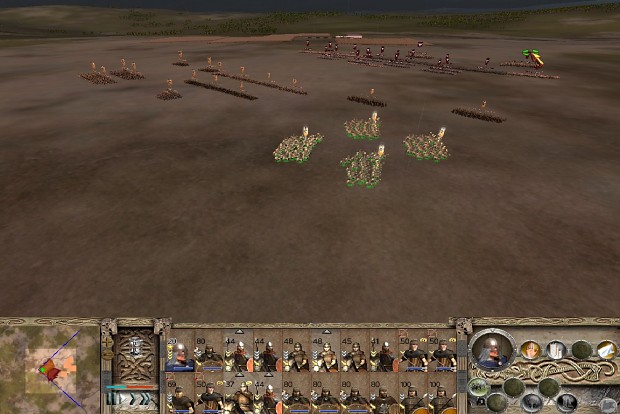
I deploy my troops as shown below. My archers occupy the front line, in the center. Some distance behind them is my small line of infantry. I like to leave some space for the archers to skirmish backwards without running into my own infantry, since the AI will often “test” your lines and then withdraw before committing to an attack. Giving your archers some room to skirmish allows them to make clear shots against any withdrawing foes.
Also in the front line, on the archers' flanks, are my foot skirmishers, the Foresters. Note the considerable gap between them. This gap allows one unit to skirmish away from an approaching foe, while the other unit stays in place to continue casting javelins.
Cavalry is deployed on each flank. Here, I have my March-wardens divided between the 2 flanks, occupying the first line of cav. Behind them are the Scouts/mercenary riders. Different deployments are possible; sometimes it's preferable to overload one wing with all of your cav. In this case, though, there is a lot of enemy infantry to deal with, and I want to be able to hit them whenever opportunity arises.
The general is positioned in the center, with skirmish turned off and fire at will turned on. He will join up with one or other bloc of cav, as circumstances dictate. As a tough FM with some good hit-point traits, he's not afraid to get into combat, and I'll try to use him against the enemy captain.
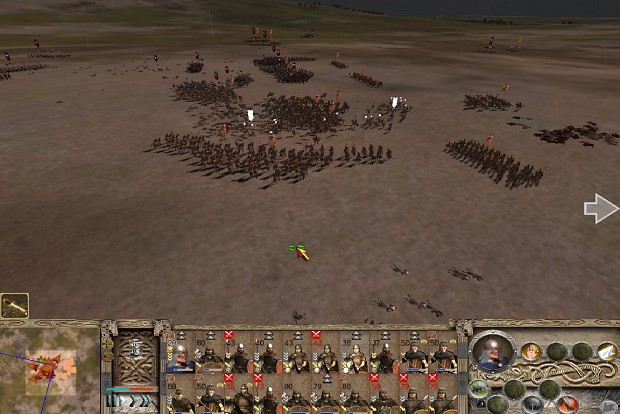
The next image shows the enemy army approaching. I move my right cavalry wing outward to entice some enemy units to follow (and turn their flanks toward my archers).
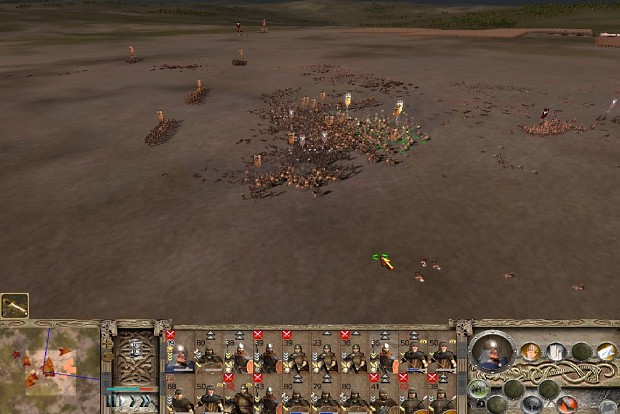
The next shot is taken from my left-wing, looking across the line of battle. Infantry is now engaged, and my cav has been busy. Note at the top of the image, in the far distance, my Foresters skirmishing away from some enemy infantry – keeping them tired, peppered with javelins, and away from the main fight. My right cav wing, after some successful charges against enemy forces, has retreated behind my lines and joined with the left wing, which is routing some enemy units in the foreground. I'll need to quickly destroy these axemen in order to aid my infantry – in the middle distance – before they rout. At the far left, you can just make out some of the enemy captain's unit of riders. I'll dispatch some March-wardens to deal with him.
Below, the last fragments of the enemy battle line are routed by my massed cavalry. My infantry have taken around 50% casualties, but my March-wardens, despite a lot of fighting, have taken very few. The fight isn't quite finished, however – note the top-down map, which shows several enemy units still chasing my skirmishers. They'll make short work for my victorious riders.
Campaign Strategy
If you don't want to start a war with your neighbors immediately, you need to decide which independent settlement to attack first – before those neighbors get there.
Thrimfeld (the East Bight) is a relatively safe choice, in that it is not likely to be contested early in the game. The Beornings or Dale may take it if you dally, but if you get there first, it is unlikely they will start a war over it. Contrast this with Mid-deeping (a target for Adunabar), Lith-morchant (ditto), or Braig Estolad (Rhun). The downside is that Thrimfeld is an Outland for Rhovanion, whereas the other 3 are all Homelands. Still, to my mind it's good to establish a relatively quiet corner of your realm early on. Othewise, you may find that, in addition to being sucked into wars with Adunabar and Rhun, your northwestern borders are under pressure from other Northmen.
The difficulty of Rhovanion's position is that threats are liable to come from 2 or 3 directions at the same time. AI factions have a way of teaming up on the player, so if you begin a war with Rhun you're soon to find Dale invading from the north. There's little to be done about this, but to some extent you can decide which enemies to pursue and which to leave for later.
For example, Adunabar often strikes north from Mordor, taking Lith-morchant and Mid-deeping. Adunabar is a tough opponent for Rhovanion, since their troops are not likely to wilt under missile fire or cav charges – so you don't want them getting too big. Alliances with Rohan and the Reunited Kingdom should be easy to obtain, and together you can begin to squeeze the Cult. After taking Mid-deeping and one or 2 other settlements from them, you may be able to force Adunabar to accept a ceasefire and trade rights – which is good, because by this time it's likely another faction has started a war with you.
It's possible to have a short-term war with Adunabar because their central location makes them susceptible to a lot of attention from other factions, and this in turn makes them likely to want peace. Compare this situation to Rhun. Rhun seems like a natural foe for Rhovanion (and it's likely you'll war with them eventually), but their position in the East is quite secure. Rhun begins allied with Khand, and they are not guaranteed to pick a fight with Adunabar. That leaves North Rhun and Dorwinion for them to fight, but both of those factions are often already pressured by Dale (or you). So if you begin a war with Rhun, chances are good that the Easterlings will have lots of land and few foes – a perfect recipe for a long, drawn-out war. And that's exactly what you want to avoid in the early game.
So, save war for Rhun until it's inevitable. Instead, choose the more profitable route for initial expansion: north.
Dale is a good target for an early war for several reasons. They're Northmen like you, so the populace of any captured towns is likely to be well-disposed to your conqueror's tread. They're bigger than you, but not unmanageably so. Their lands are well-defended, surrounded by mountains, forests, and rivers that you can easily hold against other foes.
And they're really rich.
Of course, thanks to their strong alliance, going to war with Dale means going to war with the Dwarves. Most of the time, though, this is just a formality. The Dwarves will hardly ever venture out from their mountain holds to attack you, with 2 big exceptions. If you send troops into their territory, expect the Dwarves to attack. And if you besiege the city of Dale, a Dwarven host from Erebor may well attack your forces.
A more common concern is bribery. The Dwarves will use their wealth to snap up any armies or towns of yours they can. The best defense against this is agents of your own. Keep an Emissary (or Scout, if you can) in every town, and use agents to escort troops as you send them back and forth across your land.
You may consider taking the fight to the Dwarves yourself. For the most part, this is a very bad idea. The Dwarves have nothing to do but train lots of astoundingly well-armed fighters and make money. But the Dwarf-hold of Narag-zigil is right next to your homelands. You may think that bringing it under your rule would be nice – after all, you're not even benefiting from the trade to be had if you're at war. Well, it's your funeral...
Actually, you may be able to pull it off. Narag-zigil is isolated from the rest of the Dwarven Kingdom. If you're lucky, they will have trained some troops and sent them on patrol, leaving the settlement itself relatively ungarrisoned. Bring a full stack, including a lot of Foresters and March-wardens, and hope you can assault before any reinforcements show up. If you can capture the walls and rain down javelins, then you may see some success with repeated cav charges. Even so, prepare to take tremendous losses.
The rewards for taking Narag-zigil are worth considering this bold move, if you can spare the troops. Even with a tiny population, it yields incredible trade riches, augmented by two vast Dwarf-hoards – which you can sell off for 20,000 mirian each if you desperately need the funds. And the walls are strong enough to withstand a huge assault … maybe even the assault of that Dwarven army you bypassed on your way in …
Gaining new territory can be difficult for Rhovanion, since your army is not designed for assaulting fortifications. You may prefer to besiege a settlement and then wait for the enemy to send out a reinforcing army to attack you. This turns the battle into a defensive one, and, if you kill the besieged captain plus most of his forces, you may get the town without having to go over the walls.
Another trick is to look for opportunities on the campaign map. It's rare that the AI will leave a town entirely ungarrisoned, but sometimes you'll see an AI army standing adjacent to a settlement that you'd like to capture:
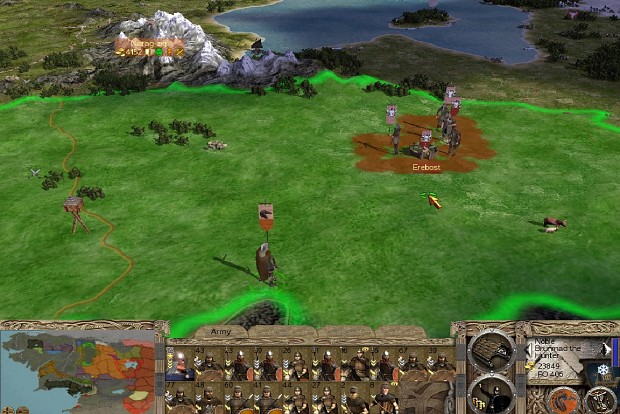
If you play this right, you can get the town without ever having to lay siege. Attack the army outside, and the town's garrison will show up as reinforcements. If you win the battle – and kill every foe – you can walk into the town unopposed. It's not enough simply to destroy the garrison force here; since you're not besieging, if some routers from either army are allowed to escape the field, they will retreat to the town, forcing you to settle in for a siege.
The late campaign offers some unique challenges. By this time the northern parts of your realm are likely secure, but you may be busy fighting a vast Easterling chiefdom and just need a few more settlements for victory. Keep an eye on events in the south and west. You probably haven't been able to influence any wars south of Mordor or west of the Misty Mountains, and around this time you may begin to see a conquering Harad or Dunland approach your borders. War with another giant, rich faction can set you back several years. So be sure to move on the campaign map the same way you do in battle: quick, decisive strikes. Snap up any likely settlements to get to your 20 before these behemoths decide to plow into your lands, and claim your Rhovanion victory.
Rhovanion is a lot like Harondor in its reliance on cavalry and skirmishers. Where it differs is in the openness of its strategic options. The flip side of not being hemmed in by sea, rivers, and mountains is that there is a great deal of variety in how any given Rhovanion campaign may play out. Make a false move, and your new kingdom will vanish as surely as did the ancient realm of Vidugavia. But strike boldly and feint when necessary, and you may establish for yourself a lasting dynasty in the wide, wild lands beyond the Greenwood.
Excellent read, thanks so much for taking the time to write this for others :)
Thank you, it's my pleasure!