Tutorial Description
In this Tutorial, you'll learn about :
- Voice recording : Create a voice as a Wav file
- Soundscript : Use that voice to make it a Soundscript recognizable by the engine as a "Game sound" (.Wav are what we call "Raw sound") and on which it's possible to add an attenuation and an origin (sound is coming from the suit, another npc, etc...)
- Subtitle : Give your sound a personalized caption (text, color, etc...) used for subtitles
Create a voice
To register your voice, I use Audacity. It does all I need, with a lot of easy-to-use tools.
It even integrates a very helpful "Noise Removal" tool.
Of course, it's your choice whether you use Audacity or not, but here's a walkthrough coming along with that program.
If you know how to create your own Wav, you can skip this part and go directly to the Create a Soundscript part.
1) Record your voice until you get the perfect sound record (remember to speak slowly)
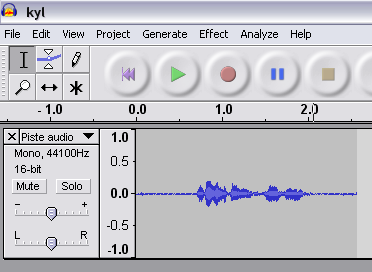
Note : According to the Valve Dev Wiki, speech files should be 4-bit Microsoft ADPCM ("MSADPCM") mono .WAV files at 44kHz (44100Hz). Well, my file is 16-bit and it works perfectly.
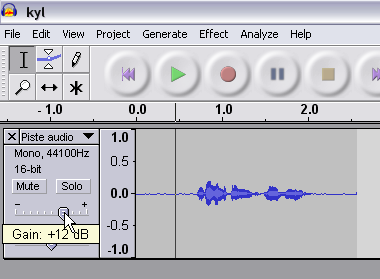
2) Adjust the volume.
I have to add at least 12dB, but this probably depends of your micro.
Note : At this point, you might want to test the volume of your voice in game... which is a pretty good idea !
It's always possible to slightly modify the volume afterwards, but you'd better have a correct volume right now.
The best way to know if your sound is loud enough, is to compare it to an existing Half-Life² voice sound and see if you're good. These sounds can be found in the gcf files.
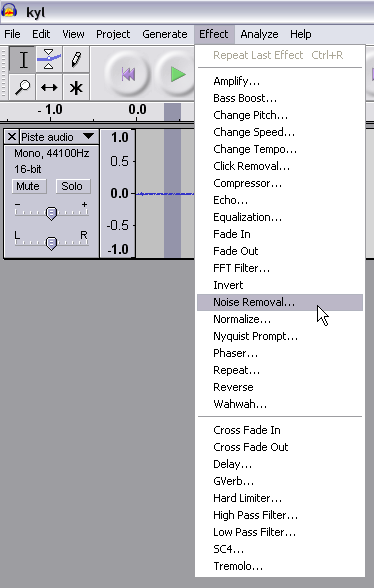
If you hear some noise as you increase the volume :
a) Select a small piece of your record where you can hear only the noise (not your voice)
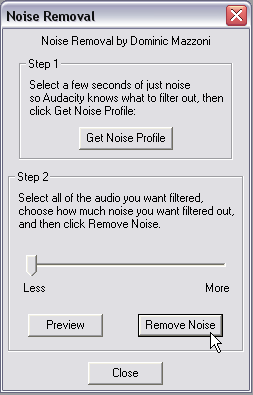
b) Go to Effects > Noise Removal
c) Press the "Get Noise Profile" Button
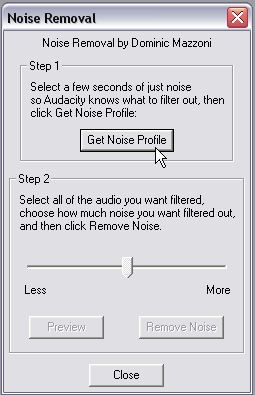
d) Select your whole record (CTRL + A)

e) Get back to Effects > Noise Removal
f) Move the horizontal scrolling bar to the extreme left (otherwise your record will be way too much truncated)
g) Finally, press the "Remove Noise" button
3) Now, select the piece of record you want to save as a Wav (I often have rubbish at the beginning and end of the recorded voice)
4) Clic on File > Export Selection As Wav...
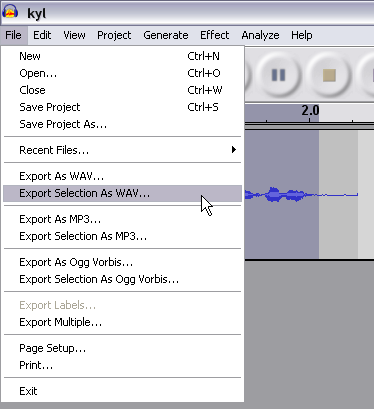
Name it, and save it.
Now, we have the raw voice ! Yeah !
Create a Soundscript
Definition : A soundscript is a little script written in a txt file that will associate information to the sound we just recorded, like the name, the volume, the channel used (source), etc...
1) Go to the "yourModFolder\scripts" folder
2) Open the file "game_sounds_manifest.txt" :
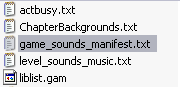
This manifest will tell the engine which files contain the soundscripts and which must be read in order for the sounds to be preloaded / precached.
You'll see something like that :
game_sounds_manifest
{
// HL2 World, Ambient Generic, Items, Physics, Vehicles
"precache_file" "scripts/game_sounds_world.txt"
...
// Game level sounds
"precache_file" "scripts/level_sounds_eli_lab.txt"
...
// NPC Sounds
"precache_file" "scripts/npc_sounds_eli.txt"
...
}
The manifest is filled with the name of all files containing the soundscripts used by Half-Life².
We don't need them, so...
3) Write inside the manifest :
{
// My Custom NPC Sounds
"precache_file" "scripts/npc_sounds_kyl.txt"
...
}
We say that when Hammer, FacePoser or the game starts, it should preload the Soundscripts inside the file "scripts/npc_sounds_kyl.txt".
If you have many actors, you can make one file per actor.
4) Save the manifest, and close it. We won't need it anymore.
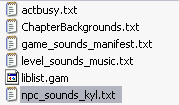
5) Create the file "npc_sounds_kyl.txt" in the "scripts" folder.
6) Open it, and let's create a soundscript for a normaly speaking actor voice.
Here's the structure I use :
{
"channel" "CHAN_VOICE"
"volume" "0.6"
"pitch" "PITCH_NORM"
"soundlevel" "SNDLVL_TALKING"
"wave" "rebellion\vo\level01\kyl01.wav"
}
...where :
npc_kyl.01.kyl01= Name of the soundscript
CHAN_VOICE = Channel used (source)
SNDLVL_TALKING = Sound attenuation / effect
rebellion\vo\level01\kyl01.wav = The path of the sound inside the yourModFolder\sounds folder
Learn more : The properties of each Soundscript keyvalue and its effect.
Tip : If you want the voice to come from the player, as if he was speaking, use :
{
"channel" "CHAN_WEAPON"
...
"wave" "#rebellion\vo\level01\kyl01.wav"
}
CHAN_WEAPON makes the sound come from the player / suit / weapon.
# before the sound path specifies you don't want any DFX on this sound (resonance when you're in a cave, etc...)
Learn more : Sound Characters
7) Save and close.
Now, we have a soundscript called "npc_kyl.01.kyl01" which can be used within the source engine.
Note : Now, should Soundscripts be created for every sound you used in your Source games ? That's really up to you. The advantage of Soundscripts is that it allows you to fully control the properties of your sounds. This can be useful for background music (no effect), or to control the Sound level (quiet or very loud) of your sound, and is an obligation for subtitles.
Learn more : Soundscripts
Give the Soundscript a Caption
The caption is simply the text of your voice, used within FacePoser or to be shown as subtitles in Half-Life².
1) Go to the "yourModFolder\resources" folder
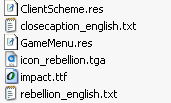
2) Open the file "closecaption_english.txt"
It should look like this :
{
Language "English" //(or "French", etc)
Tokens
{
// Captions defined here.
nameOfSoundScript "This is the caption."
}
}
3) Write the caption of our Soundscript :
{
Language "English"
Tokens
{
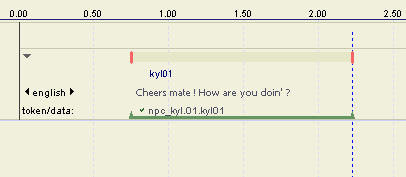
npc_kyl.01.kyl01 "Cheers mate ! How are you doin' ?"
}
}
... where :
npc_kyl.01.kyl01 = The name of the Soundscript
Cheers mate ! How are you doin' ? = The caption of the sound
Tip : I wrote before the caption (but inside the ""), which will give a green color to the text. Play with the RGB color values to get the color of your choice.
It's also possible to use (without space between < and the letter) < I>text< I> for italic text, < B>text< B> for bold text and to return to the line. Note the capital letters.
3) Save and close.
Note : Obviously, caption are useful only for voice sounds. Don't bother to create a caption for environment sounds.
Learn more : Closed captions
Congratulations !
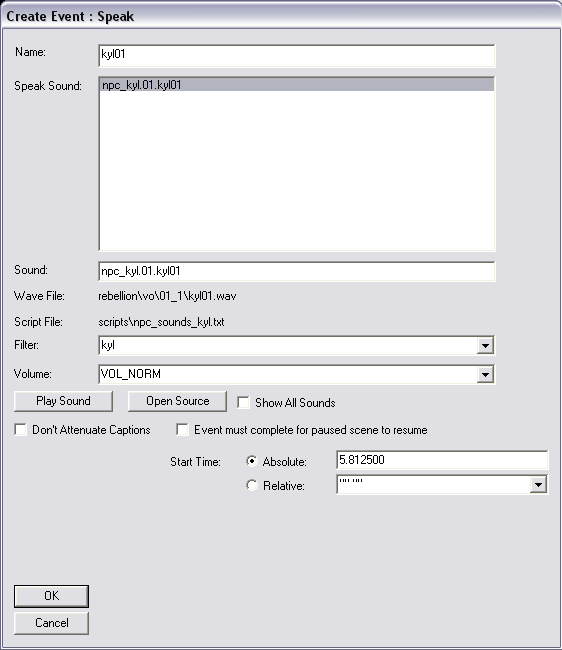
At this stage, you have a correct Soundscript wich can be used within FacePoser and Hammer.
FacePoser :
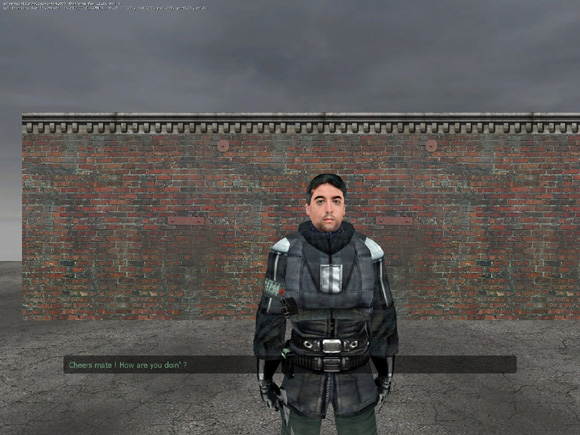
Hammer :
In the next Tutorials, we'll learn how to create a Faceposer scene, using soundscripts.
Until then, enjoy and have fun !
Kyl'

I've made a soundscript but the sounds still dont appear in faceposer.