
1. Creating an animated first person model for your weapon (skip this if you use default first person models)
A) Setting up Static Mesh Emitter
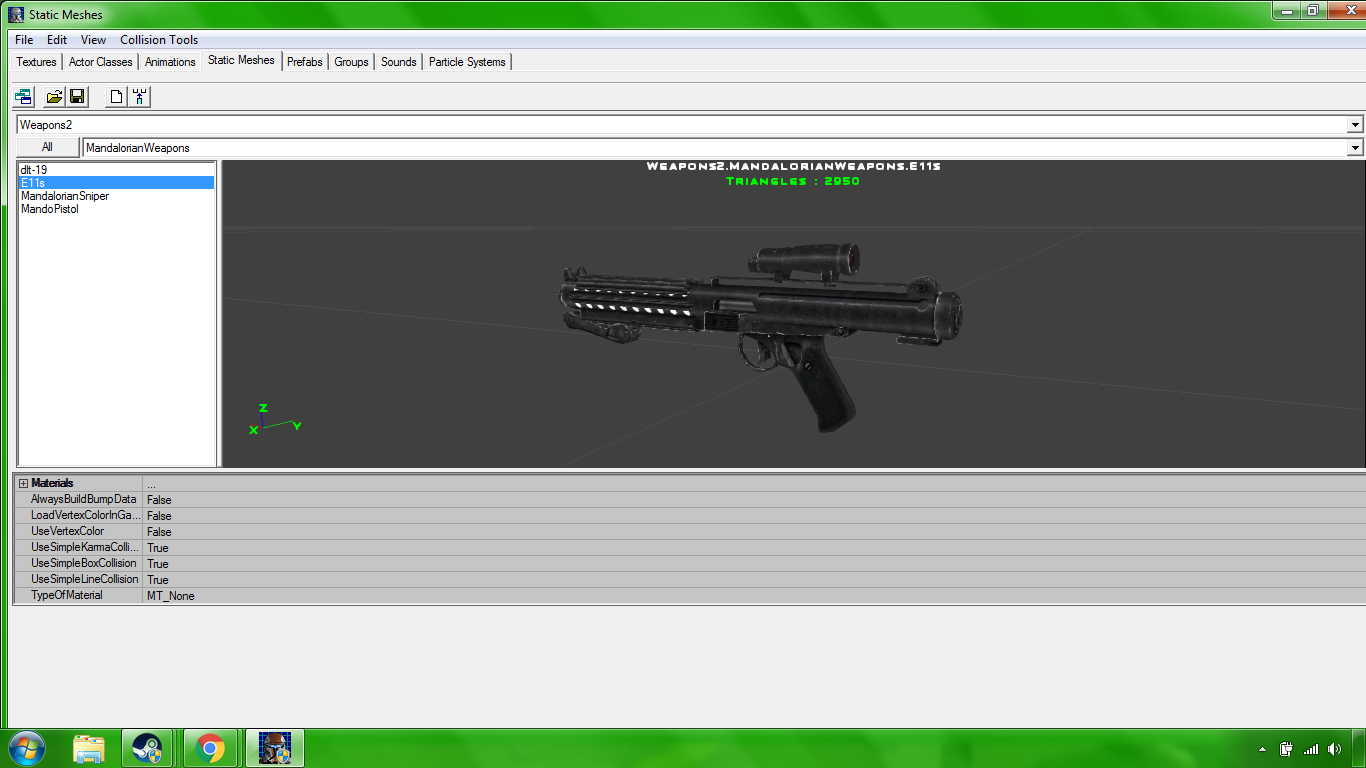
Let´s start with a simple static mesh of your choice . For this tutorial , I am gonna choose E11.
Note: YOUR STATIC MESH MUST HAVE COLLISION! IF IT DOESN´T , CLICK COLLISION TOOLS AND CHOOSE ONE OF THE DOP OR OB FUNCTIONS!
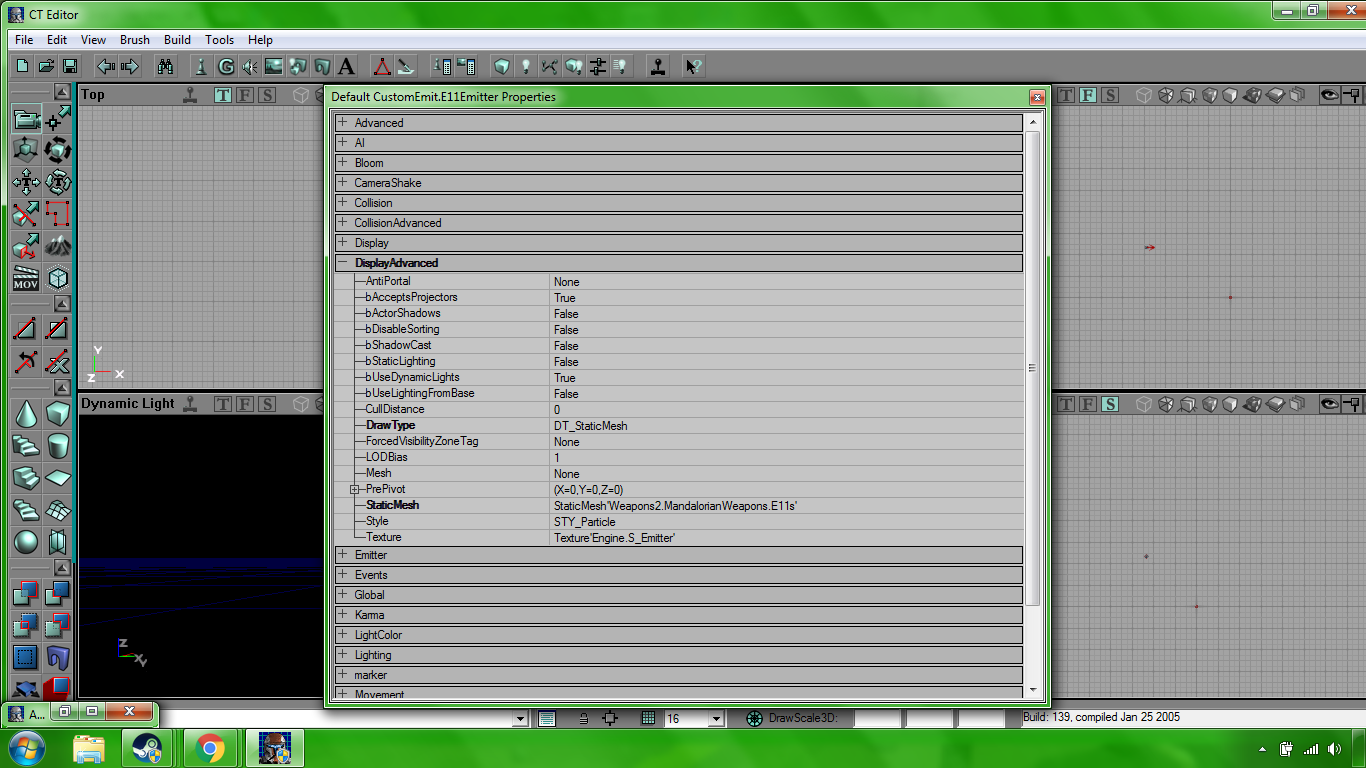
Ok , so we got our Static Mesh . Let´s get to the emitter. First , go to actor Classes , Right Click Emitter and click new. Name your emitter like you want to . I am gonna name mine "E11Emitter" . I suggest you creating a new package and using it for all first person static mesh emitters. My package will be CustomEmit. After creating the new emitter , it´s properties should pop up. Go to Display Advanced and set Draw Type to Static Mesh and Choose your static mesh in the static mesh browser. Then go back to your emitter´s properties and press "Use"
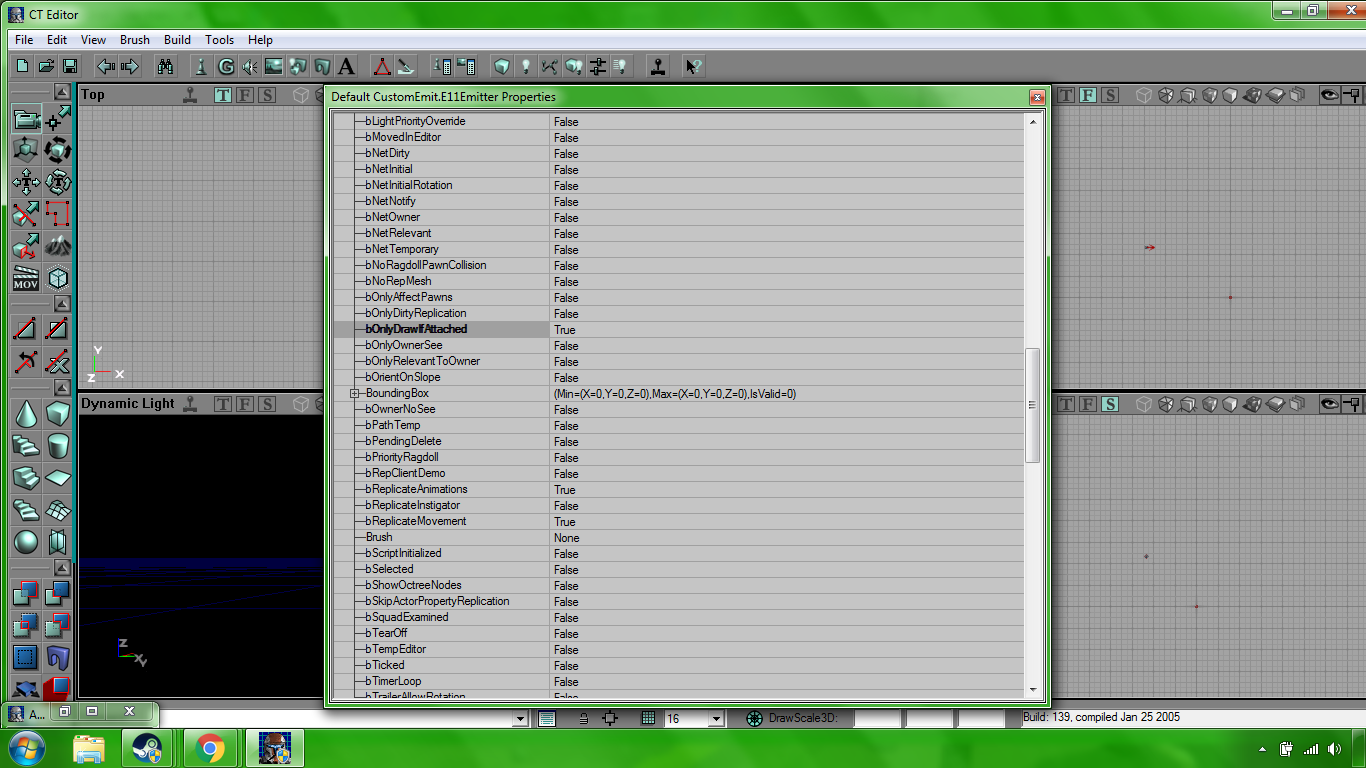
After that , click hidden and scroll down until you see "bOnlyDrawIfAttached" . Set it to true. Then go to display and set bUnlit to false.
Your Static Mesh Emitter is now ready . You can move to the 2nd part , animations.
B) Putting your model on a set of animations
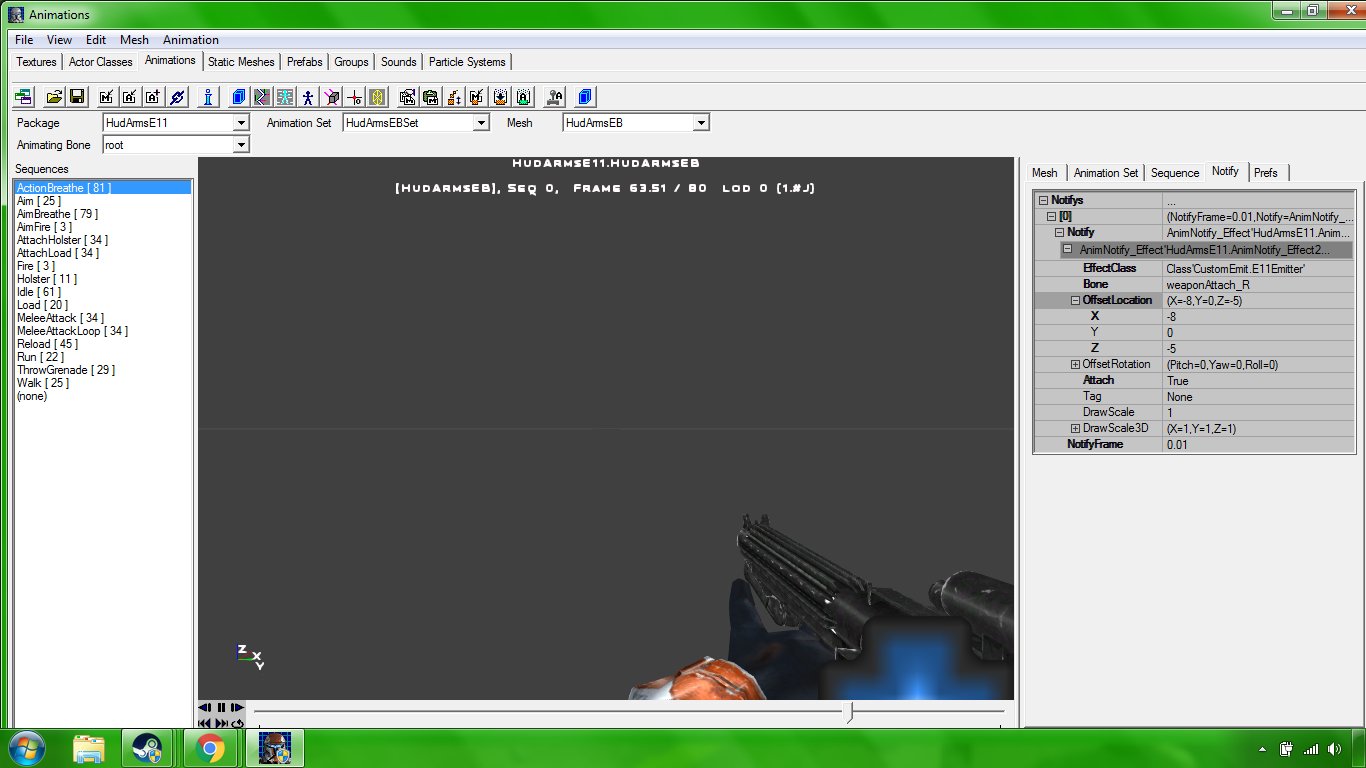
Now , take the animations you want to set it on. You can take animations from a mod or you can copy default HudArms.ukx , copy it and rename all the meshes and animations in it. I am gonna use DC-17M Animations.Go to mesh , then skin and set all the textures except for the Shader'HudArmsTextures.HudArms.HudArms_Shader' to FinalBlend'HUDTextures.Effects.DefaultInvisible' .Then click on actionbreathe animation , notify , and then add notify , set it to effect , then pick your emitter , set bone to weaponattach_r and then simply set attach to true.Set the NotifyFrame to 0.01. Pause the animation and then unpause and set it to loop to see your new model. If the model is mispositioned , simply change the X , Y and Z values in OffsetLocation . If the model is flipped backwards , sidewards , downwards , upwards etc. , you can change the values in OffsetRotation , too. You can press View and then HUDArmsView to see the animations from player perspective. Select Fire animation add notify on frame 0.01 . Set it to effect ,choose muzzle as a bone and set effect to the muzzleflash effect you want to use. Then change the OffsetLocation values until the muzzle flash will be in correct position. When you you are done , click save and if it asks for overwrites , click yes.
2. Creating the Weapon actor, pickup and third person attachment
A) Creating the Weapon Actor.
This is quite easy part and fun part to play with. Go to Actor Properties , then uncheck placeable classes only , click the plus near the inventory to expand it. Then click the plus near Weapon. You will see lots of weapon actors. You need to choose one with properties close to your weapon´s function (Bowcaster has randomized electrified attack , DC17M is just normal blaster rifle , CTWeaponRecharging are infinite ammo weapons , DC17M Sniper Attachment is sniper rifle , DC17M Anti Armor Attachment is grenade launcher , Wookie Rocket Launcher is guided rocket launcher , Trandoshan SMG is SMG ,Trandoshan Rifle is a handheld MachineGun , Concussion Gun is 1 shot mag Energy Weapon etc.) . Right Click the weapon you have chosen and click new. Name the new weapon like you want to and put it into your package for custom weapons. Go to DisplayAdvanced and set your animations as the Mesh. Then open weapon category and configure it like you want to.
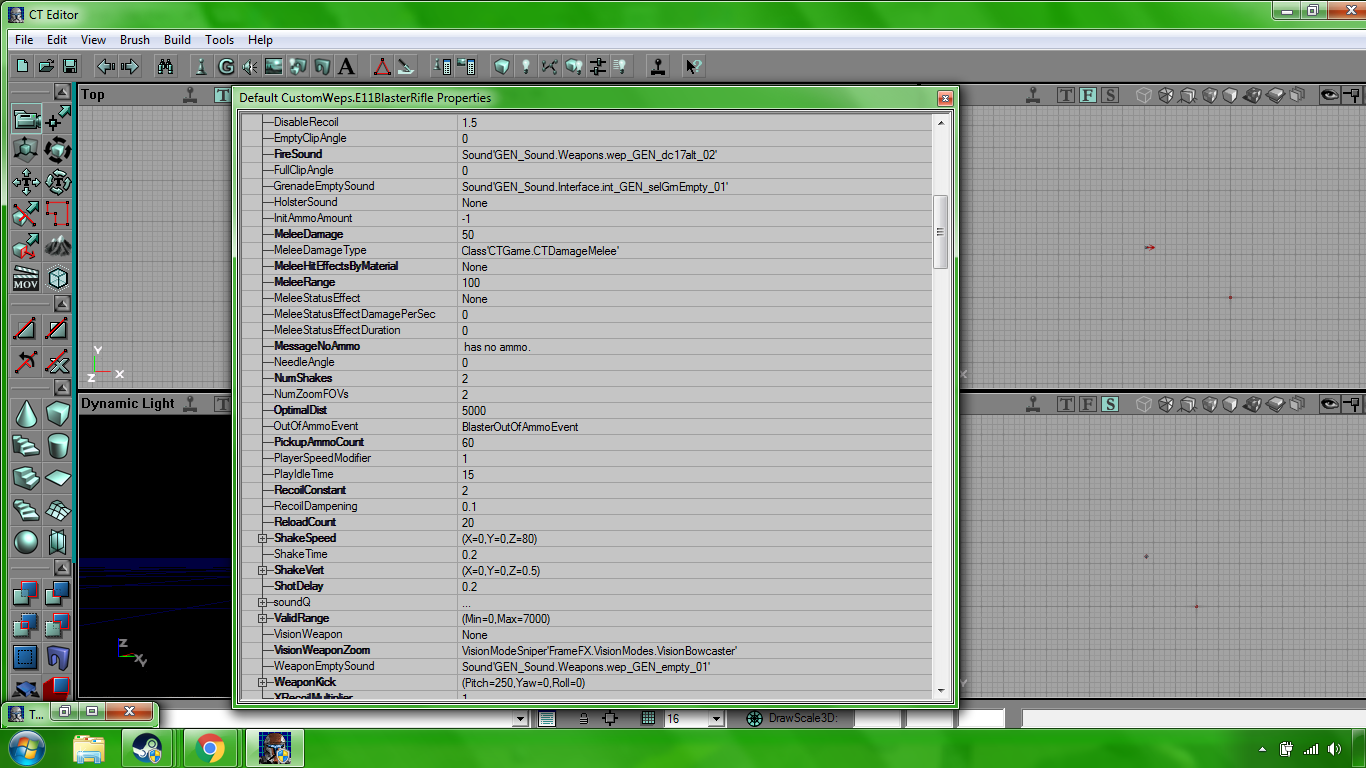
So now , open hidden category. Set the ammo to the type of projectiles you want your weapon to shoot (DC17M Blaster Ammo are blue blaster shots , DC17M Ammo is sniper rifle projectile...) . Set the muzzleclass to blank system , inventory group to 5 and weapontype to secondary.
Let´s Move on to the attachment
3. Creating Third Person Attachment (Skip this if you are using a default model)
Now , you have to create an attachment. Untick show placeable classes only , then expand Inventory Attachment and right click Weaponattachment. Click new and name your attachment like you want to . My attachment will be named E11Attachment. Click DisplayAdvanced and set it to StaticMesh. Set your static mesh to your weapon´s static mesh. Now , click hidden , scroll down to muzzle. Set Muzzleclass to the muzzleflash you want to use and then simply copy the muzzleoffset values from other attachment or set your own. Get open your weapon actor and set attachment to your weapon´s attachment.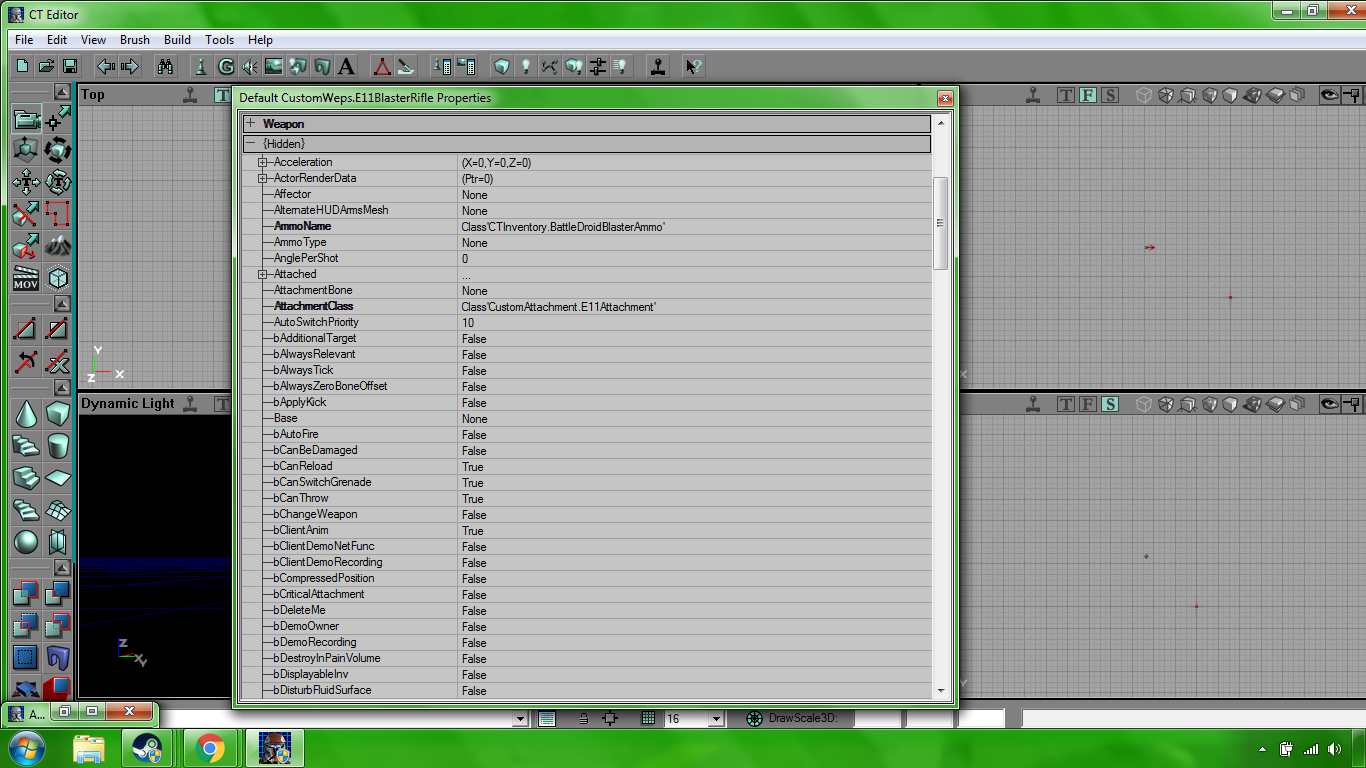
If the muzzleflash is not on correct place in thirdperson , you can edit muzzleoffset values of the attachment to your liking. If the weapon is not held properly by npcs (or just flying , mispositioned to side....) , then you can edit the position of it in thirdperson by modifying the pre pivot values of attachment that are in displayadvanced.
4) Making Pickup Actor
The easiest part of the entire tutorial . Open Actor Classes , Right Click Pickup and click new. Name the pickup like you want to and set the package to your package for pickups. Then set drawtype to staticmesh and set static mesh to your weapon´s static mesh. Click on pickup category. Rest is self explanatory. Don´t forget to open your weapon actor´s properties "inventory" section and set this pickup actor for your weapon there.
Good Luck making your own weapons and mods!


I have a problem. I wanted to use the LJ-50 concussion rifle animation set for my weapon, but when I did the instructions, the hands are still holding the concussion rifle. So it's like my weapon is inside of the conc rifle. Also when I did save, for the animation it said something about not being able to do that.
Thanks for notifying me. I forgot one thing in my tutorial. Fixed now.
I can do tutorial for converting into .ASE , but I don´t know how to rip models so you have to learn it for yourself.
I have some problems. I am making a dc15a rifle and some clones are going to drop it so i can use it. In first person mode, the gun at first is invisible, but after i move around a little, i can see the gun. Also, when i shoot normally, no bullets come out of the gun. If i shoot up high, bullets shoot, but come from the middle of my screen. I followed the instructions carefully and these errors shouldn't be happening. Can you help me?
You need to configurate the fpfireoffset in weapon´s properties.
This comment is currently awaiting admin approval, join now to view.
what program is That??