Method:
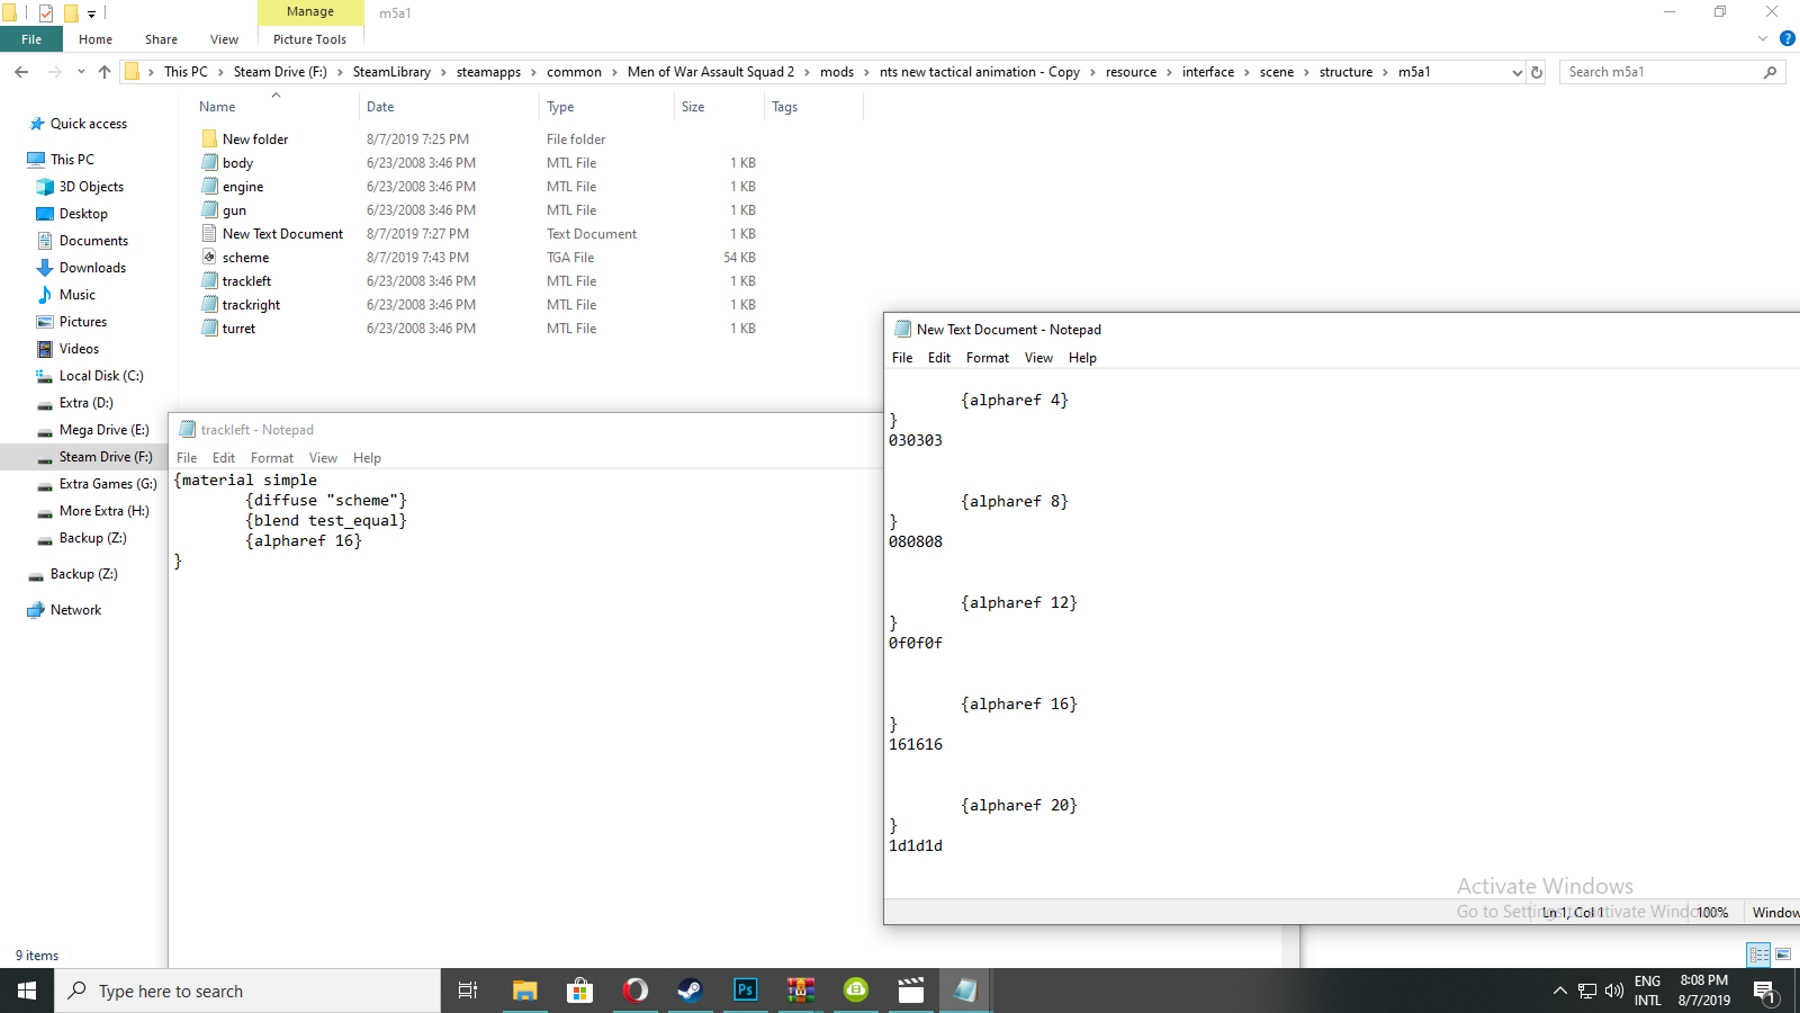
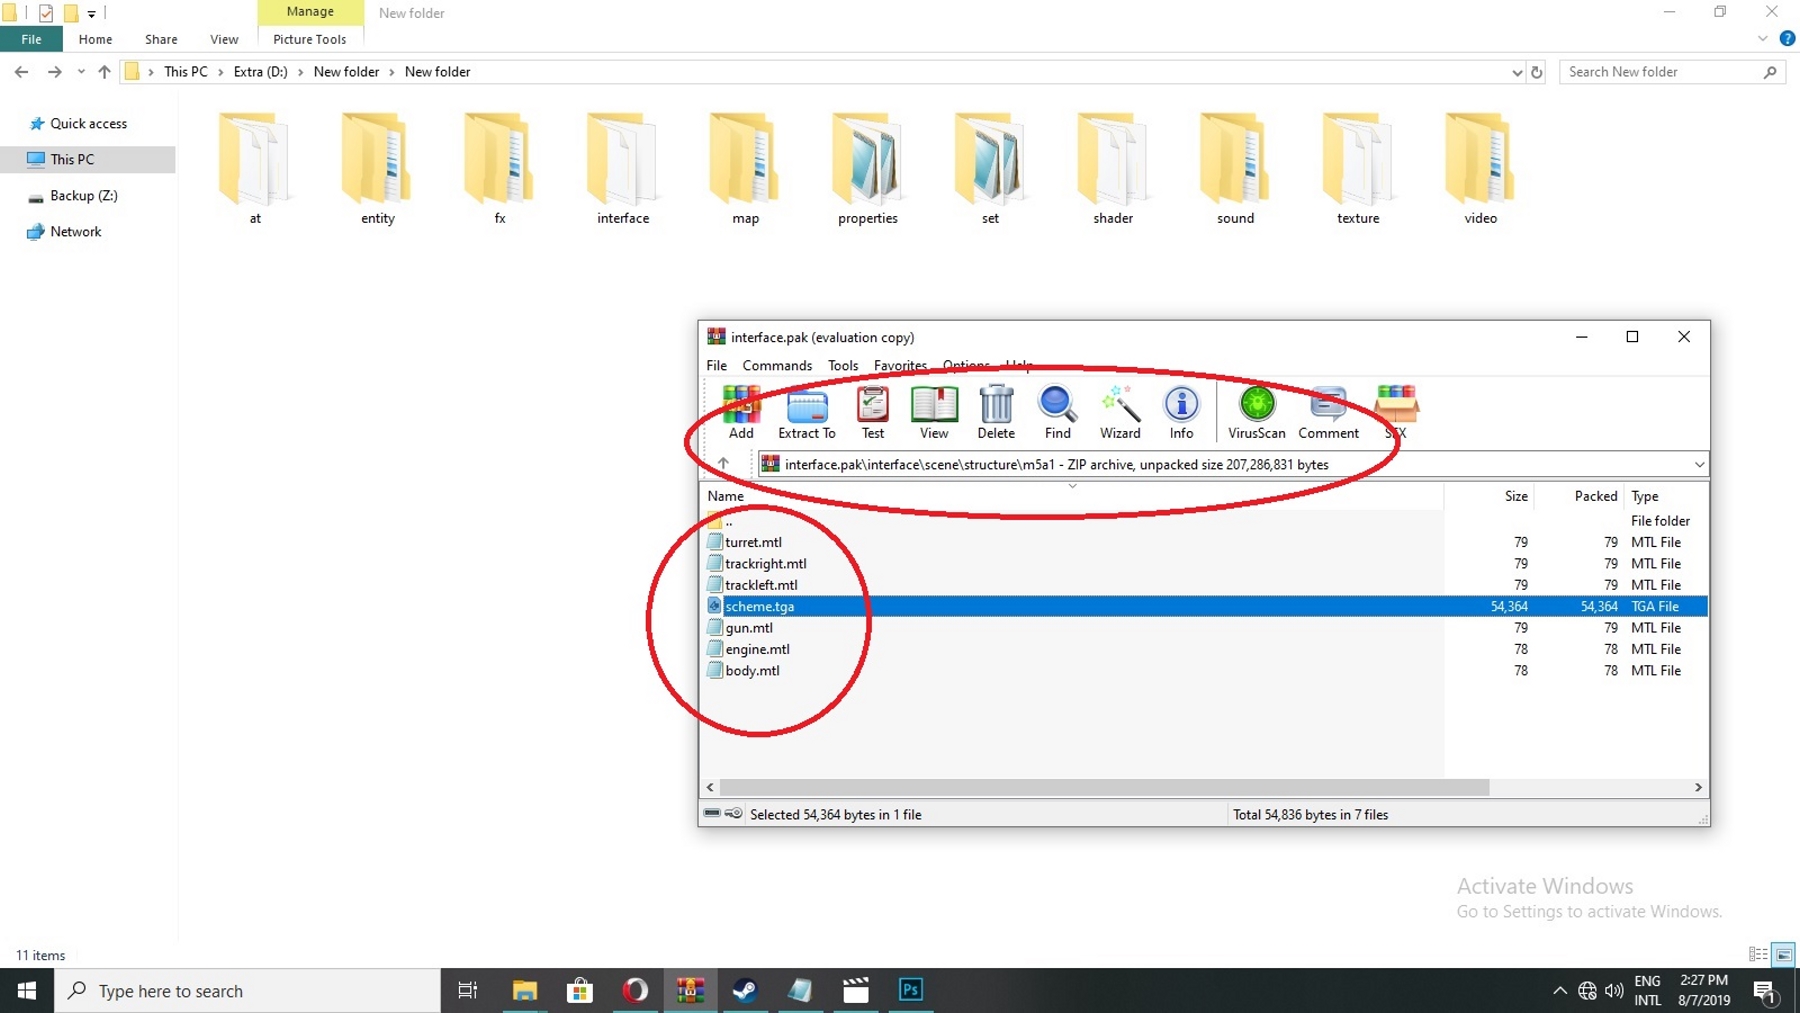
Ok, so we start with basic details, first structure is like a damage report in game interface about selected entity and its files located in:
Mod / Game Directory / Resources / interface.pak / interface / scene / structure
Here is files for all structures, now to begin with, we simply chose M5A1 light tank from structures and take its "BLUEPRINT" from internet but in case if blueprint isn't available you have to create one, well its easy to do so, just take screenshot of entity from above (or from front in case if you are making structure for MECH / Robots) and cut it from the edges of object to get sketch of it. So lets do it step wise, but first note the following ALPHAS and their in game references:
alpharef 4 = 030303
alpharef 8 = 080808
alpharef 12 = 0f0f0f
alpharef 16 = 161616
alpharef 20 = 1d1d1d
alpharef 28 = 282828
alpharef 36 = 333333
alpharef 44 = 3d3d3d
alpharef 24 = 232323
alpharef 32 = 2e2e2e
alpharef 40 = 383838
alpharef 48 = 424242
You can also review that old video for better understanding before starting tutorial, as some point may get better understand by that, while rest can be pick from tutorial, because tutorial is more details and involved new methods compare to old methods:
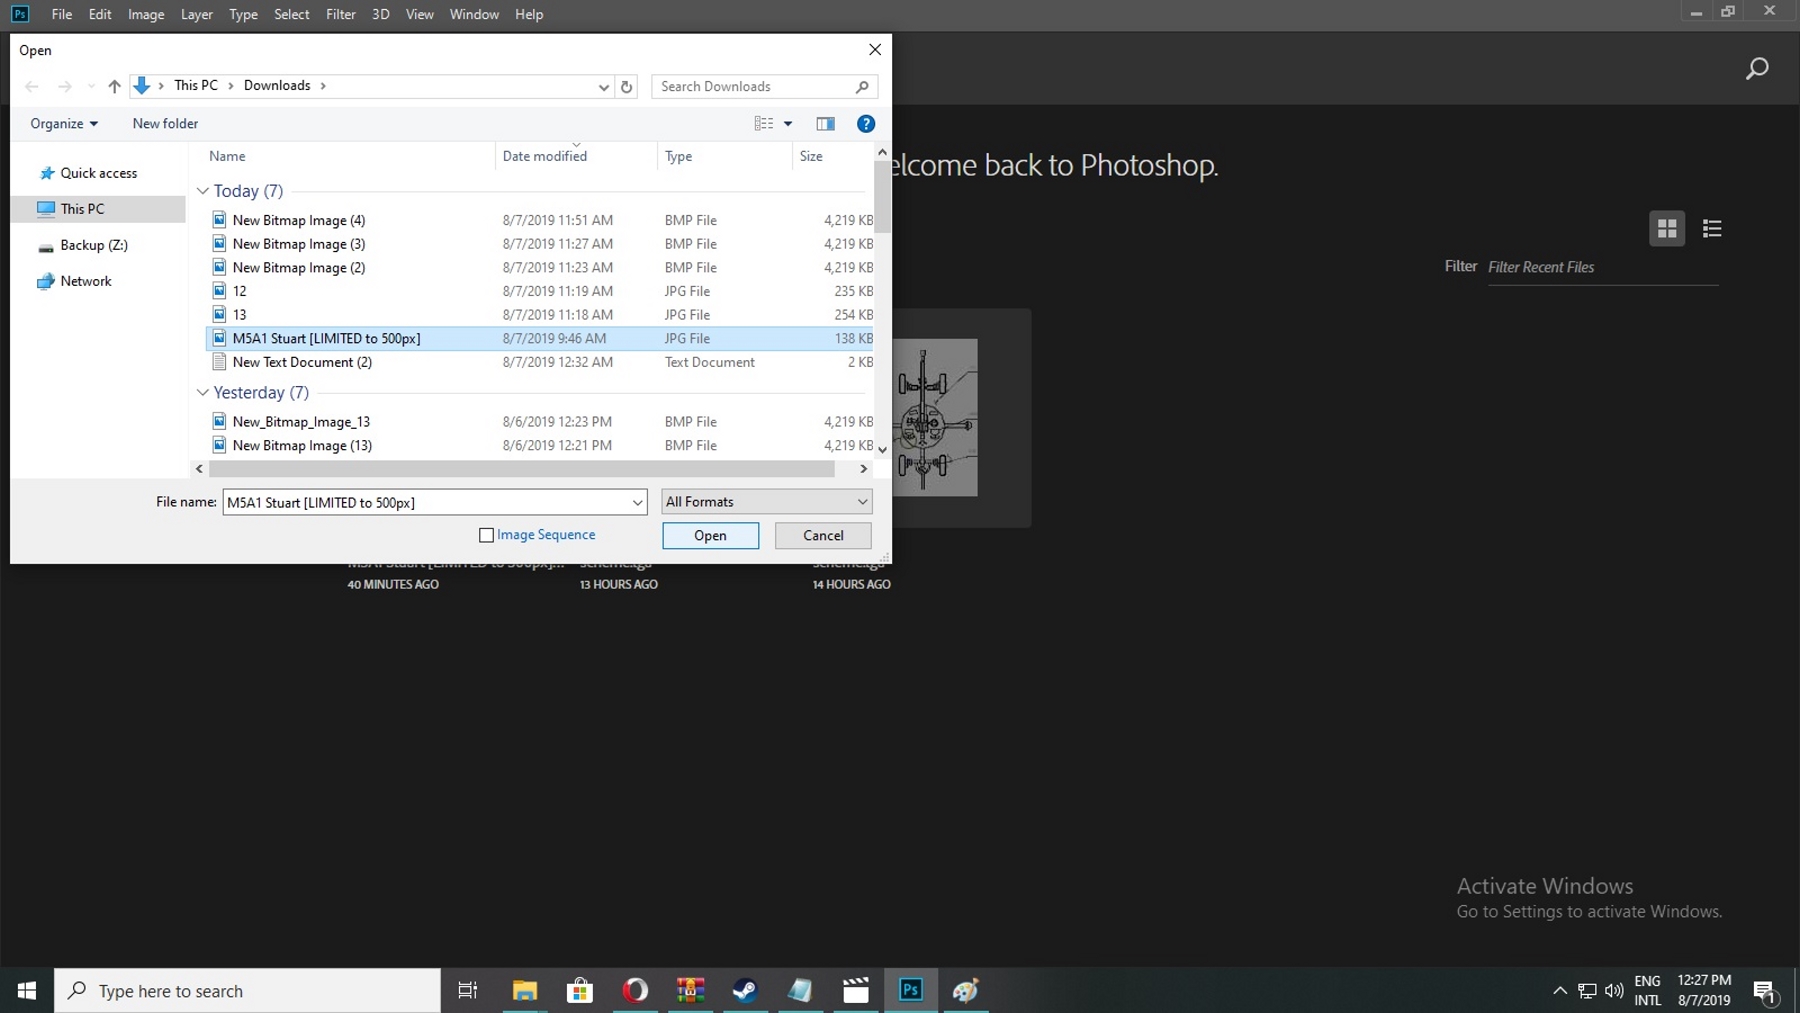
- Open the blueprint file in Photoshop and start its editing by following:
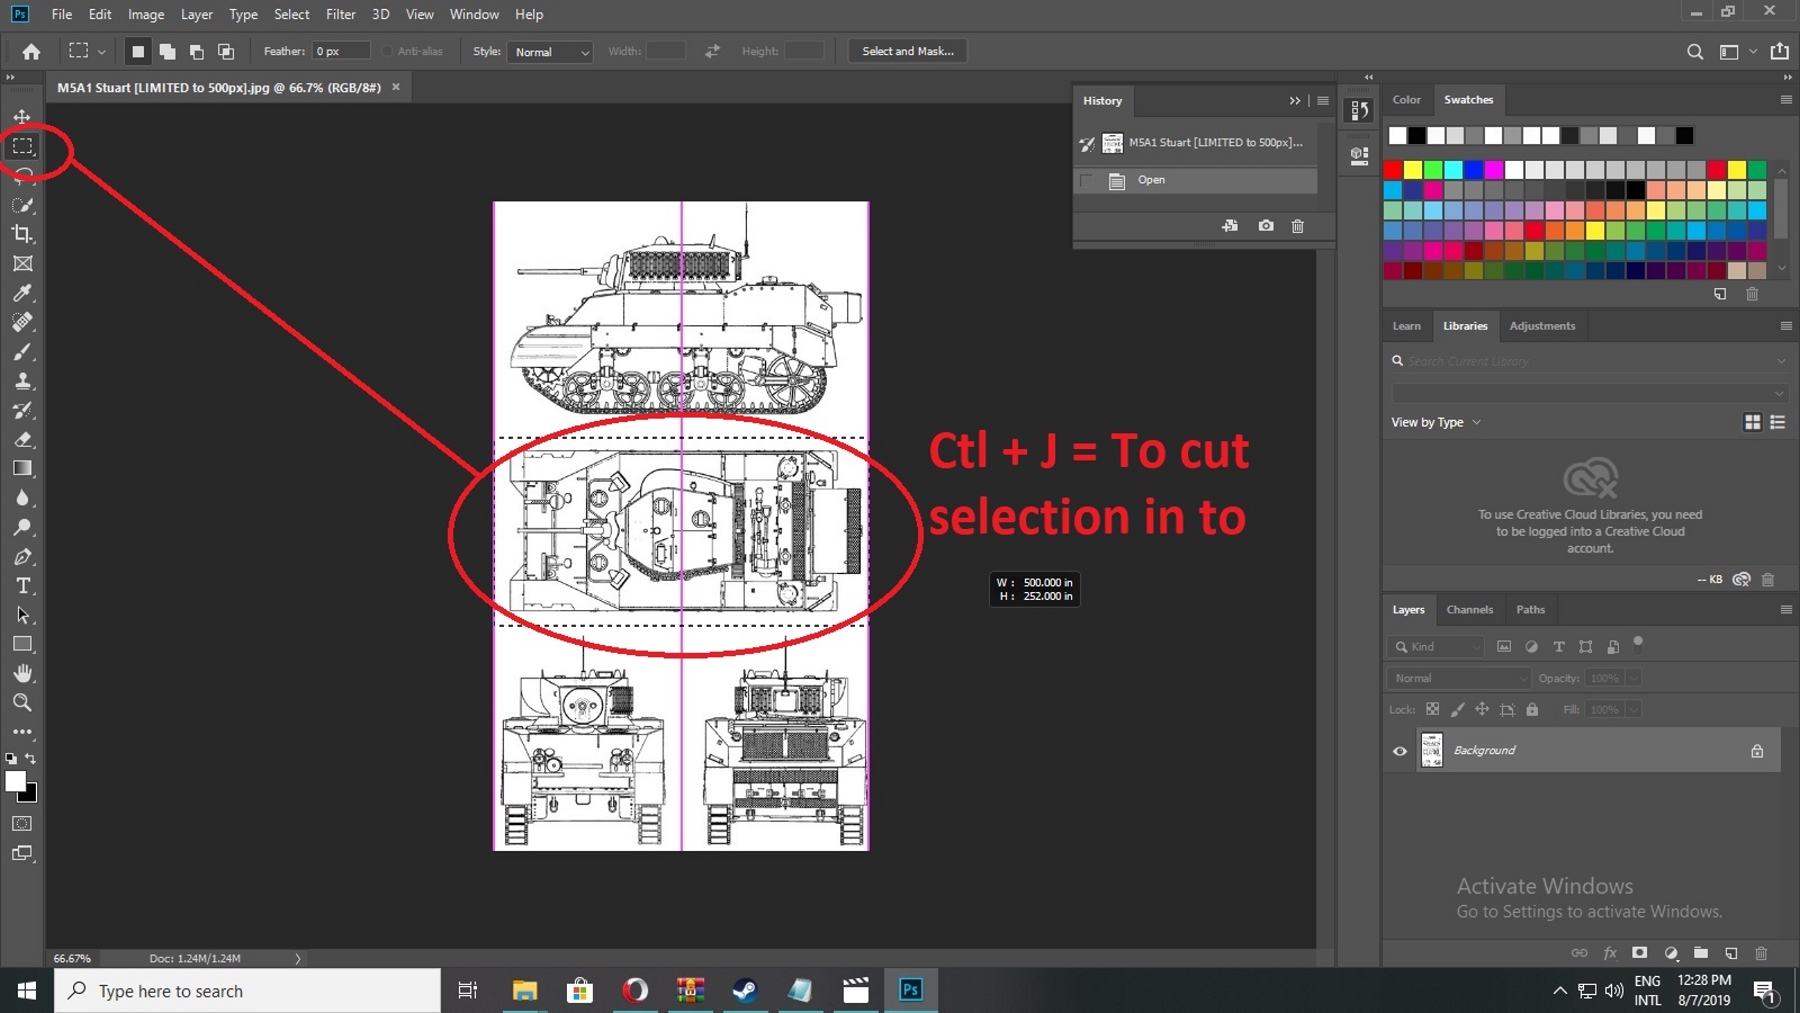
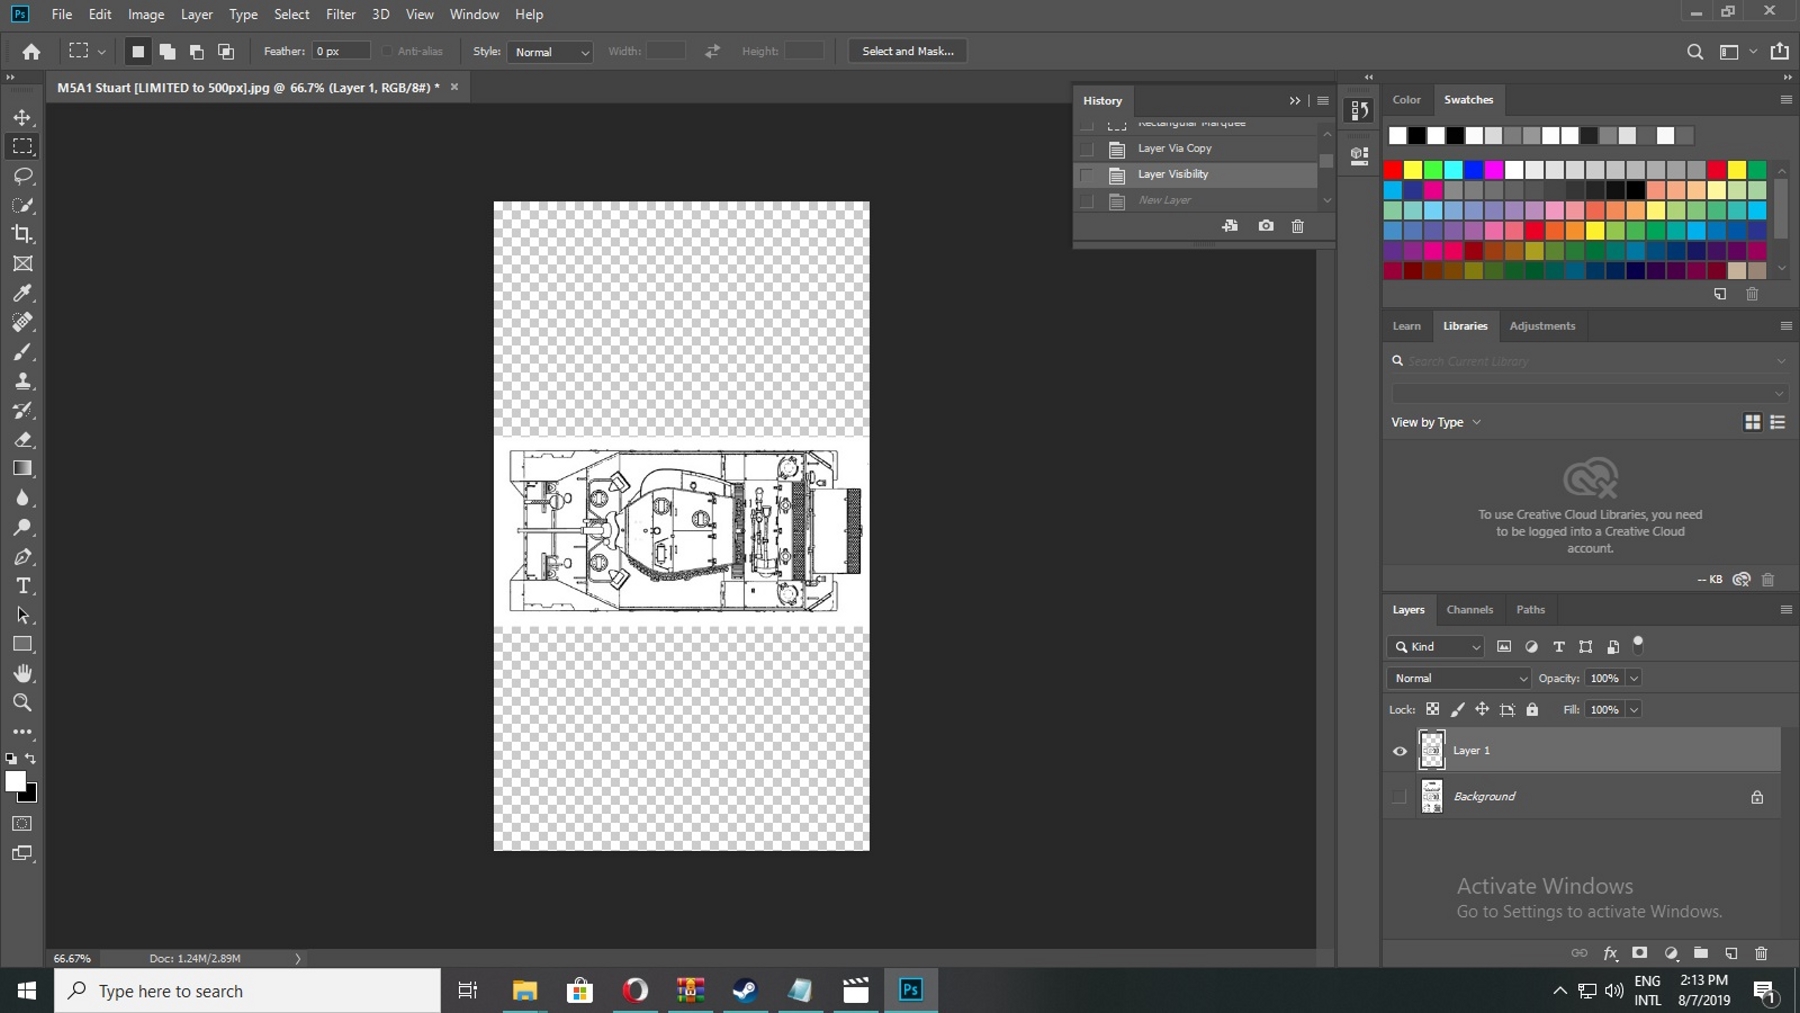
- Start its cutting from the edges to make it transparent:
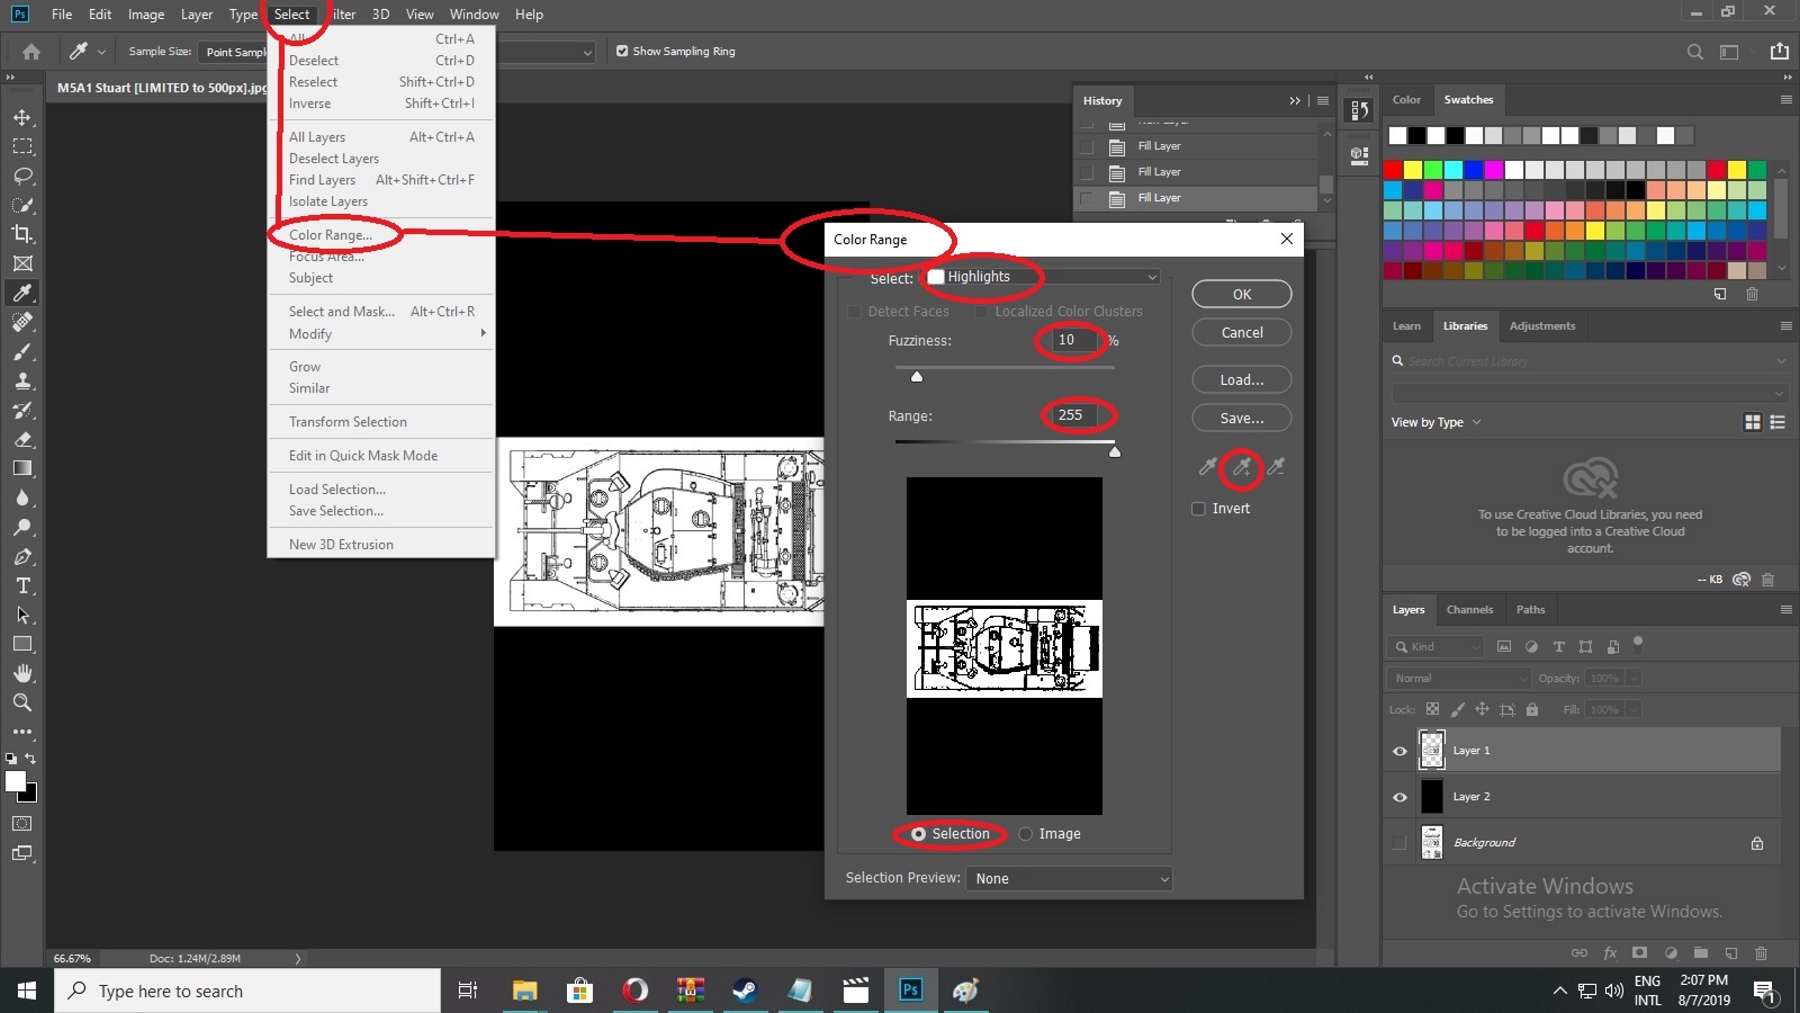
- The edges will get pick automatically, don't need to use picker:
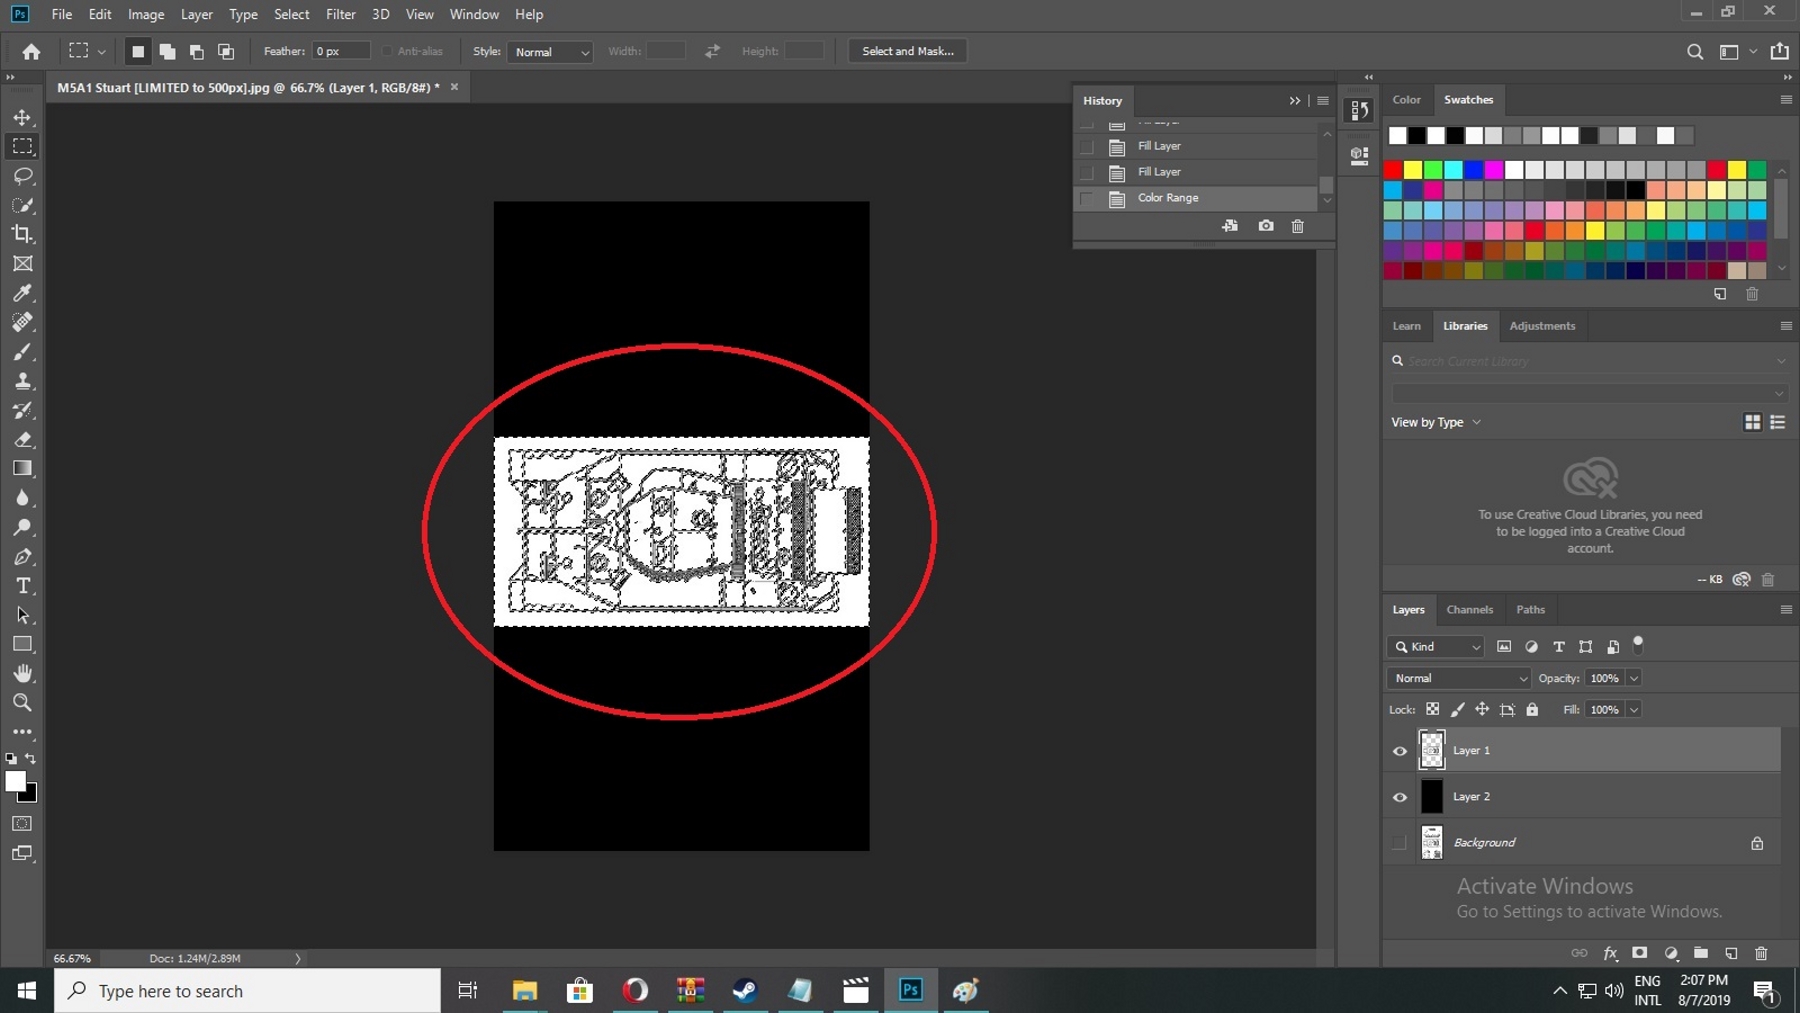
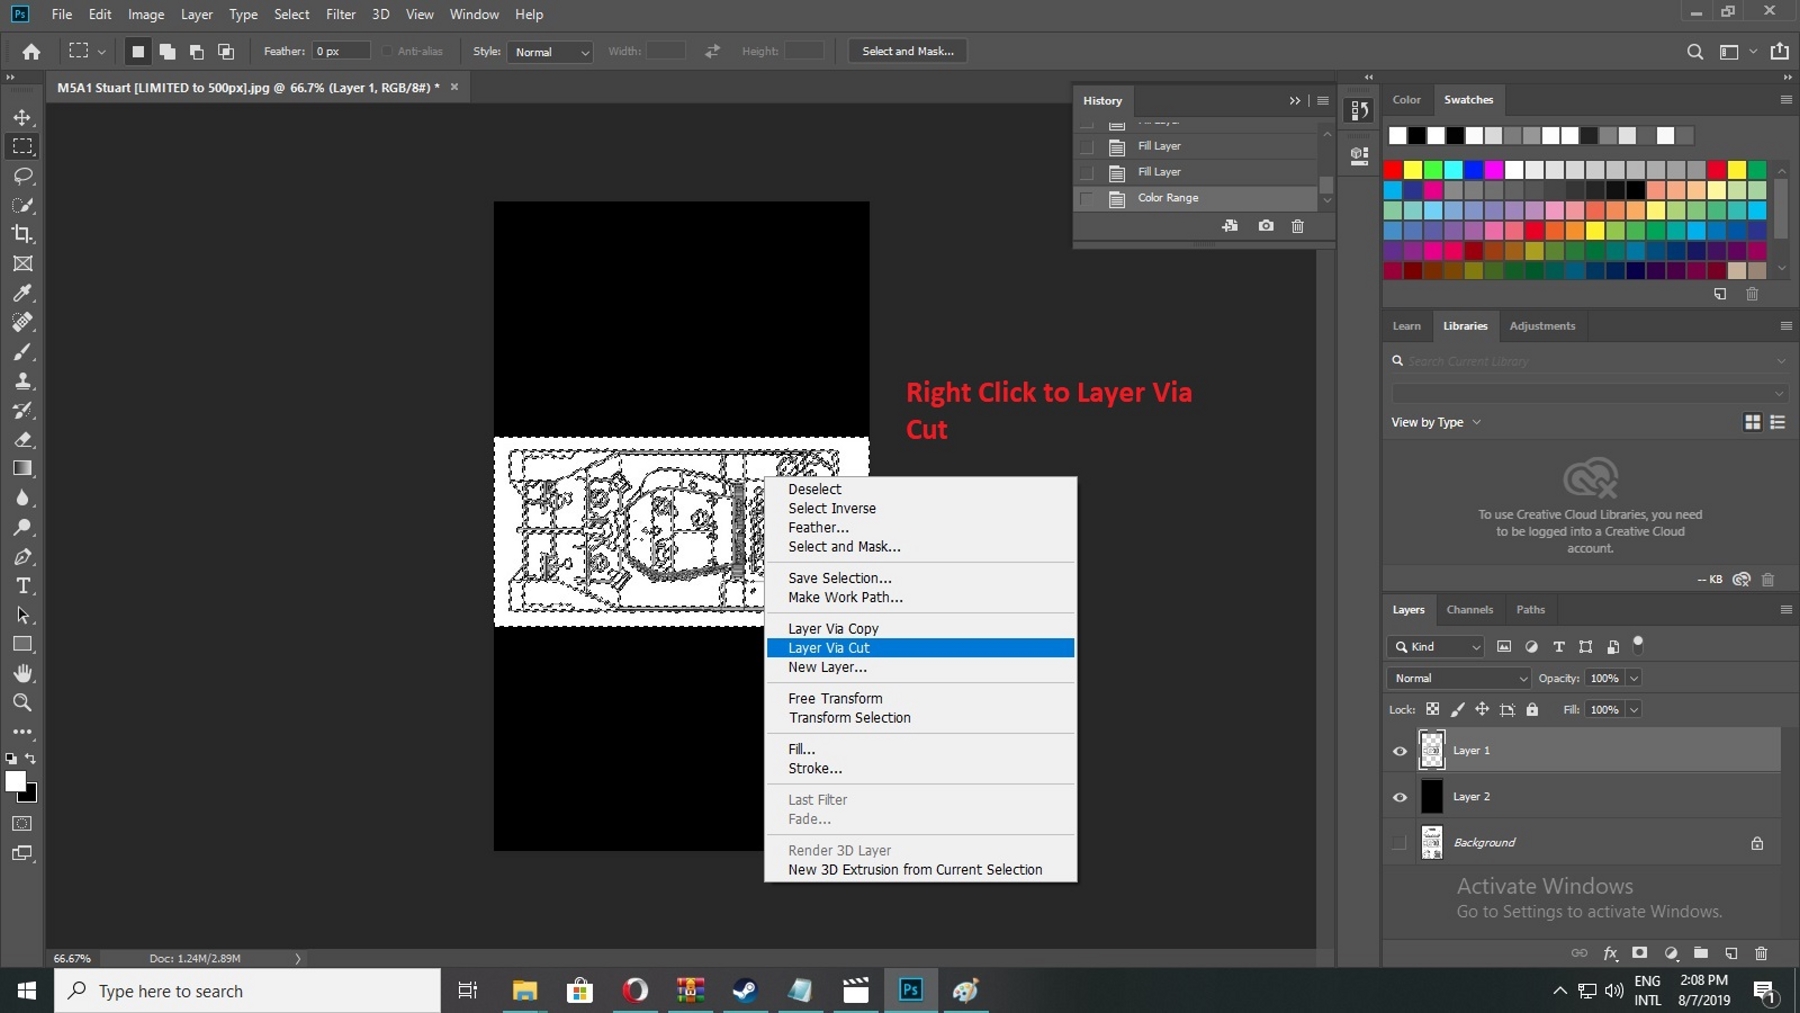
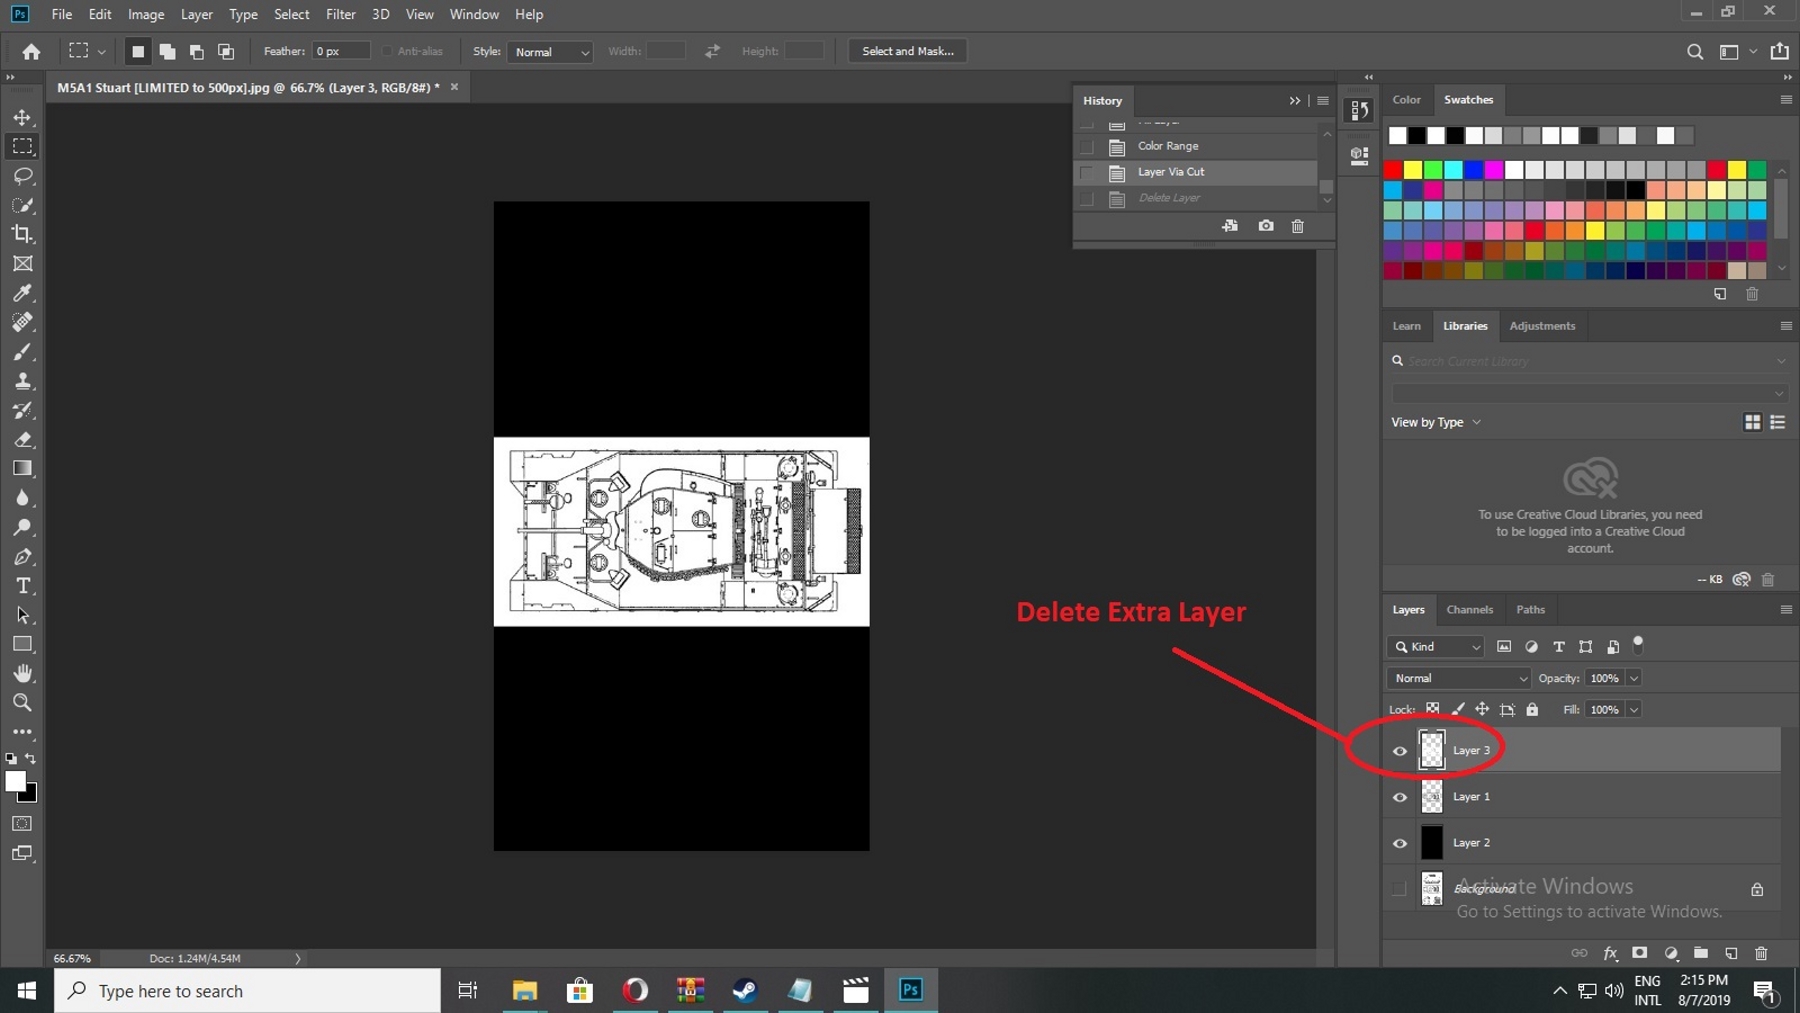
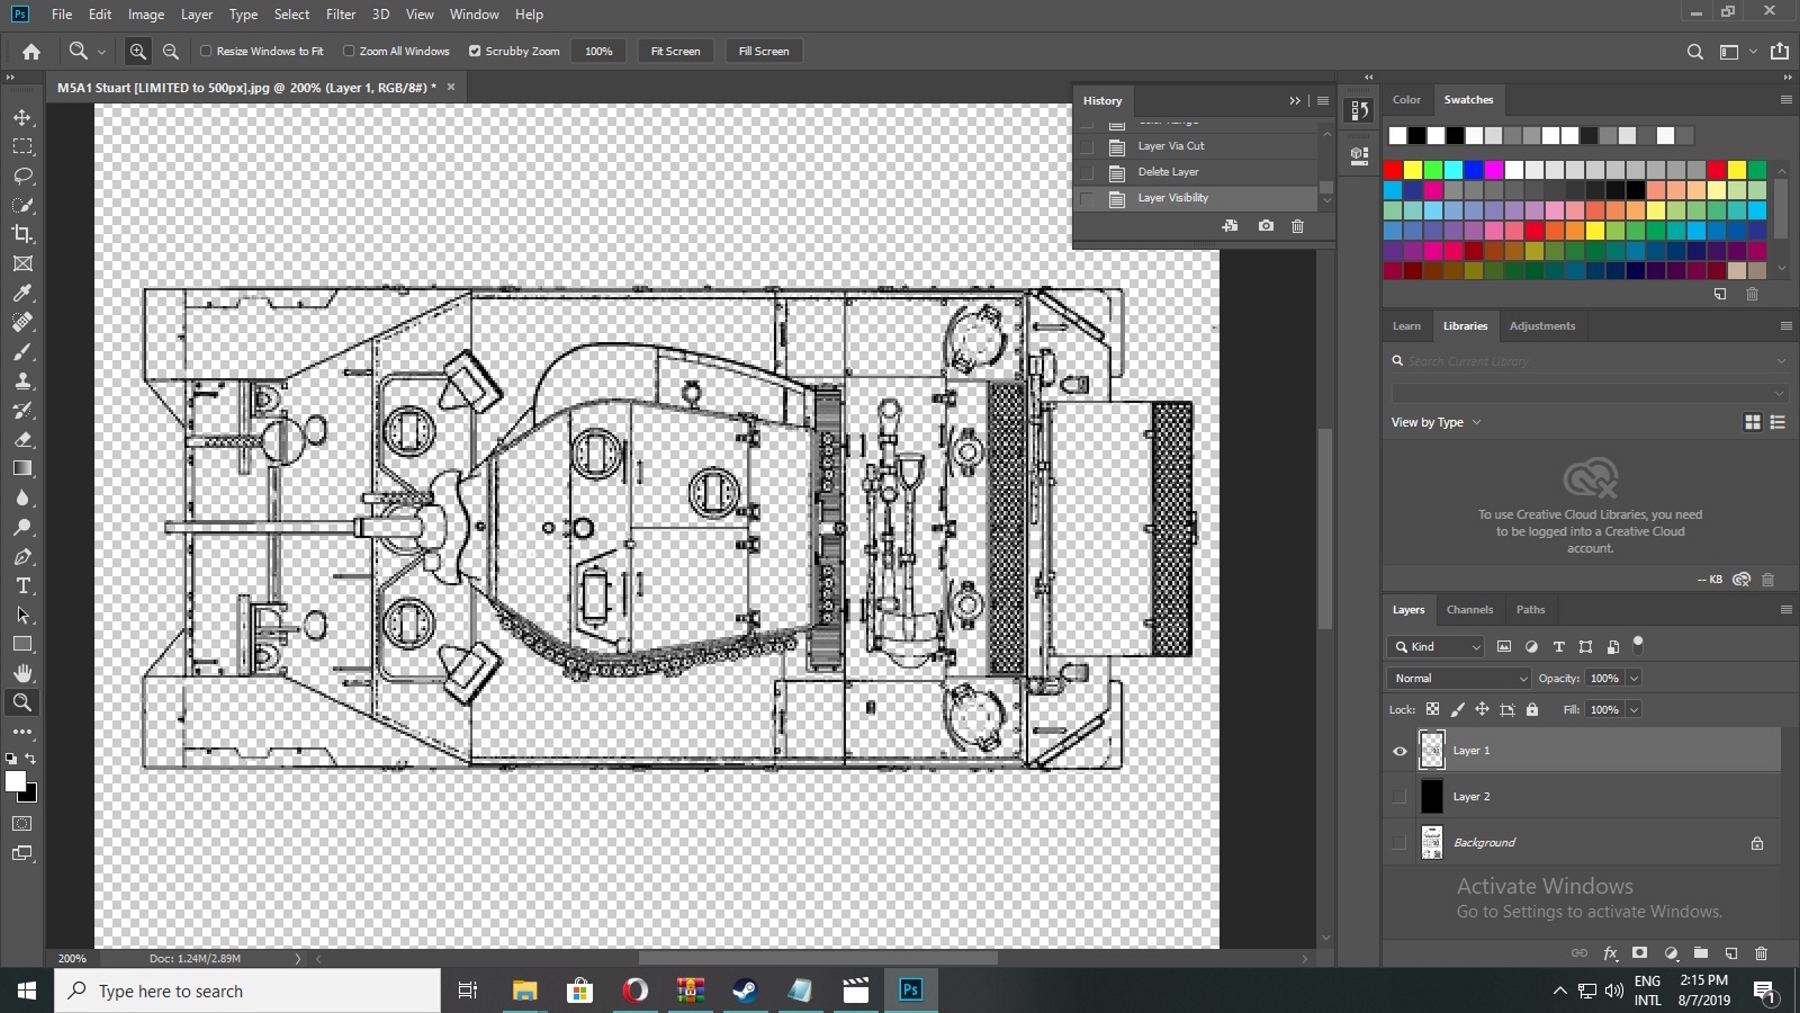
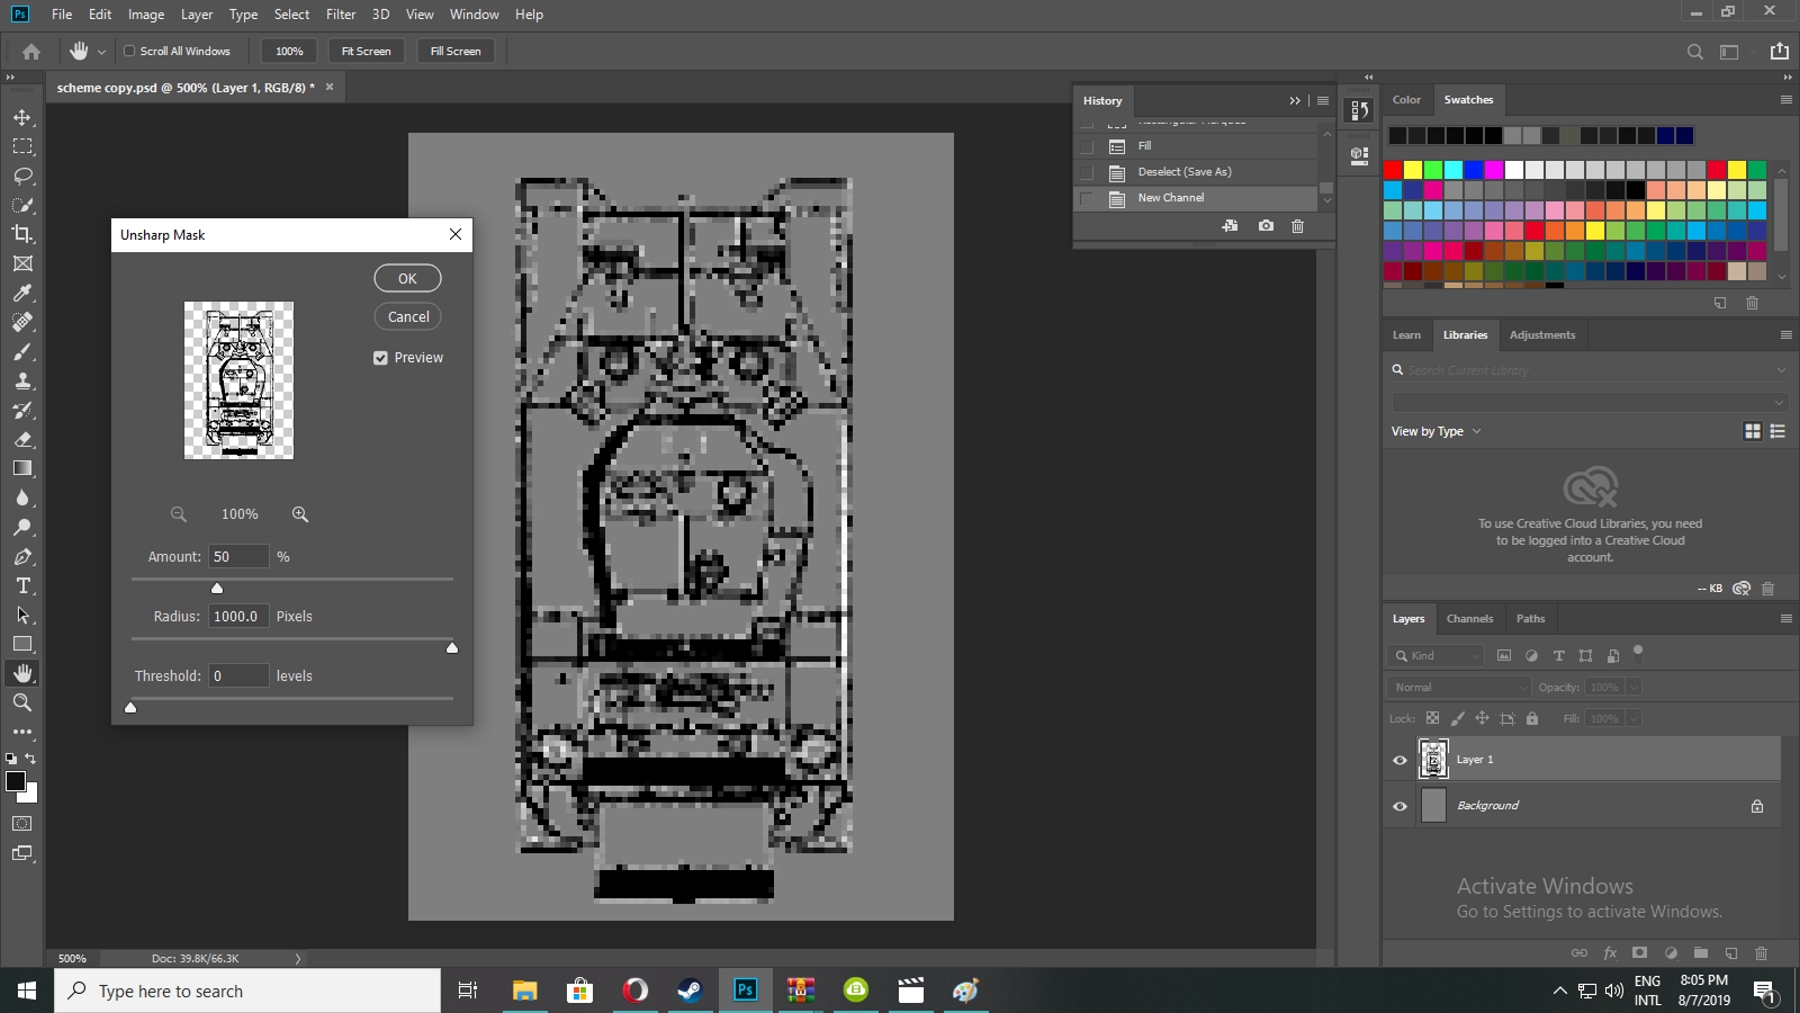
- If the edges feels so thin to you then make it more visible by increasing there size:
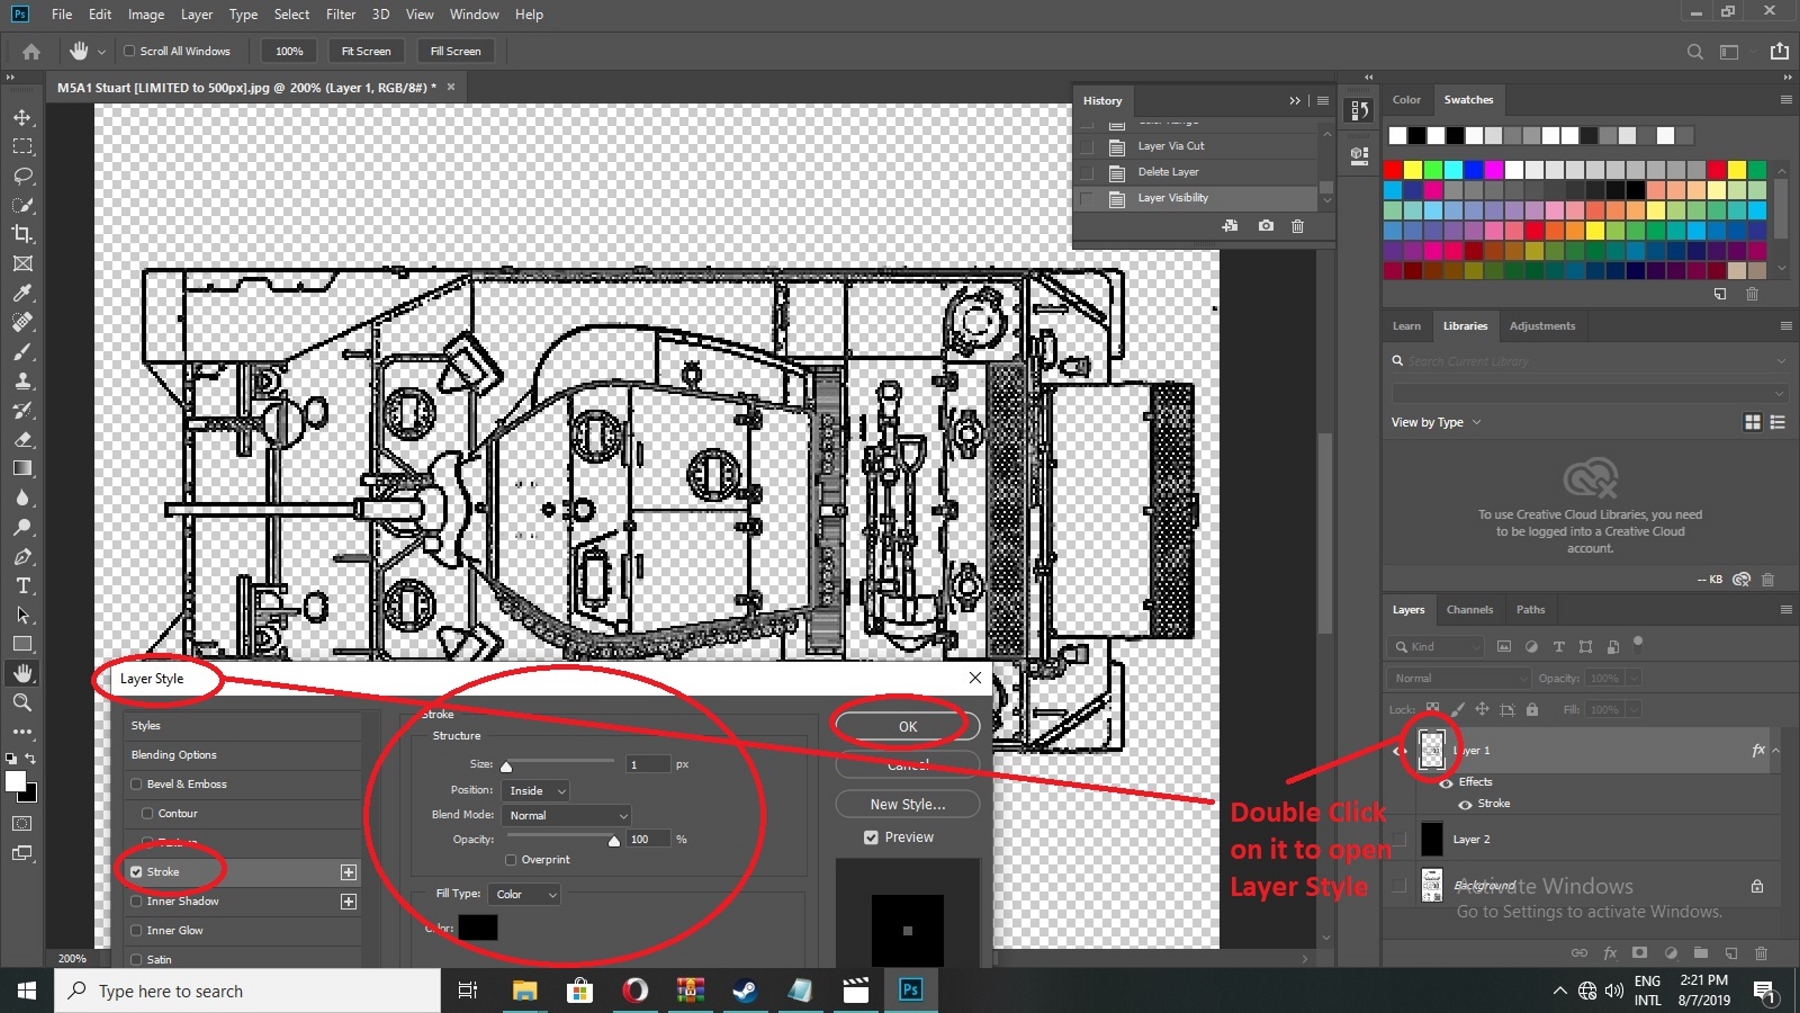
- Now your blueprint is ready, then its time to talk about "ALPHAS". well alphas are the damage point reference from in game to the entity at hand, like if any part got damage to have that damage appear in game interface, you have to chose same alpha reference and apply it to alpha in structure file and mention its reference in structure parts color scheme.
- to make better understanding review following, that where the alpha references are going to mention while follow the rest to know how to apply color scheme in Photoshop to get pick by structure interface in game:
- You can see that above mention alphas exist in game but only have reference not the color scheme which required to apply in Photoshop to have effect in game, but by that reference list at start you can have that color scheme of mentioned references.
- I also put extra references in case if your entity have 3 or 4 guns or like 4 tank tracks, so you can use those references on those alphas to integrate that parts in game (by the way that parts pick from the .MTL file of the entity).
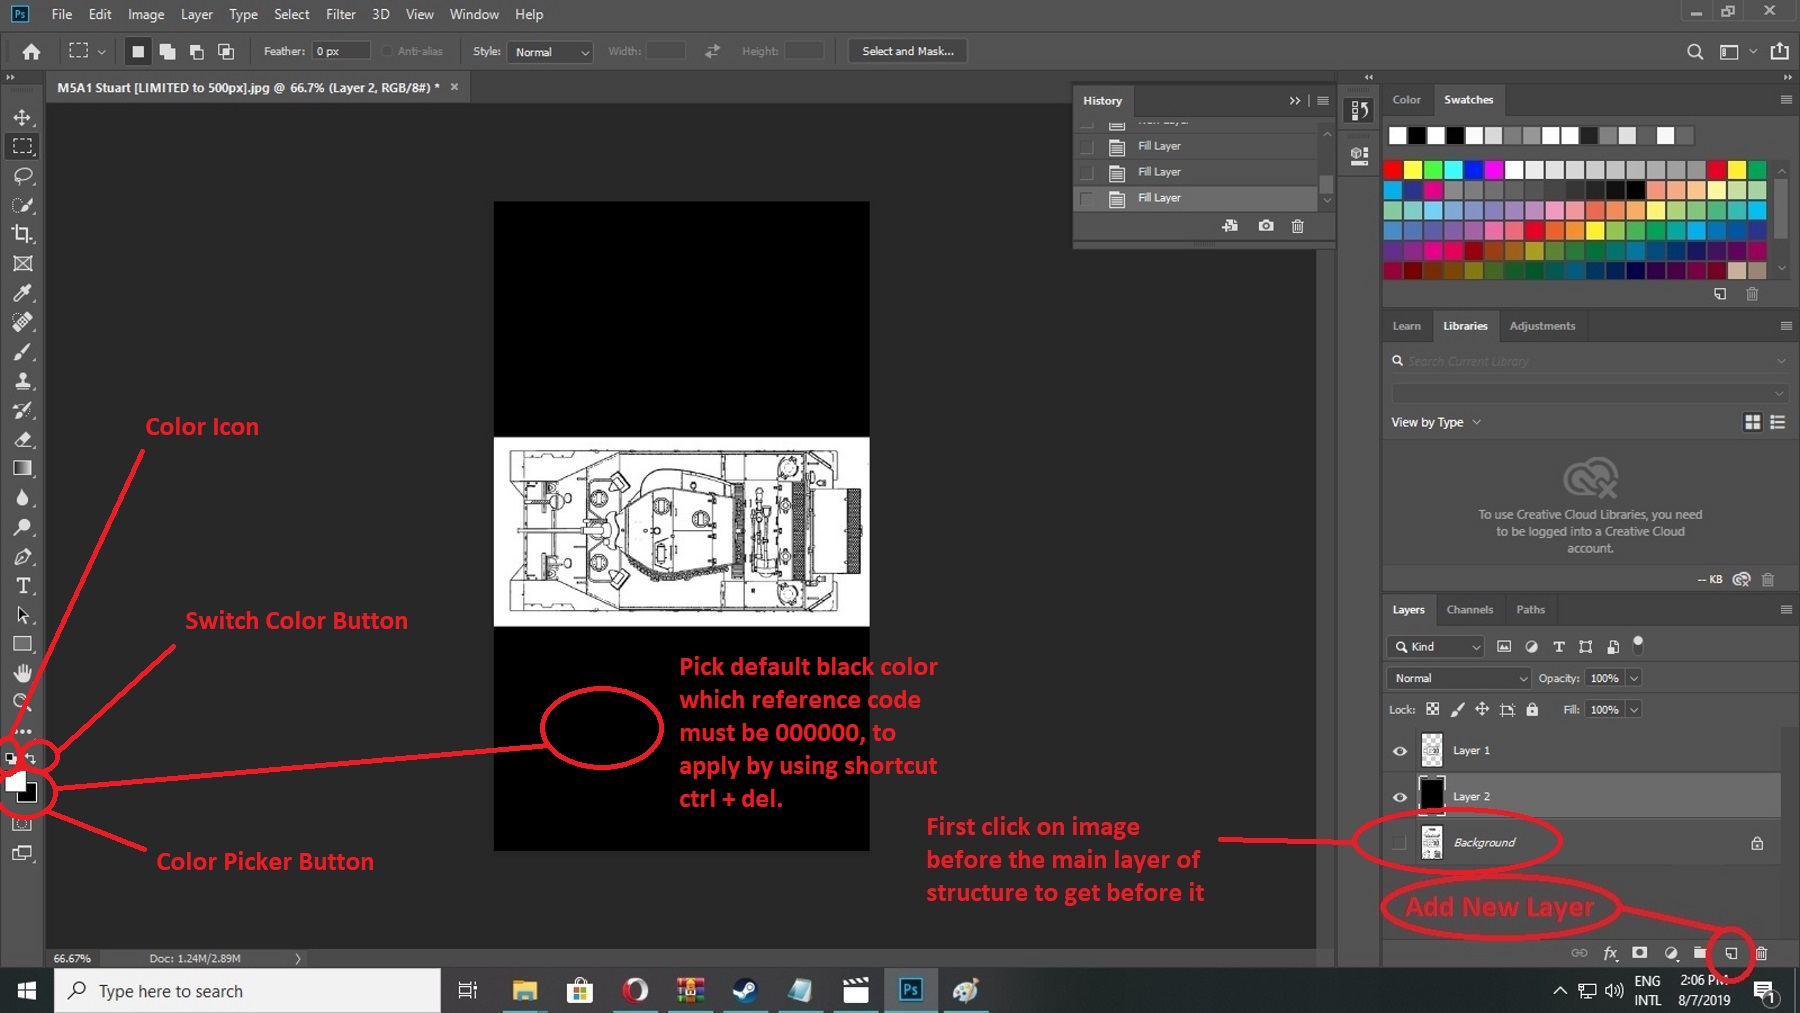
- Open the default scheme from the game base files (you can pick any random of it as it just required to have exact size to have on interface, though also depend on interface) to apply blueprint over it:
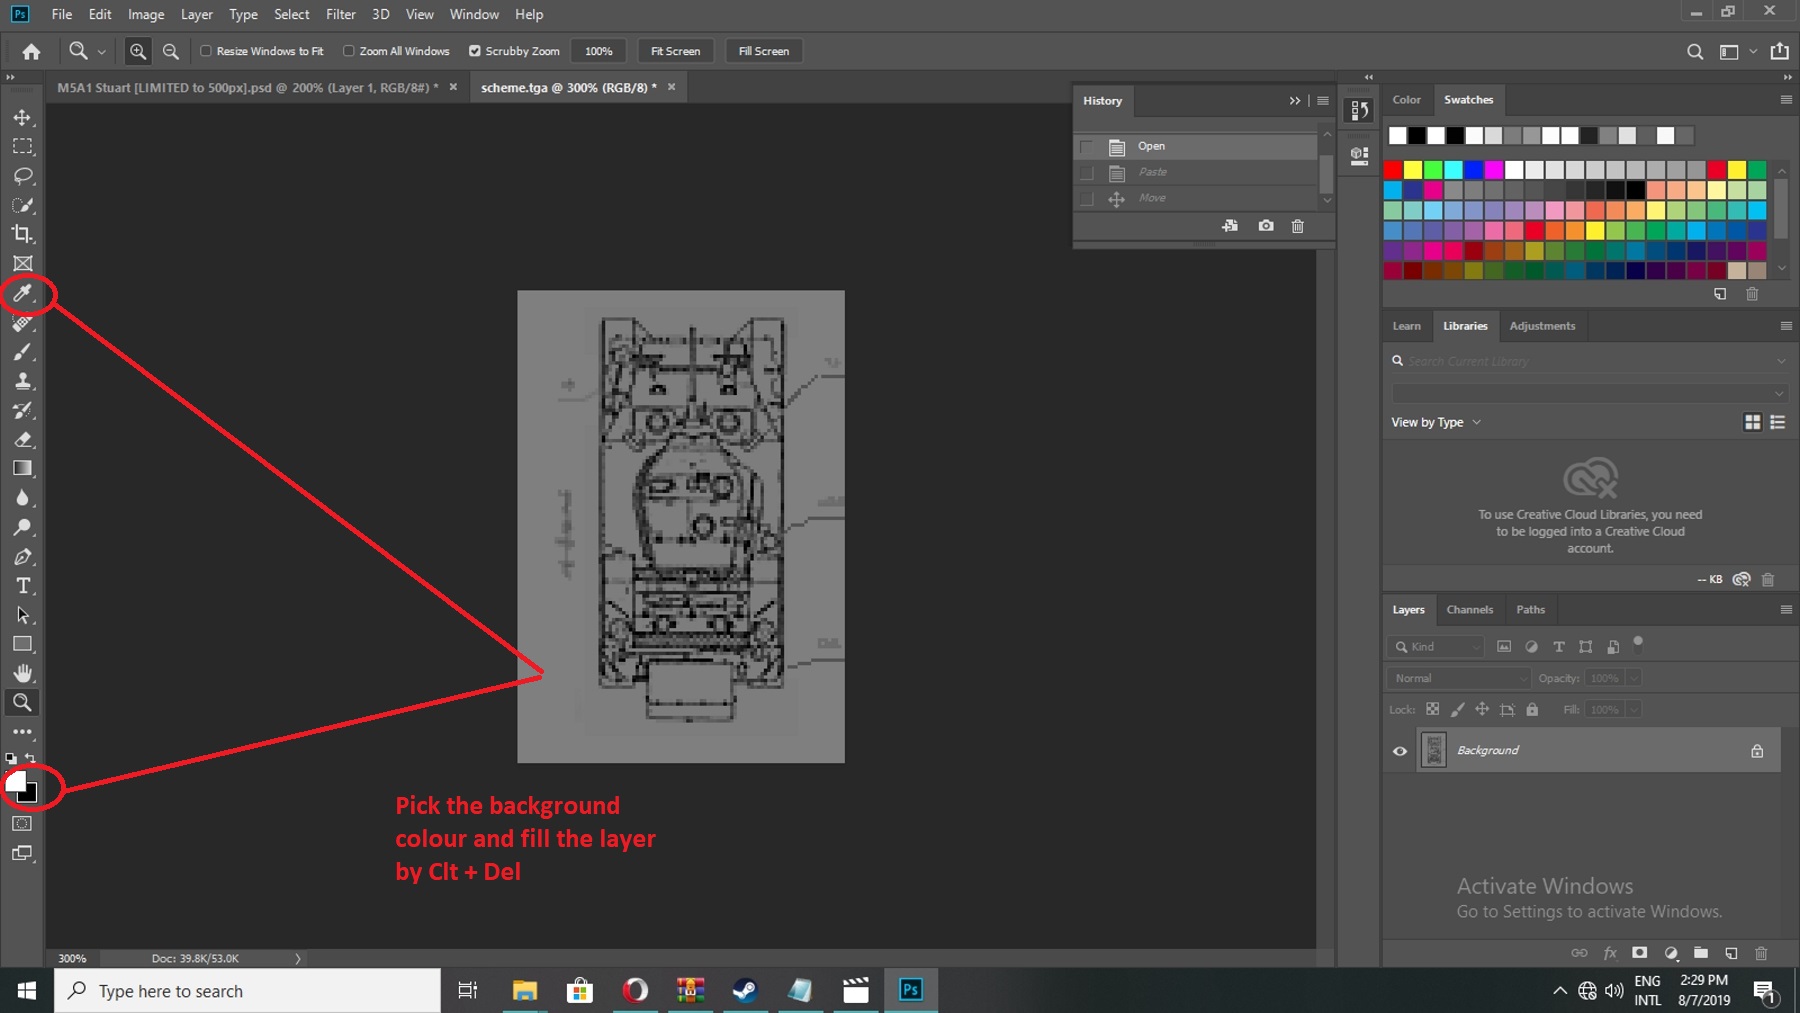
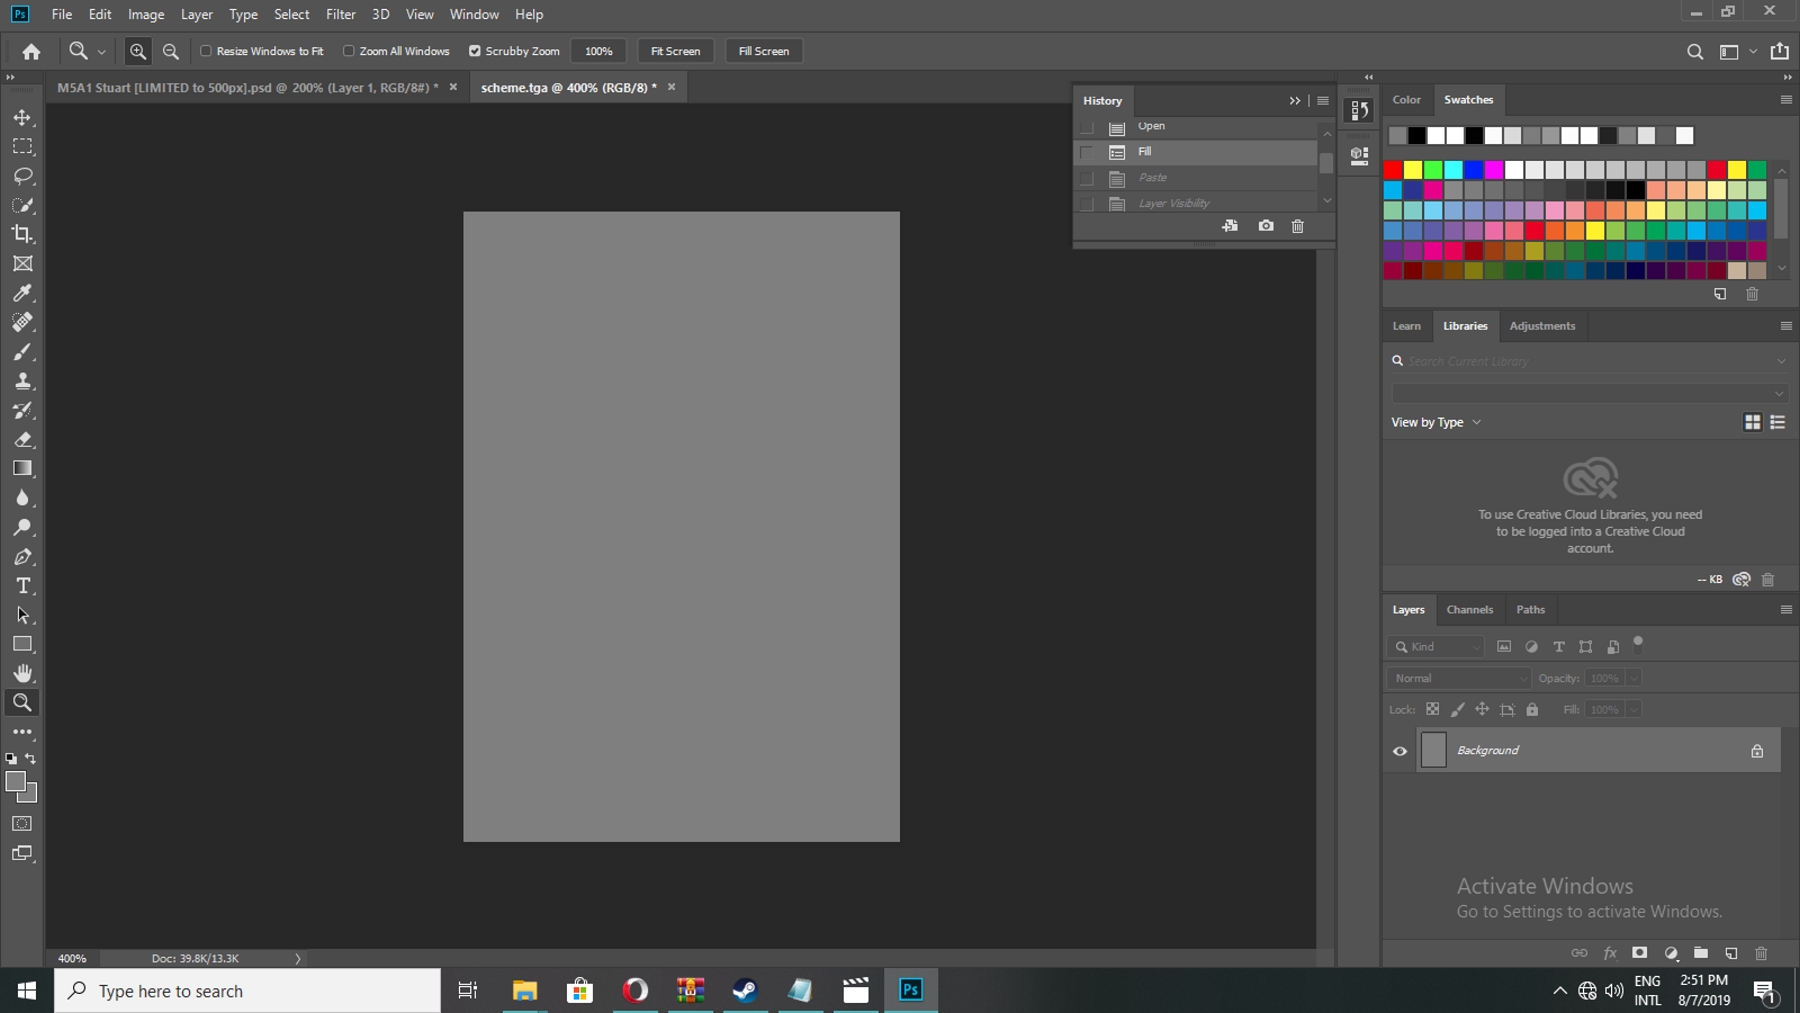
- Use the filler to remove the base game structure to apply your blueprint over it:
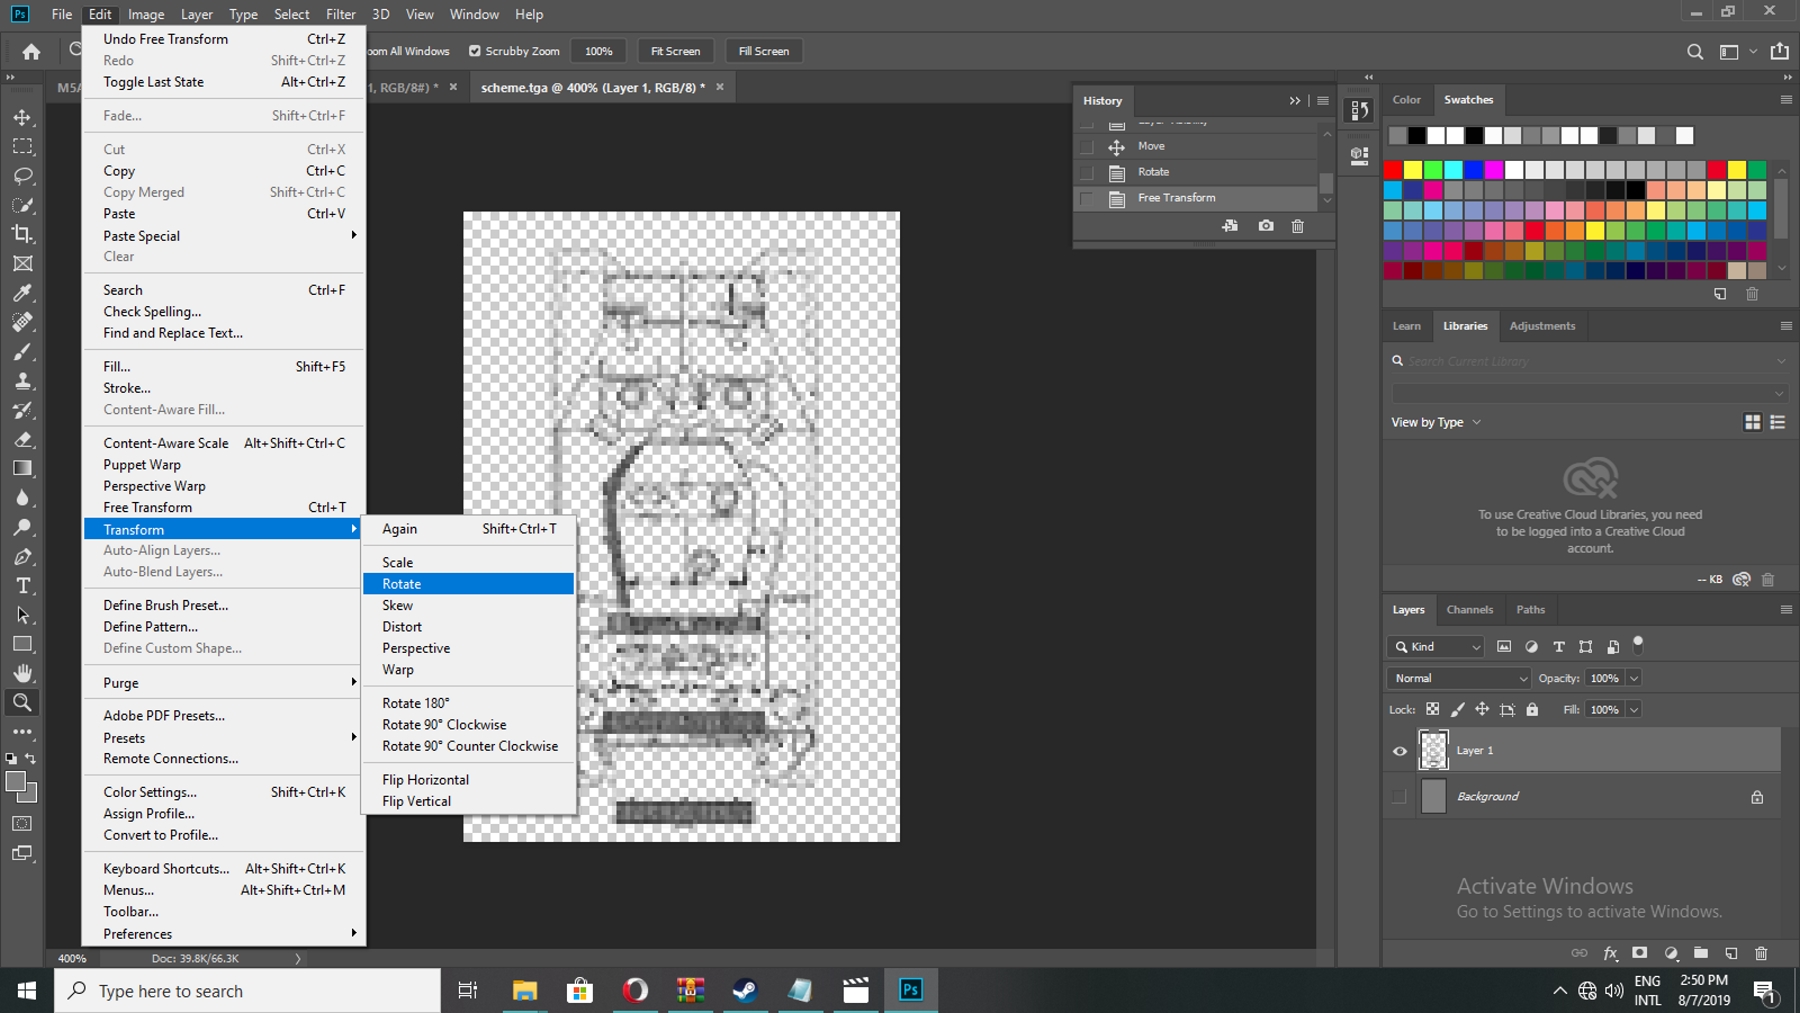
- Add your created blueprint layer over scheme and adjust it according to background by transformation:
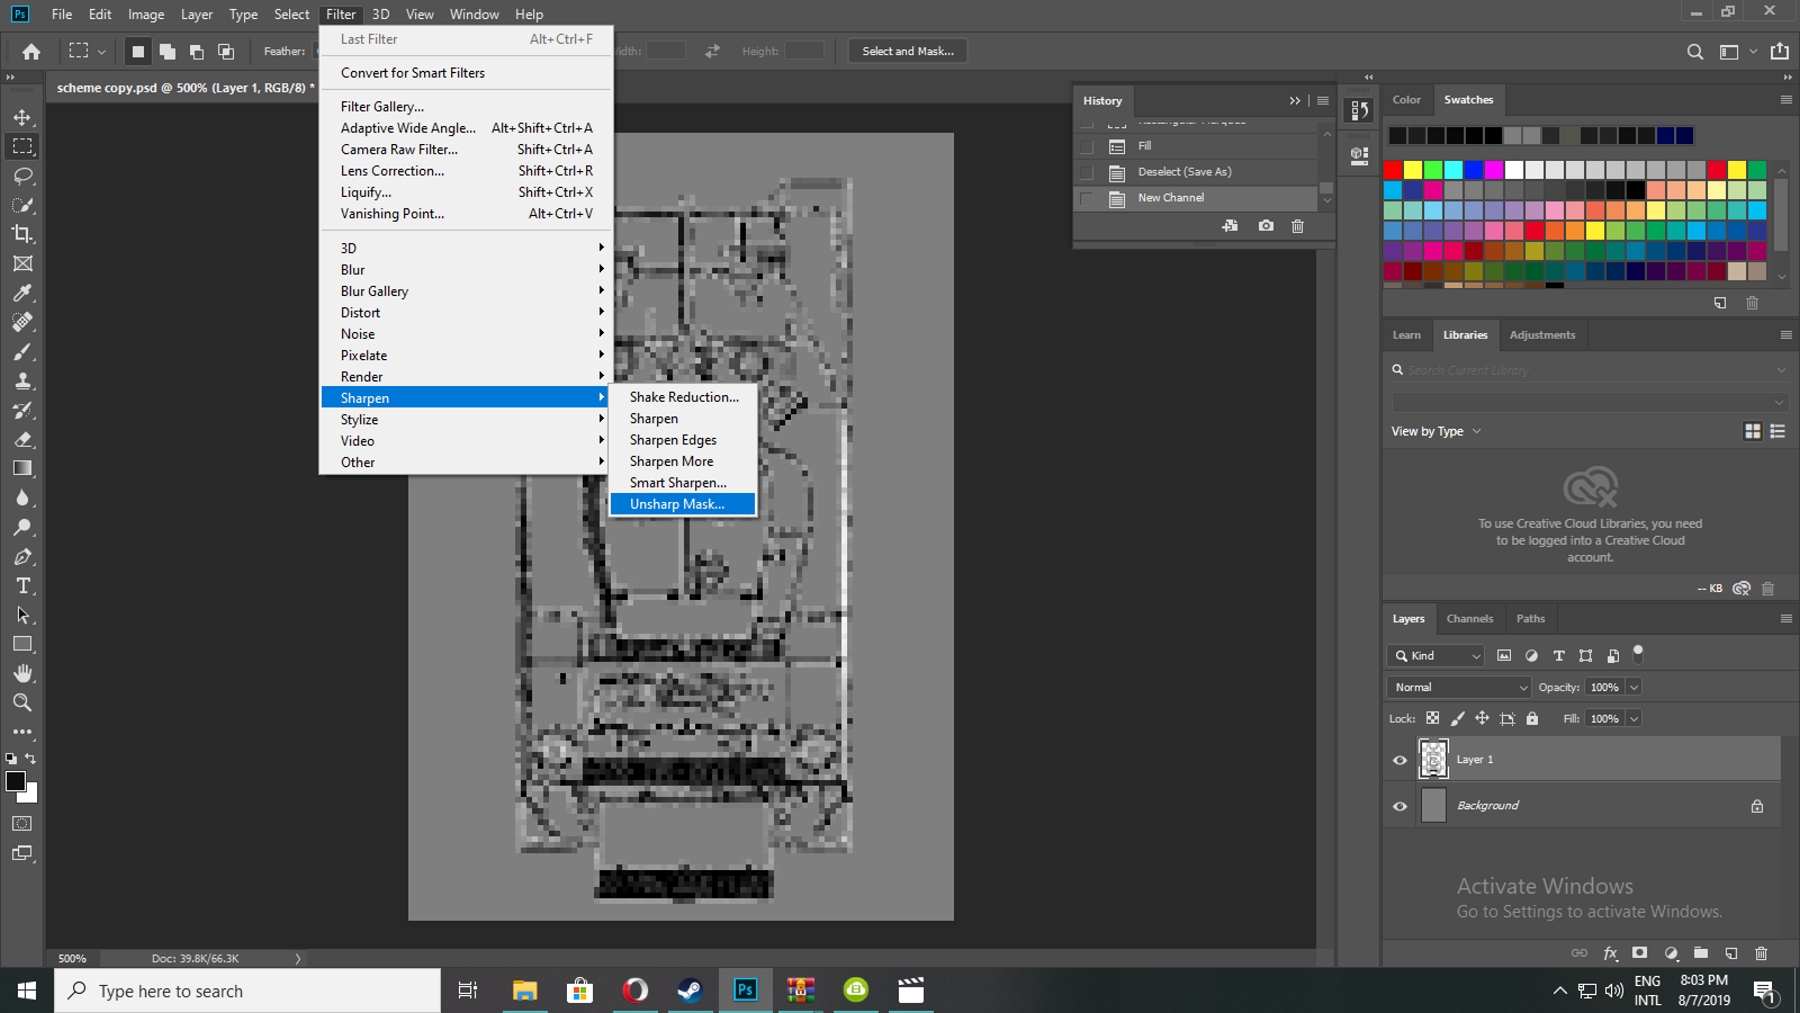
- You can use two OPTIONAL steps to make it darker if it feels light to you:

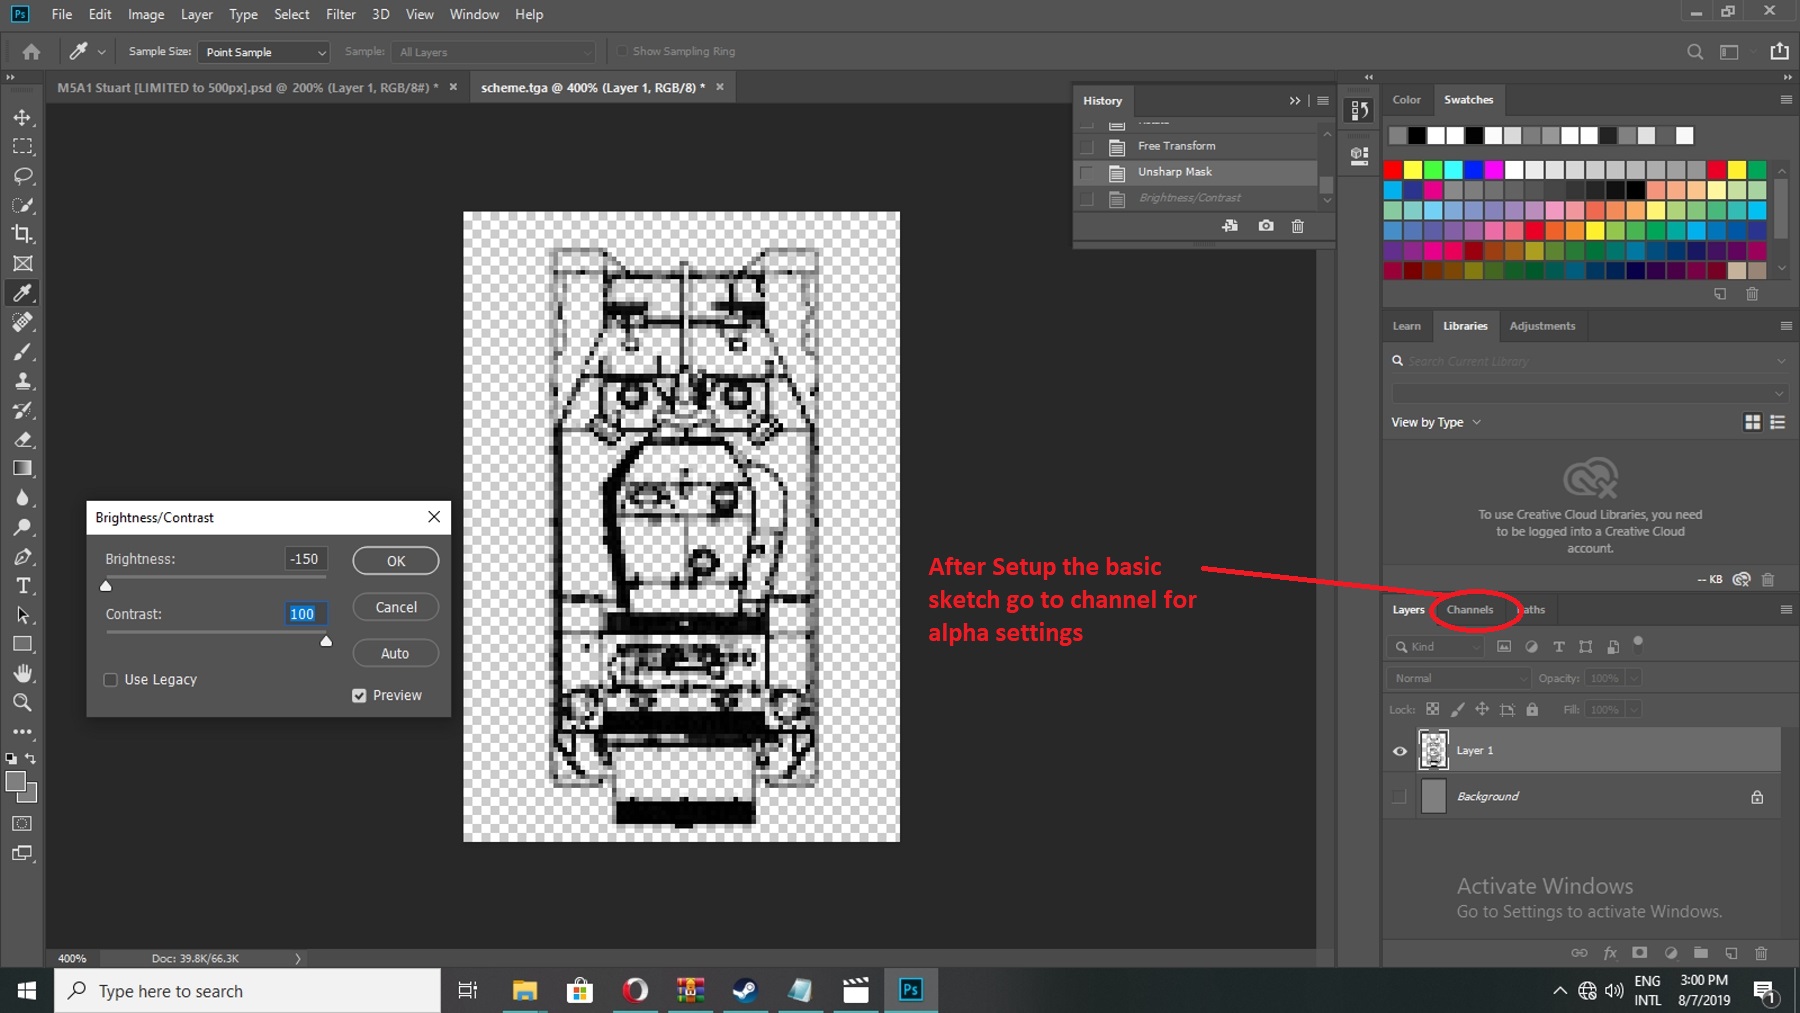
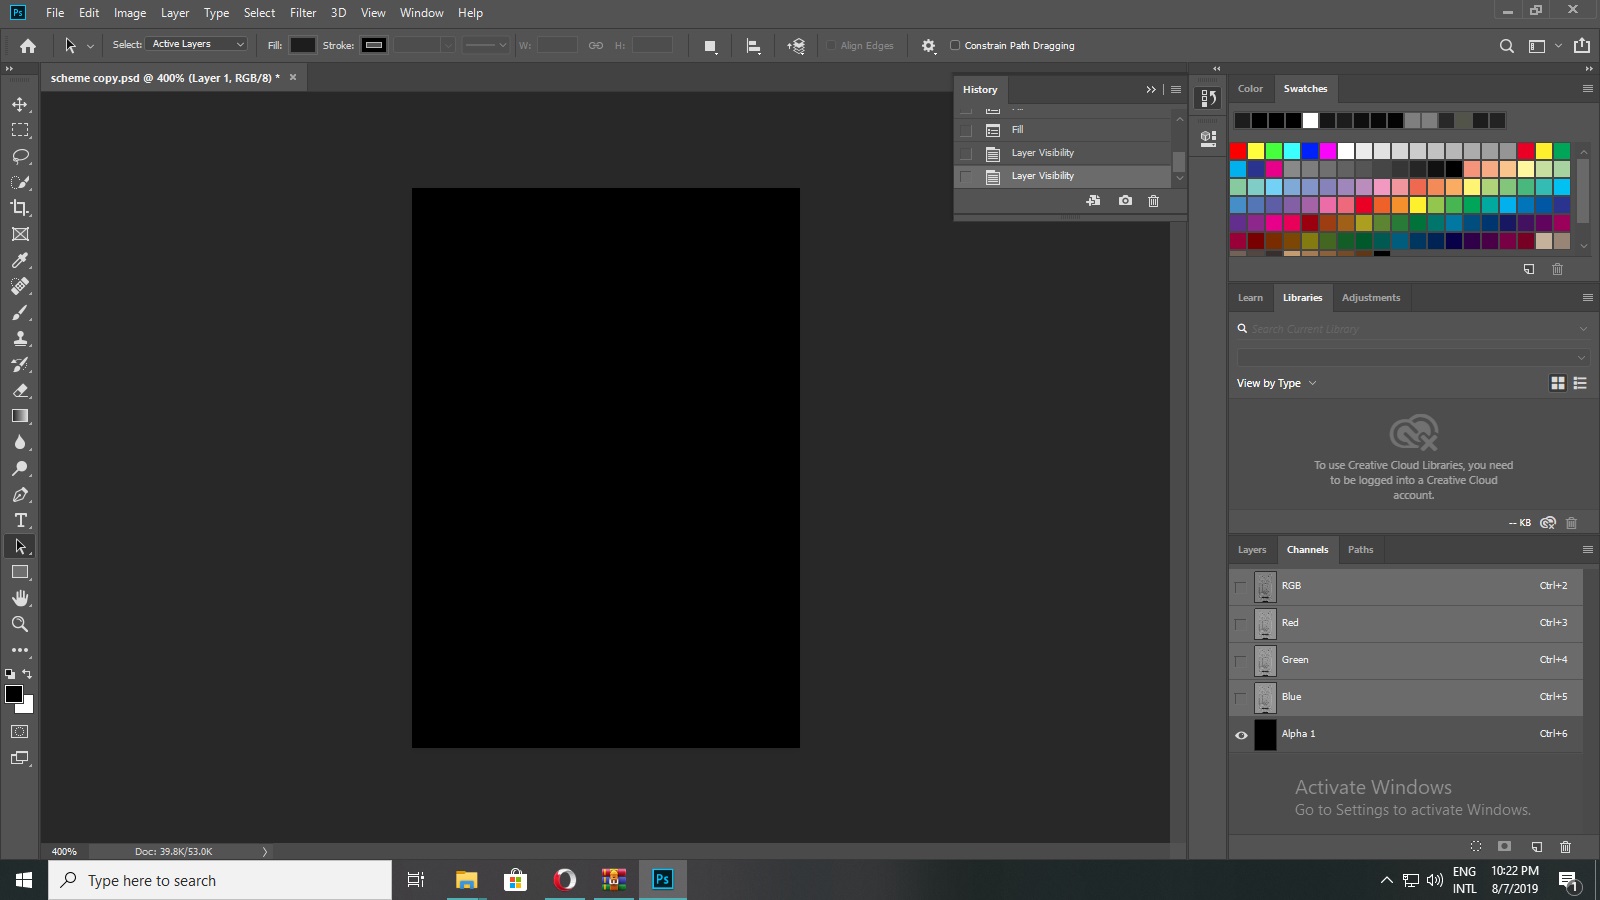
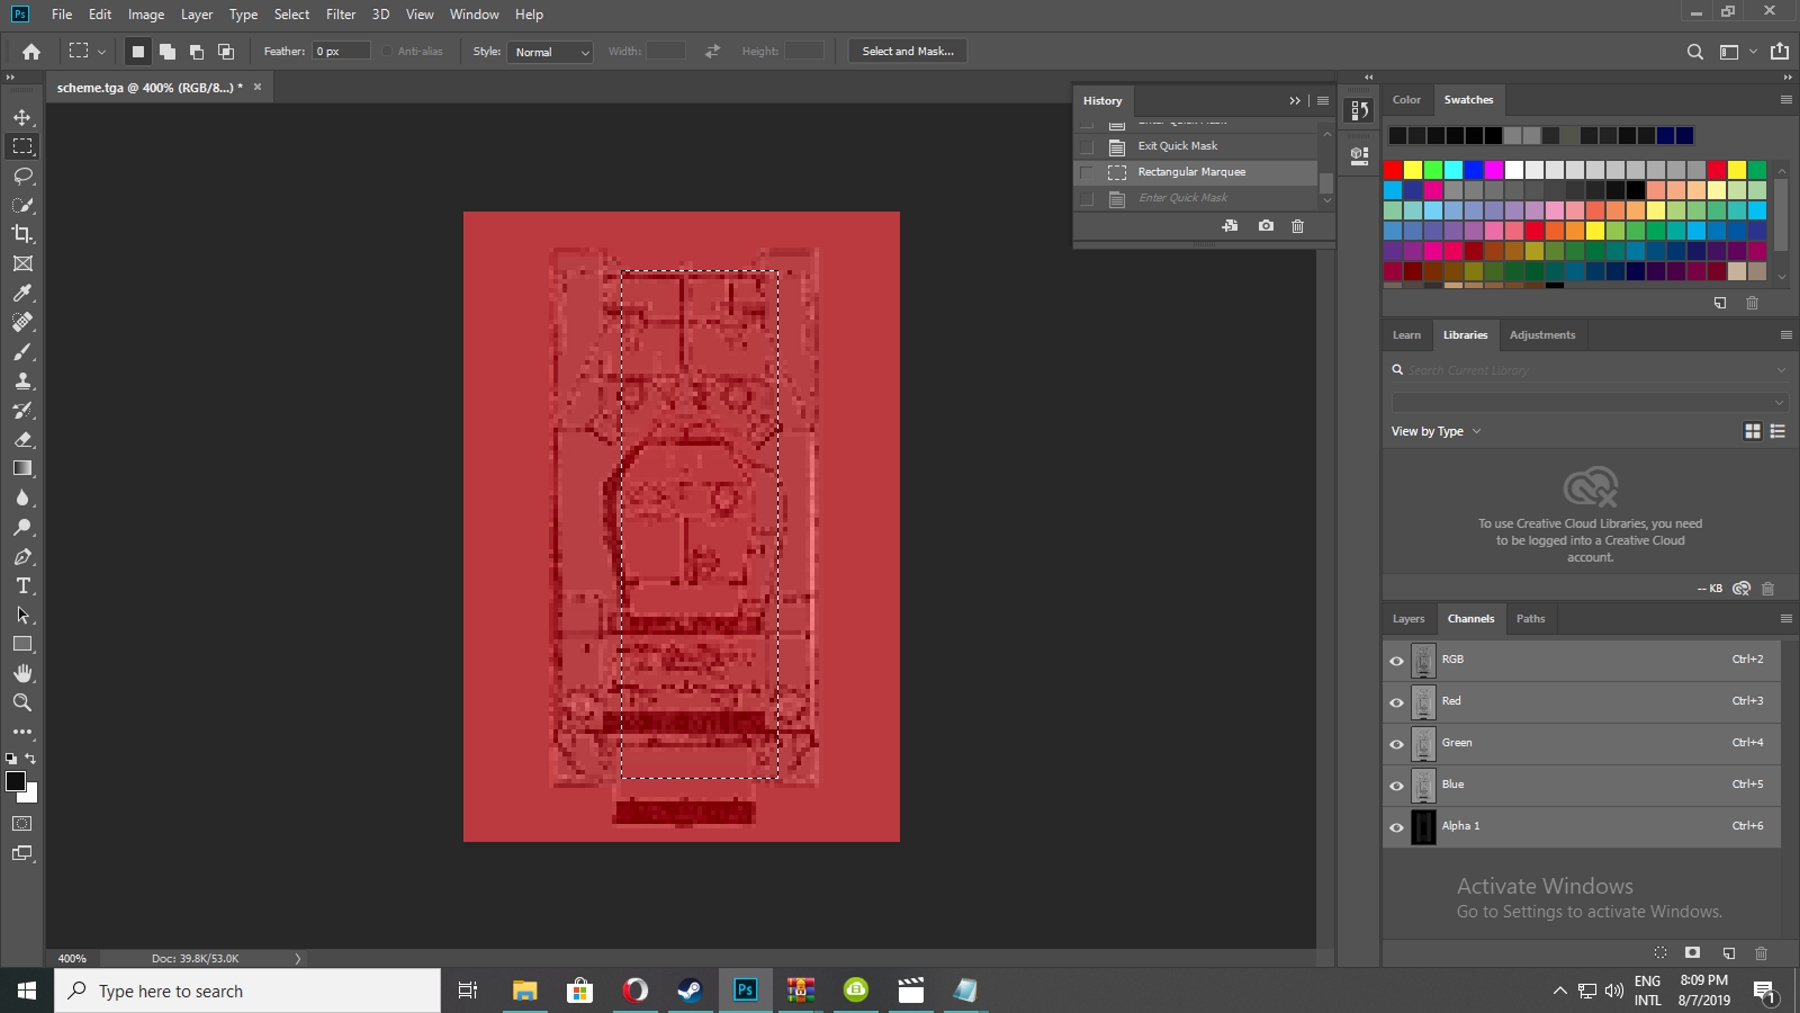
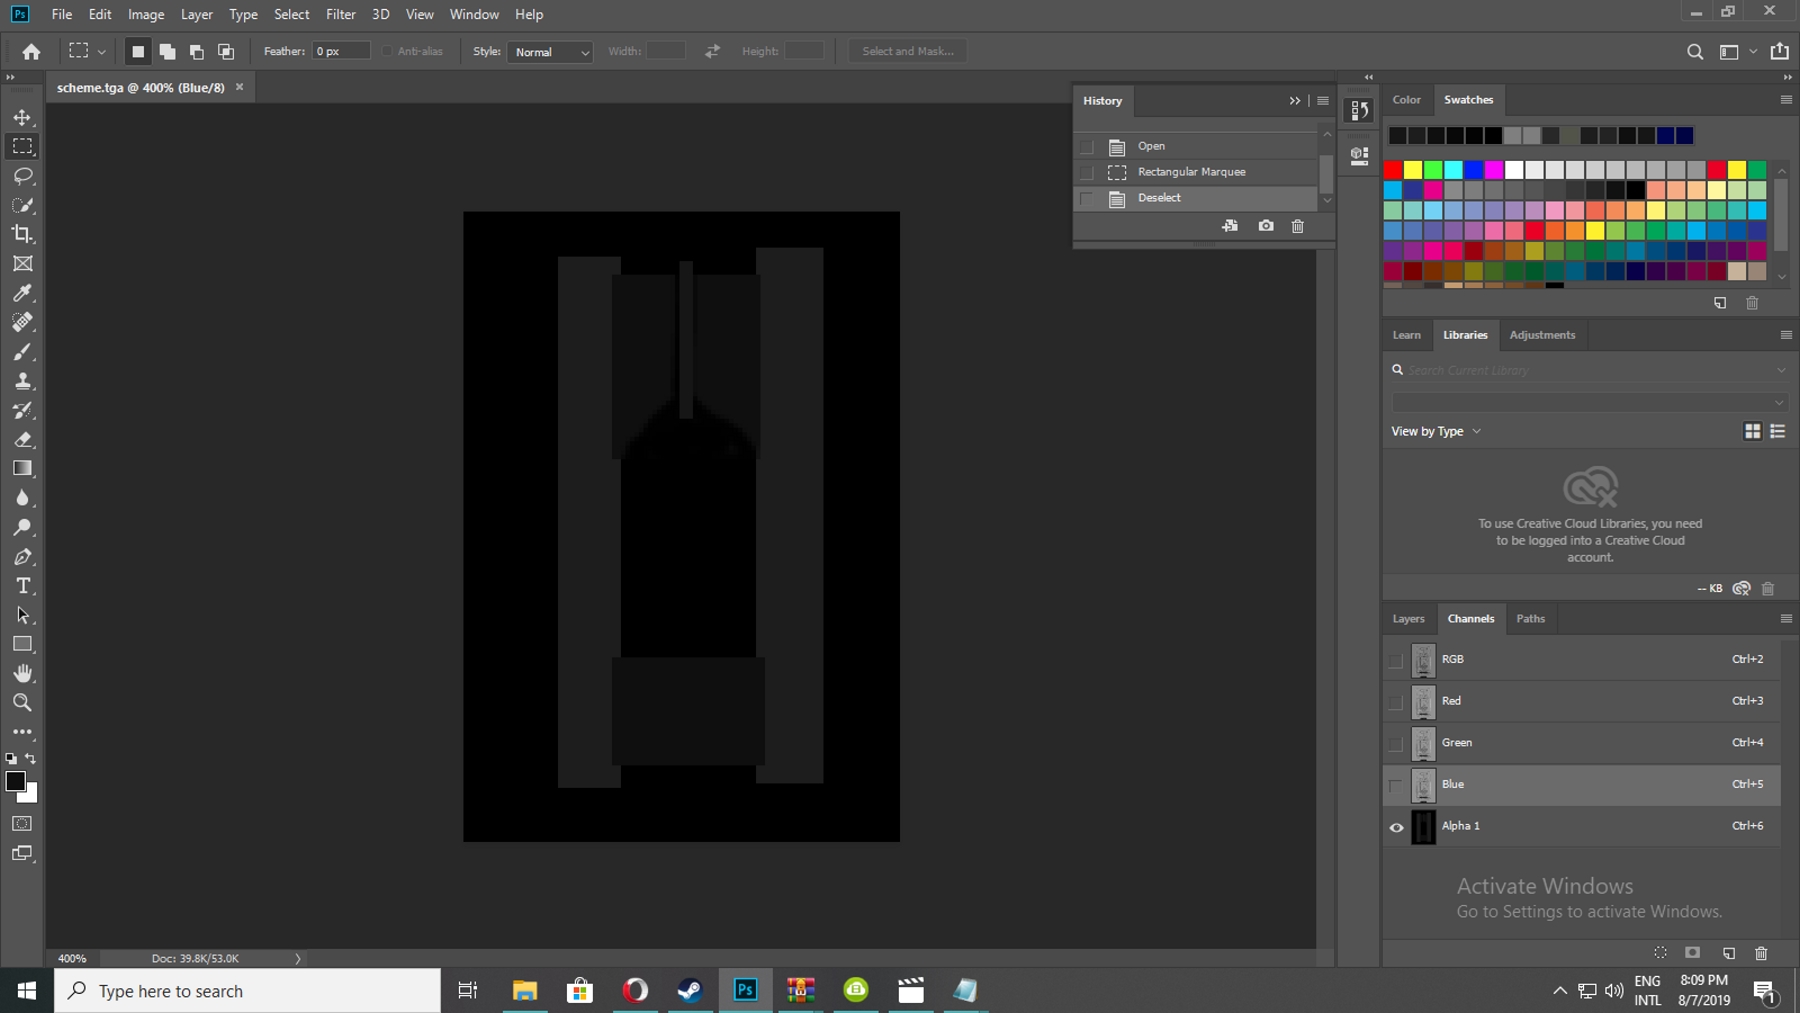
- Its time to setup alphas to ready the structure, for that go to channels, now select all R G B and Alphas, as R G B is the cover layers, where first you have to fill alpha to remove old details in it, for that select JUST alpha and fill it:

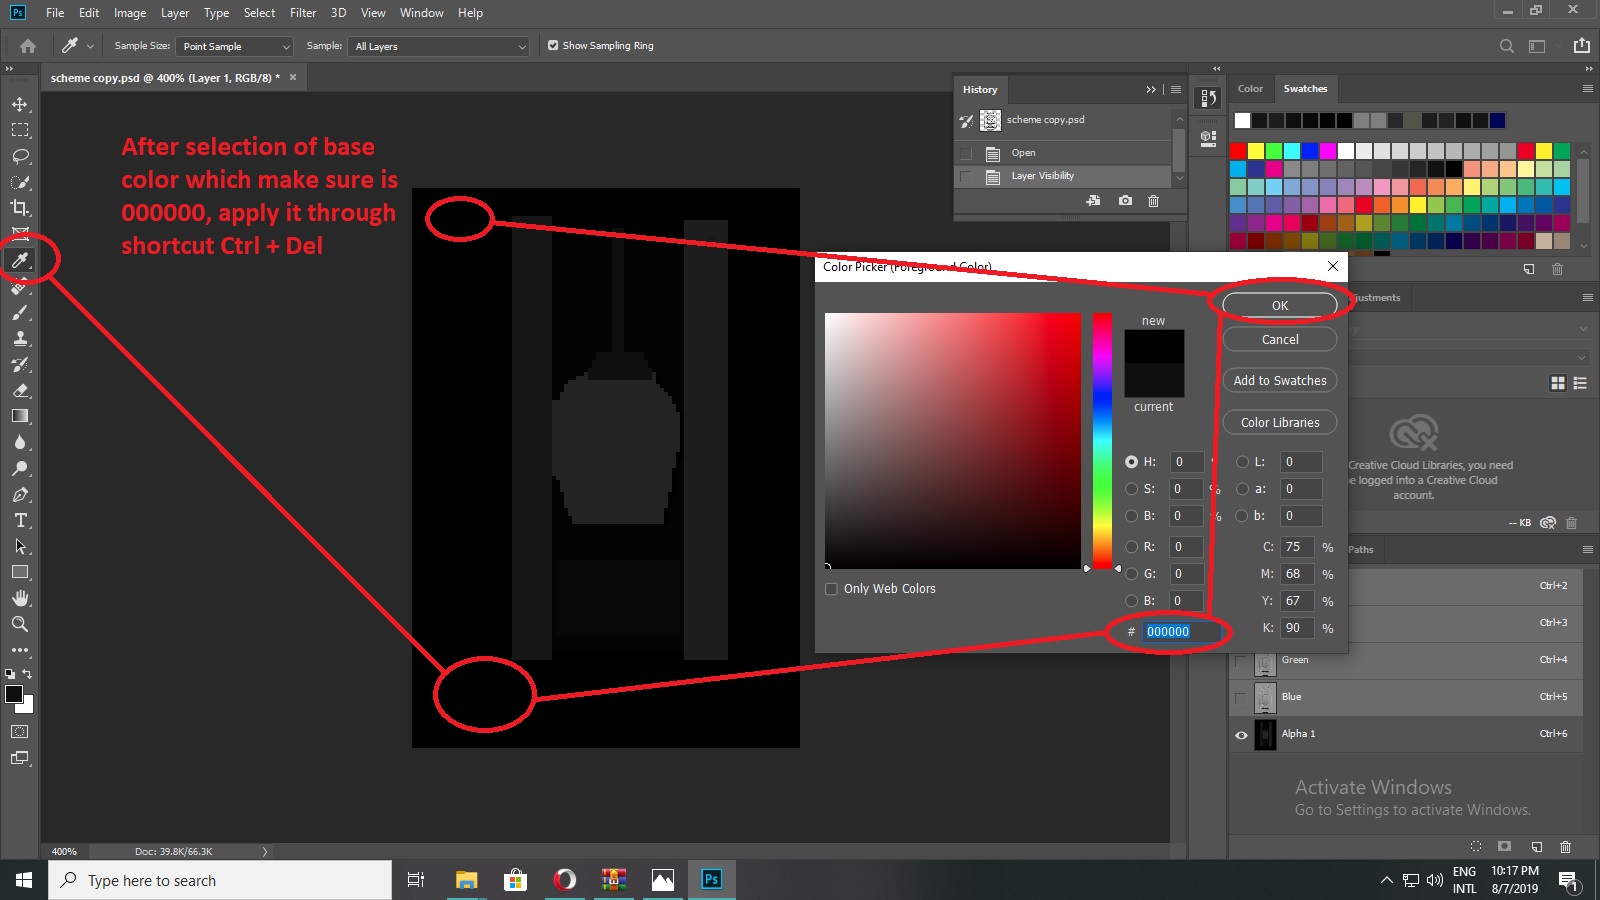
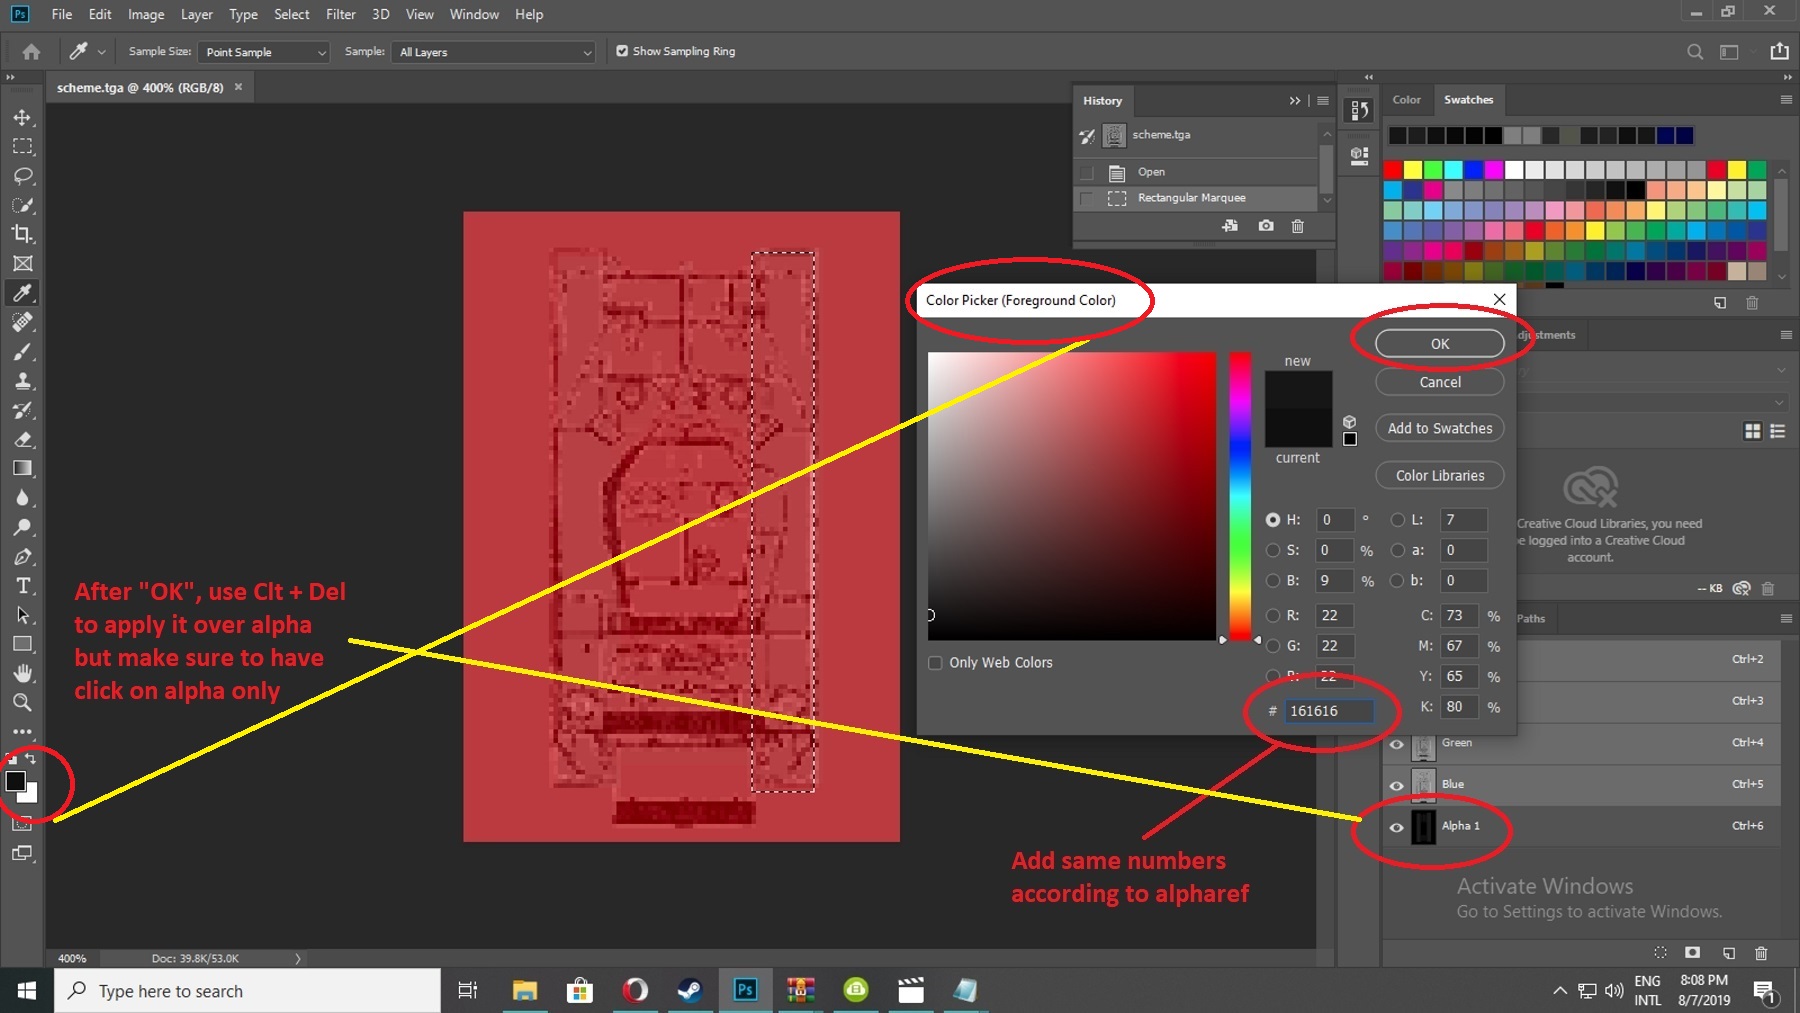
- Now UN-HIDE R G B and it will appear red after that, what you have to do is simply select the parts in alpha layer (make sure that after unhiding RGB, your selection MUST be on alpha, if all in selection along alpha, it will mess your work) which can have damage in blue print by SELECTION tools and apply ALPHAREF color SCHEMES numbers over it.
- First make SELECTION then click on color picker to mention alpharef scheme number at bottom of color finder, add the code and then click on OK to close the window, to apply it over use Ctrl + Del to apply that particular color in alpha.
- Don't forget to save which reference you are applying on which part:
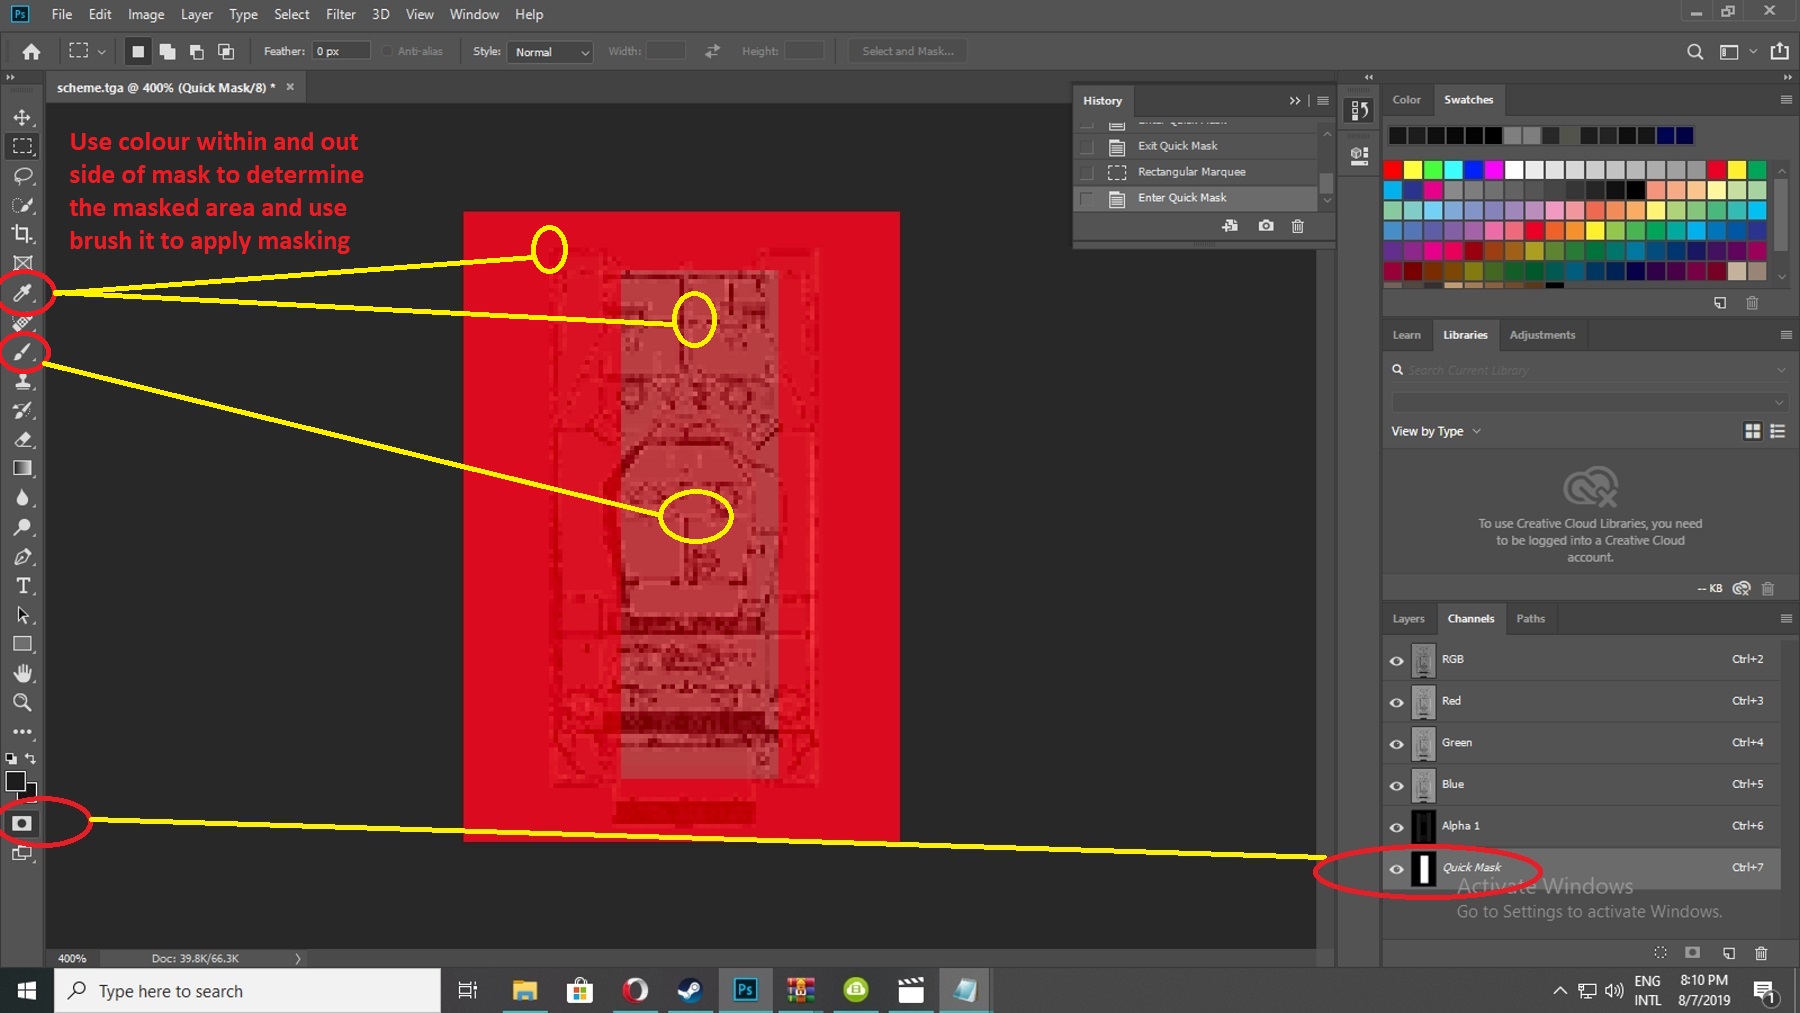
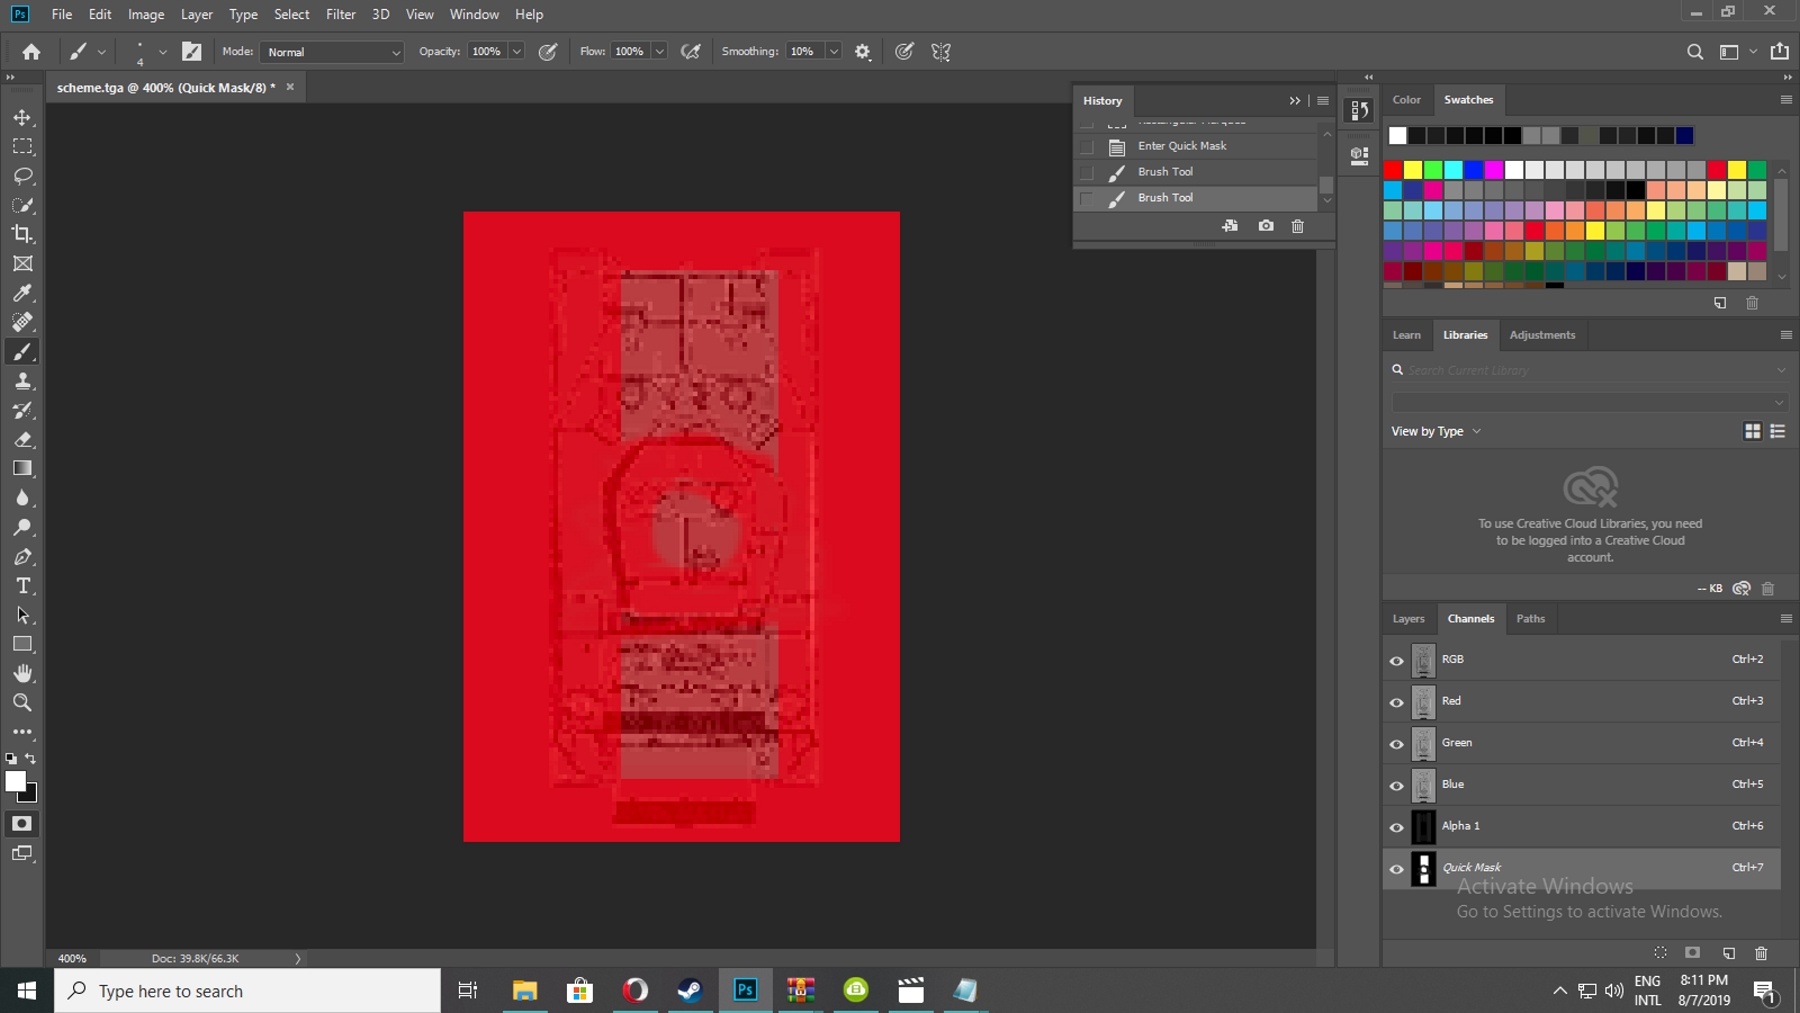
- Well that simple box / rectangular selection, now lets have advance selection by using Quick Mask, for that first you have to select area by other selection tool to have effect of quick mask, once you selected the area and applied quick mask it will change the color scheme with in the selected area and parameters out side of area, now to widen that area or make selection with in area use brush, if you want to wide area with in chose / pick color scheme with in quick mask, if you want to subtract some area within brush use outside of quick mask color scheme to decrease the selection area, now after completion of your masking, click on quick mask icon to have your selection by COLOR DIFFERENCE:

- After putting all your references of parts in alpha, you may have those parts appear like following in alpha, just HIDE the RGB and see how your alpha references are:
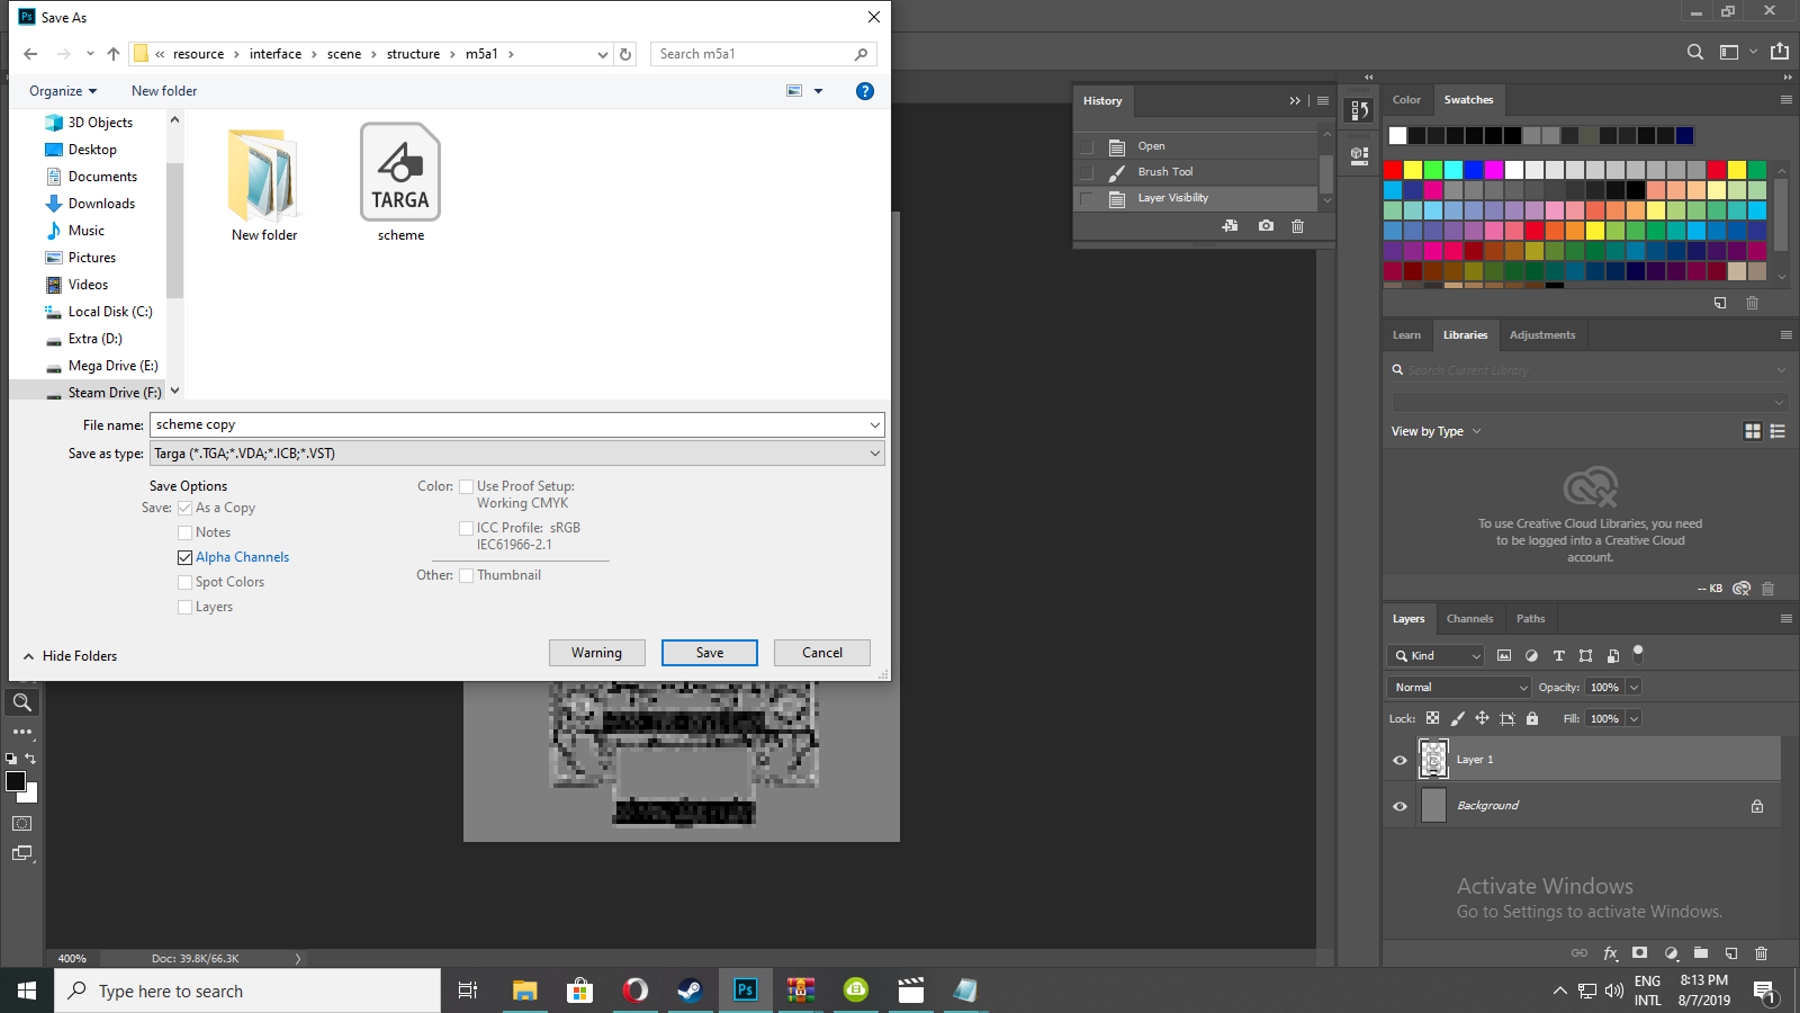
- Save it as .TGA / Targa format in your entity structure folder and check the references between Alpha and in game body parts:
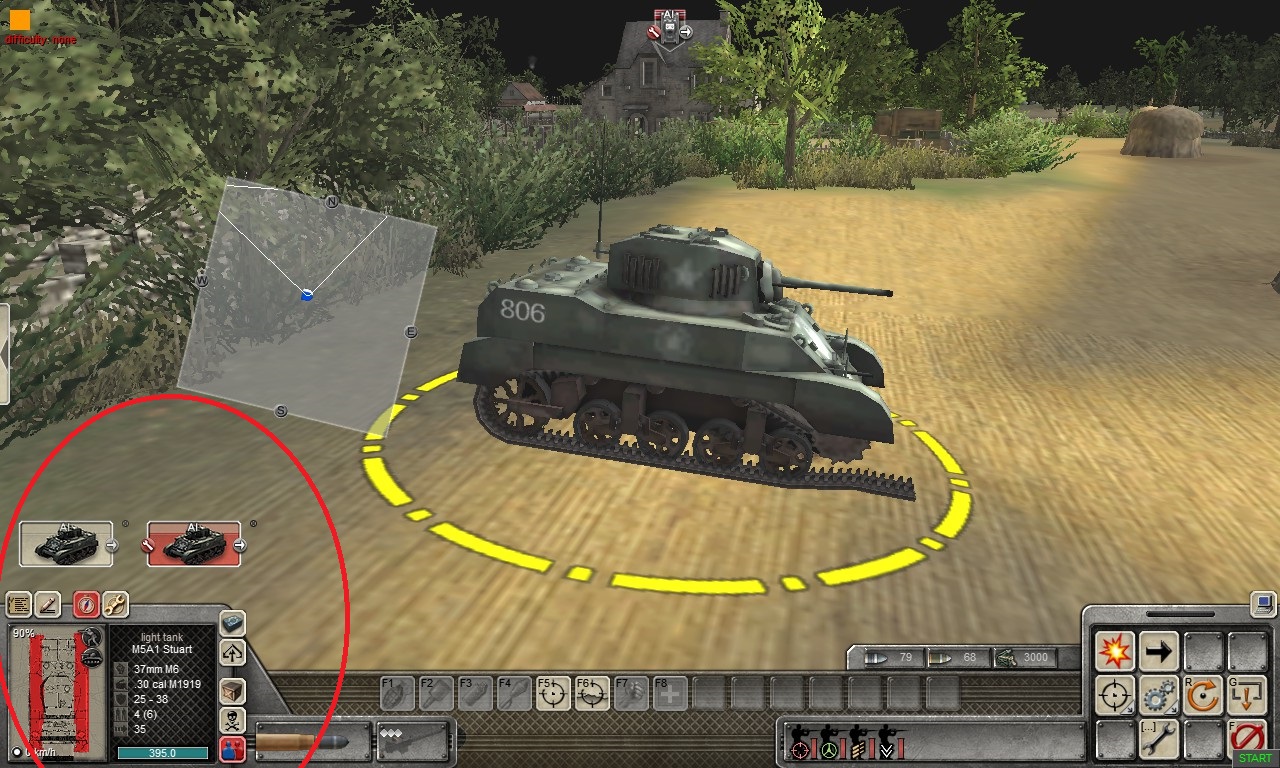
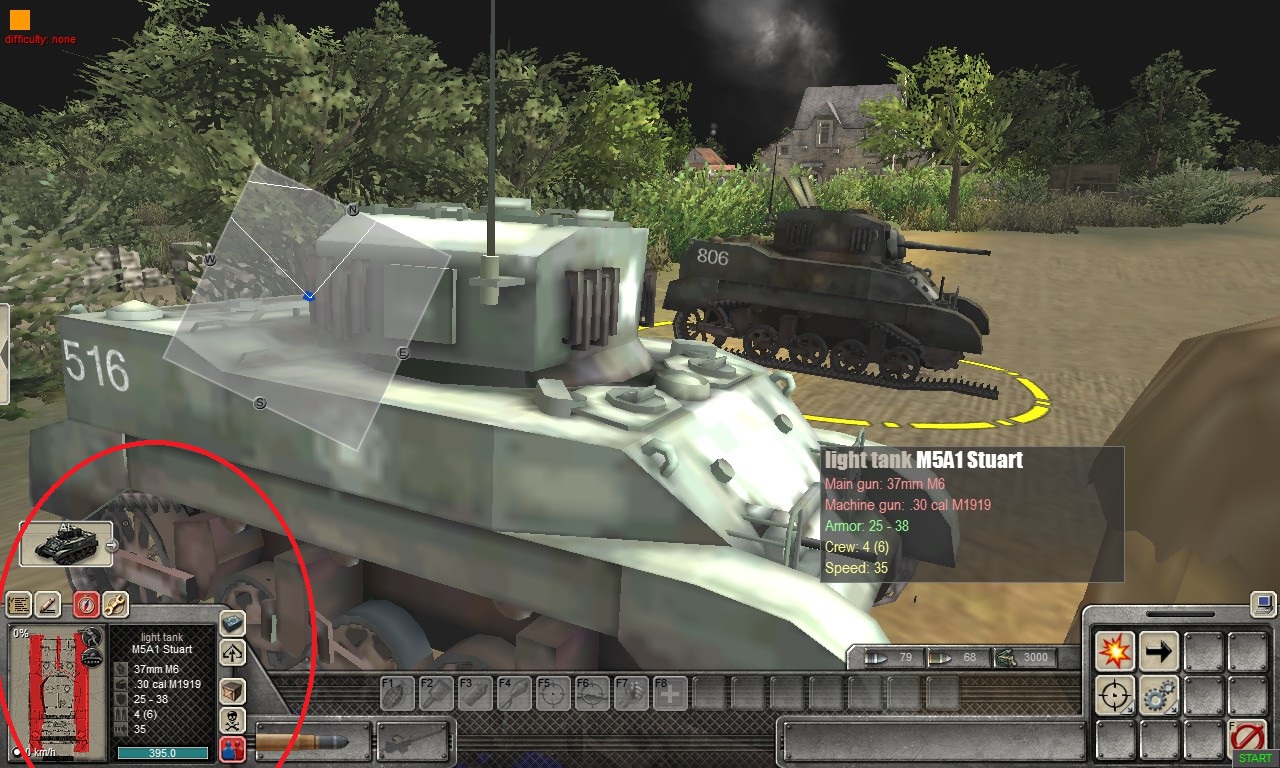
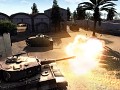
- In game screenshots (though I know its a long and tiring process but mods are incomplete without this basic functions, so enjoy your hard work finally):


This comment is currently awaiting admin approval, join now to view.