Introduction
Dragon Age Origins shipped with an official SDK created by Bioware. At the same time however they supplied very little in the way of creating entirely new content for the game. In the form of new models, animations and so forth. Thankfully fans picked up the slack and it's possible to import custom content into the sdk.
At the same time however documentation on how to do this is very sparse and hard to follow. I've done my best deciphering it and have elected to write a tutorial on the process step by step.
What you will need
1. The Dragon Age Toolset. This can be downloaded from the Dragon Age Toolset wiki.
2. The 3dsmax model import plugin. This can be located on the Dragon Age Nexus here.
3. 3dsmax 2009 (or Gmax, however this tutorial will operate off the assumption you are using 3dsmax 2009. The model plugins include a readme on how to install for Gmax specifically). Unfortunately you cannot at this time skip using one of these however I will go over how to import meshes from Blender later on.
4. Tazpn's DAO Tools. These will allow you to extract DAO's assets from the compressed archives the game ships with. These can be downloaded here.
Installing the 3dsmax plugins
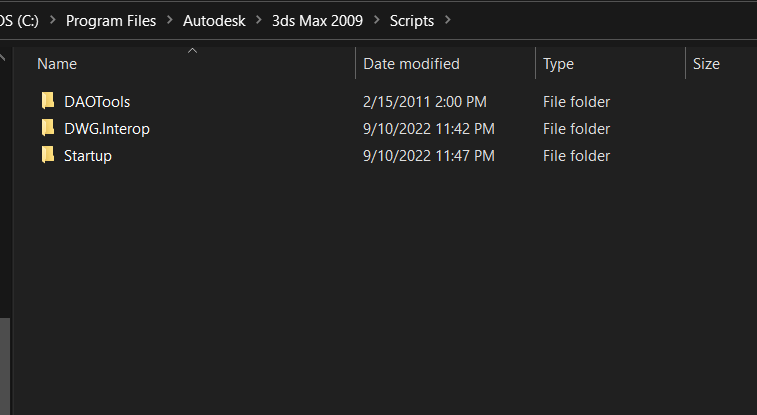
Once 3dsmax 2009 has been fully installed. Simply copy the startup and DAOTools folders into your C:\Program Files\Autodesk\3ds Max 2009\Scripts folder. Then restart 3dsmax.
After restarting 3dsmax it gets a little tricky. Go up to Customize->Customize User Interface at the top. Then switch over to Menus.
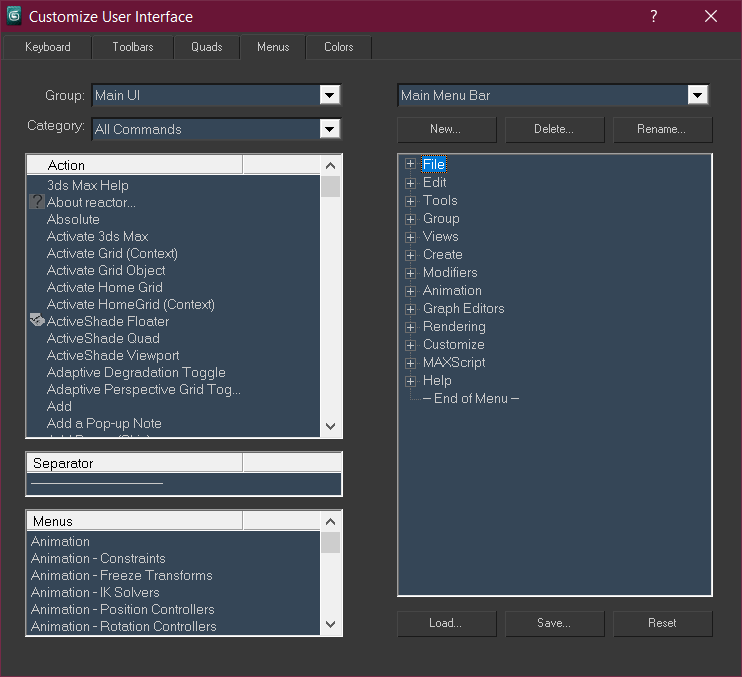
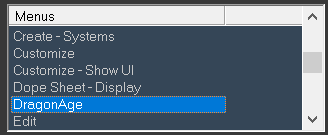
From here we'll need to create a new Dragon Age related menu. Under the heading that says "Main Menu Bar" press the "new" button. Then type in "Dragon Age". This will create a menu for the plugin's buttons.
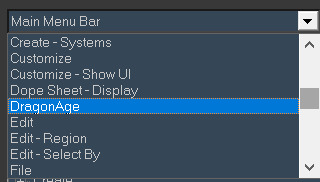
Now click on the heading that says Main Menu Bar and scroll down to Dragon Age.
You are now in your Dragon Age menu. In the top-left window on the left scroll down to "Dragon Age Origins Animation". Now click and drag it over to the right where it says "End of menu".
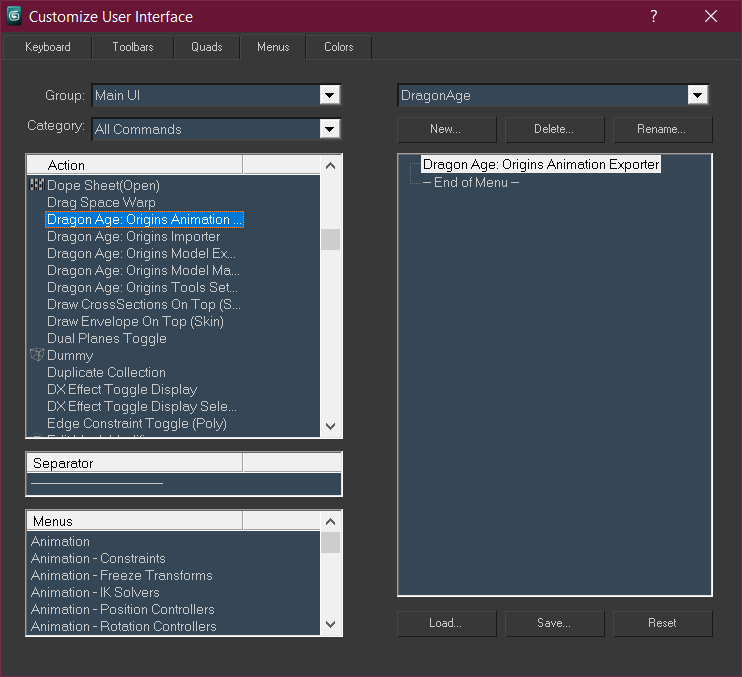
Do the same for all of the other ones that have Dragon Age Origins listed.
Now click the top heading that says Dragon Age again and go back to Main Menu Bar. In the bottom left hand menu screen you should be able to find your Dragon Age menu that you created.
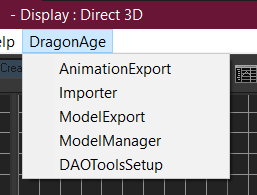
Drag that over to the right under Main Menu Bar. Ideally underneath help. Then click save.
If done correctly it should now appear in the top menu bar with all of the buttons. Congratulations you have installed the 3dsmax plugin.
Installing the toolset and extracting the assets
After you have installed the Dragon Age toolset there's one more step related to model creation. You also need to extract the assets. This can very easily be done using a tool included with Tazpn's DAO Tools called daocmd.
First. Download and extract the archive. Then open a command prompt and type in
cd (name of directory you extracted to)
Then press enter. After that type in
daocmd erf "(name of your dragon age game directory)\packages\core\data\modelhierarchies.erf"
(Make sure it has quotation marks around it)
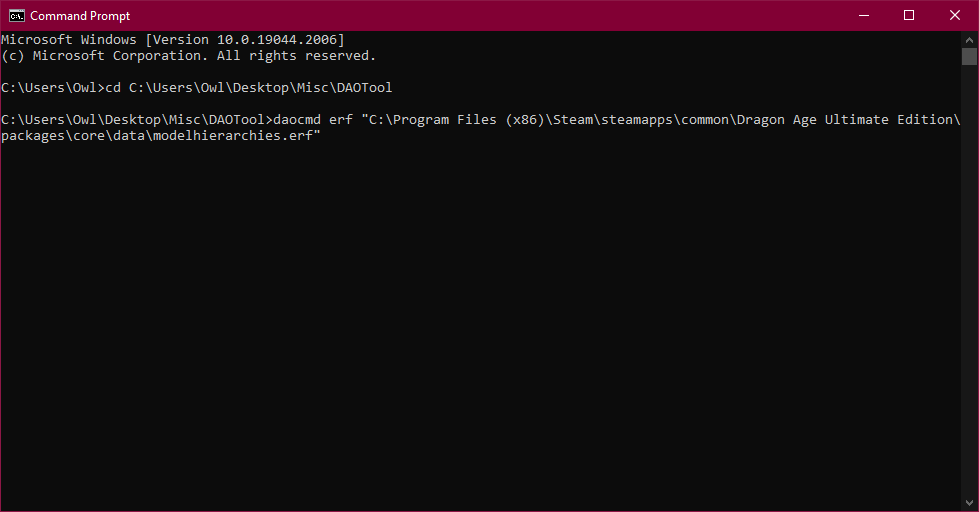
This will extract the contents of the .erf to it's own folder under packages\core\data. These are the source files to Dragon Age Origins. It's recommended to extract all of the .erf files. There's also another hiding in core\textures\high\texturepack.erf. Extract that one too.
Back in 3dsmax. Under the Dragon Age menu we created. There should be an option called DAOToolsSetup.
Click into it and you'll see some options.
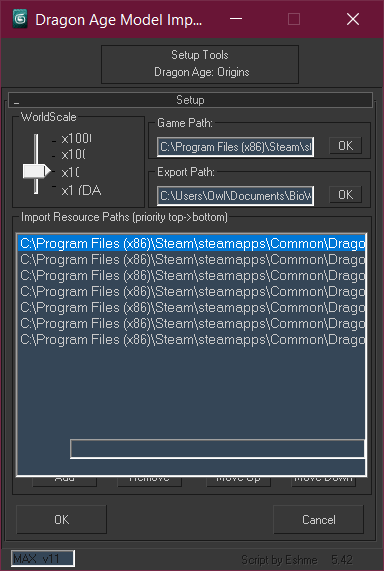
Depending on your version of Windows some of the text might be cut off. Fill in the game path and point it to your root game folder. The export path should be in your documents folder. C:\Users\YourUsernameHere\Documents\BioWare\Dragon Age\AddIns\yourmodulehere\module\data
Ideally when importing new models you should create a new module. However if you don't plan on doing it you can also point it at Documents\BioWare\Dragon Age\packages\core\override
Next. Click the add button and add in all of the folders you just extracted. This tells the 3dsmax plugin where all the game assets are so it can find them on the fly. Once you've done that you're ready to import and export some models.
Importing models
Now that you've got the plugin all setup, you're ready to import and export some models. Let's try importing one. Go to the Dragon Age menu and click Importer.
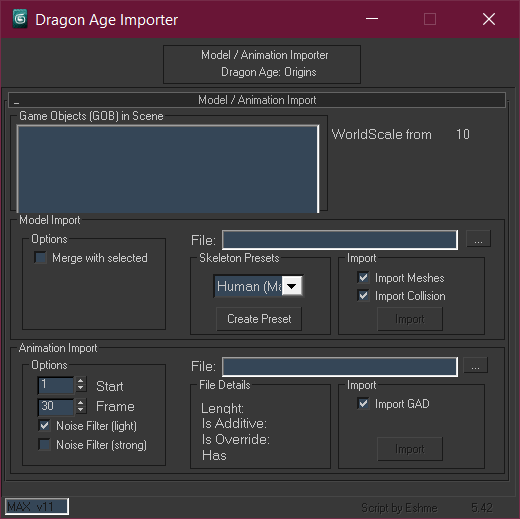
There's a lot of options here but for now go to File: and click the ... next to it. Then navigate to a file you want to import. Models are located in the modelhierarchies folder. For the purposes of this tutorial I'll import c_wolfa_0.mmh.
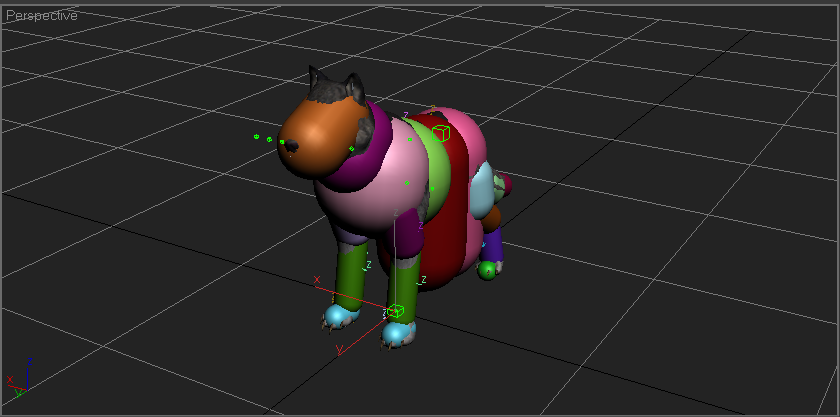
The weird cylinders are collision meshes. They essentially define where the player gets blocked when trying to walk into the model. For now let's hide these.
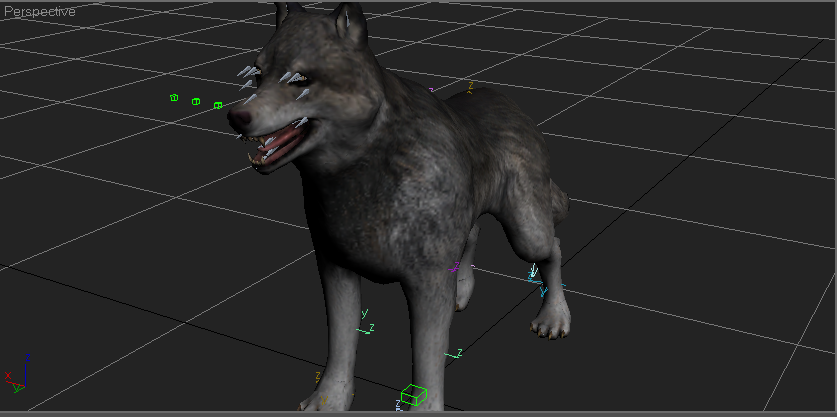
There's DAO's wolf model. Complete with rig. If you want to import an animation go back to the DAOImporter tool, click on the "GOB", and press the ...s under animation import. Then head over to the anims folder. For this I'll import c_dog.howl.ani
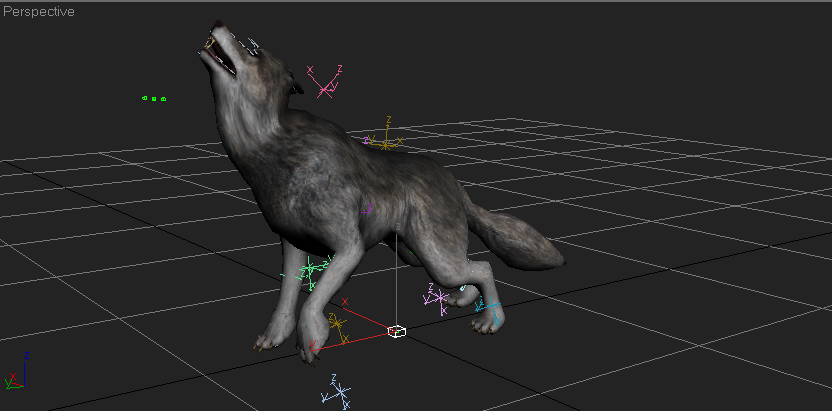
There it is. Complete with animations.
Importing models into 3dsmax 2009
Before I explain exporting I'll teach you how to import models into 3dsmax 2009 complete with animations. Since I suspect you don't want to use 3dsmax 2009 to model with. For the purposes of this tutorial I'll go over how to do it via Blender.
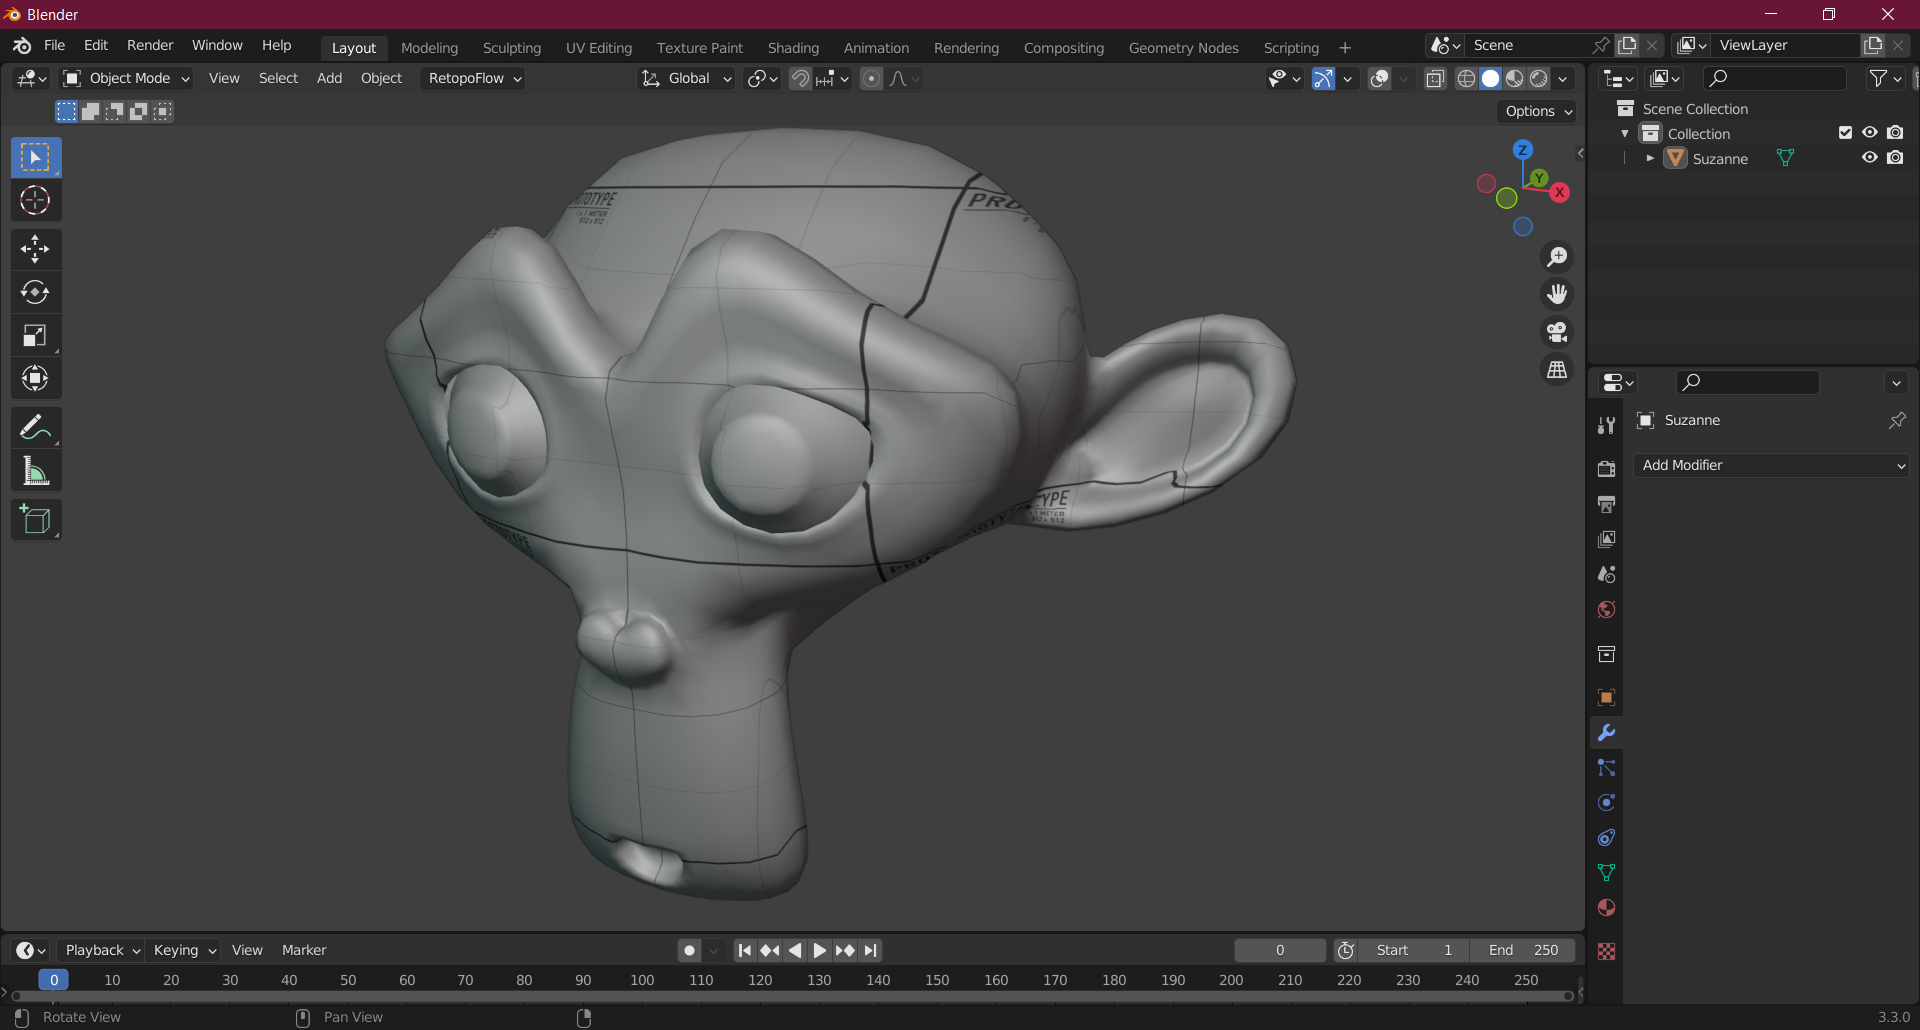
In Blender as a test I've spawned Blender's mascot Suzanne and assigned it a texture.
Next you have to export it as an FBX. There's two ways to get it into 3dsmax 2009. You can either use Autodesk's fbx converter to convert to 2009's version of FBX. Or use a paid addon for Blender called BetterFBX. BetterFBX is most ideal as its conversion is nearly flawless and lets you convert directly from Blender to the 2009 version of FBX.
After that import into 3dsmax.
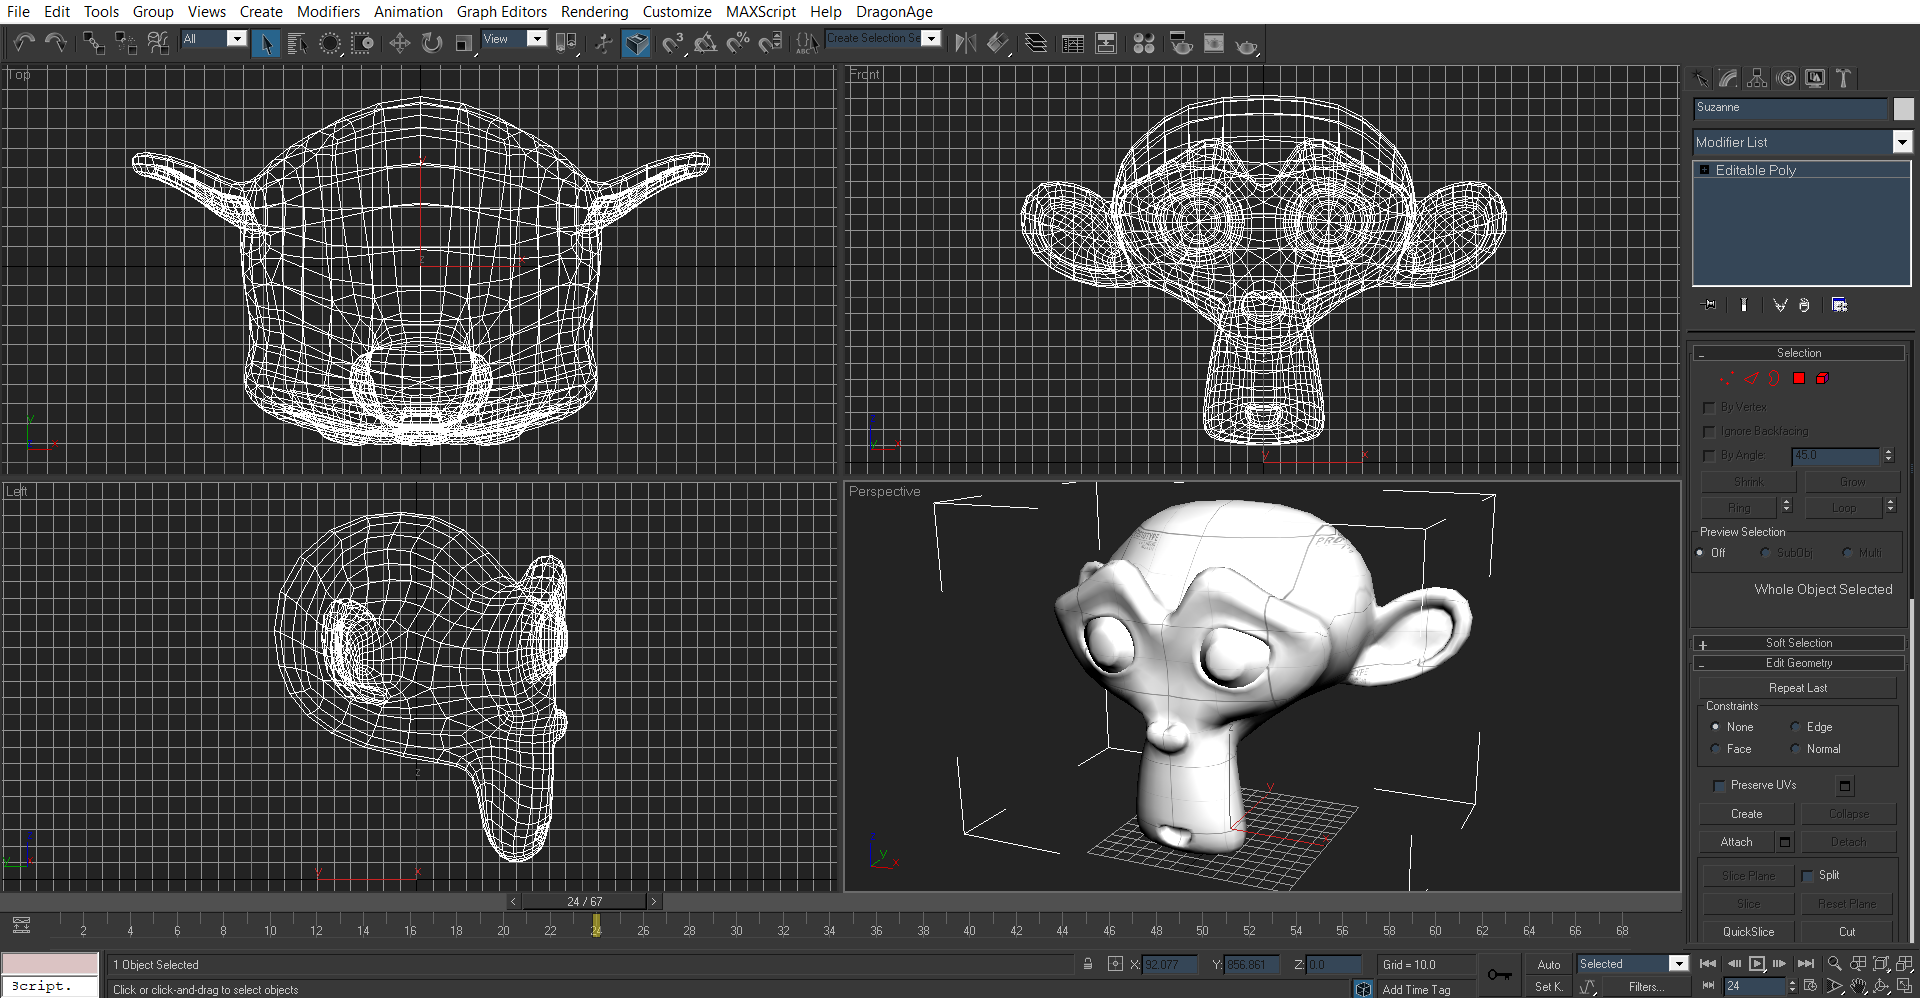
There she is. There's a few more things we need to do before it'll appear in-game.
Exporting into Dragon Age Origins
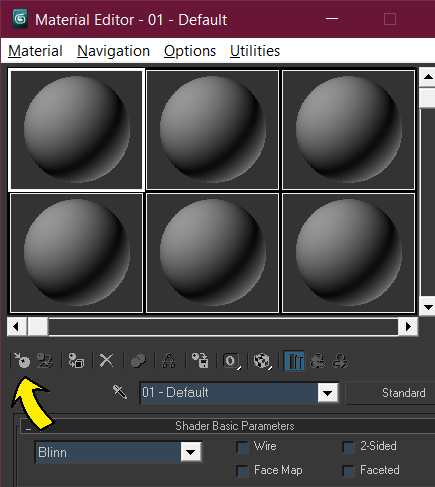
Press the M key to open the material editor. Then click the leftmost button labelled "Get Material".
Scroll over to "Dragon Age Material" and double click it.
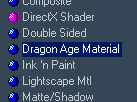
Dragon Age Material is the proper material type for importing into Dragon Age Origins. This will allow your texture to appear in-game. From here you can pick the various maps associated with the model. Once you're done drag the material over your model.
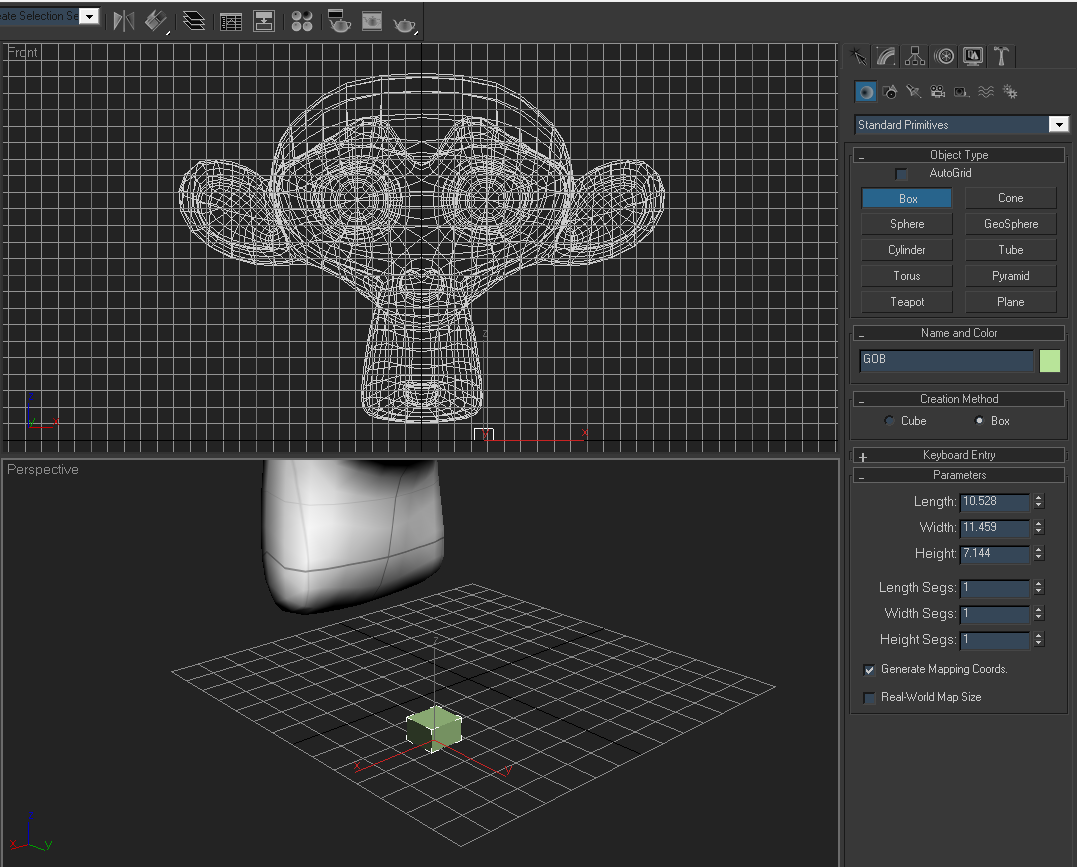
Next, Dragon Age Origins models need an object called a "GOB" in the scene somewhere. For the purposes of this tutorial I'll create a box primitive and give it the name "GOB".
Next click the "Select and Link" button in the top left corner of screen. Then drag a line from your model and the GOB.

You can check if you did this correctly by trying to move the GOB model. Your model should be dragged along with it.
Next go to the Dragon Age menu and go to ModelManager.
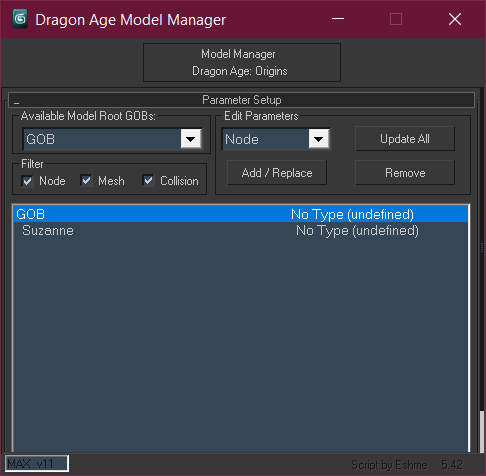
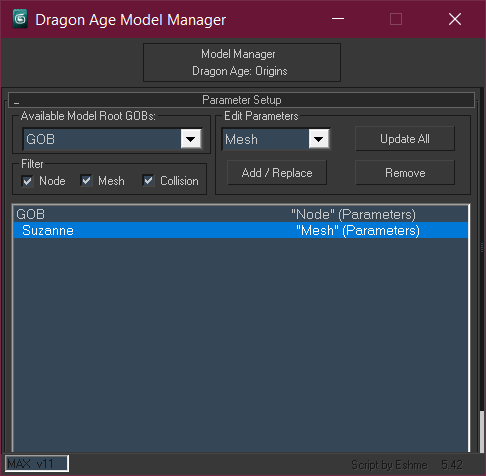
Select the "GOB" and press Add/Replace. This should set it to the "node" parameter. Then select your model and under "Edit Parameters" scroll over to mesh. Then press add/replace.
Next go to ModelExport under the Dragon Age menu.
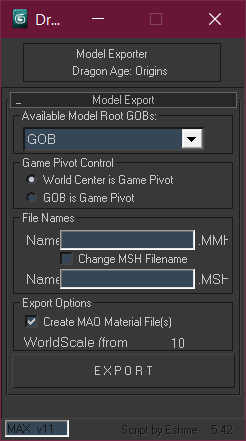
Type in a file name for the model and click "Create MAO Material File". Then click export. In this case I'll go with "Suzanne.msh". It might suggest you to reset xforms which can be done in the utilities window in 3dsmax.

Once it's been exported the model will appear now in the toolset.
Spawning the model
For the purposes of this tutorial I won't go over how to properly import animations as it would require an even longer tutorial going over 2da editing and the animation composer. For now I will just show how to spawn the model in the toolset and confirm it works.
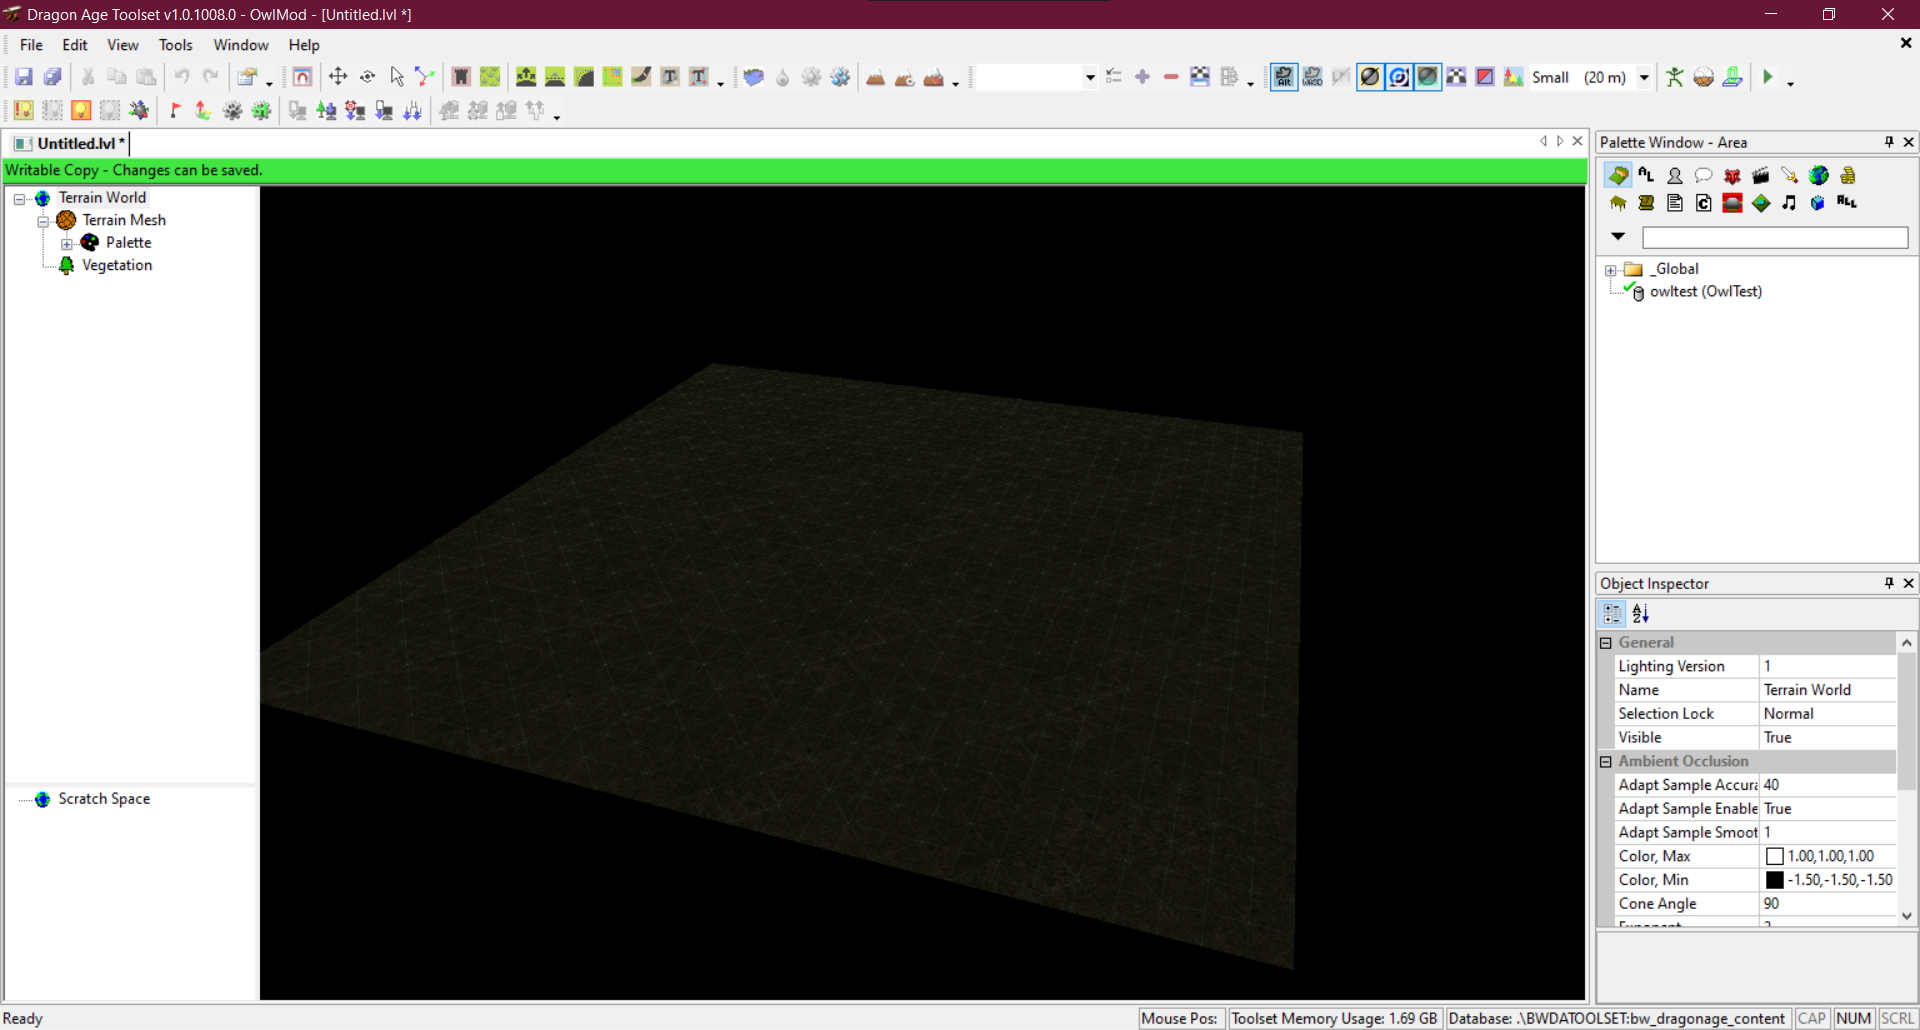
Open the toolset and go to file->new->level. Create a Terrain (Landscape) level with the default settings.
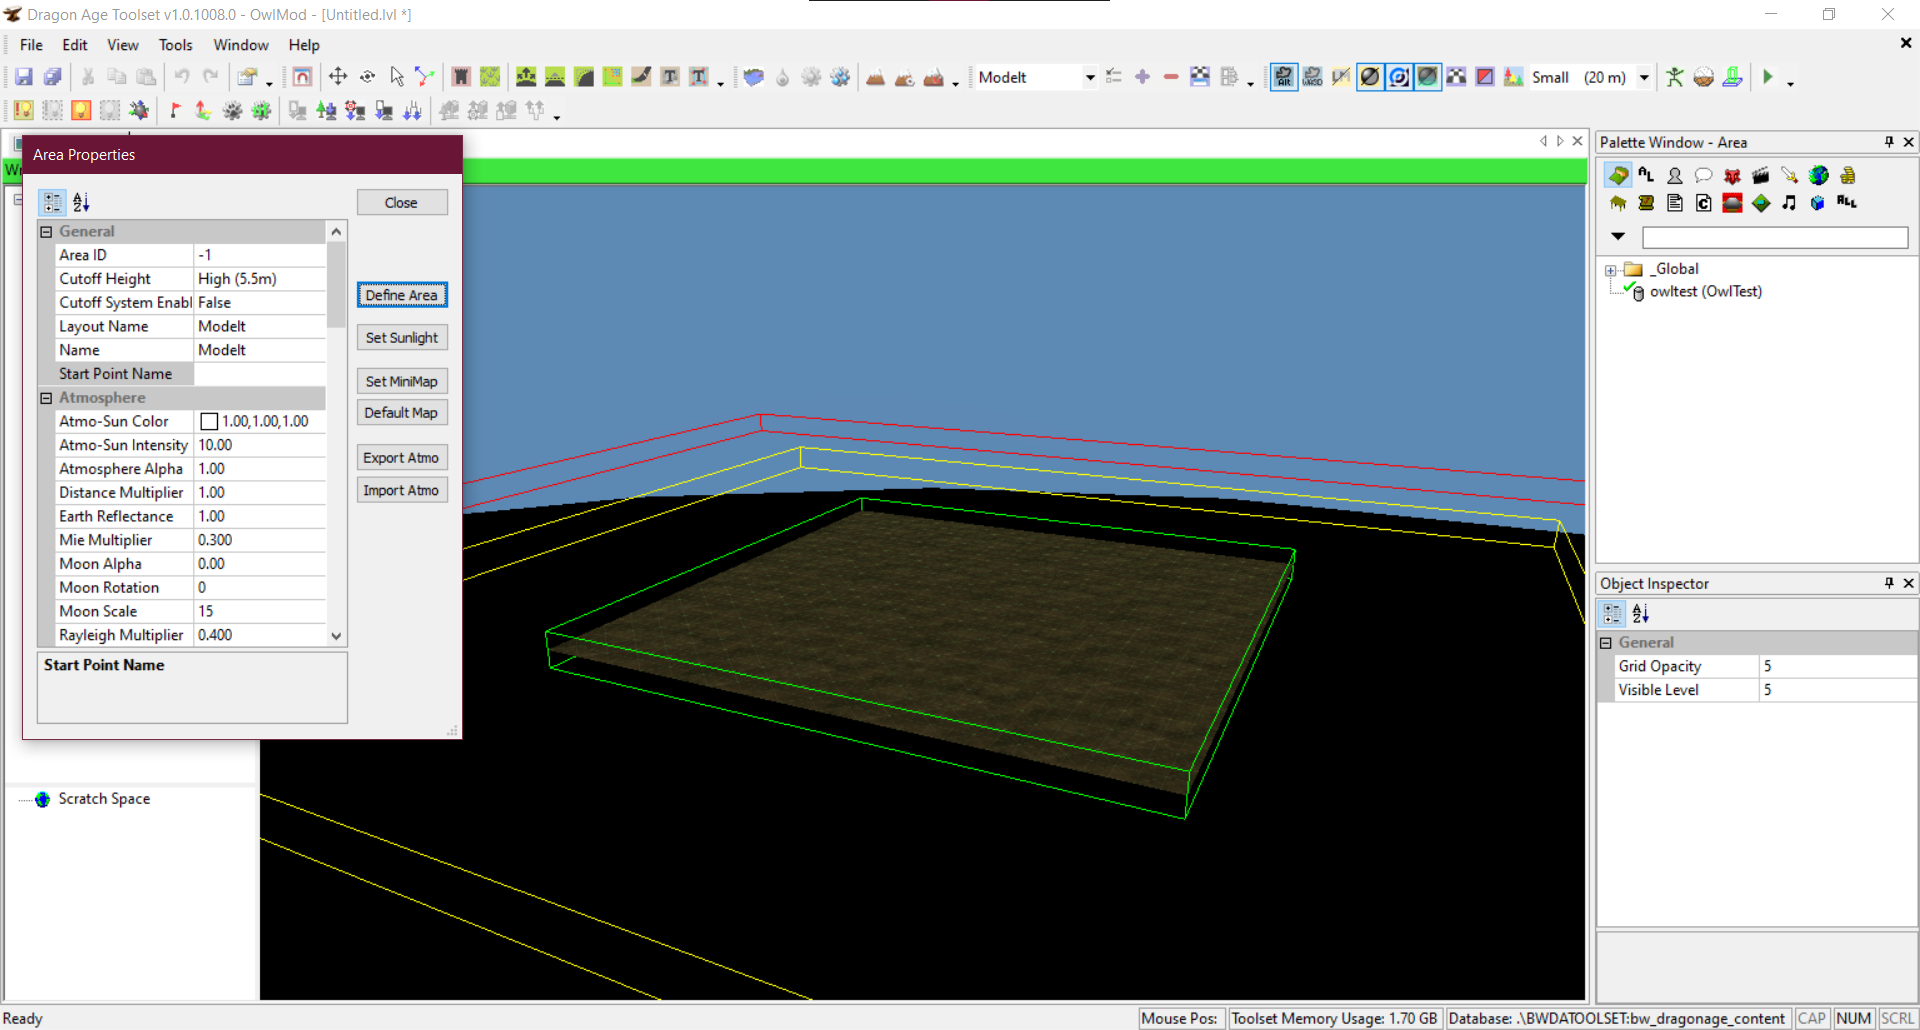
Create an exportable area. This'll give your area a sky and allow you to assign it a name and define the playable area.
Now go to Edit->Spawn Model. Scroll over to where your model is. Double click it to spawn it in.
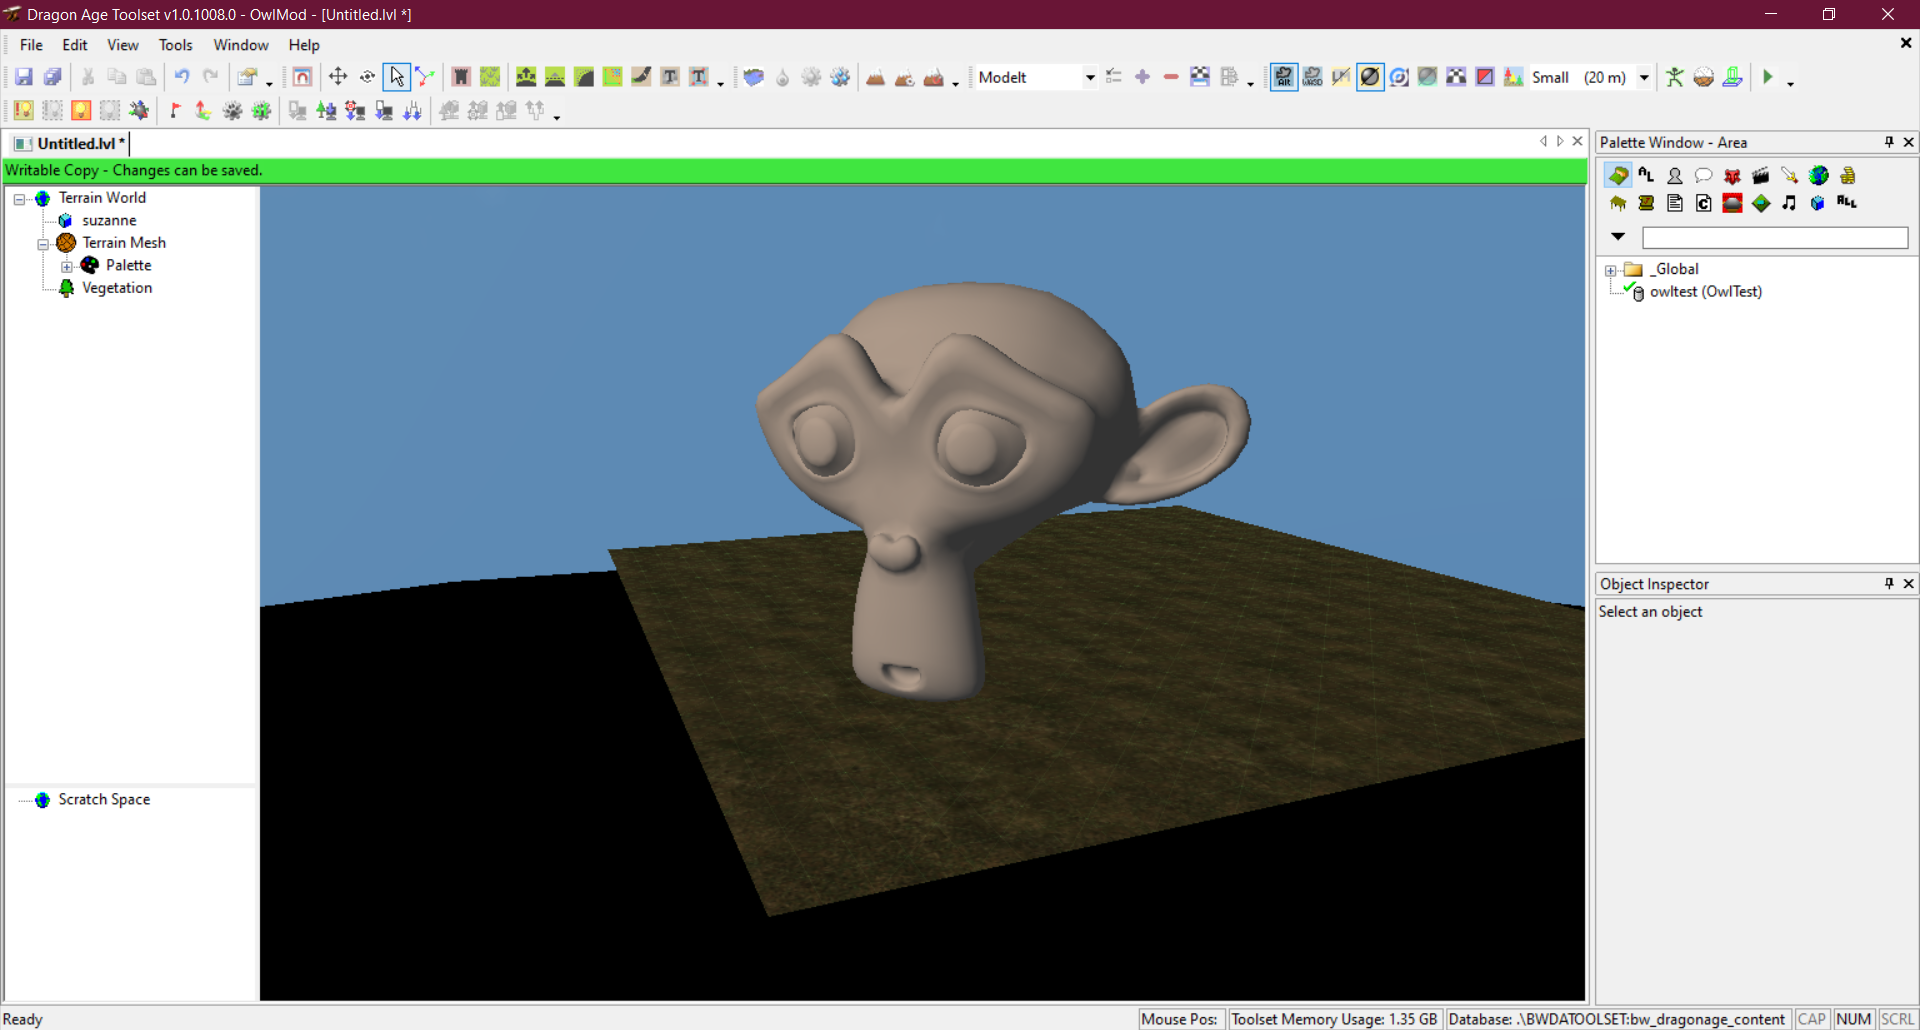
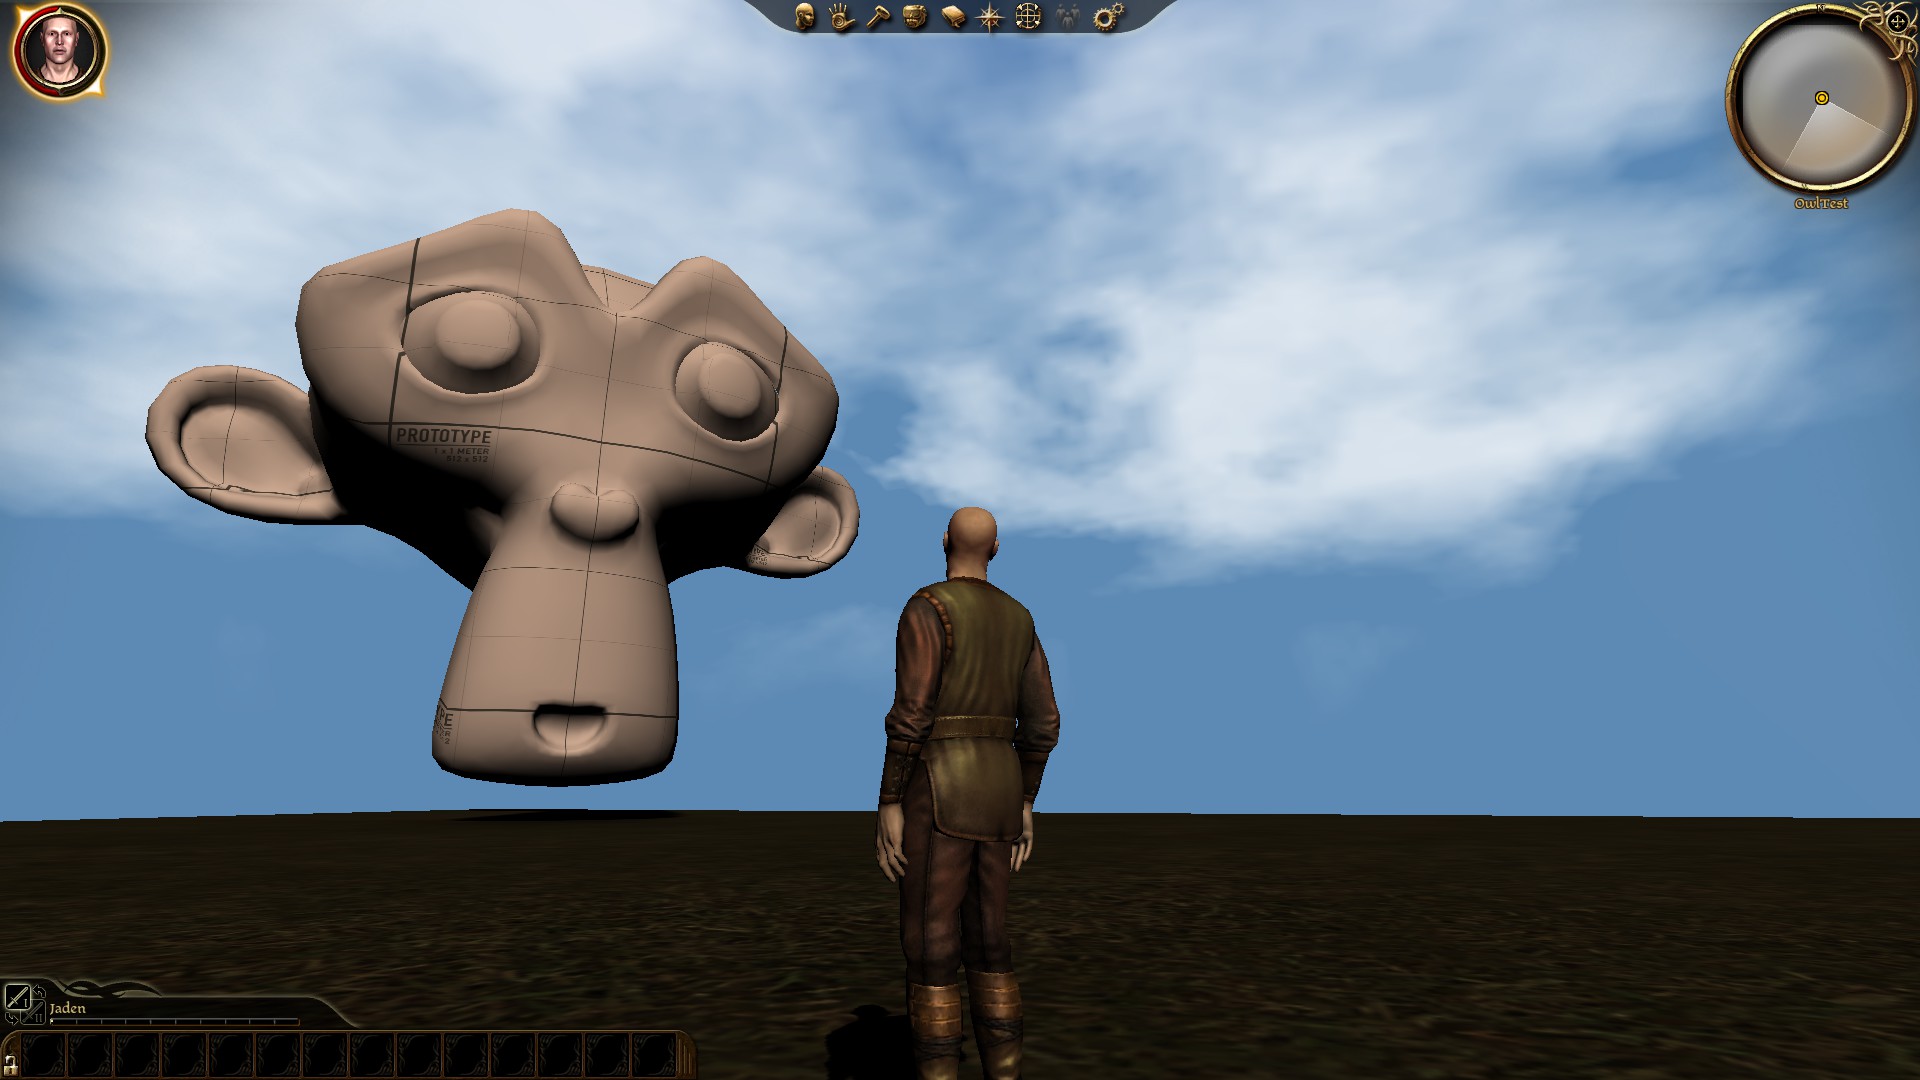
There it is. However it has no textures! To fix this we'll need to put the texture into the module\data directory (or into the packages\core\override folder). Make sure it's saved as a .dds. Then restart the editor and reopen the level.
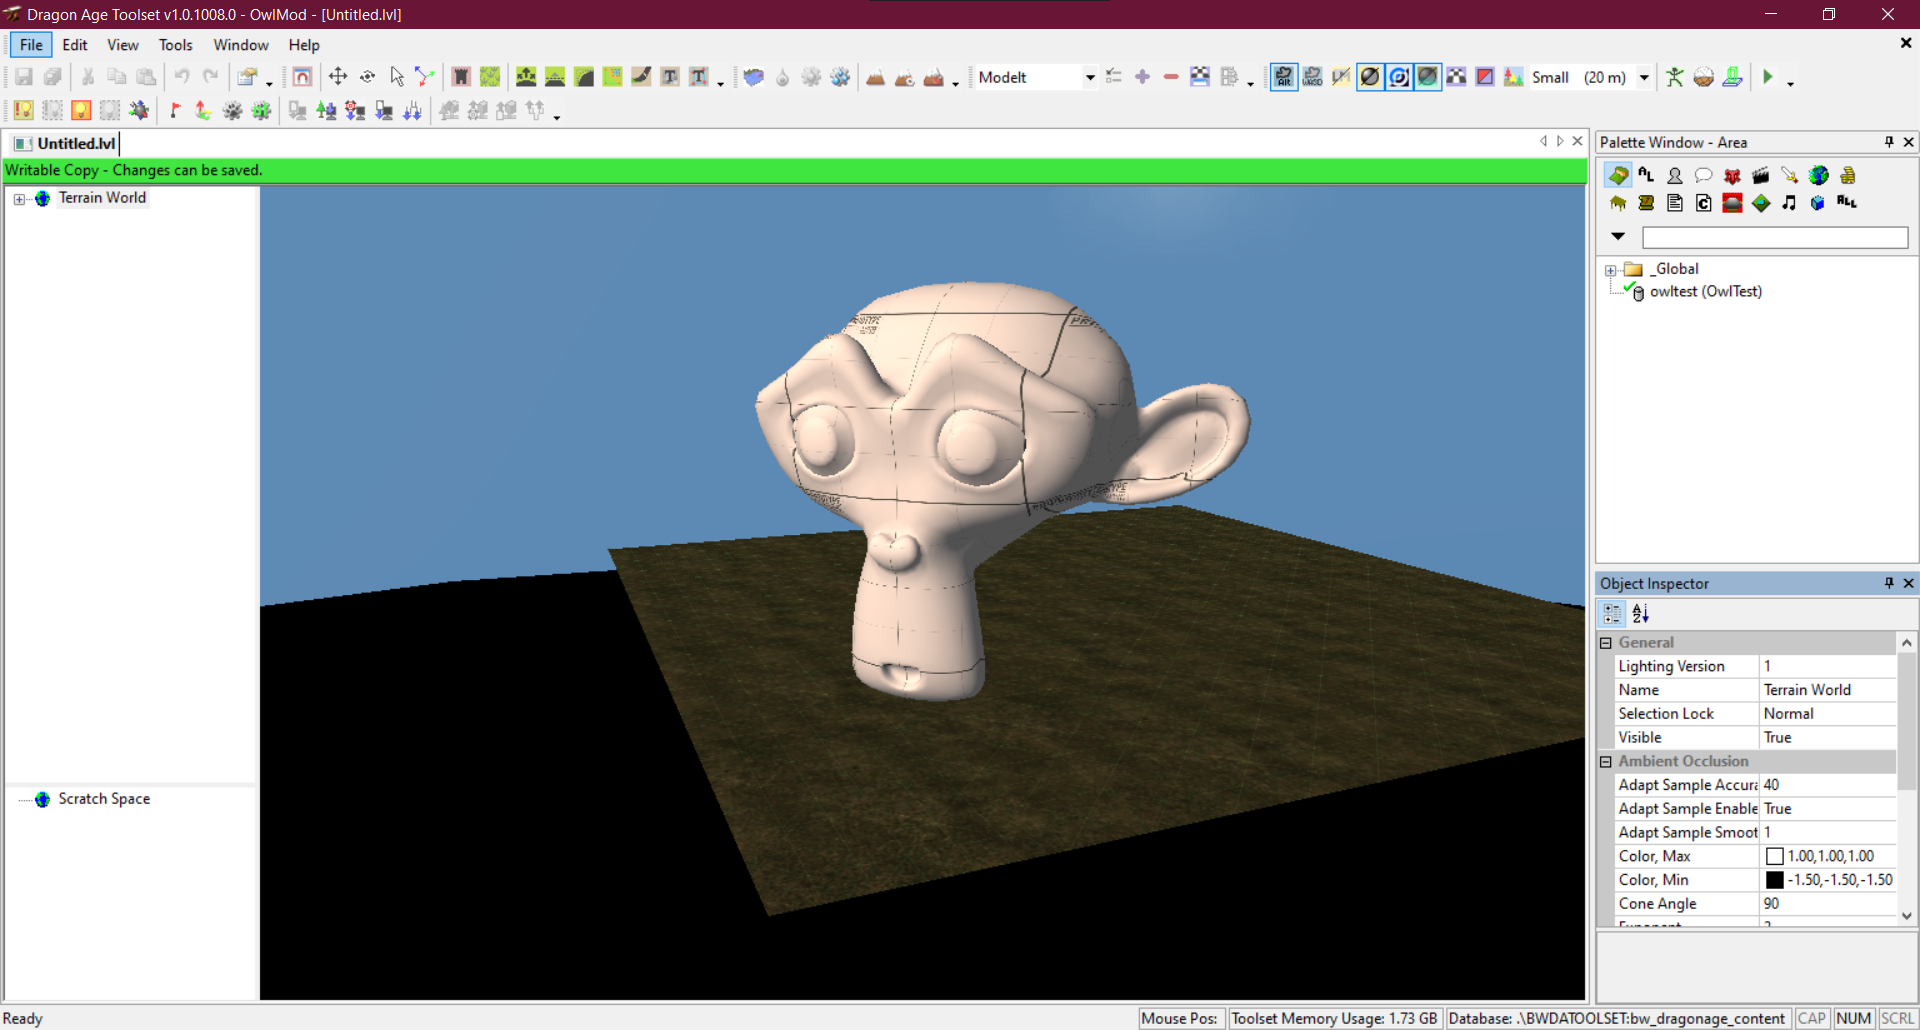
There we go there are the textures. Now if you save your level, do all local posts, create an area and export it, the model should now appear.
Note that the model will not have collision. To create collision you'll need to create a separate mesh (or multiple) that envelops the model and assign it as collision and link it similarly.
Conclusion
That's the gist of how to get models into DAO. Animations can be done using the animation based menu but it requires spawning a second model called a "GOD" and linking it. The model plugin has further documentation on this subject. In-order to get the animation to work with the toolset you will need to consult the Dragon Age Toolset wiki.
Outside of that this should help you if you want to import models into Dragon Age Origins. Be they world meshes, new armor sets or new hairstyles. If you want to talk about Dragon Age Origins modding head over to the DAO modding discord here.


Nice Tutotrial!! Easy to understand. I dont know if someone will answer me, but i have a doubt about custom items on characters.
I create a model, exported, create the GDA, scripts, etc. But whem I put my custom item in the character in-game (is a custom mage robe) appears as a floating head with the item model in a non-correct position (the models appears in game but not in the right place).
If someone can help me with this I'll be eternally thankfull...