Sound fundamentals
Sound is created by vibrations, such as those produced by a guitar string, vocal cords, or a speaker cone. These vibrations move the air molecules near them, forcing molecules together, and as a result raising the air pressure slightly. The air molecules that are under pressure then push on the air molecules surrounding them, which push on the next set of air molecules, and so forth, causing a wave of high pressure to move through the air. As high pressure areas move through the air, they leave low pressure areas behind them. When these pressure lows and highs--or waves--reach us, they vibrate the receptors in our ears, and we hear the vibrations as sound.
Amplitude reflects the change in pressure from the peak of the waveform to the trough. Cycle describes the amount of time it takes a waveform to return to the same amplitude level. Frequency describes the number of cycles per second, where one Hertz (Hz) equals one cycle per second. That is, a waveform at 1000 Hz goes through 1000 cycles every second. Phase measures how far through a cycle a waveform is. There are 360 degrees in a single cycle; if you start measuring at the zero line, a cycle reaches 90 degrees at the peak, 180 degrees when it crosses the zero line, 270 degrees at the trough, and 360 degrees when it completes at zero. Wavelength is the distance, measured in units such as inches or centimeters, between two points with the same degree of phase.
When two or more sound waves meet, their amplitudes add to and subtract from each other. If the peaks and troughs of the two waveforms line up, they are said to be in phase. In this case, each peak adds to the peak in the other waveform, and each trough subtracts from the other trough, resulting in a waveform that has higher amplitude than either individual waveform. Sometimes the peaks of one waveform match up with the troughs of another. The peaks and troughs will cancel each other out, resulting in no waveform at all. Such waveforms are said to be 180 degrees out of phase. In all other cases, waves are out of phase by some amount. This results in a waveform that is more complex than either of the original waveforms; continuing to add waves makes a more and more complicated waveform. Keep in mind, however, that a single instrument can create extremely complex waves because of the unique structure of the instrument; a violin and a trumpet sound different even when playing the same note. When you see music, voice, noise, and other complicated sounds represented by a waveform, you see all the waveforms from each sound added together.
A microphone works by converting the pressure waves of sound into changes in voltage on a wire. These changes in voltage match the pressure waves of the original sound: high pressure is represented by positive voltage, and low pressure is represented by negative voltage. Voltages travel down the microphone wire and can be recorded onto tape as changes in magnetic strength or onto vinyl records as changes in amplitude in the groove. A speaker works like a microphone in reverse, taking the voltage signals from a microphone or recording and vibrating to re-create the pressure wave. Unlike analog storage media such as magnetic tape and vinyl records, computers store audio information digitally as a series of zeroes and ones. In digital storage, the original waveform is broken up into individual samples. This process is typically known as digitizing or sampling the audio, but it is sometimes called analog-to-digital conversion. The sampling rate defines how often a sample is taken. For example, CD-quality sound has 44,100 samples for each second of a waveform. The sampling rate determines the frequency range of an audio file. The higher the sampling rate, the closer the shape of the digital waveform will be to that of the original analog waveform. Low sampling rates limit the range of frequencies that can be recorded, which can result in a recording that poorly represents the original sound. To reproduce a given frequency, the sampling rate must be at least twice that frequency. For example, if the audio contains audible frequencies as high as 8000 Hz, you need a sample rate of 16,000 samples per second to represent this audio accurately in digital form. This calculation comes from the Nyquist Theorem, and the highest frequency that can be reproduced by a given sample rate is known as the Nyquist Frequency. CDs have a sample rate of 44,100 samples per second that allows sampling up to 22,050 Hz, which is higher than the limit of human hearing, 20,000 Hz.
Just as the sample rate determines the frequency resolution, the bit depth determines the amplitude resolution. A bit is a computer term meaning a single number that can have a value of either zero or one. A single bit can represent two states, such as on and off. Two bits together can represent four different states: zero/zero, one/zero, zero/one, or one/one. Each additional bit doubles the number of states that can be represented, so a third bit can represent eight states, a fourth 16, and so on.
Amplitude resolution is just as important as frequency resolution. Higher bit depth means greater dynamic range, a lower noise floor, and higher fidelity. When a waveform is sampled, each sample is assigned the amplitude value closest to the original analog wave. With a resolution of two bits, each sample can have one of only four possible amplitude positions. With three-bit resolution, each sample has eight possible amplitude values. CD-quality sound is 16-bit, which means that each sample has 65,536 possible amplitude values. DVD-quality sound is 24-bit, which means that each sample has 16,777,216 possible amplitude values.
An audio file on your hard drive, such as a WAV file, consists of a small header indicating sample rate and bit depth, and then a long series of numbers, one for each sample. These files can be very large. For example, at 44,100 samples per second and 16 bits per sample, a file includes 705,600 bits per second. This equals 86 kilobytes per second and more than 5 megabytes per minute. Stereo sound has two channels, so CD-quality sound requires a little more than 10 megabytes per minute.
To summarize, the process of sampling or digitizing audio starts with a pressure wave in the air. A microphone converts this pressure wave into voltage variations. An analog-to-digital converter, found in devices such as sound cards, samples the signal at the sample rate and bit depth you choose. Once the sound has been transformed into digital information, you can record, edit, process, mix, and save your digital audio files. The possibilities for manipulation of digital audio are then limited only by your imagination.
CONTENTS
* 1-Equipment essential for recording quality sound clips
* 1-Microphones
* 2-Microphone stands
* 3-Recording devices
* 4-Wind and ambient noise filters
* 2-Software necessary for mixing and editing sound samples
* 1-Multitrack audio mixing software
* 2-Waveform editor (often included with mixing software)
* 3-Digital audio file converter
* 3-Setting up to record in the field
* 1-Weather conditions
* 2-Microphone placement
1-Equipment
* 1-Microphones
Ideally you will have two types of microphones, an omnidirectional microphone such as the Behringer B-5 and a uniidirectional or condenser microphone like the Audio-Technica ATR-55. If you only have access to one mic then I would suggest using the unidirectional or condenser due to it's versatility. You can find condenser microphones for anywhere from $30 to $600. Obviously the more you spend the higher quality you can achieve but you can get away with using inexpensive mic's if you have a lot of experience mixing audio.
* 2-Stands
Using a stand to hold your microphone is essential. Not only do stands allow precise mic placement but they also reduce the amount of unwanted vibrations that are recorded (also called shock). To further reduce shock you can buy shock mount microphone clips that nearly eliminate all shock. The most common and versitile stand is a boom stand. This is a stand that has a long boom arm attached to it which allows for a wide variety of placement options.
* 3-Recording devices
There are several different types of recording devices you can use for field recording. Newer audio storage devices are entirely digital which give you a huge advantage when it comes to storing audio. The digital media format will allow you to capture incredibly high quality live audio in a format which is uncompressed resulting in high sample rates delivering losless audio samples. The alternative to digital is analog. Analog recording devices capture audio onto magnetic tapes or reels much like a cassette tape stores audio. The largest downside to analog storage is that when audio is stored onto the tape there will always be some degree of degredation to the audio when it is played back due to anomalies and variations in the magnetic tape. Analog devices are also much larger and complicated because of all of their moving parts. Digital devices are obviously superior for many reasons but there are also different types of digital storage. An example of a high quality storage device is the 702 Portable Digital Audio Recorder (http://www.sounddevices.com/products/702.htm). This offers storage onto convenient removable flash cards but it also has the capabilities to play back recorded audio right in the field. There are also digital recorders which have non removable storage and are as compact as portable mp3 players. Regardless of the device you chose your ultimate goal is to simply capture quality audio recordings which can then be transferred onto a computer for mixing and mastering.
* 4-Wind and ambient noise filters
This section really only applies to you if there are undesirable or unwanted environmental effects where you are recording. One of the most common and also most easily avoidable noise interferences is wind. When air pressure exerts too high of a force against the diaphragm of a microphone it will cause an entire series of unwanted background noises and audio distortion. Although this produces a host of problems there is an easy way to ensure that you deny any unwanted air flow directly into the microphone. The way windscreens work is by creating a layer of still air around the mic so you will only be allowing the true sound wave without interference. A windscreen is a foam or fabric cover that pulls over the top of a microphone to reduce noise caused by air flow blowing across it. A windscreen is a necessity if you will be doing any recording outdoors. They are also very useful for reducing breath noise and "puh" sounds associated with pronouncing words beginning with the letter "P." Windscreens are generally made of one of two kinds of material: foam or a fuzzy stuffed animal/shag carpet-style fabric. The shag windscreens are much more effective at reducing this type of noise. It is very easy to make your own windscreen out of the foam or shag material simply by stretching it over a frame and then placing your microphone inside of it.
2-Software
* 1-Multitrack mixing software
In order to get a desired sound you sometimes might be required to mix one or more recorded sounds together. When you are trying to create a certain effect with multiple sound samples it is critical that you take into consideration exactly what your sound is going to be used for. There are many multitrack recording and mixing programs on the market, the most notable being Digidesigns "Pro tools" which is considered the industry standard for recording. The majority of these programs will allow you to reach the same goal of mixing sounds together but it is important that whichever program you choose to use you are completely familiar with and have the ability to navigate around it easily. My personal favourite piece of software is Adobe "Audition". I find that it has a straight forward user friendly design but also has very advanced and powerful tools built into it. Whichever program you decide to use is up to you but there is no substitute for experience with with audio mixing.
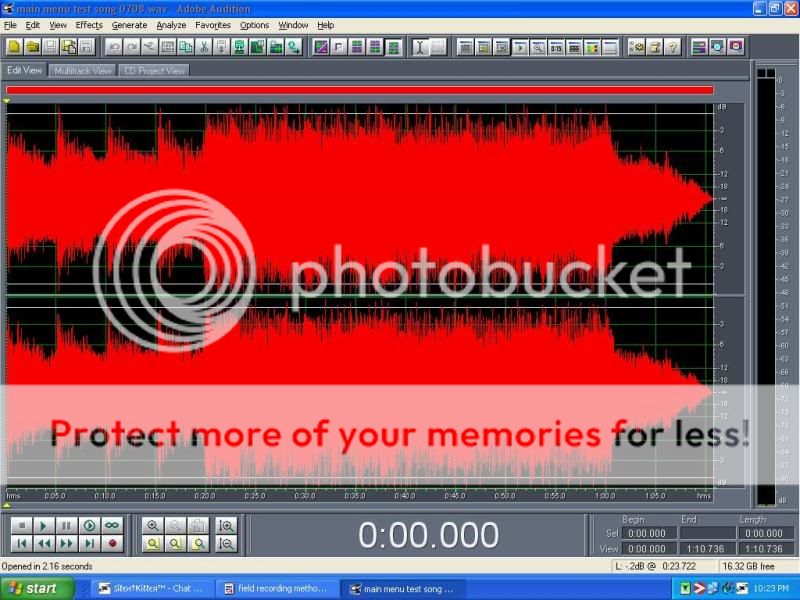
* 2-Wave editor
Most recording software comes with a waveform editor. The wave editor is an integral part of creating audio. Here you can see what a typical waveform within an editor looks like I11.photobucket.com. In the editor you will be able to manipulate single waveforms with such precision and versatility you can create virtually any sound imaginable. The editor will be your most frequently used and important tool so it is crucial you are very familiar with how everything works.
* 3-Digital audio file converter
Although most audio editing software allows you to encode your work to any file type you want there are usually vague file encoders which do not come with your software. In the event that you need to convert your audio to a specific file type which isn't supported by you software you can very easily find specific conversion tools on the internet for free. One of the file types which isn't normally supported by software that you can easily find a standalone conversion tool for is the ogg vorbis codec. One of the free tools used for this file conversion type is oggdropXPd (which can be found here Homepage.ntlworld.com). This is just an example of what to do if you need to encode audio to a specific format.
3-Setting up to record in the field
* 1-Weather conditions
As previously described in the wind and noise filters section weather conditions can play an enormous role in the field recording process. Obviously if it is raining you should not field record for reasons i don't think i need to explain. Wind, humidity and air pressure can all effect the sound of your recordings so it is a good idea to use a data storage device which allows audio playback through headphones just to make sure you are successfully preventing any unwanted background noise.
* 2-Microphone placement
This is an incredibly important part of being able to capture a sound that conforms to your specific needs. Unfortunately one of the only ways to discover where ideal mic placement will be is by trial and error. It is also necessary to record many different versions of the same sound but using various mic placement. An example of using placement for achieving a certain sound would be by having the microphone a great distance away from the sound source in an outdoor environment. This method would produce a quiet muffeled sounding sample that would also include a long reverberation created by the sound waves traveling further and bouncing off of multiple surfaces. Methods such as this are useful for creating the impression that your sound is coming from a distance. You can also mix together multiple versions of the same sound which you used more than one placement of the mic to record to create unique blends of field recorded sound samples. The possibilities are only limited by your imagination if you have multiple versions of the same sound.


See I was going to read it but then I look at the size. D: I think I'll read it when I get some more free time...curse these finals taking up my time.
I scrolled down and went DAYUUUMMMM!! No reading for me today.
Lost me at fundamentals.
i am so sorry milkydeathgrind,
but have the same feeling. i wanted to start reading but then i also scrolled down first and when i did see the size of the text i thought;
this will at least take 30 to 45 mins of reading!!
and that was a bit much to get around to right now.
maybe its best that you cut such large updates in to 2 or 3 segments and release them in 1 or 2 weeks, or edit the text and make it MUCH shorter, and add some screens and or movies to make it all more pleasant to read.
now it simply is to much,
really sorry...
leon
even your comment is too long!
Why did you post it another time ?
So , you are making your own bible ? I count this to the first chapter.
Lol agreed. Chapter one - PH (physics) - Learning about Sound.
First Chapter? More like the prologue.