These tutorials were originally written by GrrandMaMa. And were originally posted to QERadiant's website. They are mirrored here for archival purposes. QERadiant can be downloaded here.
Tutorial 9 Regions
Hey hey, GrrandMaMa here. I've seen quite a few questions in various places about how use the regioning features of QERadiant, so here's the basic "how and why" of it. Regions are pretty handy, and can save you mounds of time and hair-pulling, especially as your maps get more and more complex.
1. A Little Bit About Regions
First off, I should probably explain what a region is. A region is just a set area of your map, or a group of brushes that you work on, without other brushes in the way. There are two major reasons for using regions:
- Simplicity: If you're working on a specific area, you don't want a bunch of extra brushes getting in the way of selections in the 2d views. This includes skies, and ceilings in the top-down, and walls or supports in the side, and front views. You also don't have lines all over the place confusing the structures.
- Focus: It's just plain easier to concentrate on one area if that's all you're looking at.
2. Load up the map
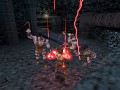
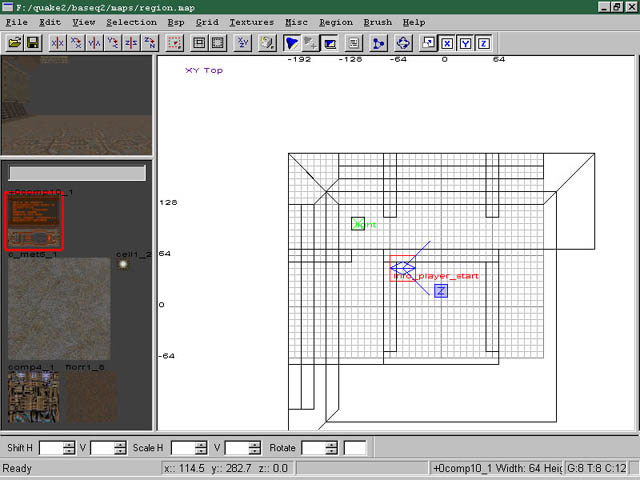
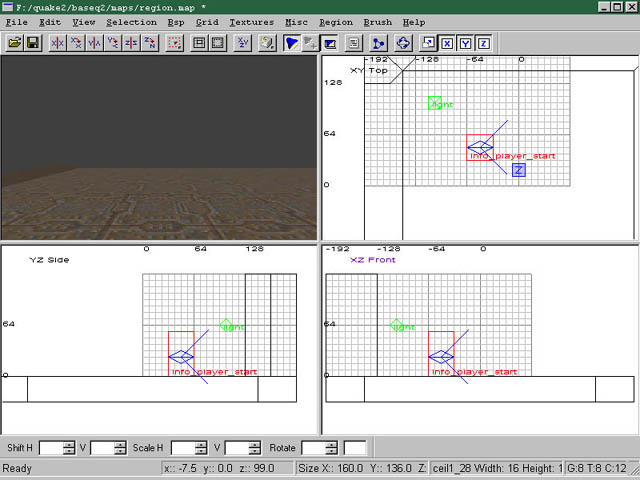
Lets load up the map. As you can see (Fig 1), there are some layers going on, and some brushes that can be hard to get to from the 2D views (the light fixtures, and supports). This is where the regions come in.
There are a few different types of regions, and they all have different uses, so let's go over them one by one.
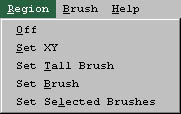
3. Set XY
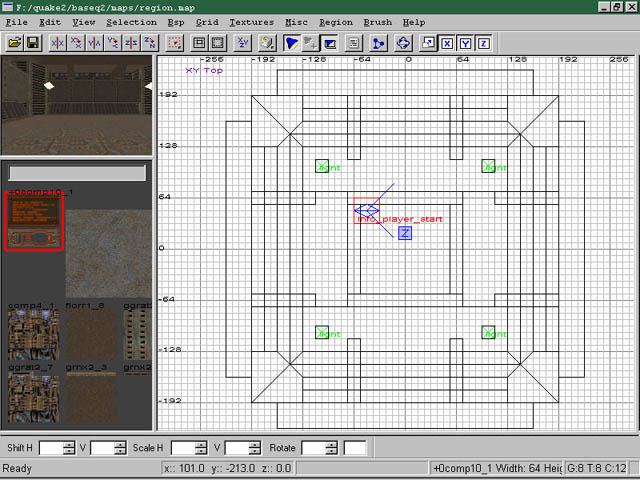
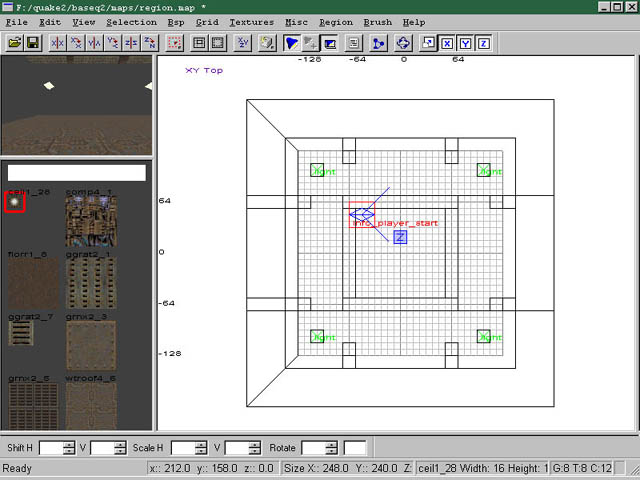
"Set XY" is used just as it says. It takes the brushes in the XY View, and makes a region out of them. This is a pretty small map, so let's zoom in ("del" key, on default configuration) so we can see how it works.
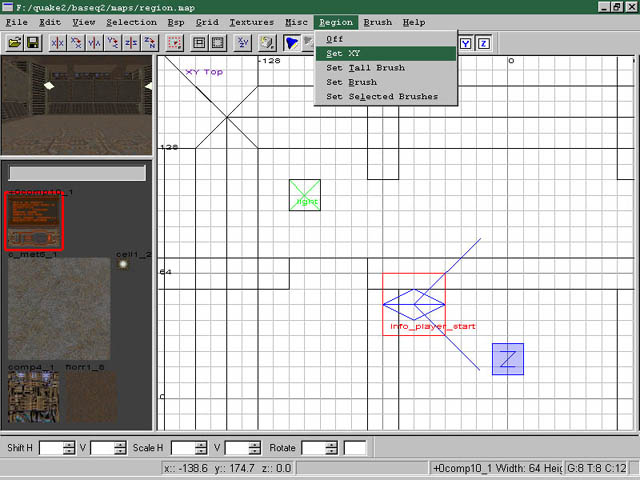
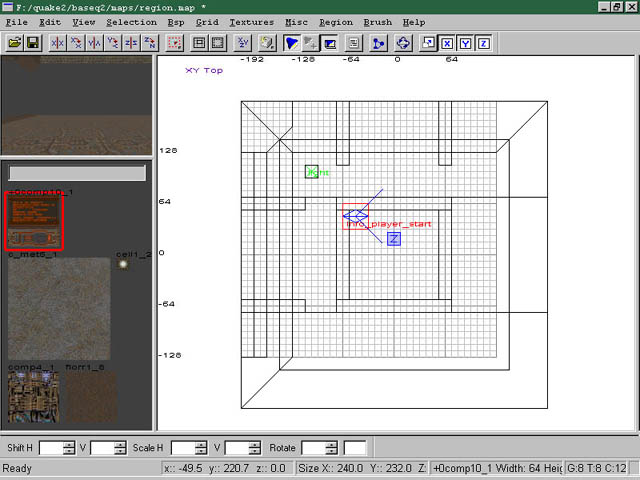
Zoom in fairly closely, and select "set XY" from the "region" menu. Now, if you zoom back out ("insert" key) you'll notice that the grid only covers that area that you were zoomed into, and the brushes that weren't in the view are gone. That grid is your region. (we'll get back to the grid in a few...)
Another thing you might notice, is that, while the grid is smaller in the XY view, it still extends to +/-4096 in the side and front views. This is because you've set a "tall" region. Tall regions are best for isolating whole areas of a map, such as a room that has no other rooms above or below it.
Select "Off" from the "Region" menu to clear your region, and go back to a full view of your map.
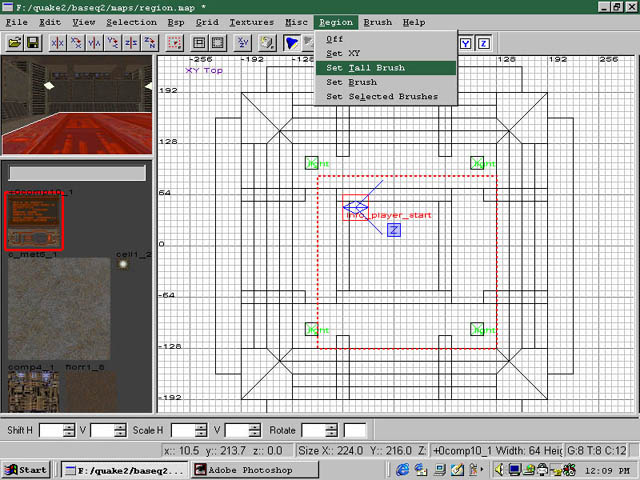
4. Set Tall Brush
Okay.. now lets say you don't want to zoom in, but you still want to set a tall region. Simple. Create a brush that covers the area you want to region off, (the height of the brush doesn't matter, only the XY size) and select "Set Tall Brush" from the "Region" menu (make sure the brush, and only that brush is selected.) Pretty much the same as "Set XY", but with more control over where your region will be.
Select "Off" from the "Region" menu to clear your region, and go back to a full view of your map.
5. Set Brush
Now, let's say we want to select an area, but don't want the whole vertical range included in our region. Make a brush that covers the area you want to select. Make sure it covers everything in all three views, and that it's the only brush selected. Now select "Set Brush" from the "region" menu.
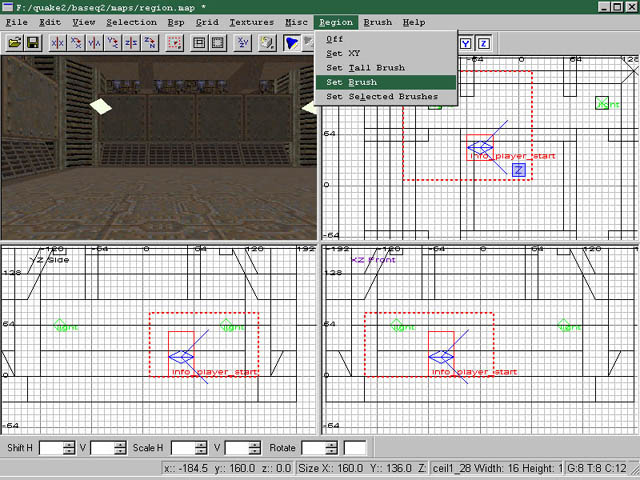
This is especially handy when you want to work inside of a room without the ceiling and/or walls in the way.
Select "Off" from the "Region" menu to clear your region, and go back to a full view of your map.
6. Set Selected Brushes
This is an especially handy one, allowing you to specify particular brushes in your map to region off. Let's try using two regioning methods at once.
First, make a tall selection that doesn't include the walls.
Now that the walls are out of the way, lets switch to one of the side views, and select two of the lights. Now, select "Set selected brushes" from the "Region" menu.
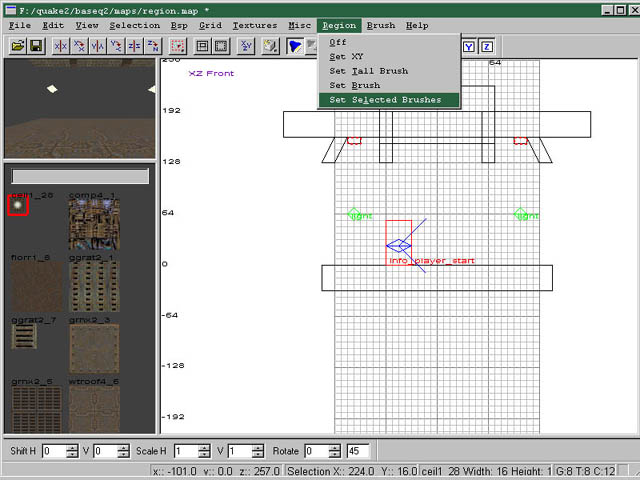
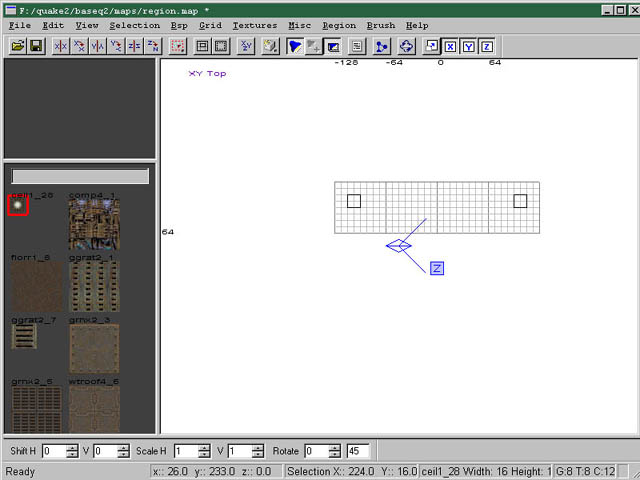
Voila. two lights, and nothing else.
Select "Off" from the "Region" menu to clear your region, and go back to a full view of your map.
(WolfeN here)I just wanted to put my 2 cents into this section here. When using this particular form of region I like to create a large brush around a particular room I want to work on and leave the the large brush selected. I then goto "Selection" on the menu and then to "Selected" and I choose "Select inside". This will select all brushs that are inside the currently selected brush and then I goto "Region" and select "Set Selected". This is a good way as you can then just work room by room.
7. Compiling Regions
Now a quick note. If you compile from a region, QERadiant will save the brushes in the region to a *.reg file (makes sense, don't it?) and compiles only the brushes and entities in that region. Simply put, this kicks the proverbial ass over compiling a whole map every time you want to look at something.
There are, however a few things you should know:
- There doesn't need to be an info_player_start in the region. QERadiant will use the location of the camera, so if the camera is outside of the region, you'll get a leak.
- Compiling regions are calculated on a tall brush basis. What this means is, if you don't have a roof and floor in the region, you get a leak. It also means that if the region passes outside of the walls, and the floor on the other side of the wall is not included in the region, you'll get a leak.
Basically, when you compile from regions, you have to be very aware of where your regions are defined, where your camera is located, and what brushes are included.
Once you get the hang of it though, it will save you hours upon hours of compile time during the process.
That's it...have fun
-GrrandMaMa