This tutorial was originally written by None-1a. And was originally posted to QERadiant's website. Mirrored here for archival purposes. QERadiant can be downloaded here.
details, Details, DETAILS and other build speed boost
Mission Statement
This tutorial has been a long time coming, I lost my note over it 5 times sorry. Anyway this covers some topics that novices and pros alike tend to over look. Mostly because all tutorial on speeding up build times where made with a technical perspective. This tutorial is different (you don't need to know what a winding it to get better build speed) I'm going to tell you what the techniques are and how to use them, I'll also try to give you situations that they work best in. One last note my example map can't be downloaded at the current time (it's a mod map on mine that will not be distributed until it's done.) However stats on my example map and some screens can be found to the right of each section.
Detail Brushes
Detail brushes with there detail property set. In Radiant setting this is as simple as selecting the brushes you want, going to the selection menu and click Make Detail (Clicking Make Structural will turn the detail option off)
On the other hand it is difficult to make direct rules on where detail brushes should be used. How every the following tips have worked form me in my map (See left)
Light fixtures, Crates, and other objects that the player can see over all ways work well. Transparent and entity brushes are automatically set as detail when you build (AKA, the do not emit planes to carve up the empty space See Technical note at the end of this tutorial) Other objects that tend to work well are rocks, ladders, computers, and thin brushes that extend to higher highest. Detail should never be used on void brushes (brushes that touch the void) Never ever simply make all brushes in a room detail with our at least thinking about it first.
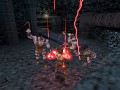
The Area in the example uses detail brushes for the Crates, rocks on the walls, and the light post. As you can see details will ad in reducing build times dramaticly.
Normal
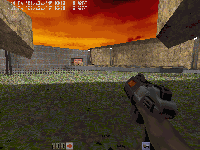
This image is looking fomr the
higest r_speed point. It counts in
at 561 visable triangles.
Portal Clusters: 490
Num Portals: 1970
Vis Speeds: 6329
Also Reported: Warning: Leaf portals saw into leaf
And Duplicate Plane.
-Using Details-
Portal Clusters: 141
Num Portals: 341
Vis Speed: 11
Also Reported: Duplicate Plane.
r_speed in oringinals highest spot: 563
Hint Brushes
Hint brushes (Brushes with the hint texture) are one of the hardest things to get used to using in the Quake II mapper arsenal. The reason for this is that they perform a function normally handled by qbsp3 automatically (See Technical note). Hints how ever can be used very efficiently by just about every Quake II mapper.
First and simplest they can be used as detail brushes, simple enclose the object in a hint brush, this works well on brushes that are to large to be made into detail brushes. These are objects that block the playes view form a standing position but not form a jumping positing or objects the player can climb on. (smaller objects work better as details)
The second use it a lot more complicated (Read Technical Note at the end of the document before you read this) Hints can be used to slowly reveal an area to the player. Under normal Quake II operation the entire area is drawn as the player walks around a corner, all though not all of it will be in site at that time. You can use hints to make cross sections of the area around the corner so that only what the player sees is being drawn.
Area Design
Yes your areas can be designed so that they allow form maximum qbsp efficiency (or even make better use of other build speed boost and have a much lower effect on r_speeds) First off make sure all doors have a func_areaprotal used with them, This will close off the areas on either side of the door so they can be treated separately when your trying to bring r_speeds down. you should also be testing r_speeds the whole time your making the level (I build after each an hour of editing testing every thing). Also be creative with how your handle r_speeds, (one of the feature not shown in the screens of my level is a semitrailer siting at the entrance to the warehouse, this trailer what placed there because the r_speeds where still to high even with the func_areportail there, the trailer was to make sure the outside area was not visible while the door was open. It allow adds a bit of atmosphere to the level. You might also want to try making the walls touching the void 64 units wide or larger, for some reason this actually works don't know why but it does. All Warning and Errors should be eliminated for maximum speed.
Lastly your areas can either be small and detailed or large with little detail not both, trying to make a large detailed area causes a ton of problems (although it can be done but it is a pain in the ass) Also software mode is the only place you should be checking r_speeds, there are several reasons for this. (the biggest is that software's r_speeds read out it much more detailed then that of the opengl modes, it will also let you see every clearly when your r_speeds are too high as things will begin to blink in and out of view)
Working with Area Portals
Area Portals while normally used in doors only can also be use in other places.
Fallow These steps to make an area portal.
- 1 Make a Brush larger then the door.
- 2 Make sure you give the func_areaportal a target name (commonly ap#)
- 3 Give the door a target that is the same as of aps targetname
- 4 If the door is a multipart door only one part the target, give every part a team key with the same value.
The first problem you'll have it ap's is that they don't like windows, water, or other transparent brushes around them here's a quick fix to that problem. Make ap's in the windows to, give them a targetname of what ever you want, now make a trigger multiple with no sound or message that triggers the ap before they come into the players view. (However this trick will not work in muiltiplayer modes, as one player could trip the aps while they are in another players view. To stop this click the not deathmatch and not co-op options in the entity list, hit 'n' to bring it up.
Technical Note
Under normal operation qbsp3 divides the empty space in your map in to portals (Or player visible areas) Detail Brushes are brushes that do not make portals (the less portals or the better organized the portals the faster qvis3 can work.) Hint brushes do the opposite of details hints are manual dividing planes and a new portal will be created along each side and inside of it, it will also stop any other portals form going any father. For the best build speeds you can use hints to stop portal form intersecting each other and thus lower the number of portals and portal clusters your maps will have.
Final Word On How future bsp/vis utilities, and editors should work
I believe it time to remove the portal creation engine form bsp utilities and place it in the editor. This way mappers could have a level of control over the portal creation that only exist in theory at this time. In theory if portals where created with maximum efficiency only a fast vis would be necessary for the best performance, however with auto portal creation used today this is impossible to achieve with all but the simplest of areas.
This could work like this the editor would be similar to UnrealED after an area is created that area is loaded up into a special subtraction type editor (all brush used in the area would be displayed in say a dark gray, to set them a part form the complex work your about to do) The mapper would then build player visible by clipping the empty space. This whole process could still be done in an auto portal mode for mappers that don't want to bother with it. The process of loading the areas in the portal editor could also be automated by having areas on the map marked as done and under construction parts that the mapper has marked as done are uneditable unless they are remarked as under construction. When a mapper marks an area as done that area is loaded into the portal editor and the empty space volume is calculated, and the clipping is ready to begin. Areas that are marked as under construction use auto portal creation for test purposes.
These are just ideas and given the look of the .ptr file used with quake II editing it is possible to modify the tools to work in this way, al though it might be pointless with quake III under development. Quake III however could have users created tools that work on these ideas, with quake III so far along in development at this time id created portal tools are unlikely but you never know.
None-1a