These tutorials were originally written by WolfeN. And were originally posted to QERadiant's website. They are mirrored here for archival purposes. QERadiant can be downloaded here.
1,2,3, and 4 way hall set creation.
Opening Statements.
Ok folks. Here we are at are 10th tutorial. Considering its been a long time (to long in fact) since my last tutorial and there is now prefab support for Radiant I figured I would finally do this tutorial.
We are going to learn how to create hallway prefabs. What I mean by hallway prefabs is basically well explained by saying its a set of brushs you create that connect together like a puzzle. Except you know how they go together because you created the puzzle.
So we are going to go over how to make hallways that you can just connect simply by dragging them together piece by piece for a 2 way (corner or single turn) a 3 way (also known as T- section or 3 way intersection) and a 4 way which is the same as a 3 way just with another opening.
Now this is going to be easier then you think. Its just a matter of knowing a basic scheme or structure you want for your hallway and a matter of knowing how to use 2 way clipping points. Thats all there is to it. Its really simple and of course I am going to show you how. But before i get started if you dont understand or know how to use radiant, go read all the other tutorials. If you dont know how to use clipping then just go read my tutorial on clipping. I am under the impression anyone reading this tutorial knows there general way around Radiant and knows the basics of Radiant so please do not expect extreme newbie talk going on in here.
Copy What?
Ok, Im going to assume you have a hall like in figure1_1. Please note that this technique can be done for any kind of hall for the most part. So this hall in figure1_1 is a basic 4 sided hall, 2 walls one roof and one floor . The brushs are all 64 units because I believe in the theory of thicker is better which there is an article about it at Quake WorkShop2 I believe.
Ok so we have this basic hall way sitting here and we want to make a bunch of different intersections that we can just slap next to it with out this crazy carving and stuff. This is great for prefabs as well if your working with a continued theme.
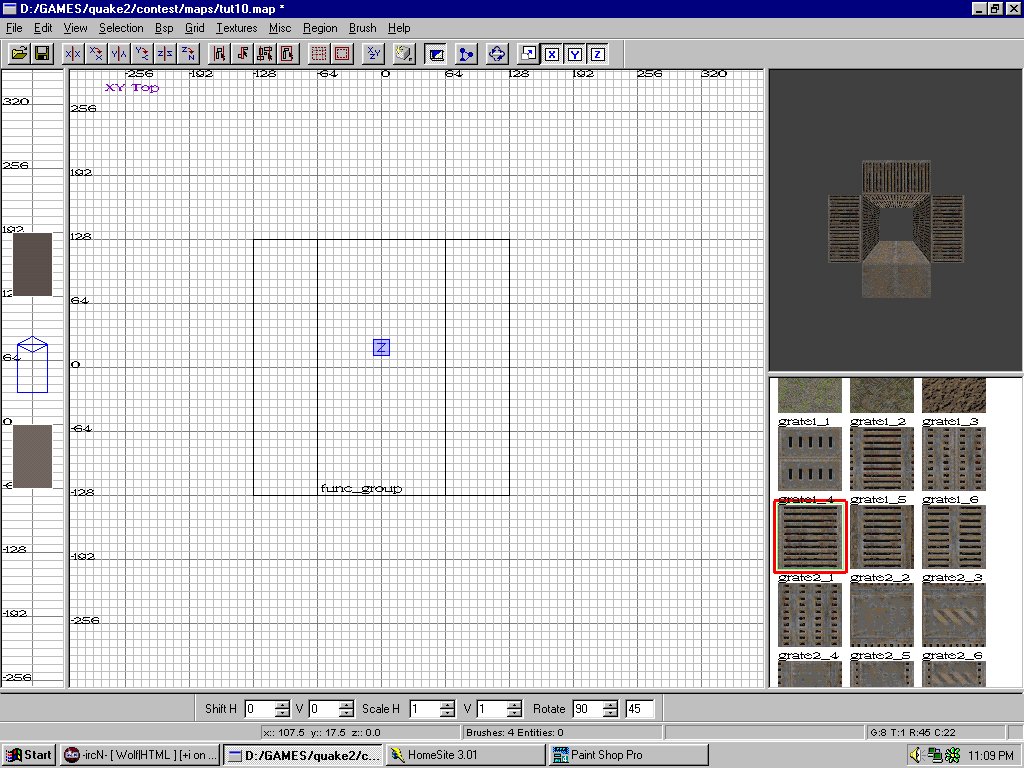
So lets get started with this thing. Select all the brushs that make this hall. Once you have them all selected load up the entity window (done by hitting the "N" key) and select func_group. This will make it so all the brushs are always together when your selecting them and will generally make the whole process here easier.
Ok now that it is grouped together we need to make at least 4 copies of it. So select the hallway which should take one single select now instead of each one at a time and while its red or highlighted hit the "space bar" and it will spawn a copy of the group. Move the copy off out of the way some where. Now just keep doing that untill you make at the least 4 copies.
Duh which "way" did he go goerge?
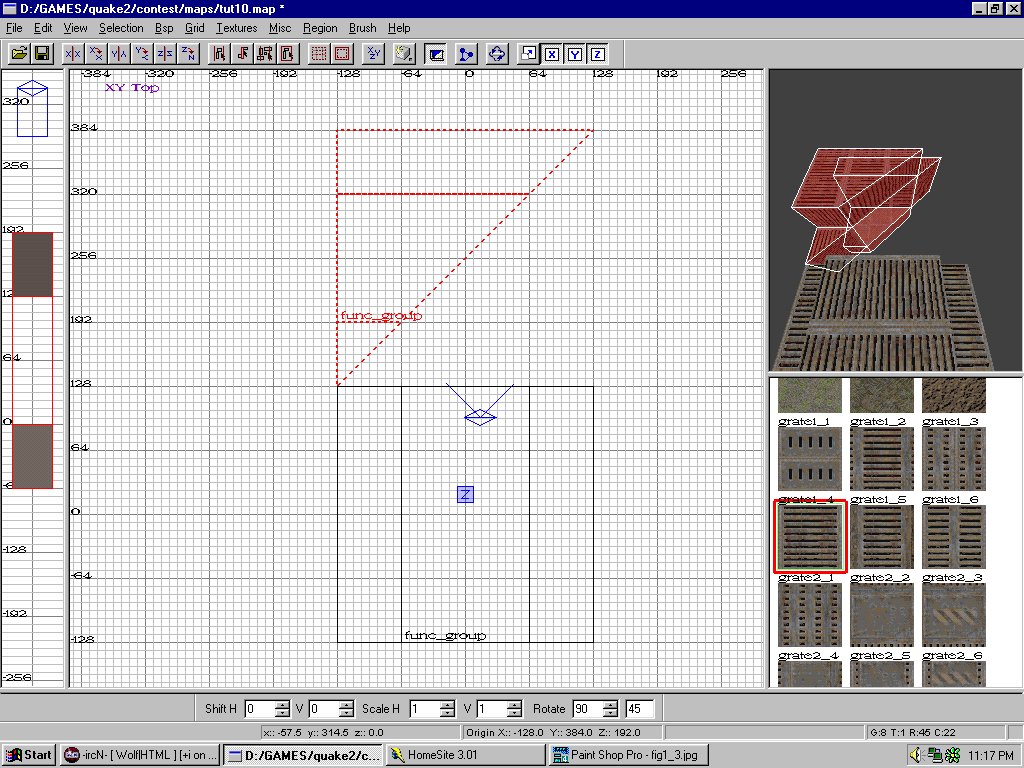
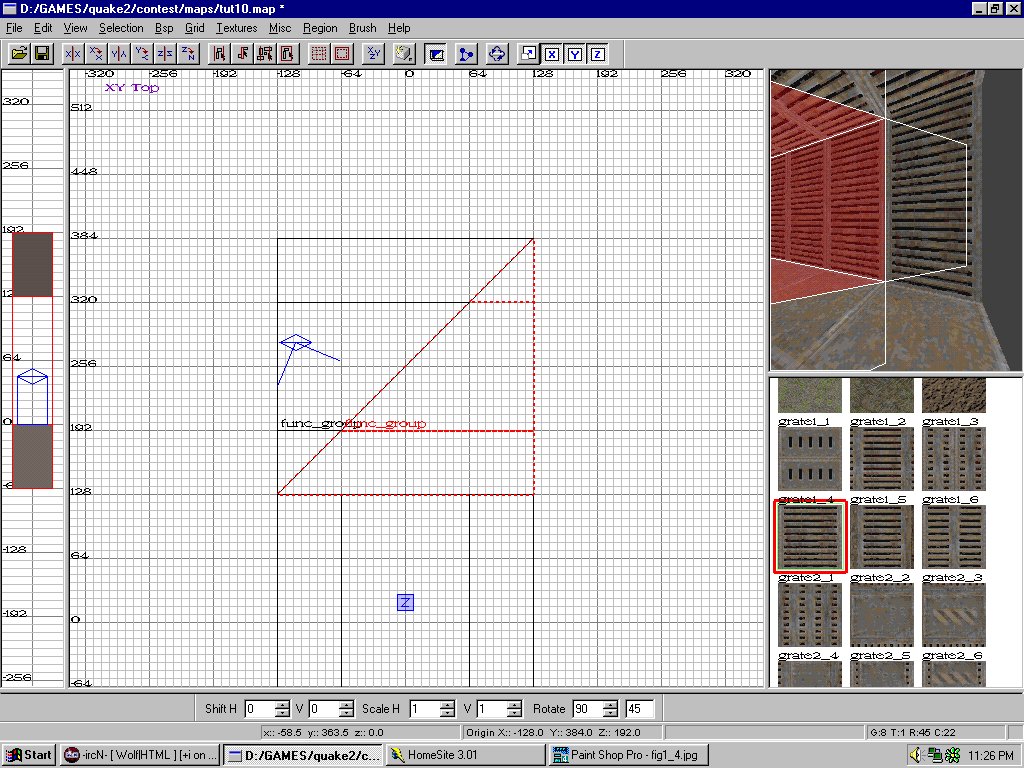
Now that we have our 4 copies, take one copy and rotate it by 90 degrees and then place it directly over another copy, as seen in figure1_2.
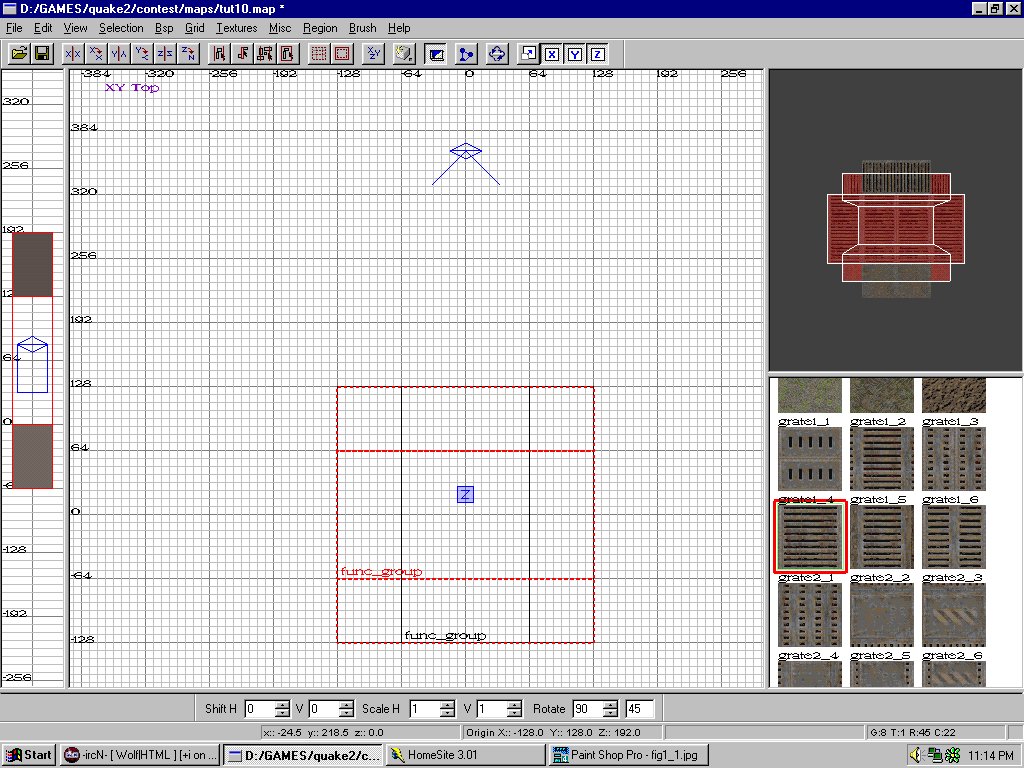
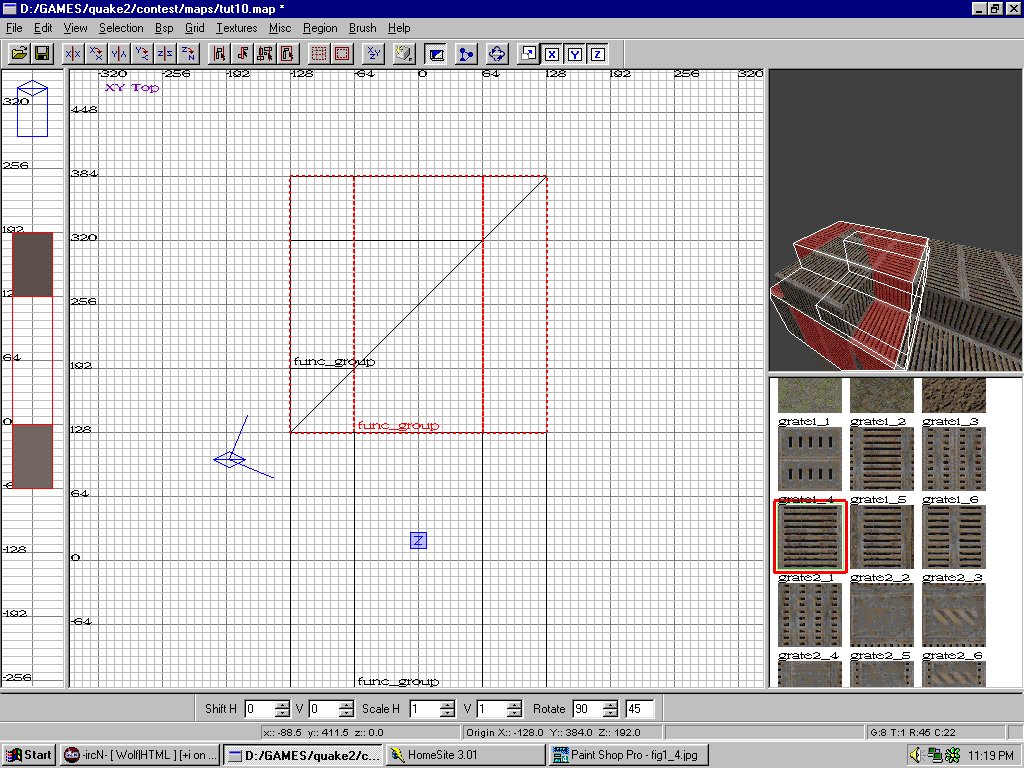
Now turn on the clipping tool while the brush group is still selected and cut in a diagonal manner like seen in figure1_3. Make sure the yellow outline where the brush is going to be cut out is on the bottom half of this cut. Now hit enter to cut the brush as it apears.
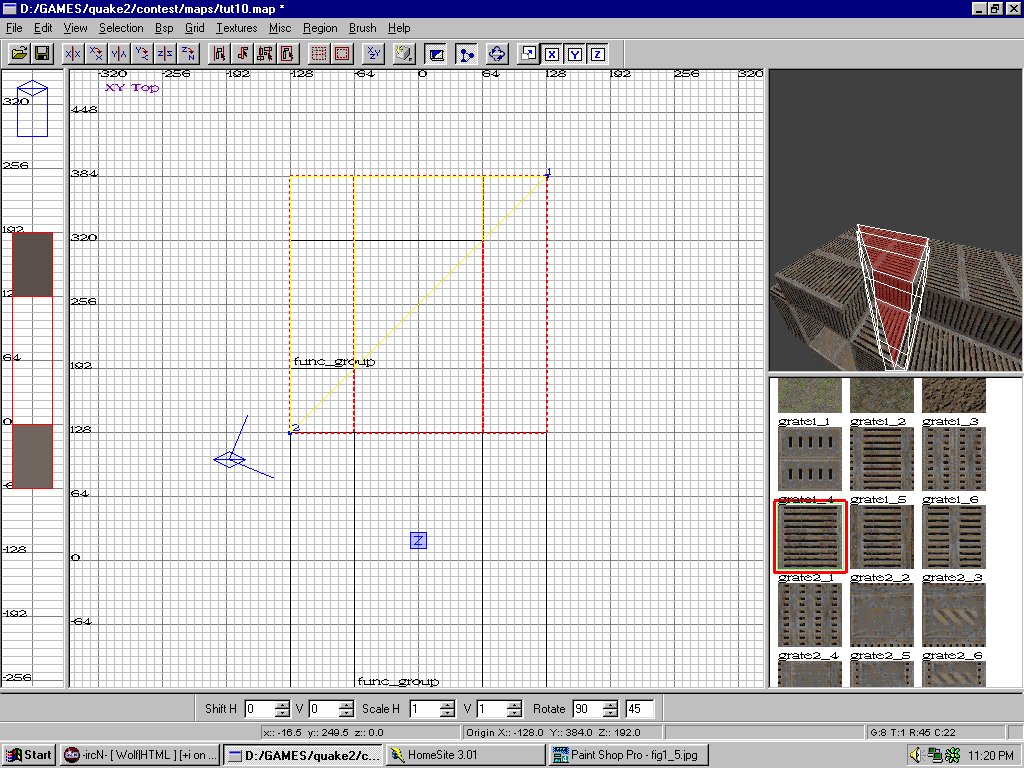
You should now have a diagonal cut version of the hall and its rotated by 90 degrees. It should look like figure1_4. Just put it at the end of your hall like it is seen in figure 1_4 as well.
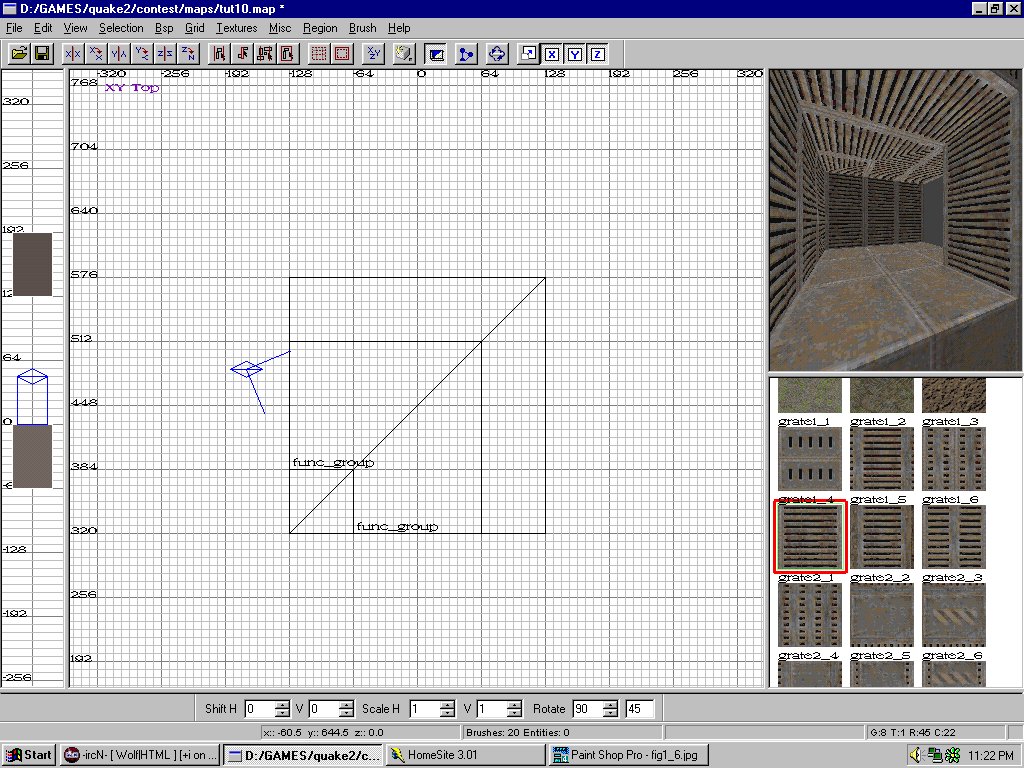
Now we need to grab another one of those copies we made. So one of the other copies we made and place it over the new diagonal cut brush we made, from here you should be able to see where we are going with this, take a look at figure1_5.
Once the brush is over the diagonal brush you need to turn clipping mode on again and cut diagonally on this group down the same line as the cut on the other brush. Take a look figure1_6 if you dont know what I mean.
You want the yellow area on this new cut to be covering that of the already diagonally cut brush we have. Once again scope out figure1_6 to see what I mean. Now just cut it by hitting enter.
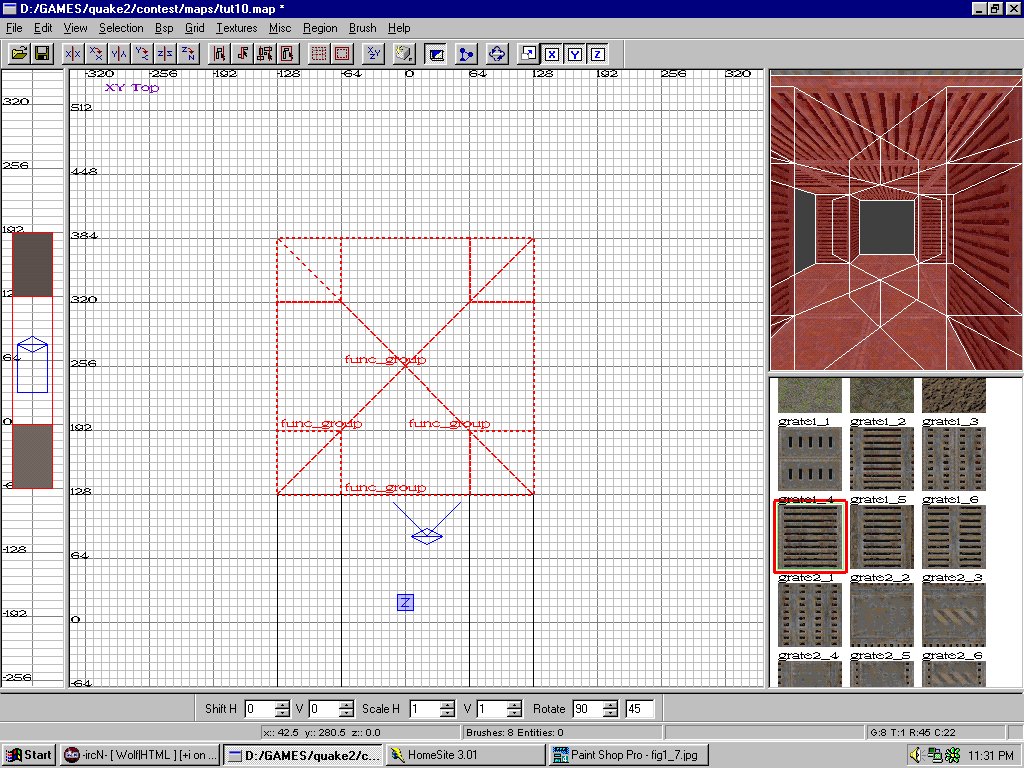
Now we have just finished making the turn brush prefab. You may want to ungroup these brushs now and re select all the brushs for this corner and then regroup them as the new turn or corner brush. It should have turned out to look like figure1_7.
As you can see it connects to the end of a hallway perfectly and turns with a perfect 90 degree turn and now all you gotta do is just place it there anytime you want a 90 degree turn. You can even rotate the brush so that it turns the other way instead of the way we just made it go.
Now move that new hall out of the way cause we are gonna make the 3 way intersection hall.
3 Way? Thats perverted man!
Ok to make the the 3 way hall you need to do the same type of cutting you did to get the first diagonal cut. That will be our first piece of the 3 way. So do that now. (see figure1_4 for the piece I am speaking of)
Once that is done you want to spawn a copy of that diagonal brush and rotate it to the opposite direction. So if your piece is facing left then rotate it to face right. See figure1_8.
Now we want to cut this newly spawned copy at an angle once again so this time its gonna look like a triangle. Now take that new triangle looking brush and spawn a copy of it. Rotate it till it fits right in the new little slot that you see. Like I said, its like making your own puzzle.
Now you have yourself a 3 way intersection. Easy as that. Next we do the 4 way, which is just as easy if not easier considering we already know how all this cutting is being done.
4 Way? Now that sounds kinky.
So to make the 4 way (boy this part is easy) grab another copy of the original hallway and all you do is cut up the brush the same as you have before all the way down to where it looks like the triangle piece.
Once you have that little triangle, spawn 3 copies of it and place them off to the side a tad so you can grab them easy. Now just put the puzzle together. Basically you want each point of the triangle to be touching so your going to have to rotate the pieces to fit in together correctly. It should look like figure1_11. Its really simple and your pretty much always in the top view.
Man I hope you all got that. Its kinda tough to write tutorials considering I really dont like them but I only do them because they have always been a great help to me and others and I want to see some cool maps. So keep the mapping going. And please feel free to email me anytime about anything Radiant or Ravages of Radiant related.
Signing off, WolfeN