
Thanks to Salohcin for the suggestion for this tutorial.
In this tutorial, you will learn the basics of setting up a fight between rebel and combine squads, as seen in the street wars section of Half-Life 2. These can be open and dynamic, or heavily scripted, and are fun to implement. This tutorial assumes intermediate knowledge of Hammer editor.
A few notes first:
Whatever environment you’re going for; (forest, city, warehouse, whatever) is just decoration. The building blocks of every map can be constructed with simple dev textures and geometry, and then decorated with trees, cliffs, etc. later. Therefore, when building your map, even if you intend to actually use it in your game or mod, create the very basics first. Don’t worry about light, texture, displacements, or anything else. You can go from this
To this, later.
I mention this because it’s especially important when assembling complicated scripted and dynamic sequences involving multiple NPCs to make sure that the actual map works before dressing it up.
Second, I've used a modified version of the Valve example map for standoffs in the tutorial. I recommend checking it out here.
In the Valve example map, they divide the combine into two squads, and though I’m not sure of the exact purpose of this, except for having the flexibility of two squads, I’m afraid something will screw up if this gets changed, so I’ve left it in the tutorial.
Now that that’s out of the way…
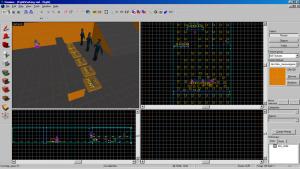
First, create a (large) basic room about 2170 long by 1247 wide.
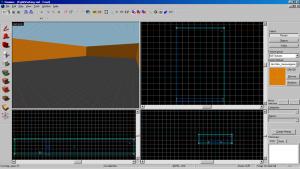
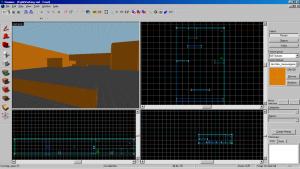
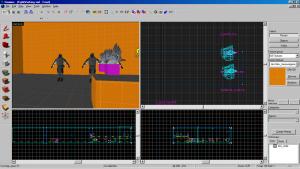
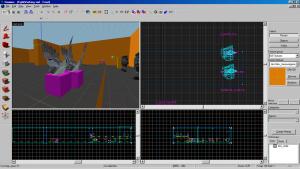
Create a few brushes for each side to use as cover. If you want, you can create a raised area as I did (A guy on a balcony? A guy in a tree? Take your pick).
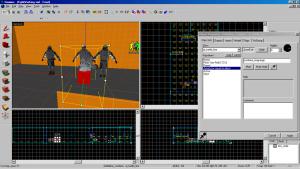
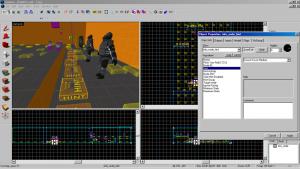
Create a few “npc_citizen” entities on one side of the cover. Give them whatever weapon you want, and set the “Type” property to “Rebel”. Set their names to “Rebel_ (number). Such as “Rebel_1”, “Rebel_2”, etc. Set the squad name of every citizen to “rebelsquad”. All of the rest of the properties are optional.
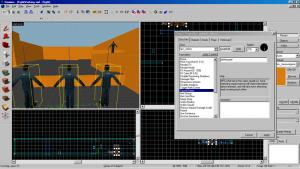
Next, create a bunch of the “npc_combine_s” entities on the other side of the room. (It’s a good idea to have an even number so you can divide them in half.) Set the “Name” property of every one to “combine_soldiers” (yes, they all share the same name). Set the “Squad name” property of half of them to “combine_shortrange” and the other half to “combine_longrange”
Create an “ai_goal_standoff” behind the combine.
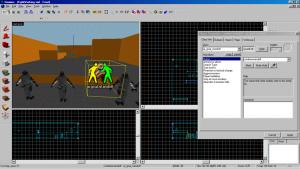
Set the following properties:
Name: Combinestandoff
Actors to affect: combine_soldiers
Search Type: Entity Name
Start Active: Yes
Reaction to tactical change: (Any)
Aggressiveness: Low or Very Low. (I highly recommend not using “very high” aggressivness. This means that the soldier will practically rush the enemy, ignoring their cover, meaning you might as well use an “ai_goal_assault”, covered in another tutorial.)
Player Battleline: No
Stay At Cover Location: You probably want “No”. (It means that if the npc finds suitable cover before advancing to their battle line, they will stick to it. It’s not quite flexible enough, so I don’t recommend it.)
Abandon if enemies hide: No
Create another ai_goal_standoff” behind the rebels.
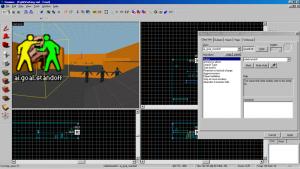
Give it the following properties:
Name: Rebelstandoff
Actors to affect: rebel_* (This means everyone named “rebel_(number)".)
Search type: Entity Name
Start Active: Yes
Reaction to tactical change: (Any)
Aggressiveness: Low or Very Low.
Player Battleline: No
Stay At Cover Location: (You probably want “No”.)
Abandon if enemies hide: No
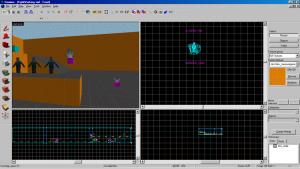
Create an “ai_battle_line” entity at the edge of the combines’ cover.
(Yes, there actually is a pigeon attached to the “ai_battle_line”. The direction the pigeon is facing is the direction the line extends.)
Set the following properties:
Name: battleline_combine
Pitch/Yaw/Roll: Unnecessary
Actors to affect: combine_longrange
Active: Yes
Strict: Yes
This is sort of an invisible line that the combine will try not to cross when engaging with enemies. It’s not a force field; they can go past it if their aggressiveness is set to high enough or when avoiding a grenade. They will try to stay behind it however. It’s used less to block the combine from advancing and more to keep them near the general area of the objects you want them to take cover behind.
Create another “ai_battle_line” with the “Actors to affect” property set to “Combine_shortrange” next to the first one, so the other squad can’t cross.
Create a Battle Line for each squad on the other side of the cover as well.
Create two more “ai_battle_line” entities sealing the rebels in the general area you want them to stay. (Remember that the direction the bird is facing is the direction that the battle line extends.)
Next, create a line of “info_node_hint” entities behind the combines’ cover (even if it isn’t low enough to crouch behind, it’s still a good idea).
eSet the “Hint” property to “Crouch Cover Medium”. All of the other
properties are unnecessary. (This means that the npc recognizes this
area as suitable cover to crouch behind. They won’t be forced into it,
but if they reload or are taking heavy fire, chances are good that they will use the hint.)
Do this for the rebels as well.
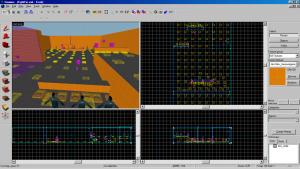
Next, cover the floor of the room with “info_node” entites.
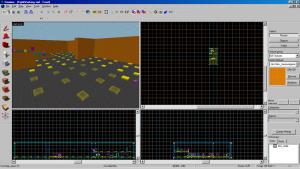
Make sure that they are spaced out about as much as in the picture. When running the map, you can type “ai_show_connect” in the console to see if your node connections are good or not. (Refer to Valve’s page on nodes for more info here).
Lastly, since you may have problems with the NPCs retreating behind walls instead of using their given cover, use brushes textured with “tools/toolsnpcclip”. These are invisible walls that NPCs can’t go through, but the player and objects can. Seal off any area you don’t want the NPC retreating to.
Run the map. If it works properly, the NPCs should stay relatively behind their cover and have a bit of a shoot-out with each other. (Chances are that the rebels will win, especially if there are more of them. ) There is a low chance that one side will overstep its battle line, but this can be remedied usually by adding in a crap-load of them in Hammer. If you REALLY want them to stay behind their cover, you can use a “tools/toolsnpcclip” textured brush.
You now have the basics of a street (forest, whatever) fight set up, assuming it works, which, odds are, it won’t at first. This type of thing takes a LOT of fiddling. Anyway, if it does work, you can spice it up. Replace the low wall the combine hide behind with a wrecked car or pile of rubble. Replace the raised platform (if you made one) with an overhanging balcony, or whatever you want.
You’re done! This type of sequence is great for background fighting, as seen in the street wars section of Half-Life 2. You may also want to involve the player somehow, perhaps by placing a trigger that causes one side or the other to break the standoff and charge when the player arrives.
I hope you’ve enjoyed this tutorial. If you have any questions or feedback, you can email (hambandito@gmail.com) or PM me.
-Psalm


You rawk unbelievably much.
Very Goood :D
I hope this is what you meant in your request, Salohcin... I'm glad you folks liked it :) Let me know if it works, I'm always afraid that I forgot something.
Very nice tutorial! Nomatter how much time I spend in hammer (a lot), tutorials like this always give me insight about a better way to do something, an alternative or more efficient way of doing it, or even a new thing all together. And I appreciate every one of them :D
More tutorials are on the way folks... I've been pretty bogged down with school work recently so I've hadn't had much time to mess with Hammer, but expect to see new ones by Friday May 4th.
Hey, you used my article! Awesome. :)
There are two squads to filter weapons to different ranges. Combine_s with shotguns (i.e. squad one) can advance freely right up to the rebels, but the ones with SMGs (squad two) hang back behind the battle_line.
I WAS wondering about that... :) Thanks Varsity
This is an amazing tutorial, keep it up!
Really cool and helpful nice work
Thank you for this tutorial ! It realy useful !
nice tut thats what im need