A tutorial for making your own golden textures in the three original S.T.A.L.K.E.R. games (SoC, CS, CoP and mods based on all of these).
=== TOOLS REQUIRED: ===
Paint.NET (it's free): Getpaint.net
Your chosen texture in the .dds format (optional, as common formats like .png can be altered, too; will only work in S.T.A.L.K.E.R. when saved in the .dds format).
**.dds stands for DirectDraw Surface; a texture file format.
***The steps shown below are most likely possible in other programs with features equivalent to Paint.NET, though this tutorial only focuses on using Paint.NET.
****Can be done with any .dds texture file, though results may differ and some tweaking on the part of the user (with their settings in Paint.NET) may be required.
*****Make sure to back up all of your textures prior to editing.
=== EDITING TEXTURES GUIDE: ===
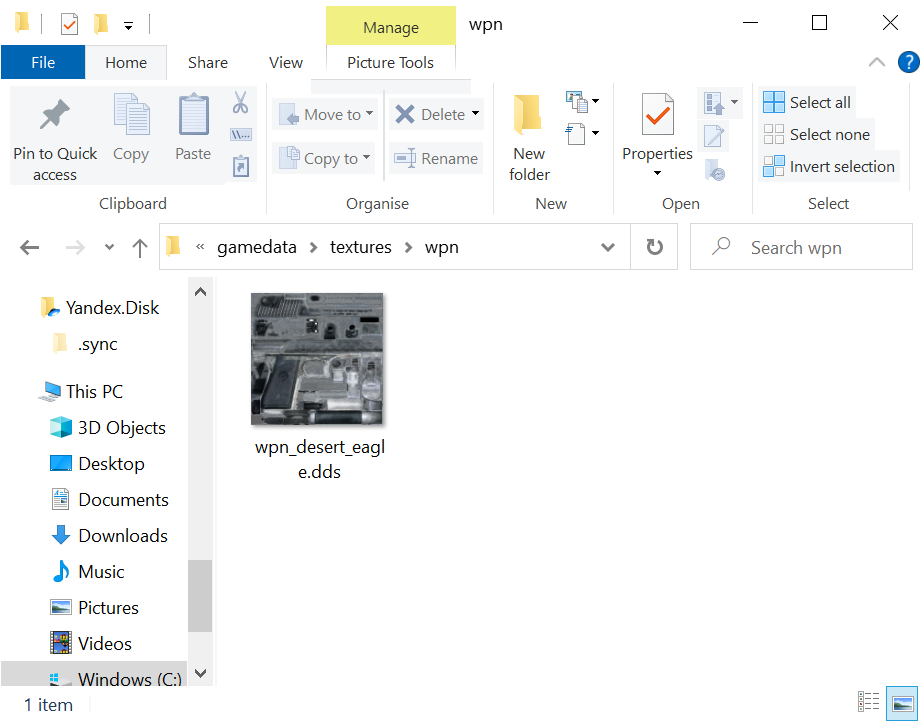
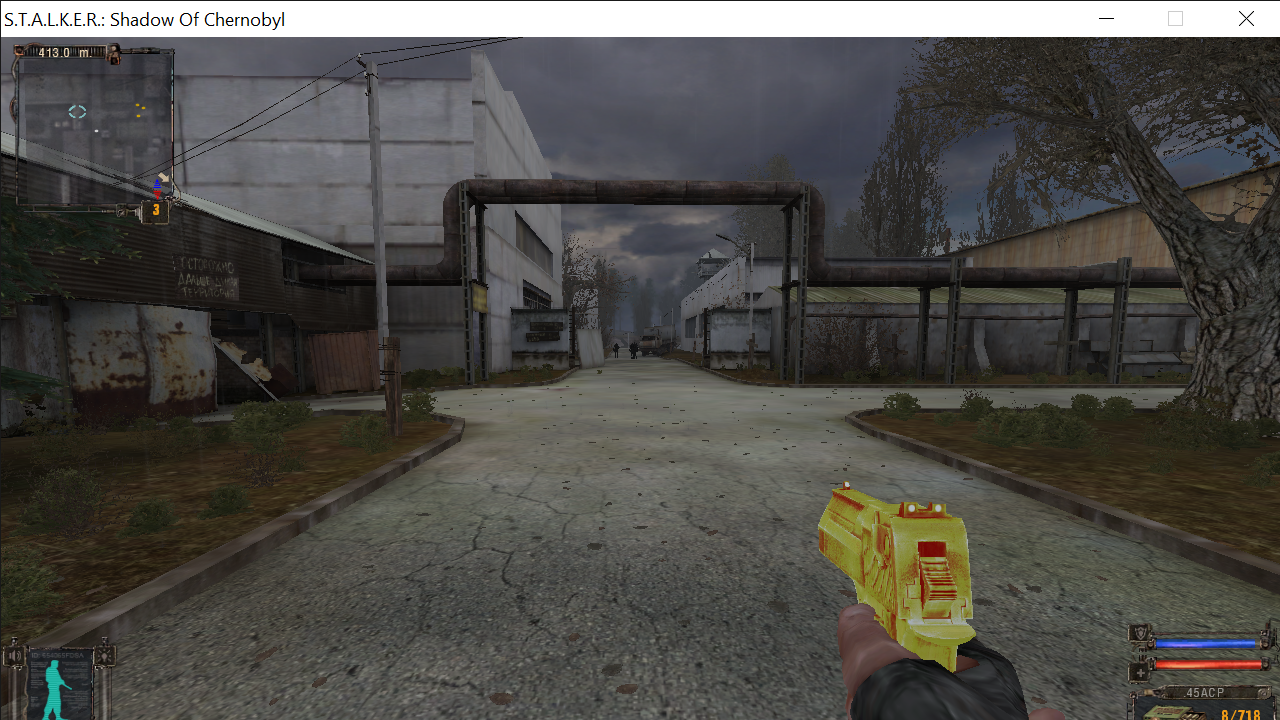
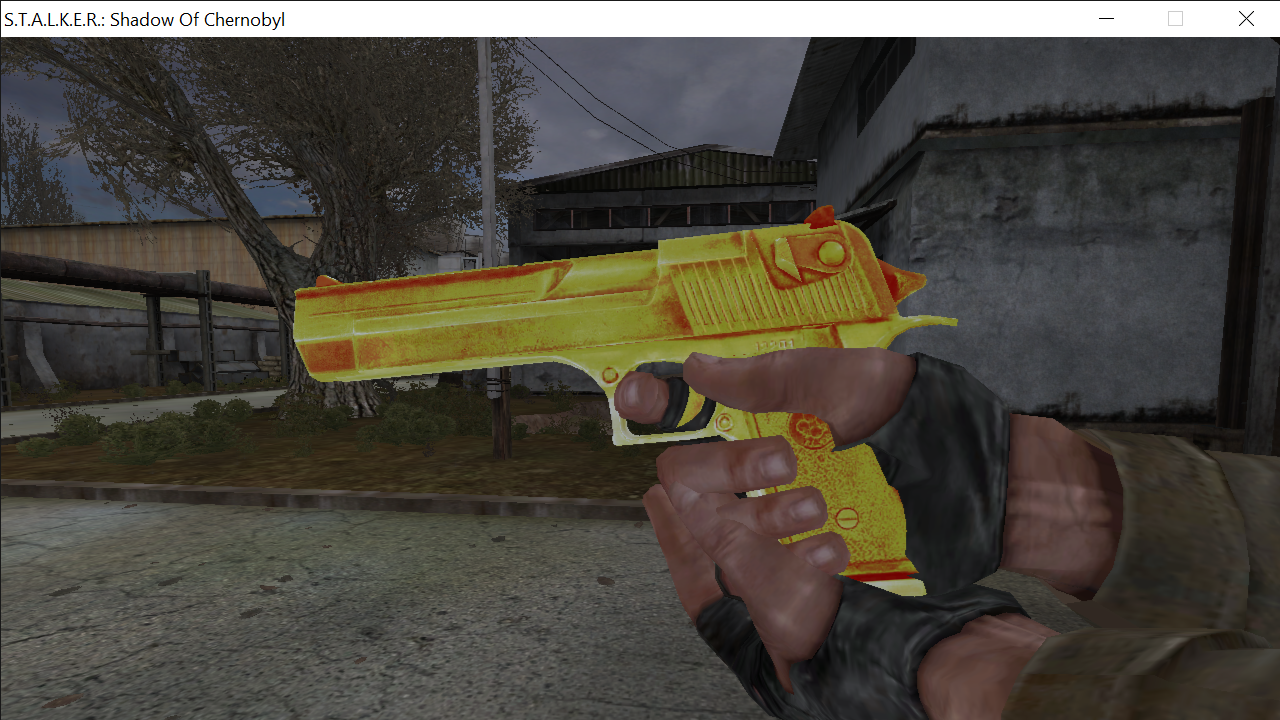
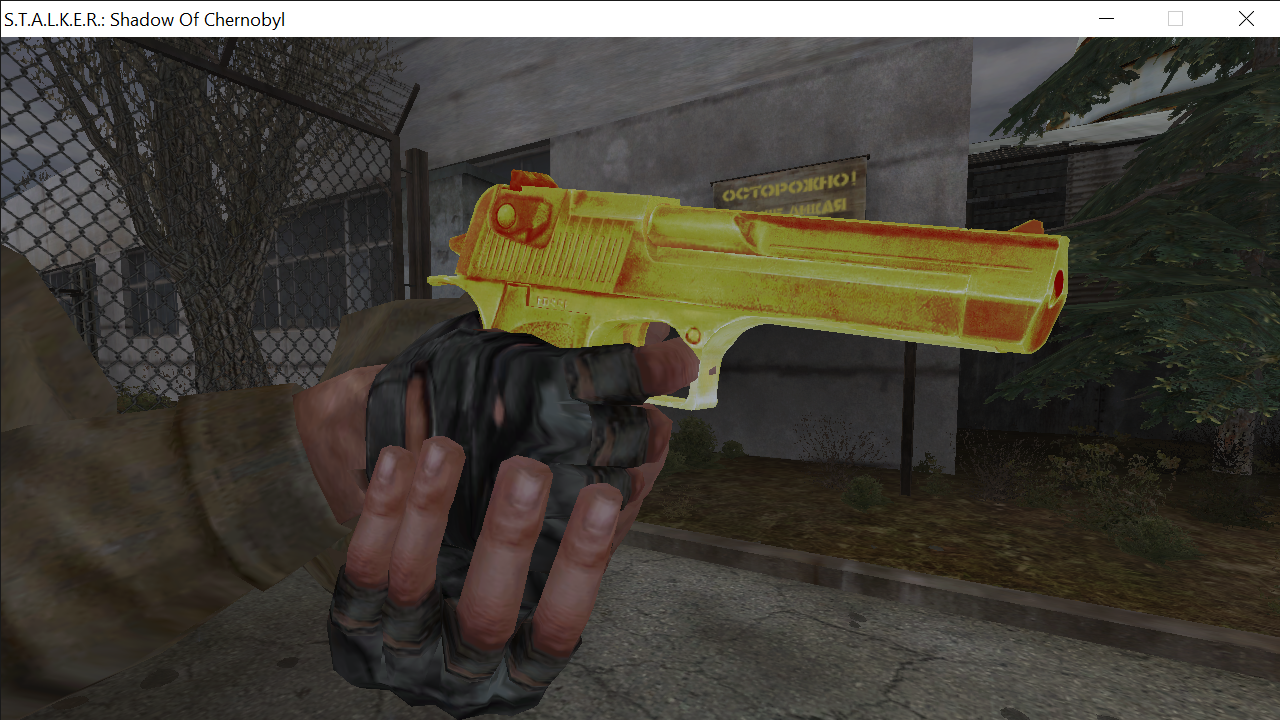
1) First off, you'll need to locate your desired .dds file that you'd like to edit. For this tutorial, we'll be editing the texture of the mighty Desert Eagle in S.T.A.L.K.E.R.: Shadow of Chernobyl (known as the Black Kite across the three original games). Most weapon textures can be found via gamedata/textures/wpn.

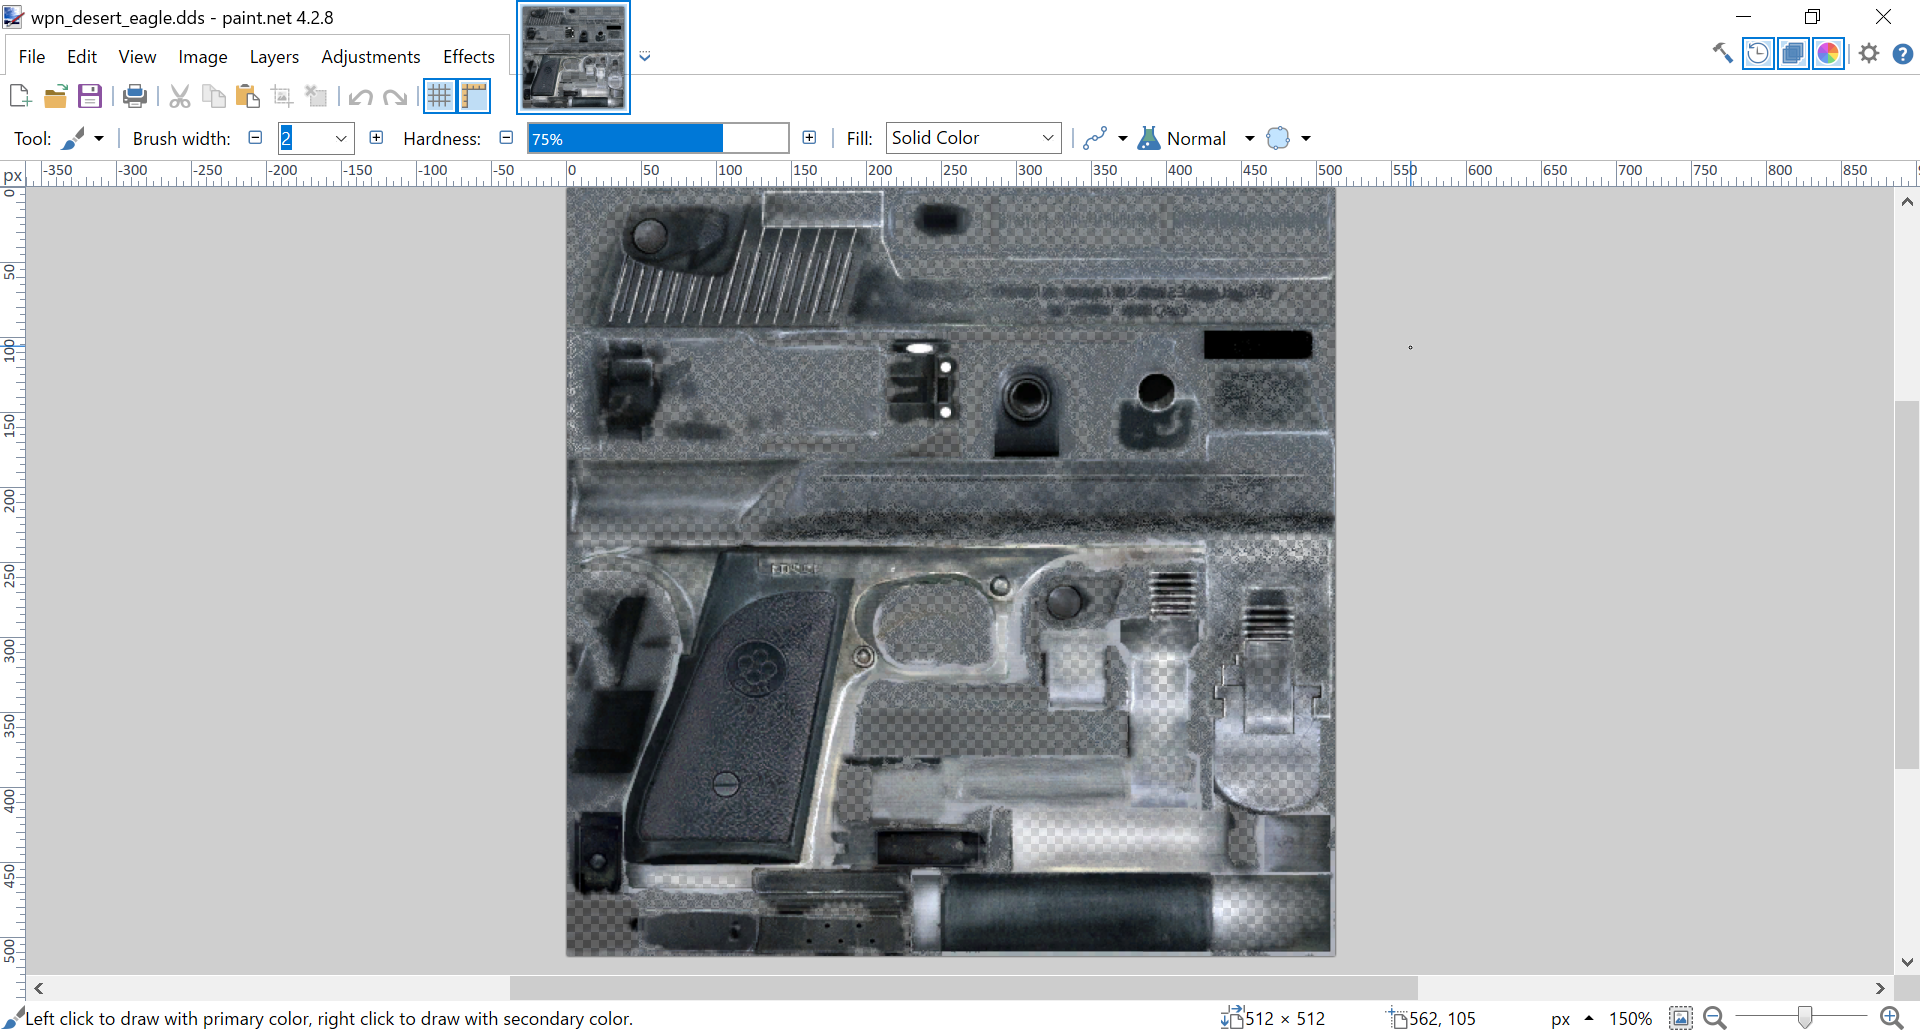
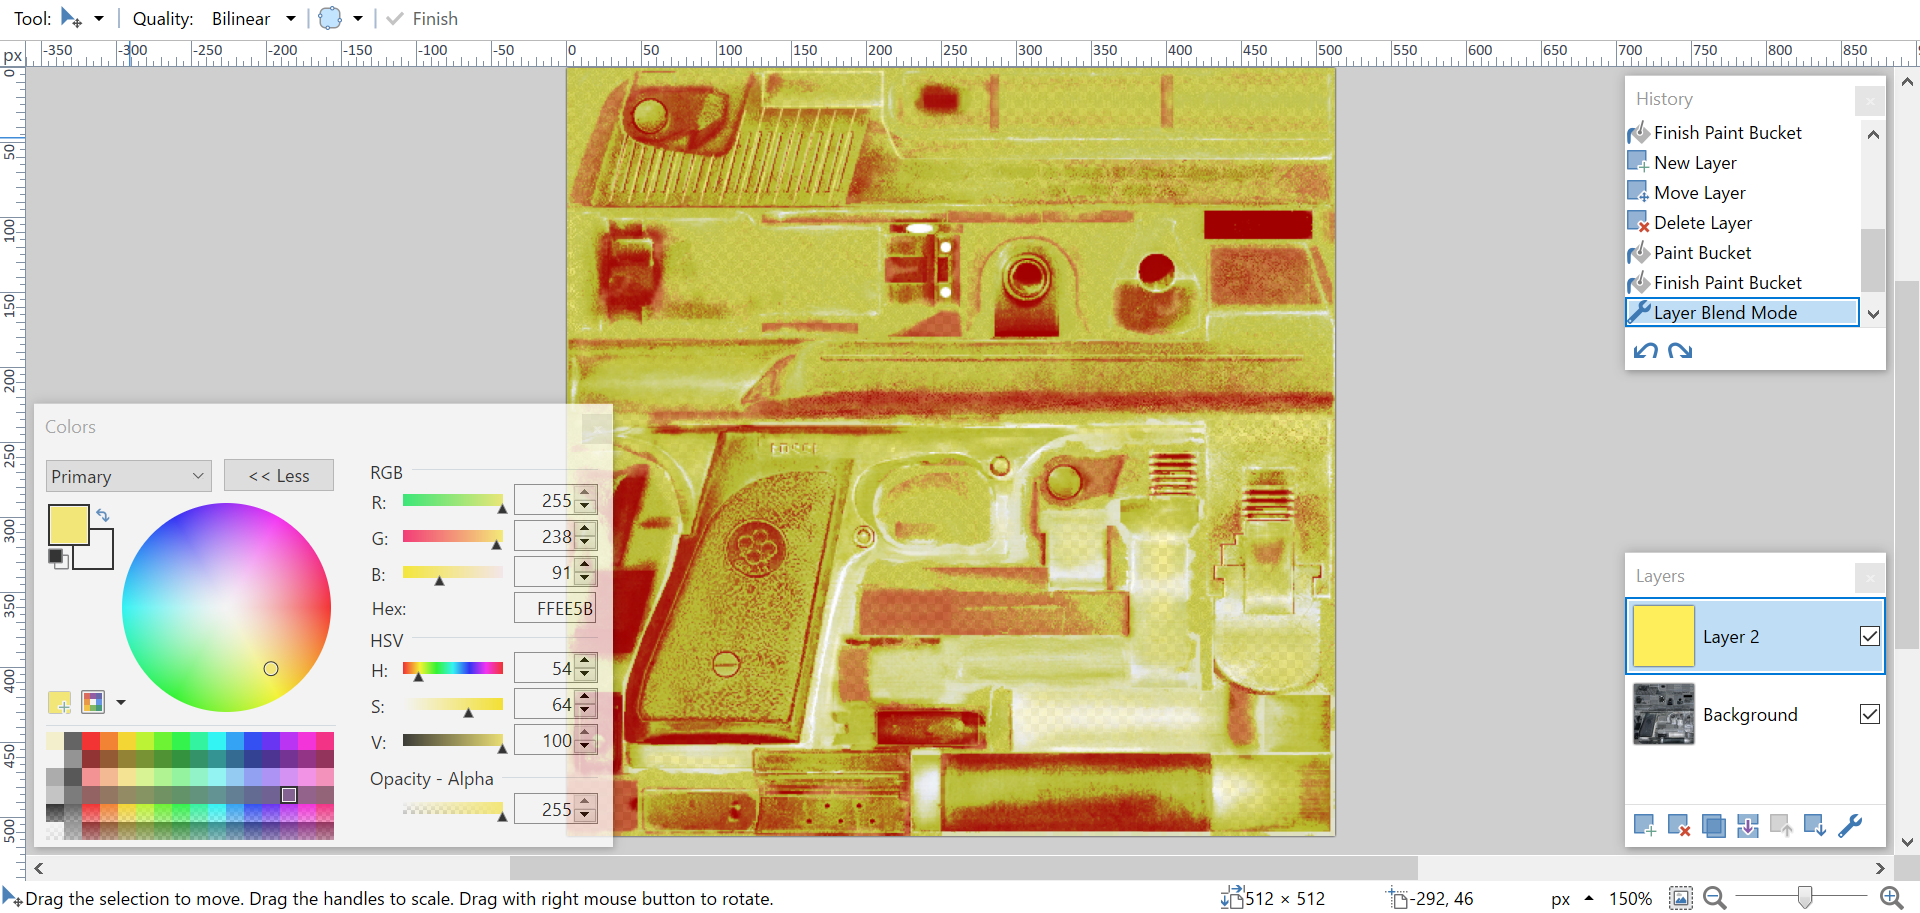
2) Open your texture via Paint.NET.
3) Once opened, click the button on the bottom-left corner of the small window on the bottom-right of your screen. This will create an extra layer for your texture.
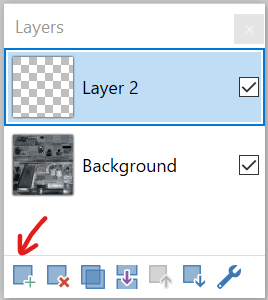
4) Click the second layer that you've just created (named Layer 2 by default).
5) Click the Fill tool in the toolbar on the left side of your screen (can also be found via the dropdown tab on the top-left side of your texture workspace marked "Tool").
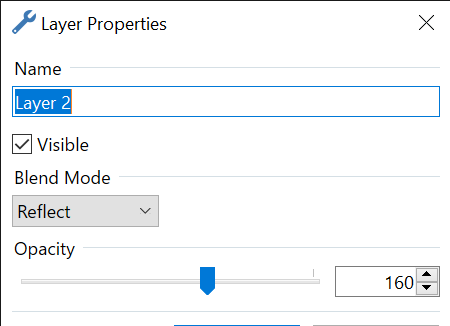
6) Click the following; Layers > Layer Properties. After this, set your layer opacity to your desired setting. Under "Blend Mode", select the "Reflect" option for the best results (from my experience).
7) Make sure to replicate a yellow/beige colour via the Colours window on the bottom-left corner of your screen, then use this new colour to fill in Layer 2 using the Fill tool. I've left a formula below as well as my final results.
8) Save your texture (make sure it's a .dds file in the same location you had originally opened it from), open your game and take a look at your new golden texture for your weapon!
End of tutorial.

You think it's possible to put in a shader too :o?
Yes, that's possible through the Actor Editor in the SDK and the AXRToolset. I've not experimented with these in-depth myself, but I've had a look at the golden textures under different shaders and got very similar results to the ones in this tutorial.
The AXRToolset would be the easier option for those who don't have access to the SDK (accessible via the Call of Chernobyl downloads page here): Moddb.com
The AXRToolset would allow you to change between many of the in-game shaders for items and weapons. I've listed these below as well as the AXRToolset link for you: Github.com
models/artefact
models/artefact2
models/lightplanes
models/mirror
models/model
models/model_aref
models/model_fur
models/model_hm
models/model_pn
models/model_pn_hm
models/pautina
models/selflight
models/selflight_det
models/selflightl
models/transparent ; for invisible/see-through objects
models/weapons ;all weapons use this by default
models/window
models/xanomaly
models/xdistort
models/xdistortcolor
models/xdistortcolorl
models/xdistortinv
Hope this helps. :)
Sorry to be 2 weeks late but thanks it did!
I wasnt looking for this, but Esta información vale millones