Introduction
The Chronicles of Riddick: Escape from Butcher Bay ran on a proprietary engine created by the developer Starbreeze simply called Ogier. Like their previous two games, Enclave and Knights of the Temple, they released an SDK for it. Unfortunately Riddick is one of the only games I've seen that had a developer SDK created for it and yet no mods were made or released.
So I have decided to try and fix that and I'm going to upload several tutorials educating everyone on how the editor works. With the goal of teaching you how to make your own Riddick levels and mods.
What you will need
- It's highly recommended you have completed the tutorial on importing textures as the vast majority of this tutorial relies on that one.
- You will need Alias Maya 6. This can be found very easily on archive.org. If you're having issues finding it message me on Discord.
- You will need Butcher Bay's Maya 6 plugin. This is located within the GDK.
- (Optional) You can use a .fbx plugin I located a few weeks ago instead of the .obj plugin included with Maya 6.
Installing the Plugin
To start off with we'll need to install the Ogier model plugin. Once you've installed the GDK, you can locate the plugin within \System\Maya2xrg. The plugin works with Maya version 4.0, 4.5 and 6.0. For the purposes of this tutorial I'll be using 6.0.
Within that folder is a .mel script file called xrgExporterWindow.mel. Copy/paste that into your Documents\maya\6.0\scripts folder.
Inside the 6.0 folder copy the xrgExport.mll file into your Documents\maya\6.0\plug-ins.
Now start up Maya 6. Go to Window->Settings and Preferences->Plug-in Manager

There it is. Toggle xrgExport.mll on for loaded and auto load. I also recommend toggling on some of the other plugins like obj export and Collada support but it's optional.
Creating the model
Since I prefer making my models in Blender. I took the liberty of modelling a desk lamp in Blender.
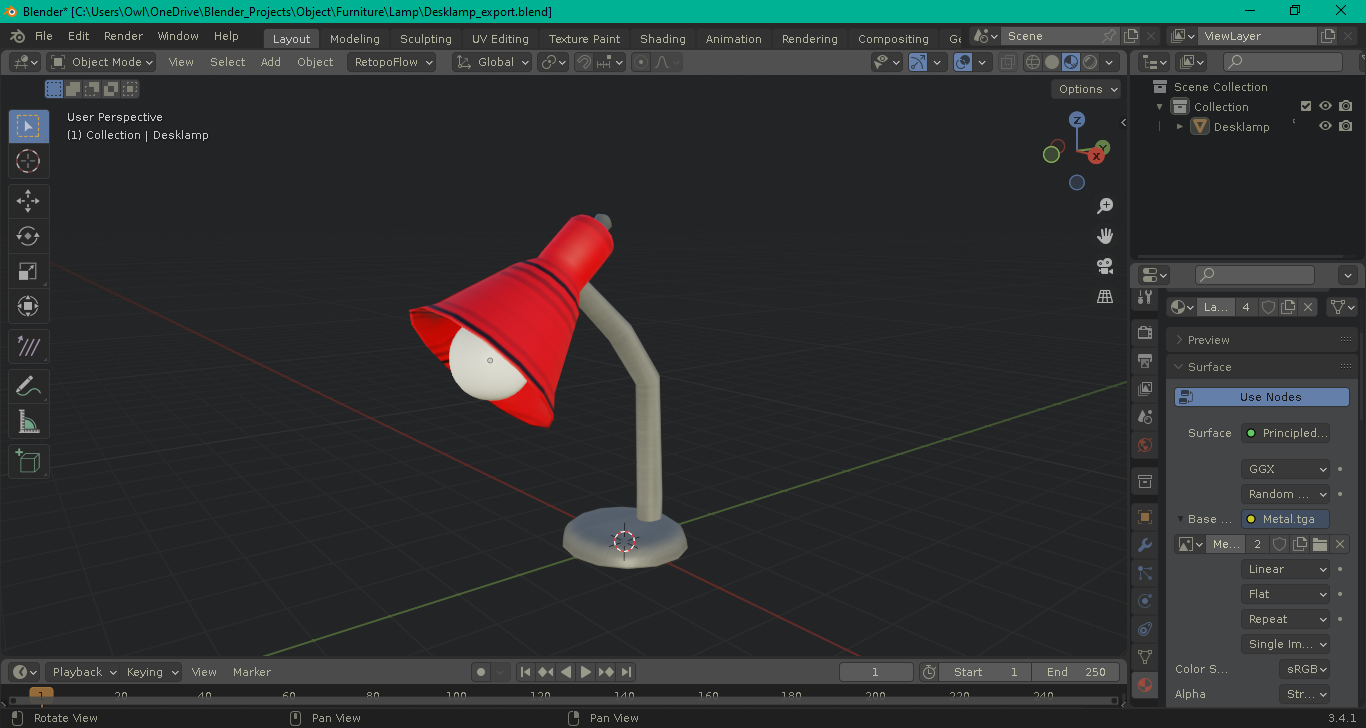
Now join your model into one mesh (this is optional but recommended for simplicity's sake). It's also recommended to triangulate it. After that export it as .obj. Make a folder on your desktop (in my case I just called mine "Lamp") and place all your textures in there.
Now in Maya 6. Go to File->Import and import your .obj.

There's your mesh. One thing I would recommend doing is rotating your model 90 degrees in the X and Z axes. This will make it right side up and facing forward in Butcher Bay's engine.
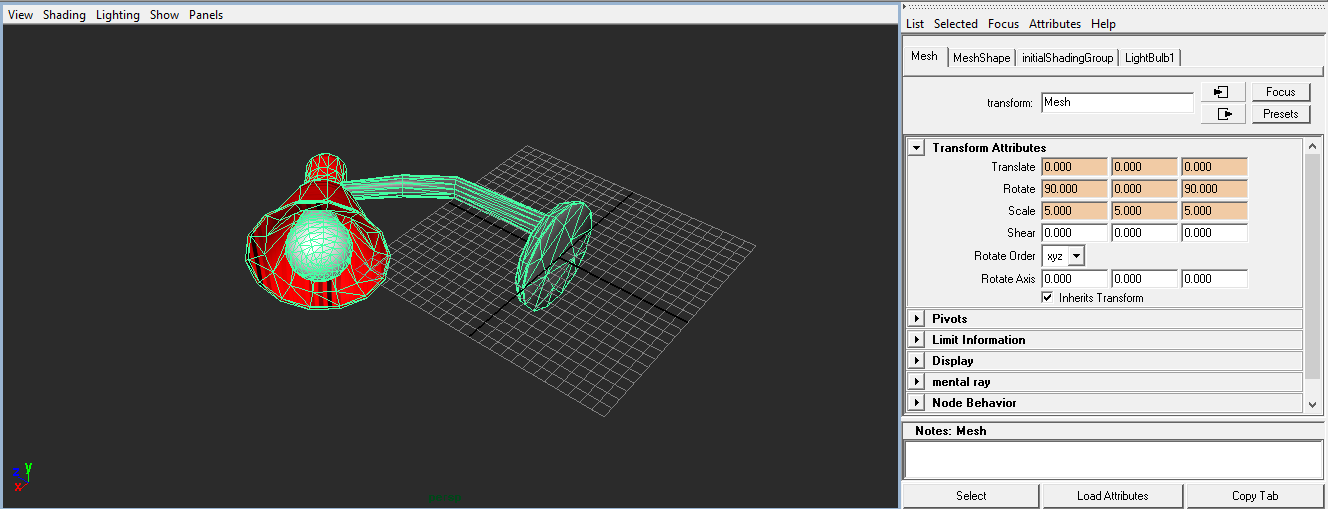
It should also have textures if you placed them within the same folder as the .obj.
If you want to export into Butcher Bay we have a few options. We can import into BB using .lwo, ase, and obj and Starbreeze's proprietary format .xrg. .xrg is recommended as it also allows for rigged meshes and I've had the most success with it. For the purposes of this tutorial I'll go over using .xrg but know that there are alternative formats you can also use if you prefer.
Now you might notice the .xrg plugin doesn't show anything under Maya's export window. I have zero idea how the plugin is meant to be used. Starbreeze included zero documentation or instruction on this process. None of the former Starbreeze developers I've questioned remember how you were meant to use the plugin. Fortunately, I discovered a way to force Maya 6 to export into .xrg by inspecting the .mel script.
At the bottom of the screen there's a white box. This is the Command Line within Maya 6.

Within this box you can type in commands. Now type in the command
xrgExporterWindow

and press enter.
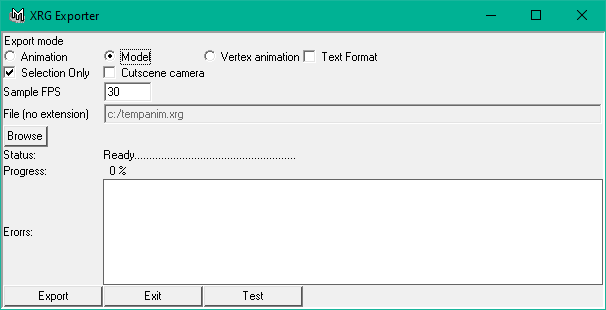
This should now bring up the XRG Exporter window. I recommend setting it to selection only then hitting browse. Let's create a new folder in our Content\Models folder called TestLamp. Navigate inside of it and hit export. It should now generate a .xrg file.
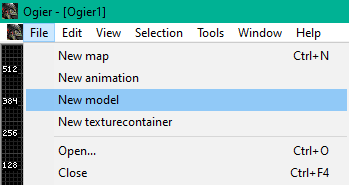
Now in the Ogier editor. Go to file->New Model.
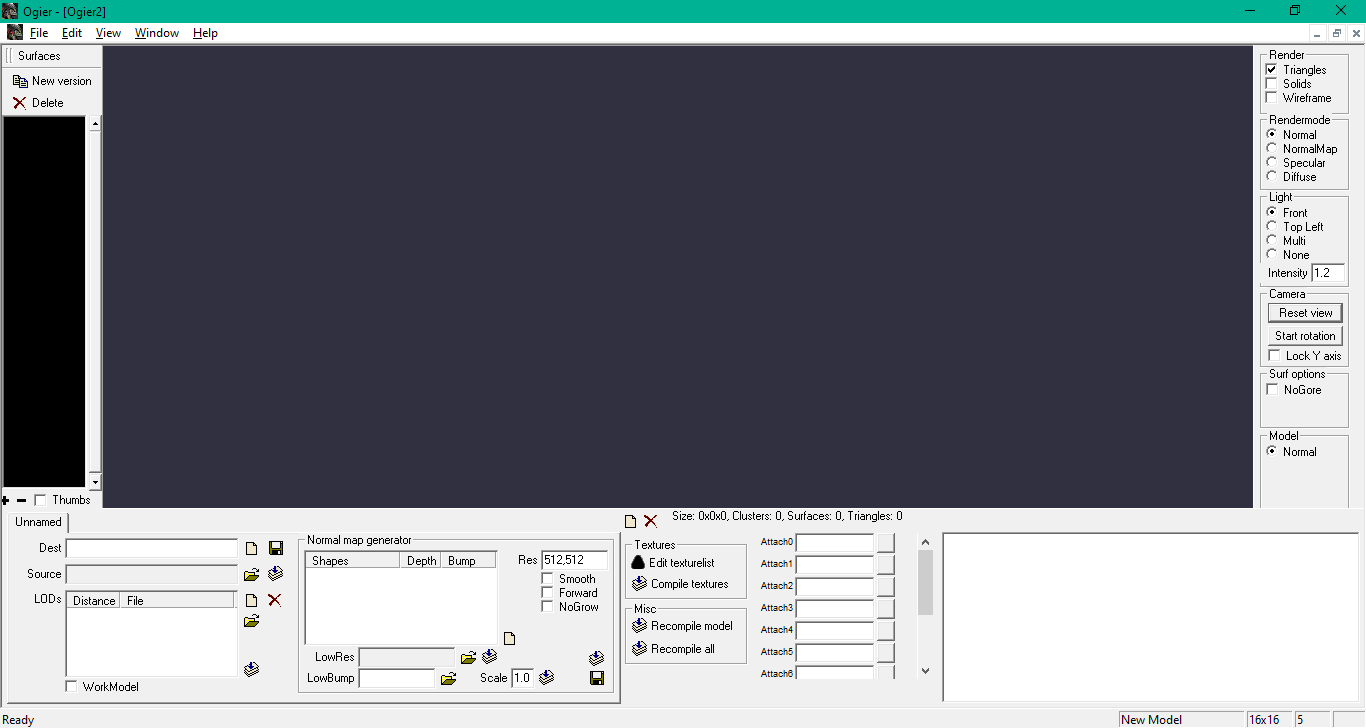
Now go to file->Save. Save it in the Content\Models\TestLamp folder. It should save as TestLamp.xtx.
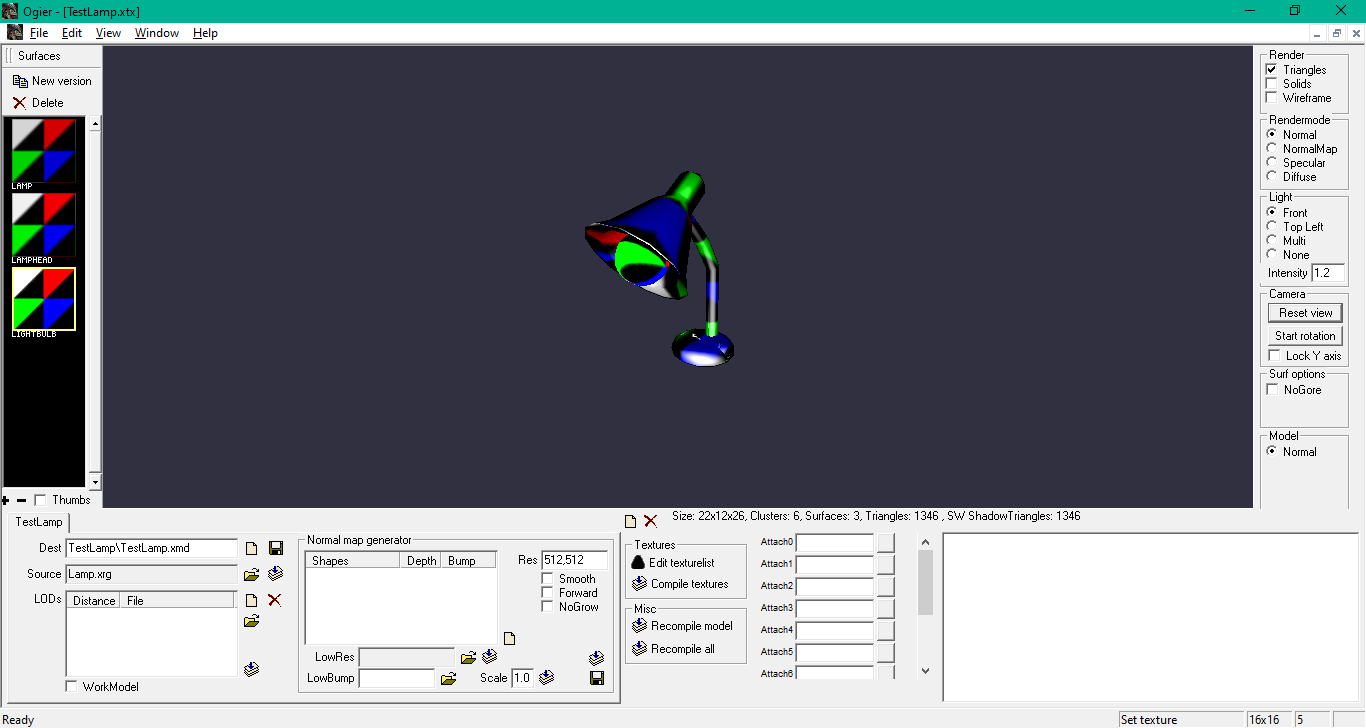
Now under Dest, go to select destination and go to that same folder. Now click the folder icon right next to source called "Select model file". And navigate to our .xrg.
If all went correctly we should see our model. If we don't see anything, try saving the file, exiting Ogier and reopening it. If we don't see it again it's likely it's too small. To use the controls of the Model Viewer hold right click to zoom in/out.
You might notice it's currently textured with the default engine texture. Let's fix that.
Let's create an import xtx and put all of our textures into it. Save it in our desktop folder like we did in the previous tutorial.
You can do it within the model viewer interface but I've found this has a habit of crashing the game. So let's create a new xtx file and put all of our textures from our desktop folder into it.
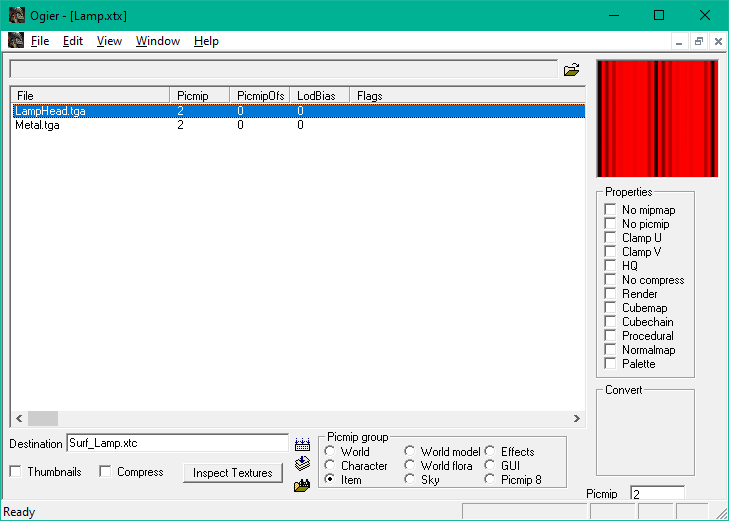
Save it as .xtx. Compile it by dragging it into XWC. If it throws up an error saying it can't save to a directory, open it up in notepad and make sure it has the heading
*DESTINATION Surf_Lamp.xtc
At the top above textures. You can see an example xtx file in the texture examples folder included with the gdk.
Now close Ogier and reopen it and reopen the model we were dealing with earlier. It should show textures now. If it doesn't, we'll have to fix that. At the top left is a menu that says "Surfaces". It should show our textures. Click on one of the textures.
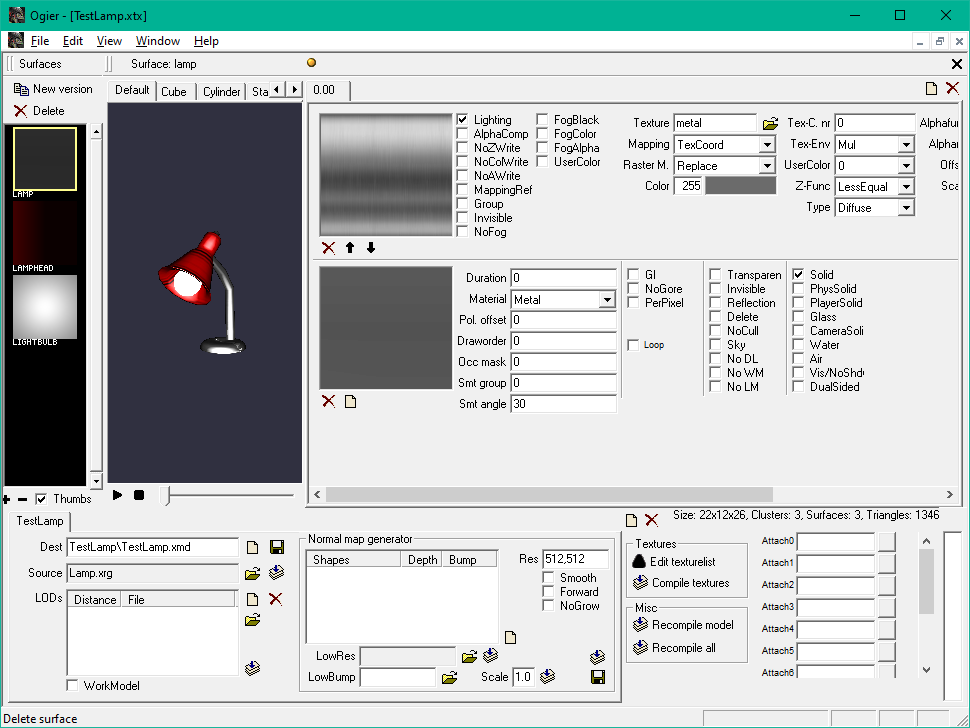
From here we can tweak how the textures look by adding normals and setting what maps act as diffuse or specular. I recommend setting at least one map to diffuse for now and adjusting with normals/specular later. If you want to remove the obnoxious glare from the model you can by adding a black specular map and setting its color to entirely black. To add new maps click the "new layer" button underneath the bottom most layer setting.
![]()
Now save it and close out of it by clicking the bold black x at the top right. You should see your model fixed in the viewport.

Much better. Now one last step. Save your model and close out of the editor. Now drag the .xtx from our TestLamp folder into XWC. It should now compile that similar to a texture or level. This is a very important step as it won't show up ingame if we don't do this.
Spawning it in the game
Spawning a static mesh is very easy to do. Let's build a level and spawn an entity. We can spawn either an engine_path or a model entity.
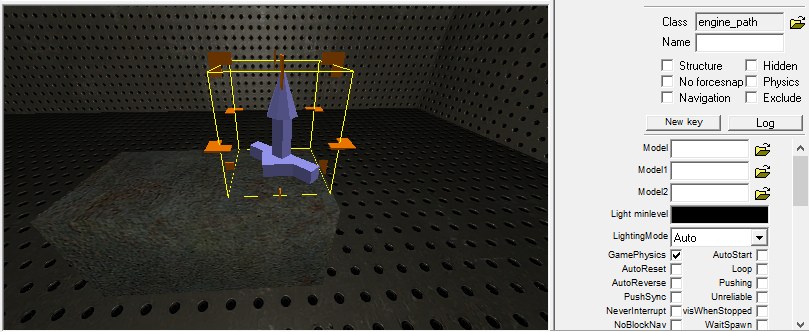
Now on the right there should be a heading called "model". Click on the folder next to it. It should allow us to select which model we want to display.
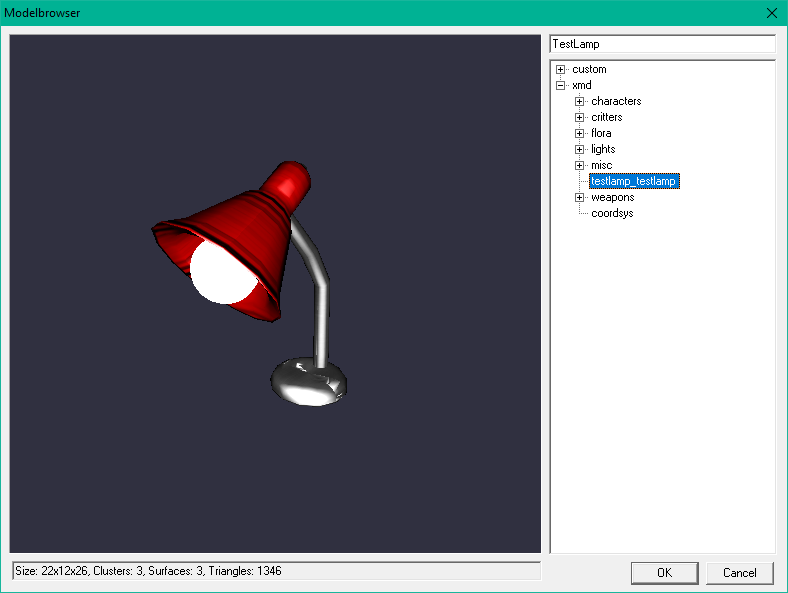
There it is. We can also now preview how the model looks by pressing Alt + R. Or going to view->Simulate World.
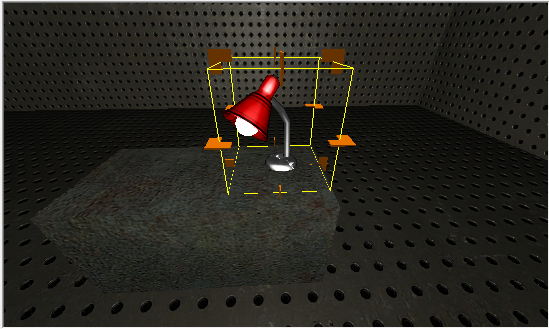
There it is. Now if you save the map, compile it and start the game up you'll see it.
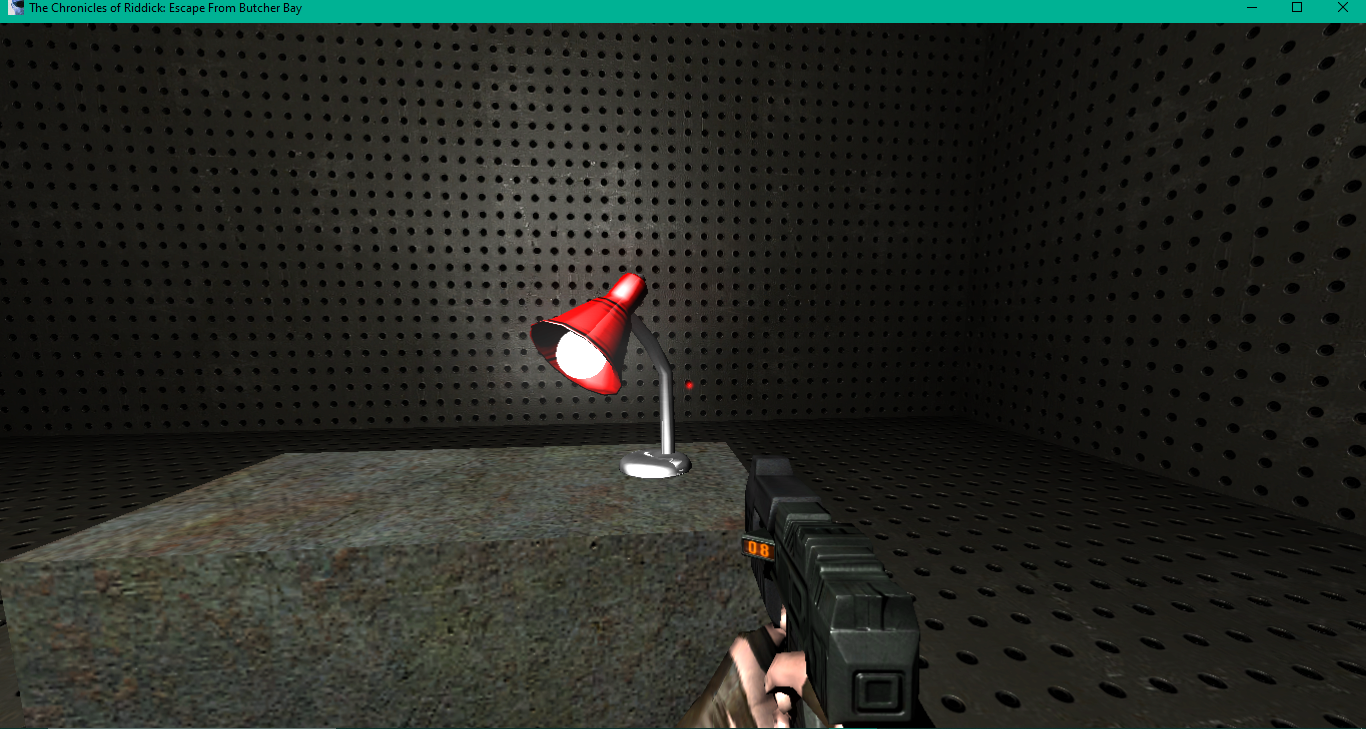
Note that Engine_Path/Model entities don't have collision or physics. To fix that create a brush around the model with a no draw texture. If you want to give it physics you'll need to create a custom entity via the registry files.
Creating a custom melee weapon
As a bonus I'll throw in this lesson as well. Making a static is all well and good but what if you wanna do something really exciting? Like a custom weapon?
It's recommended to check my previous tutorial on editing Riddick's player model as this part of the lesson goes into the registry. Open the Registry folder and scroll down to the file RPGWeapons.xrg. Now scroll down until you hit *weapon_club_nightstick
*weapon_club_nightstick
{
	*classname weaponclass_club
	*model "weapons\\nightstick"
	*iconsurface GUI_ICON_Nightstick
}
Let's copy/paste this and change its name to weapon_lamp. And point it to our model.
*weapon_club_lamp
{
	*classname weaponclass_club
	*model "TestLamp\\TestLamp"
	*iconsurface GUI_ICON_Nightstick
}
Save the file. Make sure you've removed SvCampaign.xcr and SvDebug.xcr. Now spawn a pickup entity.
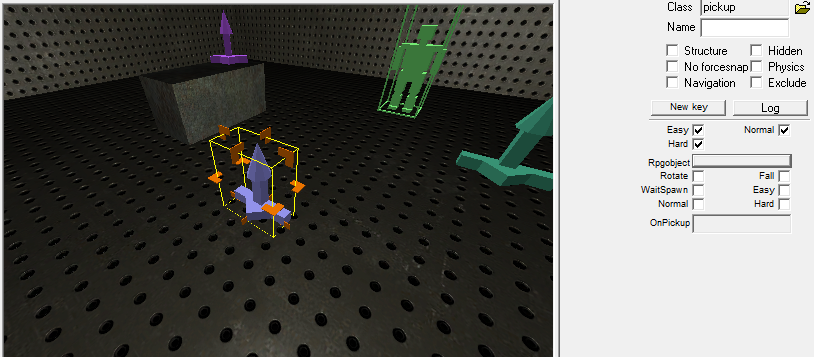
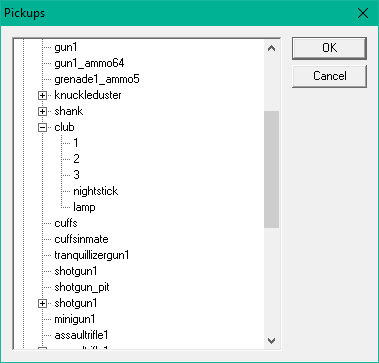
Click on the Rpgobject button on the right. Now expand "weapon" and let's scroll down to club. We should see lamp in the list.
Select it. Now save the level and compile it. We should be able to see our weapon. Let's kill something with it!


This video is the first recorded evidence of a custom weapon mod being produced for Butcher Bay.
The sky is the limit as far as importing statics goes. You can also use this method to import rigged meshes and animations but that might require a dedicated tutorial for it later. For right now I hope this has inspired you to try creating your own models for Butcher Bay.


As a massive fan of this game since it launched, this is indeed very inspiring. Breath of fresh (old actually) air to even see it on the front page man.
I hope this tutorial and some of the others I've written inspire more people to mod the game.