Introduction
The Chronicles of Riddick: Escape from Butcher Bay ran on a proprietary engine created by the developer Starbreeze simply called Ogier. Like their previous two games, Enclave and Knights of the Temple, they released an SDK for it. Unfortunately Riddick is one of the only games I've seen that had a developer SDK created for it and yet no mods were made or released.
So I have decided to try and fix that and I'm going to upload several tutorials educating everyone on how the editor works. With the goal of teaching you how to make your own Riddick levels and mods.
This tutorial took several hours to figure out as the official documentation doesn't describe how to import custom textures. Special thanks to Amran for helping me figure this out.
What you will need
It's recommended to have completed the first tutorial as it fills you in on how to make basic things like brushes and how to spawn entities.
You'll also need an image editing program that lets you export as .tga.
Creating the texture
Note: There are multiple ways to create textures in the Ogier editor. You can also use the editor to create the initial XTX file. But this is the method I've found is the most reliable and consistent.
To start off with you'll need to export your texture as .tga. For the purposes of this tutorial I'll be using Paint.net.
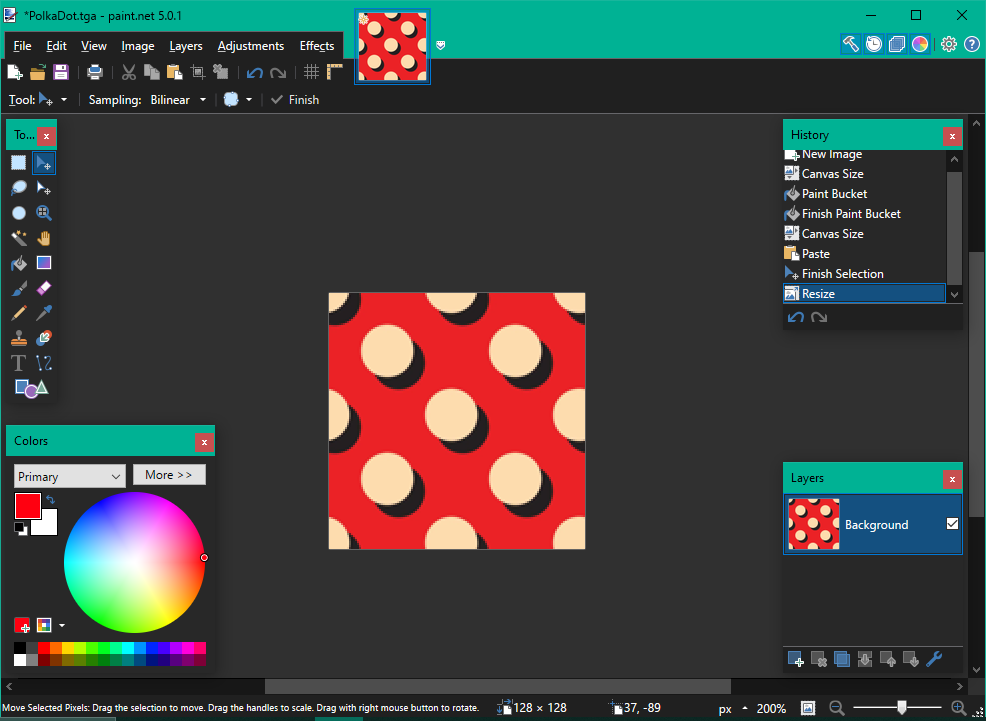
Next let's save it as .tga. Go to file->Export and save it as TGA.
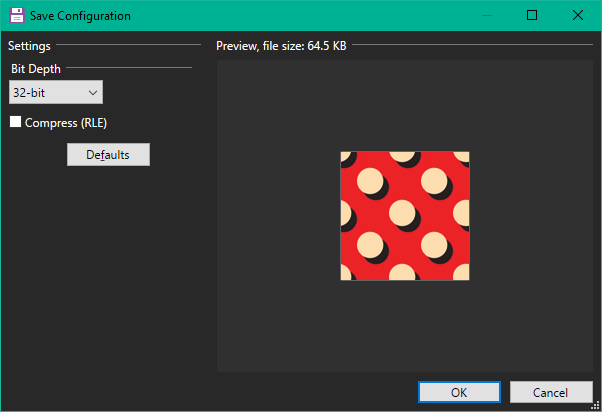
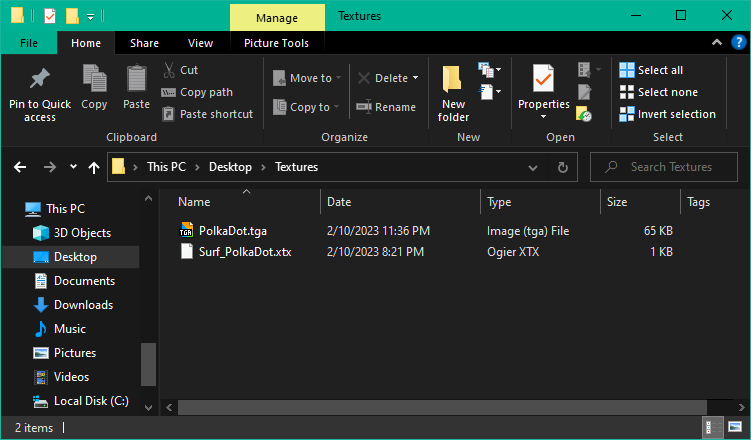
Make sure you save it as 32-bit and turn off "compress (RLE)". Now save it into a folder. I'm going to save it to a folder on my desktop named "Textures"
Within that same folder. Create a text file and rename it to "Surf_PolkaDot.xtx". Starbreeze named their texture packages with the prefix Surf_ so it's recommended to keep the same naming convention.
Now open up that .xtx in notepad and let's edit it.
*TEXTURES
{
	*THUMBNAILS 1
	*DESTINATION "Surf_Polkadot.xtc"
	*TEXTURE
	{
		*PATH Polkadot.tga
	}
}
This is the minimum you need to make a simple diffuse texture. If you wanna add a more complex texture with normals or specular maps I suggest consulting the example xtx located within the gdk's /examples/ folder. It contains an example file for a texture package containing multiple textures with normals and speculars so it's a great reference to consult with after completing this tutorial.
Now we need to open XWC. If you completed the first tutorial you should be acquainted with it for compiling levels. Drag the .xtx you've created into XWC. It should now compile.
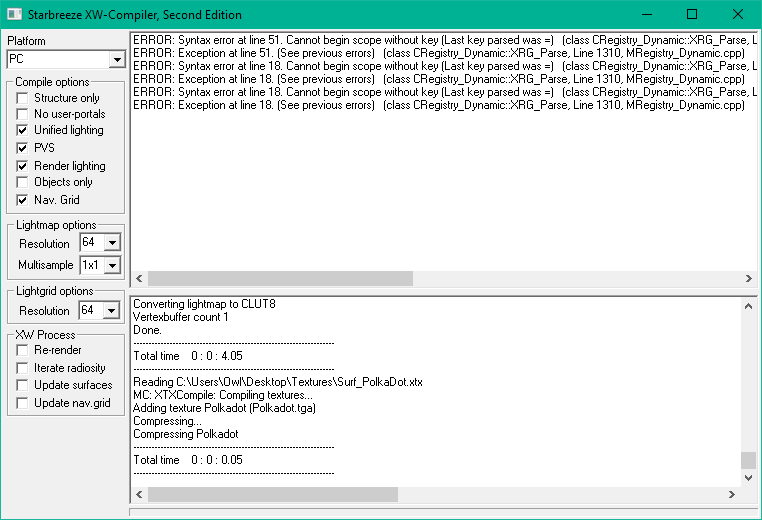
This creates two files located within your game's /content/ directory. The name of which is specified in the "destination" field in the .xtx file. Note it can also put the .xtc file in a folder called /sbz1/ in your main game directory. This appears to be a holdover from when they were making the game Enclave. If that happens just copy/paste it into your content directory.
Next you'll need to create a second xtx file. This one goes into the content/surfaces directory in your Riddick game folder. This xtx file is referred to as a "Surface xtx" and is completely different to the first file. The first file defines where the TGA file is for importing. The second file controls how the texture looks when it's in-game.
Once you create the file in content/surfaces. Edit it as follows
{
	"CLASSNAME" "SURFACES"
	"XR_PARSE" "0"
	"OGR_NAME" "Polkadot"
	"OGR_ORDER" "0"
	{
		"CLASSNAME" "SURFACE"
		"NAME" "Polkadot"
		"MATERIALTYPE" "61"
		{
			"CLASSNAME" "TLAYER"
			"TEXTURE" "Polkadot"
			"FLAGS" "Lighting"
			"COLOR" "0xff7f7f7f"
		}
	}
}
Save this file and open it in the Ogier editor. Make sure if it's already open that you restart it as it will crash otherwise.
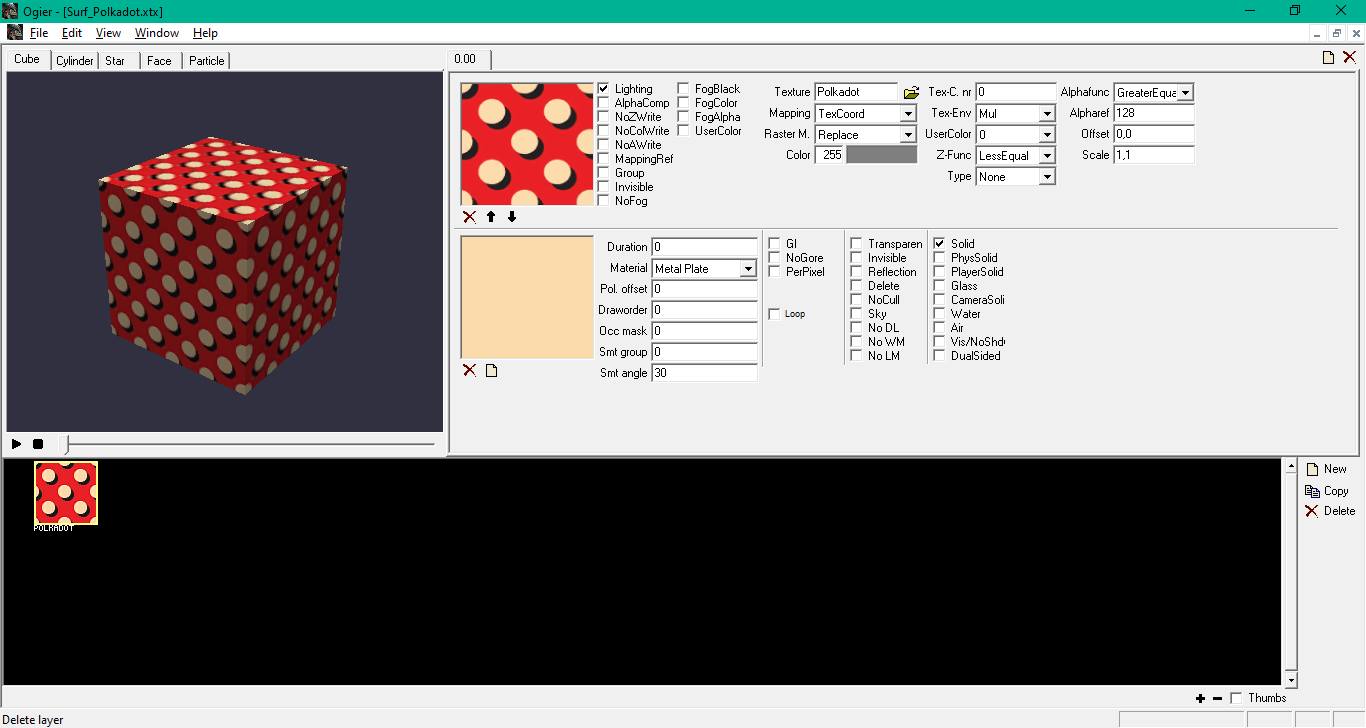
Here we can edit some of the more advanced elements of the texture. We can also set certain textures as being normals or specular maps. We can also include more than one texture within a texture package. It's recommended to play around with the initial import xtx file a little to get the right result.
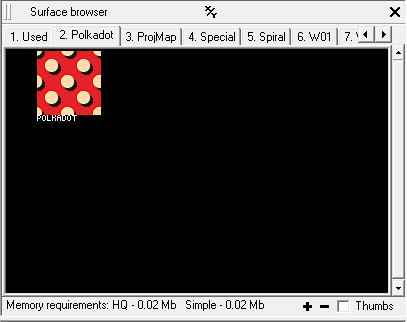
Now save the file and let's build a level. We can now see the Polkadot category within the ~ menu.
Once we've gotten to this point we're in the 7th inning stretch. Let's map it to a brush.
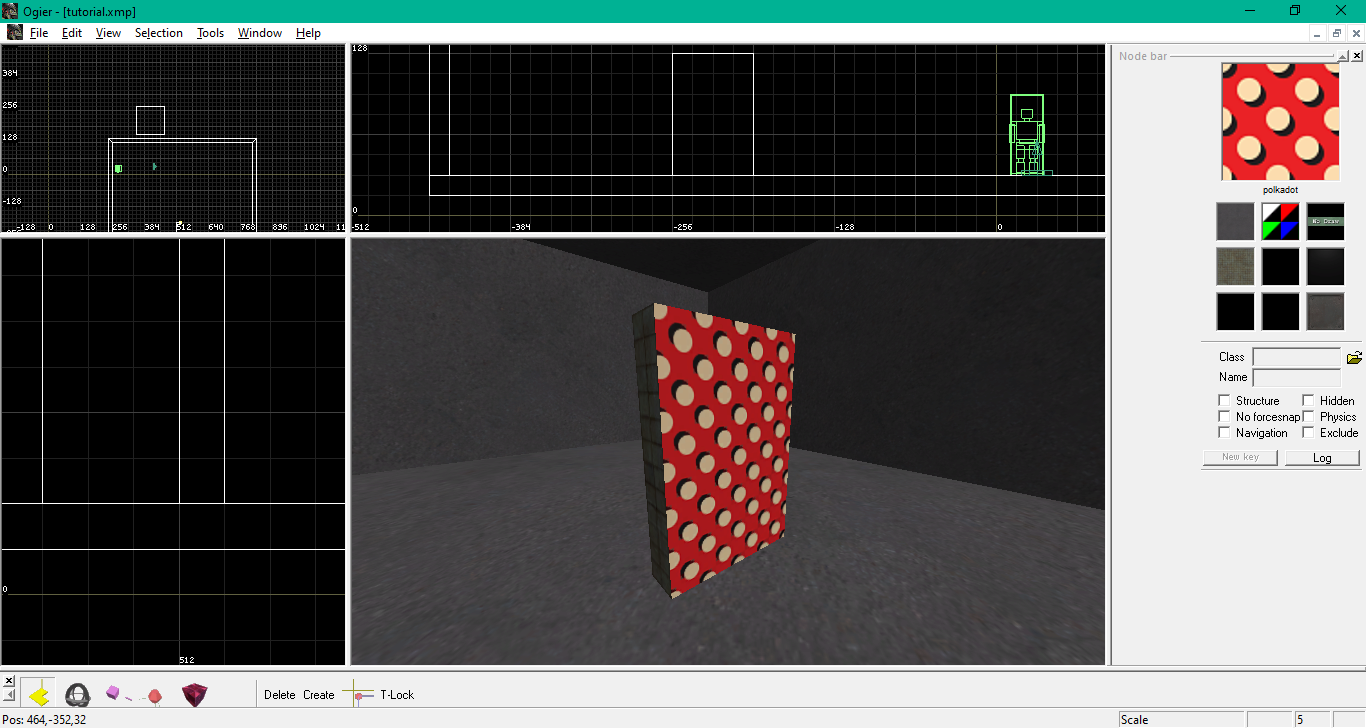
There's our texture. Let's save and compile the level and see if it now appears.
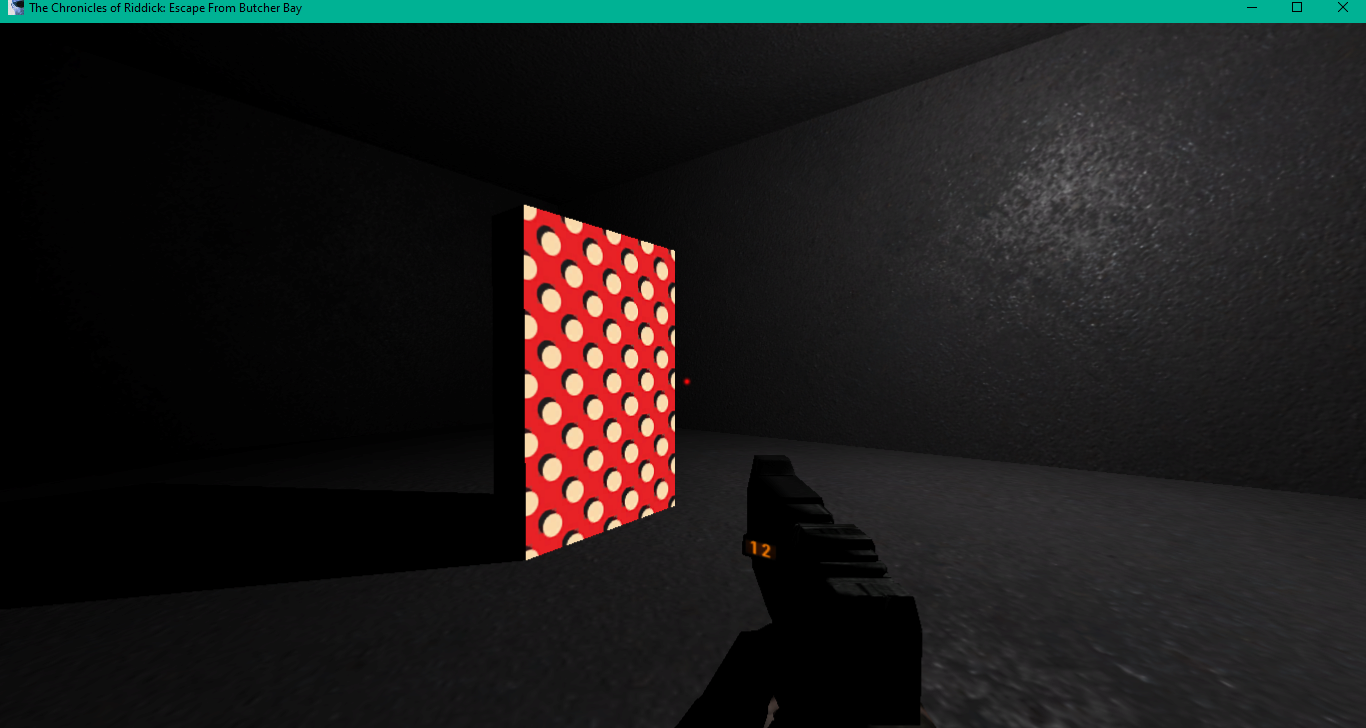
There it is. The texture now appears in-game. We can further modify it with normal maps and specular maps. If we open the original XTX file in the editor we can toggle certain flags like setting the model to be a world texture vs a model/character texture. But I recommend experimenting with it yourself. The most important part is this method outlined in this tutorial does work. As doing this process improperly crashes the game. Hopefully this tutorial will be of use to you.