Introduction
The Chronicles of Riddick: Escape from Butcher Bay ran on a proprietary engine created by the developer Starbreeze simply called Ogier. Like their previous two games, Enclave and Knights of the Temple, they released an SDK for it. Unfortunately Riddick is one of the only games I've seen that had a developer SDK created for it and yet no mods were made or released.
So I have decided to try and fix that and I'm going to upload several tutorials educating everyone on how the editor works. With the goal of teaching you how to make your own Riddick levels and mods.
Credit to Amran for creating his tutorial for the game Enclave as much of this guide is based on that one.
If you want to discuss Riddick modding or Ogier modding in general I recommend joining the Enclave discord here.
What you will need
- A copy of the 2005 Director's Cut version of The Chronicles of Riddick: Escape from Butcher Bay. As far as I know the Assault on Dark Athena version of the game does NOT work.
- The GDK and Ogier editor. Which are located here.
Installation
Note this tutorial assumes you have installed the game and that it runs properly on your computer. If you need help running the game on Nvidia cards I suggest following the instructions laid out in this Vogons post.
Once you've downloaded the GDK zip you should see the following files.
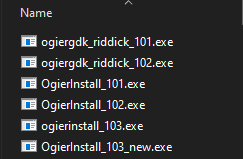
I recommend installing ogiergdk_riddick_102.exe and ogierinstall_103.exe. Ogierinstall 103 installs the Ogier editor itself, while the GDK installs files specific to Butcher Bay.
Note 103_new is a slightly updated version of the Ogier editor however I've noticed it has some compatibility issues with modern versions of Windows. I only recommend installing it if the regular version gives you issues. The 101 and 102 versions are there more for compatibility reasons just in-case you might need them.
Install both to your game directory. Make sure that the GDK is installed over the game's files as it needs to be installed within the game's directory. The Ogier editor can be installed independently in any directory.
Setting things up

Once you start the Ogier editor it will ask you to identify where the gdk is installed. This should be populated here by default. If it isn't the file to look for is Content\PB.xrg in your game folder.
Once the editor has started go to file then click New map. You should be greeted with this.
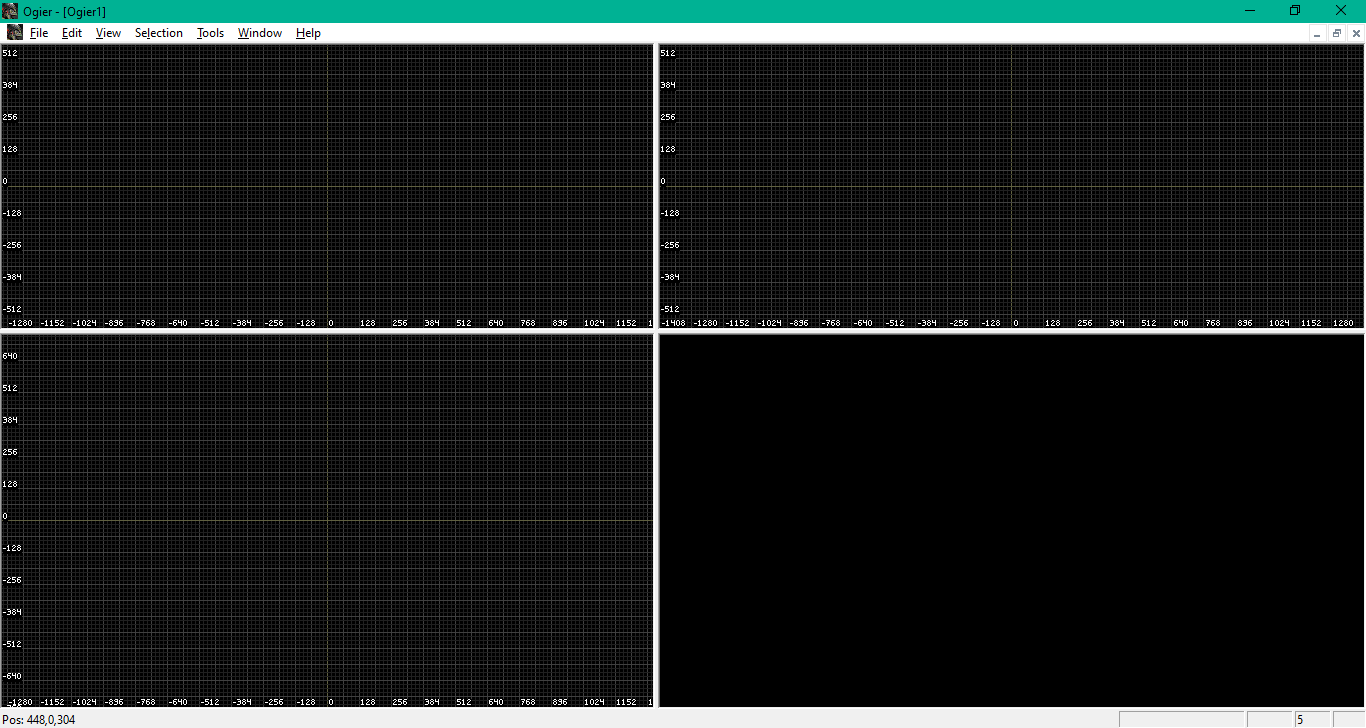
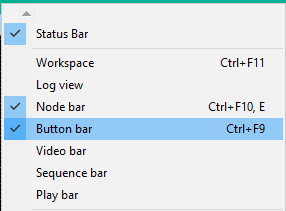
While this might be confusing in reality all of the important information is hidden by default. Go up to the top menu bar and click view. Then toggle the node bar and button bar on.
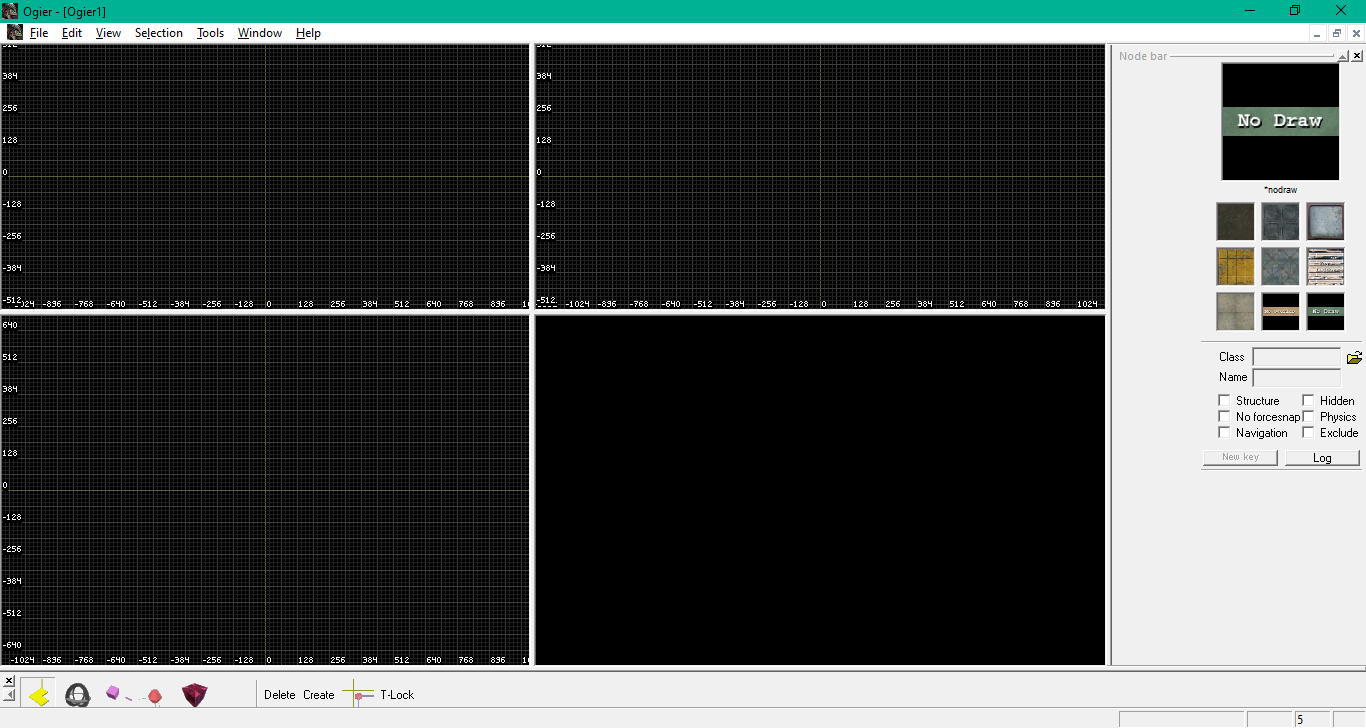
Now we're getting somewhere. The bottom menu is called the button bar. It includes all the notable editing utilities. I've labeled them bellow.
![]()
- Resize/Scale
- Rotate
- Bend (for use with curves and spines)
- Vertex editing (This allows you to modify the vertices of a mesh)
- Texture
- Delete selected
- Create object
- Force grid snap
- Texture Lock
Some basic navigation info: To move around the three 2D views (top/front/side), hold the shift button while the cursor is over the view and move the mouse. Also, in the top/front/side views, use the mouse wheel to zoom in and out. In 3D view hold down shift and move W,S,A,D keys to move around and the mouse to look around. You can also use the middle mouse button instead of shift.
Another notable control is Q and Ctrl Q to adjust the grid size. For now it's recommended to keep the grid size relatively large to avoid problems later.
Create your first brush
Now, let's make our first brush. Hit the "1" key to create a box at the cursor's location. (The number keys create brushes, while holding shift and pressing a number key creates a curved surface or spline.)

We have spawned our first brush. Now let's resize it. You can resize brushes by dragging the edges in either of the 2D viewport or in the 3D viewport. We want to resize this mesh so it becomes a floor.
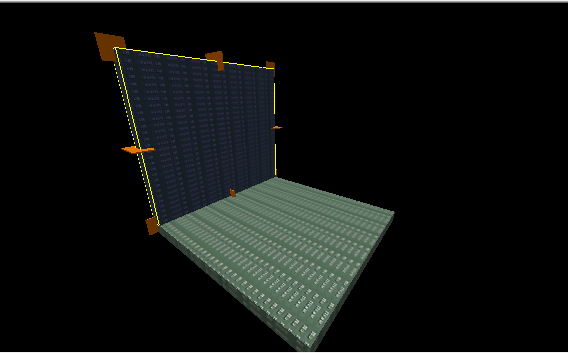
Alright now let's make the rest of the room. Hit the 1 key again and spawn another brush. Resize it and move it into position to make a wall.
Vertex Editing
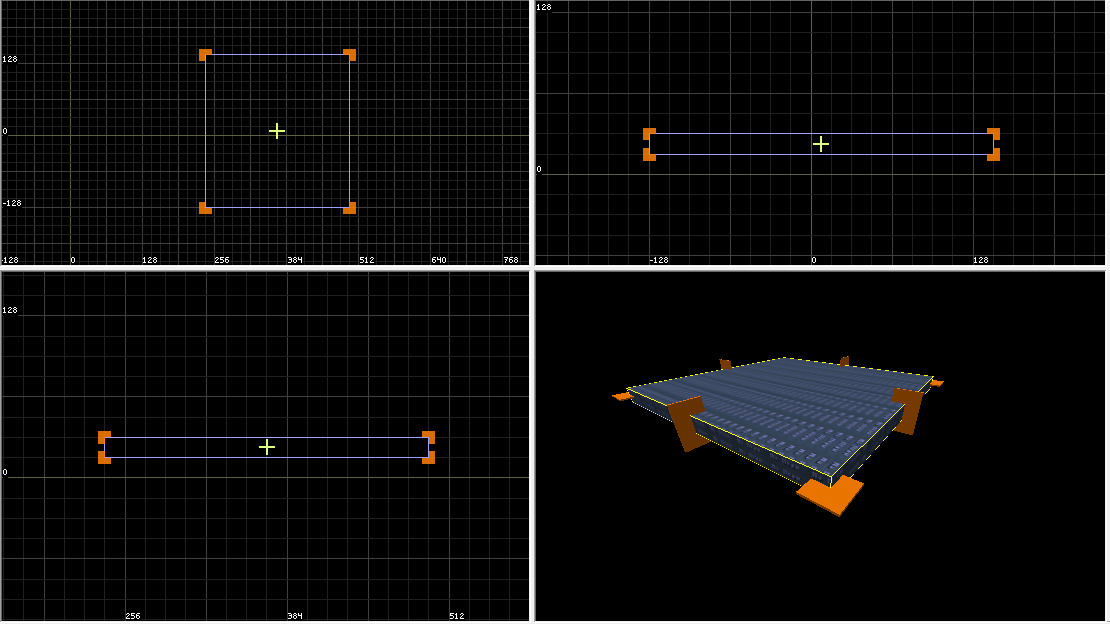
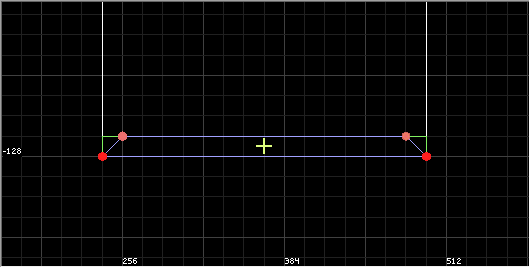
Let's take a look at some vertex editing. Click the vertex editing button in the Button bar (the sphere with three grey lines extending out from it) then click on one of the pink corners in the top view and extend it outwards one grid spacing.
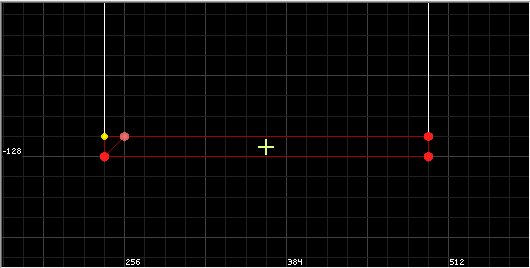
As you can see, the brush has now turned red due to the way one vertex is projecting out. (It will either not compile, or will compile but have problems.) To fix this, drag the other corner to the same spot.
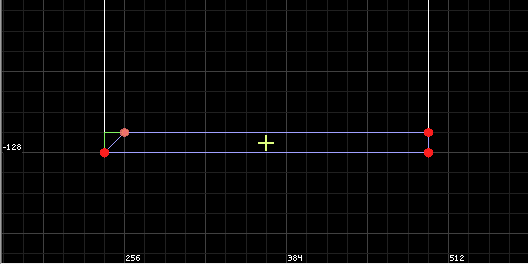
Much better, now repeat these steps for the other side of the brush.
Duplication
Next, we will duplicate this brush to make the walls of our room. With the brush still selected, hit Ctrl-C then Ctrl-V to create another copy of it. You can quickly rotate it by tapping the V key. Let's rotate it, then drag it into place right next to the other brush.

Holding down Ctrl, click on the original brush. This will select both at the same time. Now do another Ctrl-C Ctrl-V and with the cursor over the top view tap "V" four times. Move these two duplicated sections into place like below.
To deselect anything in the editor, right click in any of the views.
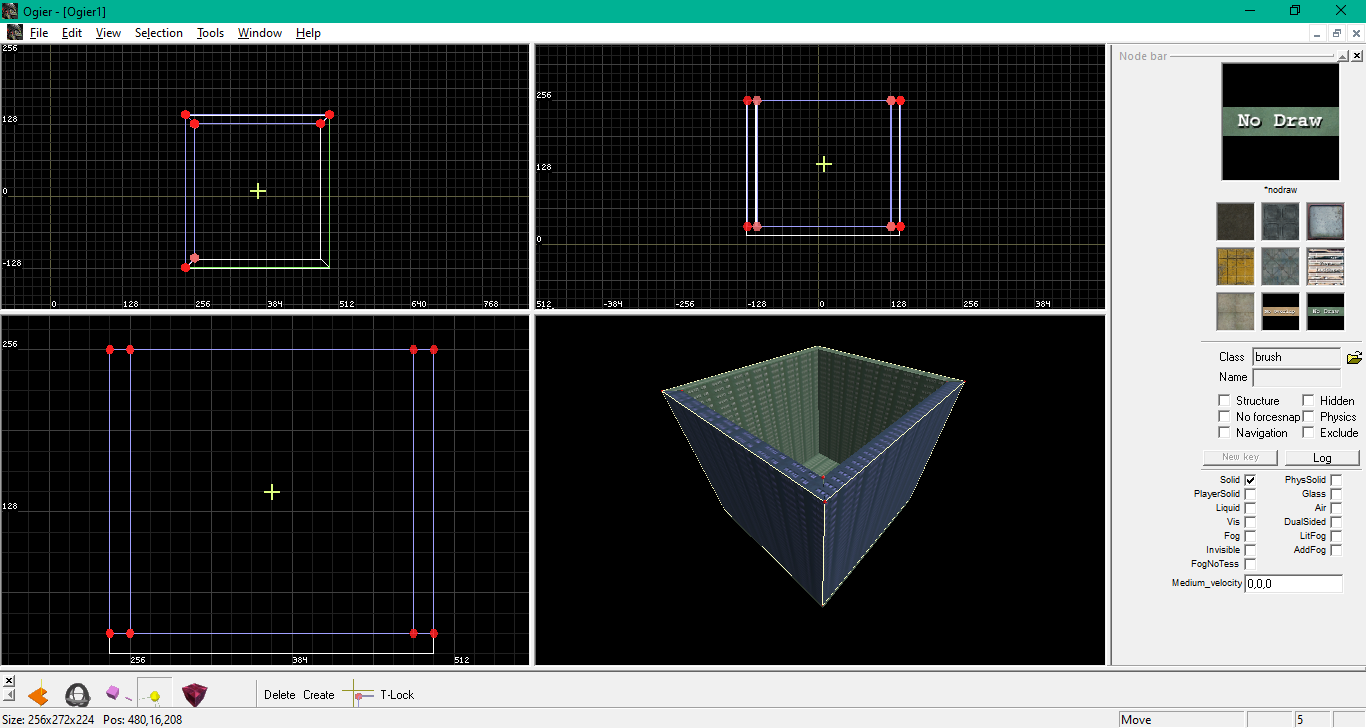
Now let's add the ceiling. Select the floor and copy/paste it. Now drag it upwards. We have finished the room.
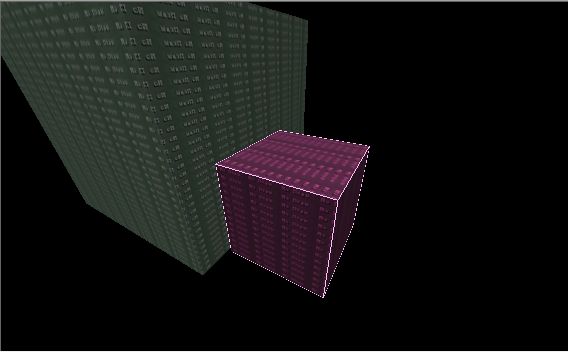
Texturing
And now we have a simple room made with some of the basic tools. Let's add a few textures. First, right click off your ceiling to deselect it, then holding the right mouse button, drag a selection box over your entire room and release the mouse button. Now your whole room will be selected and you can see in the 3d view that all the brushes have a tint showing this.

Click on the texture tool in the Button bar (the dark purple box) and you will see the brushes in the 3d view are now purple. Click once with the left mouse on the surface in front of the 3D views camera and it will return to having no tint. In texturing mode this means that that surface is now selected.
Now, while holding Ctrl, click with the left mouse button on the other 5 surfaces to add them to the selection.
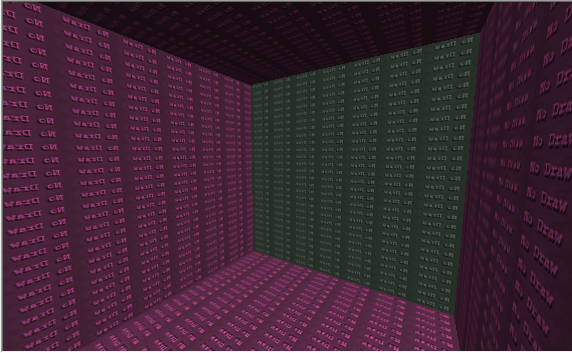
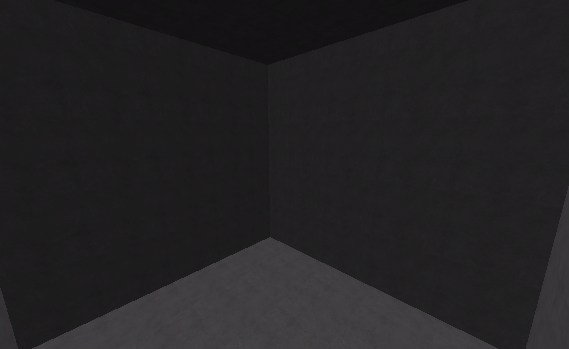
We now have all of the surfaces on the inside of our room selected for texturing. You'll notice how they currently all have the NoDraw texture applied by default which means that the engine will not render them, and they will appear invisible in game. Let's find a texture and change that.
Place the cursor over top of any of the 4 view windows and hit the ~ key to bring up the texture browser. The various texture collections are in groups listed on the tabs on the top, and the textures themselves are displayed in the window below.
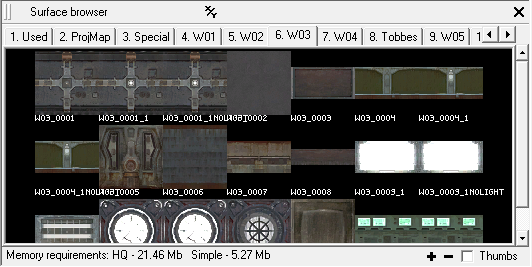
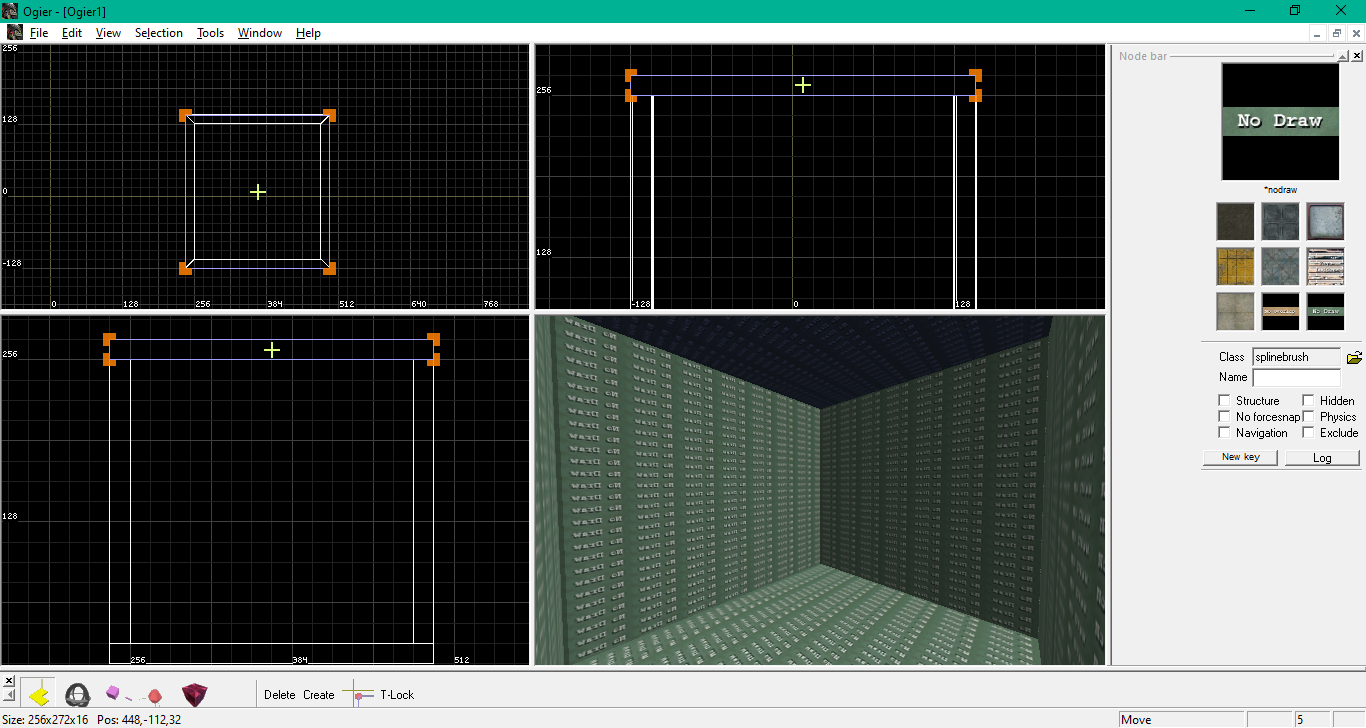
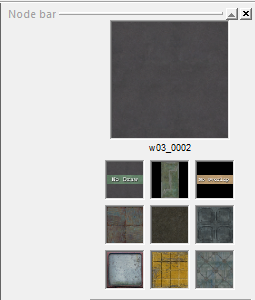
Let's use W03 for now. Click once with the left mouse button on the fourth texture shown to select it causing the texture browser to close and this texture to appear up in the Node bar's currently selected texture window.
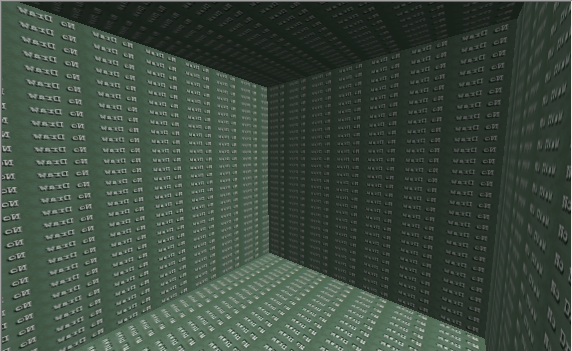
To apply the texture to all selected surfaces, tap the "K" key once. You should now see the inside of the room with the texture applied to it.
Alignment
Let's adjust these textures. While in texture mode press enter. The texture alignment tool should appear.
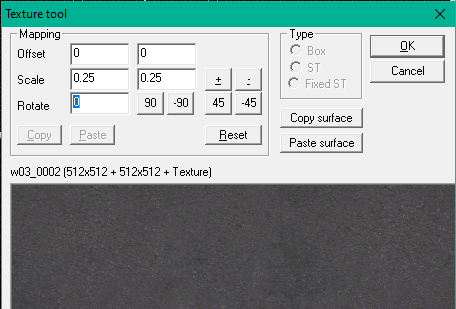
This will allow us to adjust the scaling or rotate the texture. Set this to 0.10.
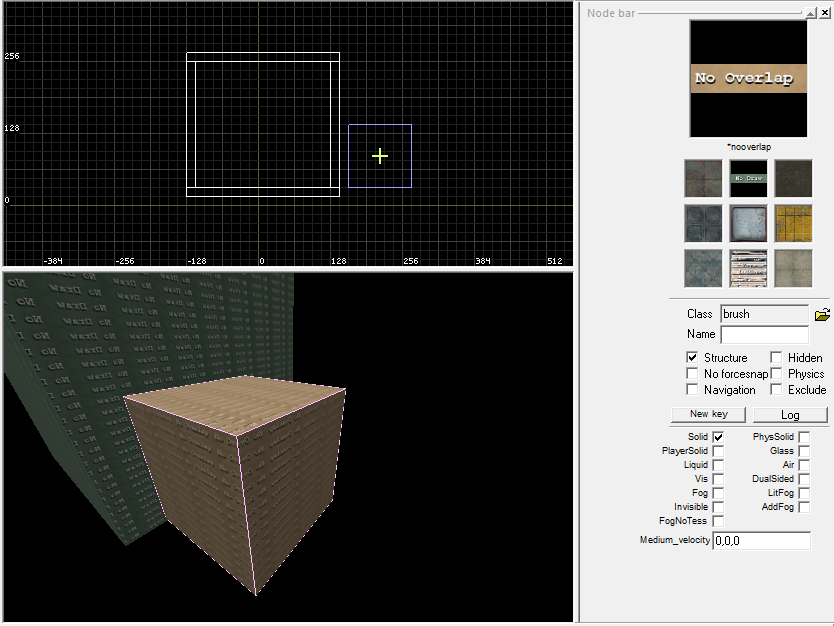
Structure
OK so now we have a room with a nice little alcove attached. The next thing we'll need to take care of is Structure. I'll just paste in the section from the faq on this as it explains it well.
"This is an art form. I'll give you a quick summary, but this section would benefit from more detail by someone better than me. Structure is what the engine uses to find out what polygons to exclude when rendering the world. Basically, if the polygon is behind a Structure block it won't be rendered.
The thing is that a Structure brush is extremely taxing for the cpu so unless it covers a lot of polygons it's cheaper to just render the polygons. STRUCTURES SHOULD BE BUILT AS PRIMITIVELY AS POSSIBLE WITH AS FEW BRUSHES AS POSSIBLE. Basically, if you build a room you should encase it in a box of structure that has as small holes as possible for the doors.
Never make structure at an angle (unless you really really know what you're doing). Always let the brushes follow the grid lines.
A Structure brush should always have the "NoOverlap" texture on all faces. This will make it invisible in the engine as long as it is inside of a regular visible brush (the face of the structure block can be in the exact same space as a regular visible face if you wish)."
Now as this is only a test map we'll just add a structure bush outside the level so it will compile. (If one of these isn't in the level it will not compile or run.) Create a new box and place it outside the room we've created. Adjust it's size with the resize tool and then with it selected click on the texture tool.
Hit "X" to select of all the faces of this brush at once, then open the texture browser with "~" and click on the "Special" tab. Click *Nooverlap and hit "K". Now switch back to the resize tool and on the right side of the screen in the Node bar, check off the box that says "Structure". Press Ctrl-R to show only structure brushes to make sure everything is correct, then hit Crtl-R again to go show all.
Deselect the brush.
Objects and Lighting
All of our geometry is now complete, lets add some lighting and objects. Press the insert key on your keyboard, or go to edit->create object.
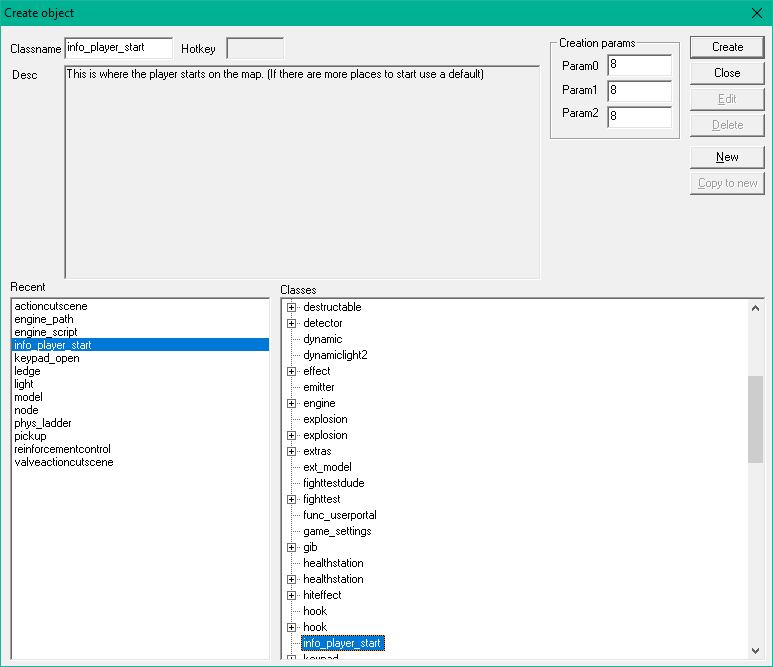
info_player_start should be the first object selected. Press the create button. It should spawn it in the level. This is the player start entity which is where Riddick will spawn in the level.
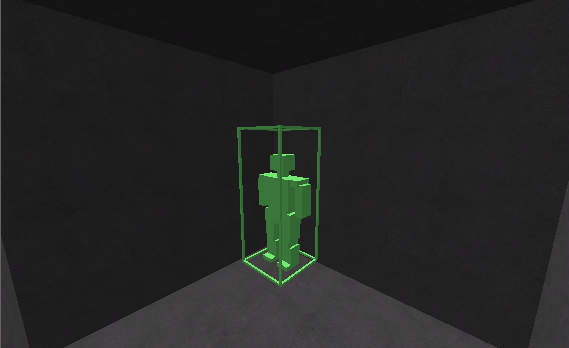
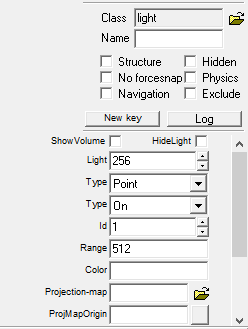
A player start will now be inserted into your map. Move it into position on the floor of your room. Now let's hit insert again and insert a light.
You will note that the lighting properties are displayed in the bottom of the Node bar, and can be edited.
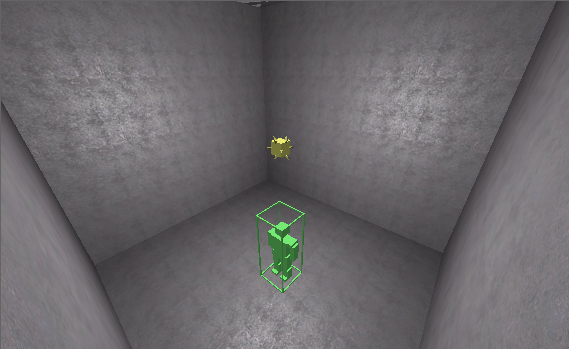
You can preview the lighting by going into "View", "Preview Lighting". I recommend doing this by selecting the brushes you want to preview first as it makes it render much faster.
Saving and running the level
That's it! We can now compile and see how it plays. "File", "Save" the map. You can save it wherever you want. Now we need to compile the level.
Included with the GDK is a program called XWC_Static. It's located in System\Win32_x86_Release. Upon running it you'll see this.

Click and drag your level file into this window. If everything went well it should compile.
Now start Butcher Bay and open up the game's console. Type in the map (Name of your level here)
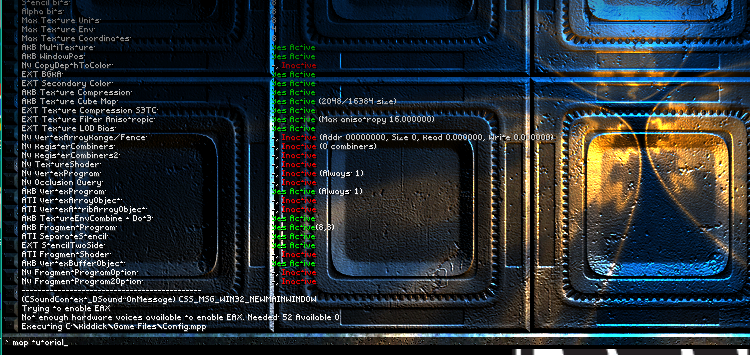
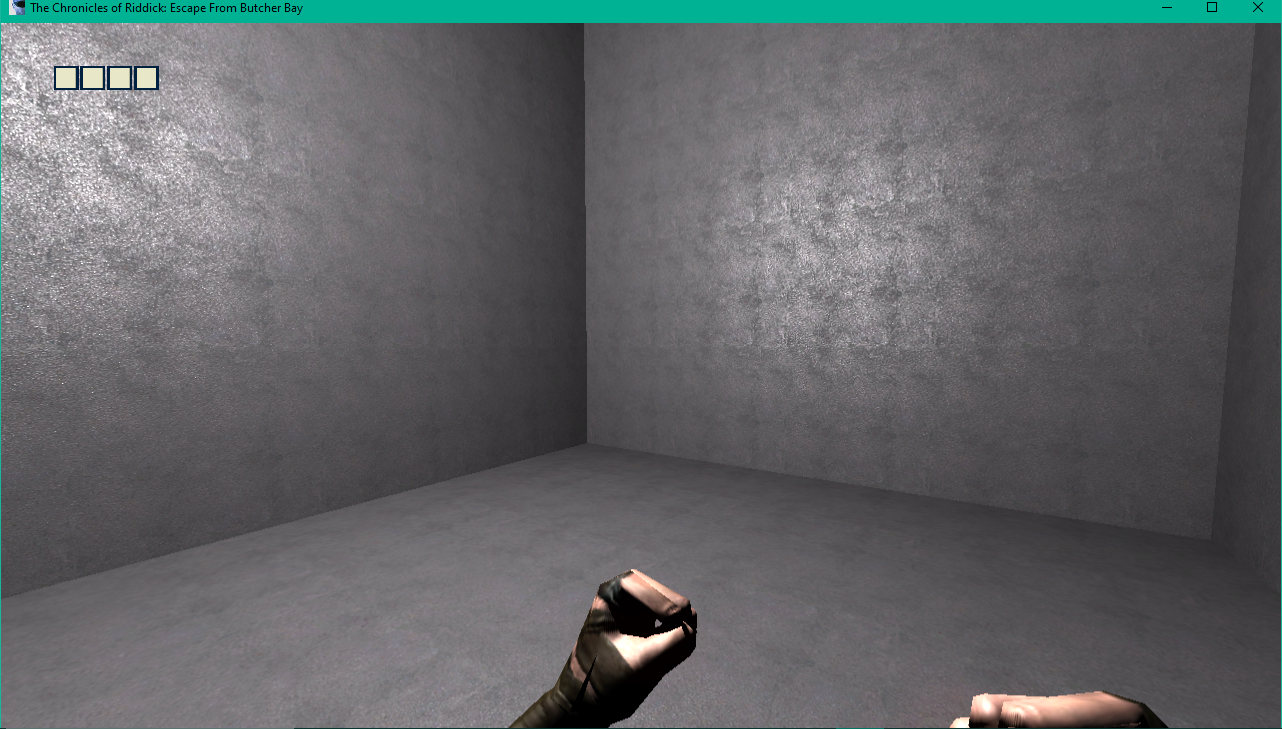
There we go. You have now created your first Riddick level. If you have any further questions feel free to ask. I'll try to make some more tutorials documenting some of the more complex features in the editor.


Can I create levels for Chronicles of Riddick Assault on Dark Athena?
Unfortunately no the sdk doesn't read its files.
Hi there,
Do you know how to open existing maps within the GDK? Every time I try to, it wants me to find map files, or .xmp files, and I can’t find any. I’d really like to play around with the game’s existing levels, but I just can’t figure it out. Any help would be greatly appreciated, thank you.
You can't. You can only open the sample files included with the editor. Riddick's levels are compiled.
That’s a shame. Thank you for clarifying for me.