
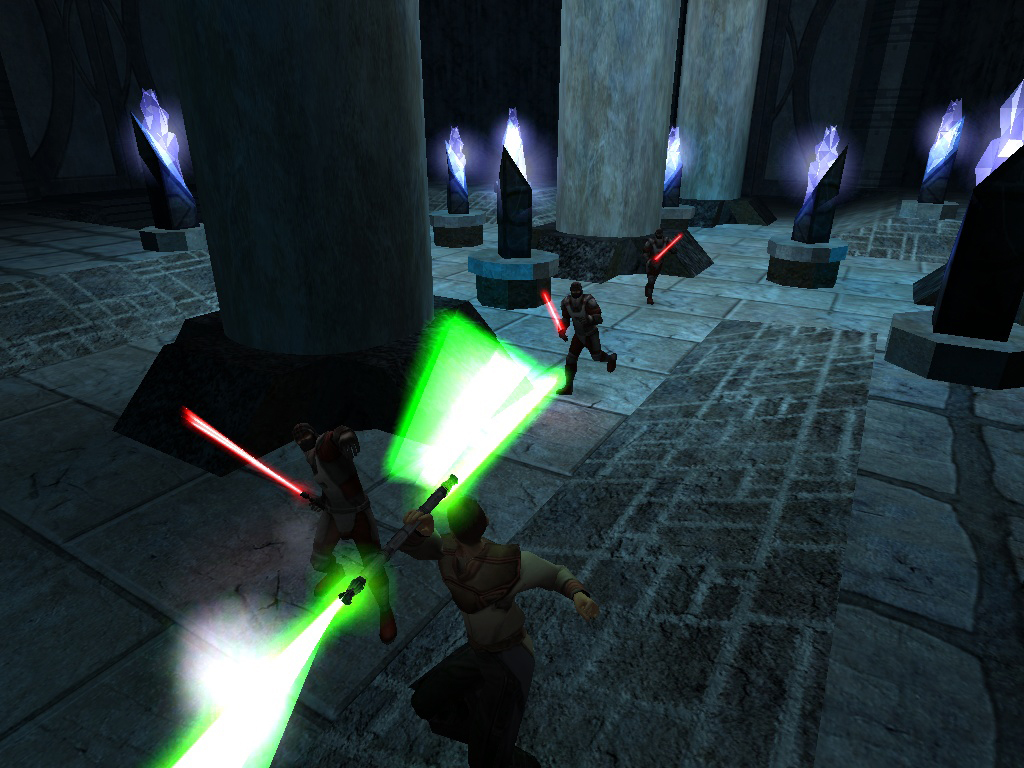
A spin-off of Jedi Knight II: Jedi Outcast, Jedi Academy allows players to create their own Jedi, train in the Academy under the tutelage of Luke Skywalker and Kyle Katarn and ultimately choose to follow the path of the Light Side or the Dark Side of the Force. The game is powered by the same version of the Quake III engine used in its predecessor, Jedi Outcast, containing modifications to the Quake code to give a third-person view and new lightsaber effects (Jedi Knight II had these 3rd person effects as well). Players have the ability to construct their own lightsaber by choosing the hilt style and blade color. After completing certain objectives, new saber styles become available including the ability to wield two independent sabers in a style known as Jar'Kai, once used by Anakin Skywalker during the closing fight in Star Wars Episode II: Attack of the Clones, or the double-bladed lightsaber (also known as a "saber staff").
Location
Games : Star Wars: Jedi Academy : FilesFilename
jedi_knight_jediacademydemo.exeCategory
DemoUploader
GameWatcherAdded
Size
187mb (196,079,221 bytes)Downloads
61 (1 today)MD5 Hash
15524eb3a7a778803592b967584fc34fEmbed Button
Embed Widget
Description
Single-player demo.
###############################################################
LucasArts, a division of Lucasfilm Entertainment Company Ltd.
Star Wars(TM) Jedi Knight(TM): Jedi Academy(TM) Demo
Version 1.0
###############################################################
Thank you for playing the Star Wars Jedi Knight: Jedi Academy
Demo. We recommend that you read this file to get the most up
to date information about installing, running, and playing this
demo.
Be sure to check the LucasArts website at www.lucasarts.com for
the very latest information related to Jedi Academy.
###############################################################
Supported Operating Systems
---------------------------
To be able to play Jedi Academy, you must have Windows 98, 98SE,
Millennium Edition (ME), 2000, or XP installed and configured
correctly, and your computer hardware must be OpenGL 1.4 and
DirectX 9.0a compatible.
According to Microsoft, Windows 95 has entered its non-supported
phase as of December 2001. Because of this, Jedi Academy doesn't
support this operating system. Windows 98 also entered its non-
supported phase as of June 2003. Because of this, several
hardware manufacturers are no longer developing drivers for this
operating system.
Minimum System Requirements
---------------------------
Computer: 100% DirectX 9.0a compatible computer required.
CPU: Pentium III 450 MHz or faster CPU required. Pentium
III or Athlon class 600 MHz or faster CPU recommended.
Memory: 128 MB RAM required. 256 MB RAM recommended.
Graphics Card: 32 MB OpenGL 1.4 compatible AGP or PCI 3D
Hardware Accelerator required.
Sound Card: 16-bit sound card required.
CD-ROM: Quad Speed IDE or SCSI CD-ROM drive required.
Input Device: Keyboard and mouse required. 100% DirectX
9.0a-compatible joystick or gamepad (optional).
DirectX: Microsoft DirectX 9.0a must be installed to play the
Star Wars Jedi Knight: Jedi Academy demo. To download DirectX
9.0a, please refer to the LucasArts Web site:
Support.lucasarts.com
From there, choose Updates/Patches, and then Utilities to find
a link to the latest version of DirectX.
NOTE: DirectX may require the "latest" updates for your
operating system. This may also include the latest drivers
for your particular motherboard, sound and video hardware.
Installation: Installation requires 200 MB of free hard drive
space. We recommend that you have at least an additional 200 MB
of free space available after installing the game for the
Windows swap/page file and save games.
Multiplayer Support: included in Full Version of Jedi Academy
-------------------------------------------------------------
Pentium III 700 MHz or faster recommended for Dedicated Server.
Local Area Network Play: Supports up to 16 players via Local
Area Network.
Dedicated Server: Broadband connection (DSL/Cable modem or
better)required for Internet hosting.
Internet Play: Supports up to 16 players via 56Kbps or faster
connection to the Internet.
Video Cards Supported
---------------------
For a list of supported video cards at the time of release,
please refer to the Troubleshooting Guide
###############################################################
General Information
-------------------
Installing the Star Wars Jedi Knight: Jedi Academy Demo
-------------------------------------------------------
Double-click on JediAcademyDemo.exe to install the demo. Click
on the top button from the following options and the installer
will guide you through the installation process.
* Install
* Help
* Analyze Your Computer
* View Readme
* View Troubleshooting Guide
* Go Back
* Options
* Visit www.lucasarts.com
* Register Online
* View License Agreement
* Uninstall
* Go Back
* Exit
The default installation location for the demo is: C:\Program
Files\LucasArts\Star Wars Jedi Knight Jedi Academy Demo.
Running Jedi Academy
--------------------
To run the game, click on your Start Menu, select Programs, then
LucasArts, then Star Wars Jedi Knight Jedi Academy Demo and click
on Launch Star Wars JK Jedi Academy Demo. This will bring up the
Launcher screen. Click on "Single Player Game" to begin the game.
Desktop Color Palette
---------------------
We recommend that you set your desktop to High Color (16 bit)
color. When playing Jedi Academy with your desktop set to a
color palette other than 16 bit, you may experience various
problems while running the game.
Task Switching
--------------
Task switching is disabled when playing Jedi Academy in full
screen mode. In order to task switch, you must change Full
Screen to Off in the Video Setup screen.
CTRL-ESC
--------
We recommend that you do not use CTRL-ESC while playing.
Console commands
----------------
Jedi Academy's console commands are primarily used for
development, testing, and product support purposes. Users
unfamiliar with these console commands should not attempt to
use them, as their use may result in game crashes, corrupted
graphics, and/or a variety of other issues. Console commands
and errors resulting from the use of console commands and/or
cheats are unsupported.
NUMPAD Keys
-----------
Due to the dual function of the NUMPAD (number pad) Keys, you
may experience problems when trying to enter numbers with the
NUMPAD (trying to type 4, for example, will also bring the
cursor over to the left). Because of this issue, we recommend
limited use of the NUMPAD in Jedi Academy.
################################################################
Welcome, apprentice. I am Luke Skywalker, and it is my pleasure
to inform you that you have been chosen to undergo training in
the ways of the Jedi at the academy on Yavin 4. You are about to
embark on a long and sometimes perilous journey, one in which
you will learn more about yourself than you can possibly imagine.
Here, we will train you in the ways of the Force. You will learn
to defend yourself with a lightsaber. You will also study
diplomacy, history, and more.
Should you complete the training, you will represent the Jedi
Order as a guardian of peace and justice throughout the galaxy.
The path before you is arduous, and not all will be able to
complete the trials that lie ahead. Know also that the path to
the dark side is ever present, and the temptations are many. Be
mindful of your task at hand, and let the light guide you in all
your decisions. Those who are successful will enter a brand new
world within themselves. May the Force be with you.
SINGLE-PLAYER MENU
------------------
Click Single Player Game to launch the game and access the
following options:
NEW GAME
--------
Click to start a new game, and then choose a difficulty level:
Padawan (easy), Jedi (normal), Jedi Knight (hard), and Jedi Master
(hardest).
LOAD GAME
---------
Load a previously saved game from an available list. You can also
delete savedgame files from this screen.
CONTROLS
--------
Select to view and/or customize the default control settings.
SETUP
-----
Select to view and/or customize the default settings for Video,
Sound and more.
EXIT
----
Quit Star Wars Jedi Knight: Jedi Academy and return to your
desktop environment.
--------
CONTROLS
--------
The Controls screen allows you to view and/or adjust the following
options. NOTE: The control settings listed here and throughout the
rest of this manual are the default settings.
MOVEMENT
--------
FORWARD: W or UP
BACKPEDAL: S or DOWN
TURN LEFT: LEFT
TURN RIGHT: RIGHT
RUN/WALK: SHIFT
STEP LEFT: , or A
STEP RIGHT: . or D
SIDESTEP/TURN: V
UP/JUMP: SPACEBAR
DOWN/CROUCH: C
LEAN: Hold USE + Step Left or Step Right
INTERACTION
-----------
ATTACK: CTRL or Left Mouse Button [MOUSE 1]
ALTERNATE ATTACK: ALT or Right Mouse Button [MOUSE 2]
LIGHTSABER STYLE: L [select the key to use to switch between
Lightsaber Combat Styles when multiple styles are available]
USE: ENTER or R
LOOK UP: PAGE UP [or move mouse forward if Mouse Look is enabled]
LOOK DOWN: PAGE DOWN [or move mouse backward if Mouse Look is
enabled]
MOUSE LOOK: / [also can be toggled on/off as Free Look on
Mouse/Joystick menu]
CENTERVIEW: END
WEAPONS
-------
Star Wars Jedi Knight: Jedi Academy includes an array of weapons
the players will acquire during gameplay. After leaving the
academy for your first mission you are given two weapons, and you
gain more weapons as you progress. Weapons can be picked up off
the ground by running or walking over them. If you can't get close
enough to an object, press the Use key to grab it. Ammo packs for
weapons are picked up in a similar fashion.
MELEE/LIGHTSABER: 1
BLASTER PISTOL: 2
BLASTER RIFLE: 3
DISRUPTOR RIFLE: 4
BOWCASTER: 5
HEAVY REPEATER: 6
DEMP 2: 7
FLECHETTE: 8
CONCUSSION RIFLE: 9
MERR-SONN: 0
THROWABLE WEAPONS: -
(Thermal Detonator, Trip Mines, Detonation Packs)
NEXT WEAPON: ] (or scroll down using the mouse wheel)
PREVIOUS WEAPON: [ (or scroll up using the mouse wheel)
FORCE POWERS
------------
Only a limited number of Force powers are available at the
beginning of the game. As you acquire them, you will be able to
scroll through the available list by pressing the E and Q keys,
and then pressing the F key to use the choose power. You can also
bind, or assign, Force powers to a Function key for immediate use.
JUMP: SPACEBAR [Hold Down]
PUSH: F1
PULL: F2
SPEED: F3
SENSE: F4
ABSORB: Unbound
HEAL: Unbound
MIND TRICK: Unbound
PROTECT: Unbound
DRAIN: Unbound
GRIP: Unbound
LIGHTNING: Unbound
DARK RAGE: Unbound
USE FORCE POWER: F
FORCE NEXT: E
FORCE PREVIOUS: Q
QUICK KEYS
----------
These keys quickly help you call up important features of the
game, including your Datapad and the options to access your save
and load menus.
DATAPAD: TAB or M
SAVE MENU: F11
LOAD MENU: F10
QUICK SAVE: F12
QUICK LOAD: F9
MOUSE/JOYSTICK
--------------
Set up, adjust, enable and disable miscellaneous mouse and
joystick options.
INVERT MOUSE: Switch the Y-axis of the mouse.
SMOOTH MOUSE: Should usually be set to on, but if you experience
difficulties with your mouse, try turning it off.
SENSITIVITY: Move this slider to adjust the mouse sensitivity.
Lower settings result in slower mouse speeds.
ENABLE JOYSTICK: Turn joystick support on/off.
X-AXIS AS BUTTONS: Turns on/off X-axis movement on the mouse or
joystick.
Y-AXIS AS BUTTONS: Turns on/off Y-axis movement on the mouse or
joystick.
THRESHOLD: This slider changes the joystick sensitivity.
FORCE FEEDBACK: Turns force feedback on/off for supported input
devices.
OTHER
-----
ALWAYS RUN: Toggles player's movement speed between run and walk.
AUTO SWITCH: Choose whether to switch weapons when a new one is
picked up. The three settings are as follows:
Higher Weapon When Safe: Only switch to newly acquired weapons.
Always Higher Weapon: Always switch to a better weapon.
Don't Switch: Prevents automatically switching weapons.
3RD PERSON: P (Switch between first- and third-person camera views
while wielding in-view, non-lightsaber weapons.)
NOTE: If you die during gameplay, you are given the following
options: Load Checkpoint, Load Saved Game, and Quick Load
-----
SETUP
-----
The Setup screen allows you to view and/or adjust the following
graphical and sound settings:
VIDEO
-----
Select this tab to adjust the game's video settings for optimal
performance on your machine. Users with high-end machines should
be able to turn on most of these features. If you experience slow
frame rates, you can come back and turn off options.
VIDEO QUALITY: Choose from Normal, Fast, Fastest, Custom or High
Quality. Each choice alters the remaining video settings to pre-
set levels to adjust your system's performance.
VIDEO MODE: Adjust the video resolution of the game. Higher
resolutions mean crisper graphics, but the frame rate may drop.
Experiment to determine the best resolution for your video card.
COLOR DEPTH: Choose between Default, 16-Bit or 32-Bit color.
Default will set the game to the color depth that your desktop is
set to. Setting color depth to 16-Bit may help increase
performance.
FULL SCREEN: If this option is turned off, you can run the game
in a desktop window, provided your video card supports this
feature.
GEOMETRIC DETAIL: Select how much polygonal detail is
represented in the game world. Selecting a lower setting will
increase performance.
TEXTURE DETAIL: Choose between Low, Medium, High or Very High.
Higher detail requires more system resources.
TEXTURE QUALITY: Default, 16-Bit and 32-Bit textures are
available. NOTE: 32-Bit textures are the most system-intensive and
are not supported on all video cards.
TEXTURE FILTER: Toggle between Bilinear and Trilinear graphics
filtering. Trilinear filtering uses more system resources and is
not supported on all video cards.
DETAILED SHADERS: Turn off shaders if you are experiencing in-
game slowdown.
VIDEO SYNC: Synchronizes the game's frame rate with the refresh
rate of your monitor.
MORE VIDEO
----------
BRIGHTNESS: Adjust the brightness of the game by moving this
slider left or right. The number 6 should be barely visible, for
optimum brightness.
SHADOWS: Adjust the quality of shadows in the game from None,
Simple or Volumetric. Volumetric utilizes more system resources.
DYNAMIC LIGHTS: Dynamic lighting is the use of flashing or
changing lights in the game. This option drains system resources.
Turn off to improve performance.
DYNAMIC GLOW: Toggle to turn dynamic glow on or off for
lightsabers and other glowing objects. This option drains system
resources. Turn off to improve performance.
LIGHT FLARES: Toggle to show halos around light sources.
WALL MARKS: Toggle to see wall damage from weapon fire and
lightsaber usage. Turning Wall Marks off will increase
performance.
ANISOTROPIC FILTER: If on, elements of the scene will appear
smoother when viewed at near-edge angles. Your video card must
support this feature before it can be turned on.
SHOW DRIVER INFO: Click to view the driver information for the
currently selected video card. This option helps you check if your
video drivers are up-to-date. NOTE: If you are experiencing
problems with the game, consult this screen and your video card
manufacturer to make sure you have the most up-to-date video
drivers.
SOUND
-----
EFFECTS VOLUME: Use this slider to adjust the volume of weapon
explosions and other ambient in-game sound effects as well as
movie volume.
MUSIC VOLUME: Change the volume of the music that plays during
the game.
VOICE VOLUME: The volume of character voices can be modified
with this slider.
SOUND QUALITY: Choose between Low and High sound settings. If
you are experiencing slowdown in the game, try Low sound quality.
EAX: Turns environmental audio on/off. Not all sound cards
support EAX. Consult your sound card manual or your sound card
manufacturer's Web site to determine whether or not your sound
card features EAX support.
NOTE: This game supports Creative's EAX 4.0 ADVANCED HD
Environmental Audio technology to accurately simulate sonic
effects such as Multi-Environment(tm) Environmental Panning(tm),
occlusion, obstruction, and advanced reverberation in real time.
OPTIONS
-------
DRAW CROSSHAIR: Turns the targeting crosshair on/off.
IDENTIFY TARGET: Turns crosshair target identification on/off.
SLOW MOTION DEATH: Determines the frequency of slow motion death
animations in the game.
1ST PERSON GUNS: Toggles to first-person view when lightsaber is
put away.
FOOTSTEPS: Set the assets used for footsteps.
MODEL DISMEMBERMENT: Toggles dismemberment from lightsaber
attacks on/off.
VIEW SWAYING: Turns camera movement caused by player movement
on/off.
TEXT: Select the language for all of the game's text.
SUBTITLES: Choose from two settings: In Cinematic only shows
subtitles during a cinematic cutscene. None will not display any
subtitles.
DEFAULTS
--------
Restores all settings, including controls, back to their factory
defaults.
------------------
CHARACTER CREATION
------------------
Before training can begin, all students must first customize their
appearance using the following options:
SPECIES/GENDER: Choose between Human Male, Human Female, Twi'lek
Female, Rodian Male, Zabrak Female or Kel Dor Male.
COLOR: Select an outfit or skin-tone color from nine choices.
HEAD/TORSO/LEGS: Select an appearance for each from a variety of
styles, colors and choices.
After choosing an appearance, click Next to go to the lightsaber
creation screen.
---------------------
CREATING A LIGHTSABER
---------------------
The lightsaber is the preferred weapon of the Jedi. Before
entering the academy, all students are required to customize their
lightsaber from the available list of options.
SABER TYPE: Choose between Standard, Dual and Double-bladed
lightsabers.
SABER HILTS: Nine lightsaber hilts are available at the start of
the game. Students should choose whichever hilt fits their
personality best.
SABER COLOR: Choose from five lightsaber colors: blue, green,
orange, purple or yellow.
COMBAT STYLE: Choose from Fast, Medium or Strong style, when
available.
After deciding on an appearance and creating a lightsaber, it is
time to enter the academy. Select Begin Game to start.
Press the ESC key to access the in-game menu. From here students
can save their current game, load a previously saved game and
adjust gameplay options. To quit playing, select Exit Game. To
return to the game, select Resume Game. This menu functions the
same way as the game's Main Menu. NOTE: Students may also use the
Quick Save feature from within the game to quickly save their
progress.
All students are given access to a Datapad (TAB key), which serves
as a personal digital assistant, allowing them to review mission
objectives as well as their current arsenal of Force powers,
weapons and combat moves. NOTE: Once completed, the circle next to
the objective will be filled in. Once the Datapad is open, the
mission objectives are displayed in the text window. Students can
also access the following options from the bottom of the Datapad
screen by clicking on them:
MISSION: After clicking on another tab, click this tab to return to
the mission objective information.
WEAPONS: Current weapons are displayed here, including information
on each weapon.
FORCE: Current Force powers are displayed here, including
information on each power's rank.
MOVES: How to execute acrobatic moves, flips, wall runs and other
special maneuvers are described in detail here.
NOTE: Students can click _ or _ on the Weapons and Force tabs to
move between specific items. Click the RESUME button to return to
the game.
---------------
INTERFACE [HUD]
---------------
One of the most valuable tools a student has is the onscreen
interface, or HUD. Some students may recognize this display from
previous journeys. Those who aren't as familiar with the interface
should take a moment to review this lesson.
LEFT STATUS: This display shows a student's shield and health
status. The number and bar appearing in red represent health. Full
health equals 100 units. The number and bar appearing in green
represents the student's personal shield strength. Shields absorb
all energy based attack damage, but do not function against damage
caused by falling or being crushed.
RIGHT STATUS: This display shows the student's current weapon
ammunition with the orange number and status bar. This display is
blank if a student is using a lightsaber or other weapon that does
not have ammunition. The blue status bar and number show the
student's current Force power strength. These bars fade out as
Force powers are used. Once depleted, students will not be able to
use Force powers for a short period of time. The bars will slowly
recharge when Force powers are not being used.
When wielding the lightsaber, the Right Status Display shows the
Lightsaber Combat Style being used in place of the Ammo Indicator.
Colors are Yellow (Medium), Blue (Fast) and Red (Strong).
INTELLIGENT TARGETING RETICLE
-----------------------------
The targeting reticle quickly indicates how Jedi students can
interact with their environment. The reticle changes color as it
is moved over objects; the color scheme is as follows:
RED: Indicates an active enemy or destructible object.
GREEN: Shows friendly entity.
BLUE SWIRL: Indicates that Force powers can affect this object.
WORLD and CHARACTER INTERACTION
-------------------------------
During a mission, students should listen to non-player characters
(NPCs) and interact with important objects in the environment,
like doors, consoles, keypads, elevators and buttons. To do so,
approach an NPC or object and press the Use key (ENTER or R).
NOTE: On some missions students will need to protect allies. For
instance, when working with Chewbacca, his survival will be
critical to completing the mission. Certain allies may lend their
assistance for a short period while they are being protected.
IMPORTANT: Some enemies, generally officers or other important
characters, are carrying keys necessary to progress through a
given mission. Pick up these keys by walking over the body of the
fallen enemy.
In the hands of a novice, the lightsaber is a clumsy tool, as much
a danger to the user as to the enemy. In the hands of a Jedi
Master, the lightsaber is like an artist's brush, both elegant and
powerful. To learn more about how to effectively wield the
lightsaber, see the following lessons.
---------------------
LIGHTSABER TECHNIQUES
---------------------
New students at the academy are only given the choice to use a
Standard lightsaber when beginning their training. As students
develop their skills, other alternatives become available. The
following descriptions discuss lightsaber types.
STANDARD LIGHTSABER
-------------------
The use of a single lightsaber is the preferred fighting style for
almost all Jedi.
DUAL LIGHTSABERS
----------------
Most Jedi have neither the skill nor the inclination to learn
arcane fighting techniques, as a Jedi should not rely on combat to
solve problems. Thus, even though many Jedi know of the dual-
lightsaber style, few ever choose to practice it. If wielded
correctly, a dual-lightsaber combatant is a very dangerous
opponent, as the defender never knows which side of their body to
protect.
DOUBLE-BLADED LIGHTSABER
------------------------
Although the dual lightsaber technique is considered rare, rarer
still is the doublebladed lightsaber technique. Besides the skill
needed to successfully wield such a dangerous weapon, a lightsaber
must first be created. Many have failed trying to build a double-
bladed lightsaber worthy of using in combat.
----------------
LIGHTSABER MOVES
----------------
The following moves are available to students. Some moves require
the student to use a particular lightsaber technique.
BASIC ATTACKS
-------------
FORWARD TOP-DOWN HACK: W + Mouse 1 or S + Mouse 1
Forward + Primary Attack or Backpedal + Primary Attack
HORIZONTAL SWIPE ATTACK: A + Mouse 1 or D + Mouse 1
Step Left + Primary Attack or Step Right + Primary Attack
DIAGONAL SLASH DOWN: W + A + Mouse 1 or W + D + Mouse 1
Forward + Step Left + Primary Attack or Forward + Step Right +
Primary Attack
DIAGONAL SLASH UP: S + A + Mouse 1 or S + D + Mouse 1
Backpedal + Step Left + Primary Attack or Backpedal + Step Right +
Primary Attack
------------------------------------------------------
STANDARD, DUAL AND DOUBLE-BLADED LIGHTSABER TECHNIQUES
------------------------------------------------------
The following moves can be performed using all lightsaber
techniques.
ATTACK KATA: Simultaneously Press Mouse 1 + Mouse 2
Simultaneously Press Primary Attack + Alternate Attack
Prerequisite: None
ATTACK ENEMY ON GROUND: W + Mouse 1
Forward + Primary Attack
Prerequisite: None
ROLLING STAB: After a Forward Roll, press Mouse 1
After a Forward Roll, press Primary Attack
Prerequisite: None
STANDARD LIGHTSABER ATTACKS
---------------------------
The following attacks are performed using the standard lightsaber.
The combat styles required are listed, as necessary.
LUNGE ATTACK (Fast): C + W + Mouse 1
Crouch + Forward + Primary Attack
Prerequisite: None
FORCE PULL SLASH: Force Pull + Mouse 1
(Medium, Strong) Force Pull + Primary Attack when enemy is
relatively far away
Prerequisite: Force Pull 3
FORCE PULL IMPALE: Force Pull + Mouse 1
(Fast) Force Pull + Primary Attack when enemy is close
Prerequisite: Force Pull 3
CARTWHEEL: SPACEBAR + simultaneously press Mouse 1 + A or D
Jump + Primary Attack + Strafe Left or Step Right
Prerequisite: Force Jump 1
DUAL LIGHTSABER ATTACKS
-----------------------
The following attacks are performed using dual lightsabers.
TWIRL: C + W + Mouse 1
Crouch + Forward + Primary Attack
Prerequisite: None
BARRIER: Mouse 1 + Mouse 2
Simultaneously press Primary Attack + Alternate Attack
Prerequisite: None
DUAL STAB FRONT AND BACK: Mouse 1 + W or S
Primary Attack + Forward or Backpedal
Prerequisite: None
DUAL STAB LEFT AND RIGHT: Mouse 1 + A or D
Primary Attack + Step Left or Step Right
Prerequisite: None
DOUBLE-BLADED LIGHTSABER ATTACKS
--------------------------------
The following attacks are performed using the double-bladed
lightsaber.
BACK FLIP ATTACK: Mouse 1 + SPACEBAR + S
Primary Attack + Jump + Backpedal
Prerequisite: None
TWIRL: C + W + Mouse 1
Crouch + Forward + Attack
Prerequisite: None
KICK: Mouse 2 + W or S or A or D
Alternate Attack + any direction
Prerequisite: None
HILT BASH: Mouse 2 + W
Alternate Attack + Forward, when facing an enemy
Prerequisite: None
SPLIT KICK: Mouse 2
Alternate Attack, when enemies are on a student's left and right
sides
Prerequisite: None
SPIN KICK: Mouse 2
Alternate Attack, when surrounded by enemies
Prerequisite: None
FLIP KICK: Mouse 2
Alternate Attack, when enemies are in front of and behind a
student
Prerequisite: None
BUTTERFLY ATTACK: W or A or D + Mouse 1
Forward or Step Left or Step Right + Primary Attack
Prerequisite: Force Jump 1
---------------
ACROBATIC MOVES
---------------
In addition to specific lightsaber combat techniques, students can
also practice these acrobatic combat moves. NOTE: Some moves
specify prerequisites that must be met before they can be
performed.
JUMP UP FROM KNOCKDOWN: Hold SPACEBAR
When knocked down, hold Jump.
Prerequisite: Force Jump 1
JUMP KICK FROM KNOCKDOWN: Hold SPACEBAR + W or S key
When knocked down, hold Jump + Forward or Backpedal.
Prerequisite: Force Jump 1
ROLL: C + W or S or A or D
While moving, press Crouch + Forward or Backpedal or Step Left or
Step Right.
Prerequisite: None
ROLL FROM KNOCKDOWN: Hold A or S
When knocked down, hold Left or Right.
Prerequisite: None
FORCE JUMP: Hold SPACEBAR + W or S or A or D
Hold Jump + Forward or Backpedal or Step Left or Step Right.
Prerequisite: Force Jump 1
FORCE FLIP: Hold SPACEBAR + Tap W or S or A or D
Hold Jump + Tap Forward or Backpedal or Step Left or Step Right.
Prerequisite: Force Jump 1
BACKFLIP OFF WALL: Run toward a wall and press SPACEBAR
Run toward a wall and press Jump when near the wall.
Prerequisite: Force Jump 1
SIDE-FLIP OFF WALL: Stand next to a wall, press SPACEBAR + A or S
Standing next to a wall, press Jump + Step Left or Step Right,
depending on the direction the student is facing.
Prerequisite: Force Jump 1
WALL-RUN: Strafe alongside a wall and press SPACEBAR; press
SPACEBAR during run to flip off wall
Strafe alongside a wall and press Jump; press Jump again during
run to flip off wall. Press Forward or Backpedal during run to
control the speed of the run.
Prerequisite: Force Jump 2
WALL-GRAB JUMP SPACEBAR, and then SPACEBAR + W or S or A or D
Press Jump, then press Jump again + the direction the wall is in.
Prerequisite: Force Jump 3
RUN UP WALL BACKFLIP: Tap SPACEBAR + hold W, release W or press
SPACEBAR
Run at a wall, tap Jump and hold Forward. Release Forward or press
Jump at any time to push off wall.
Prerequisite: Force Jump 3
LONG JUMP: Force Speed + SPACEBAR
Use Force Speed, and then press Jump immediately.
Prerequisite: Force Jump 3, Force Speed 1
------------------------
LIGHTSABER COMBAT STYLES
------------------------
All students begin with a standard lightsaber and fight using the
medium style. Over time, students can choose to learn one
additional combat style, either Fast or Strong. Once the new style
is acquired, press the L key to cycle between the two.
NOTE: The following combat styles only apply when using the
standard lightsaber.
MEDIUM LIGHTSABER COMBAT STYLE
------------------------------
This is the classic lightsaber combat style. The attacks are
medium speed and range, inflicting a fair amount of damage. Some
moves even incorporate spins, enabling the user to chain together
up to five attacks. This style is the best for fighting multiple
enemies.
FAST LIGHTSABER COMBAT STYLE
----------------------------
This style is very fast and efficient, though somewhat limited in
range. The short, quick motions allow for many repeated attacks
and quick follow-ups, but the damage inflicted is low due to the
glancing nature of the strikes. This style is best suited for
dispatching enemies while constantly moving.
STRONG LIGHTSABER COMBAT STYLE
------------------------------
This style uses powerful swings to break through defenses. The
attacks have great range and a large windup and follow-through
(leaving you open to counterattacks). If they hit, the enemy is
rarely able to block the attack and may be knocked down. If an
enemy has a lightsaber, it may be knocked aside. It is wise to use
these attacks when fighting a lone lightsaber-wielding enemy.
LIGHTSABER BLOCKS, DEFLECTIONS AND PARRIES
------------------------------------------
Lightsaber attacks may not always be successful. Depending on the
strength of the attack and the skill of the defender, attacks may
be blocked, deflected or even parried. Students may only defend
against an attack when their lightsaber is either in the ready
pose or already in a defensive pose. If an enemy blocks or
deflects an attack, the student will be able to transition to
another attack quickly. If the ensuing attack is weak and the
enemy's defensive skill is high, a parry is possible. In this
case, the defender can knock a student's lightsaber away. As a
result, the attacker will have to recover for a few seconds before
another offensive or defensive lightsaber move is possible.
LIGHTSABER LOCKING
------------------
When two lightsabers lock, the combatants are stuck pushing
against one another. Students must push against the other
combatant by repeatedly tapping Primary Attack (MOUSE 1 button) to
win the lock. The higher the combatant's offensive lightsaber
skill, the harder they can push. If a student loses the lightsaber
lock and is knocked down, press and hold Jump (SPACEBAR) to
quickly get up.
NOTE: If a student has learned Level 3 Force Push, they can
attempt to break a lightsaber lock this way. However, there is no
guarantee of success, and the student may suffer an attack against
them.
---------------
USING THE FORCE
---------------
Most Force powers are not available when training begins. As
students become more attuned to the Force, new powers will be
granted, and existing powers can be strengthened. Once acquired,
students can scroll through an available list by pressing the E
and Q keys, and then pressing the F key to use the chosen power.
Each Force power depletes energy from a student's Force Meter,
which can be seen on the right-hand Status Display. When no Force
powers are being used, the Force Meter recharges. Students, as
well as Jedi, may also bind, or assign, Force powers to a Function
key (or hot key) for immediate use.
NOTE: The use of Force powers may be required to solve puzzles.
FORCE POWER RANKS
-----------------
Each Force power has three ranks, beginning at one, and can then
be strengthened by the student as the game progresses. Generally,
the higher-ranking Force powers function the same as the lower-
level powers, but the effect is usually more pronounced or
depletes less energy from a pupil's Force Meter. Students can
access their Datapad (TAB or M keys) in-game to receive
information on available Force powers, as well as to view each
power's current rank.
------------
FORCE POWERS
------------
FORCE JUMP
----------
This power enables the Jedi to make a tremendous vertical leap.
Tap Jump (SPACEBAR) to do a normal jump, or hold down Jump to leap
higher.
LEVEL 1: Students can jump twice as high as a regular jump.
LEVEL 2: Students can jump approximately four times as high as a
regular jump.
LEVEL 3: The highest possible vertical leap, eight times that of a
regular jump.
NOTE: Hold down a direction key (A, D, W or S) during the Force
Jump to do a Force Flip.
FORCE PUSH
----------
Enables a Jedi to shove away non-player characters (NPCs) and
world objects. If NPCs are pushed into solid surfaces or off
ledges, they'll take damage. Can also be used to move certain
objects.
LEVEL 1: Knocks down targets.
LEVEL 2: Pushes back target.
LEVEL 3: Pushes back multiple targets. Jedi can also try to Force
Push out of lightsaber locks at this level.
FORCE PULL
----------
Lets Jedi pull weapons and specific world objects toward himself
or herself.
LEVEL 1: Pull certain levers and objects in your targeting
reticle. You can also pull one enemy toward you.
LEVEL 2: In addition to Level 1 features, Jedi can now pull the
weapon out of the hands of an enemy, provided the enemy is facing
the Jedi.
LEVEL 3: The strongest pull, Jedi can now pull multiple enemies
(and their weapons) toward them.
FORCE SPEED
-----------
When activated, this Force power slows down the world around the
Jedi, allowing him or her to gain a speed advantage over enemies.
LEVEL 1: World is slowed to 75 percent normal speed for 10 seconds.
LEVEL 2: World is slowed to 50 percent normal speed for 10 seconds.
LEVEL 3: World is slowed to 25 percent normal speed for 10 seconds.
FORCE SENSE
-----------
Allows Jedi to see enemies (including cloaked enemies), friendly
characters, pickups and some world objects more clearly, even
through walls, in the following spectra:
ENEMIES: Appear in red.
FRIENDLY CHARACTERS: Appear in green.
ITEMS AND WEAPON PICK-UPS: Appear in yellow
MISSION OBJECTIVES AND ENEMIES CARRYING KEYS: Appear in blue Force
Sense can also be used to see hidden markings and secrets needed
to solve puzzles.
LEVEL 1: Enables Jedi to see enemies. Each use is active for ten
seconds, covering a small arc in a short range.
LEVEL 2: Enables Jedi to see enemies and items. Each use is active
for thirty seconds, covering a medium arc in a moderate range.
LEVEL 3: Enables Jedi to see enemies, items, and the health of
nearby enemies.
Each use is active for sixty seconds, covering a large arc over
long range. NOTE: Force energy does not regenerate while this
power is active.
FORCE ABSORB
------------
When activated, this light side Force power will take damage from
Force Push, Pull, Grip, Drain and Lightning attacks and turns that
energy into Force power for the Jedi to use.
LEVEL 1: Absorbs one-third of the Force power used by the attacker.
LEVEL 2: Absorbs two-thirds of the Force power used by the attacker.
LEVEL 3: Absorbs all of the Force power used by the attacker.
NOTE: Physical attacks and blast damage are not converted into
Force energy.
FORCE HEAL
----------
This power increases the student's health by converting the
essence of the Force into a maximum of 25 health points.
LEVEL 1: Jedi must stop and meditate to heal. Healing stops when a
Jedi moves or fires a weapon.
LEVEL 2: Jedi can move while healing, but not attack. Healing
stops if the Jedi is hit or fires a weapon.
LEVEL 3: Jedi can move and attack while healing, and the healing
process is sped up.
JEDI MIND TRICK
---------------
To use this Force power, the Jedi needs to target the intended
character they wish to influence, and then press the appropriate
key. A confirmation sound will be heard and a visual effect will
appear around the enemy if they have been successfully tricked.
Once affected, the character in question will be confused and
ignore the Jedi, if they walk past. However, aggressive action or
loud noises will alert the enemy thereby spoiling the effect. Note
that the Jedi Mind Trick will not work on all enemies.
LEVEL 1: Only one targeted enemy will be tricked for five seconds.
LEVEL 2: Ten seconds of confusion. Jedi cause a distraction that
affects all enemies in the area.
LEVEL 3: Create a distraction OR target an enemy to become the
Jedi's ally. Direct the reticle to the spot where the distraction
is to occur or target an enemy.
FORCE PROTECTION
----------------
Allows Jedi to decrease incoming damage from energy, physical,
projectile, and explosive sources.
LEVEL 1: Jedi are protected against 25 percent of the damage from
physical and energy and projectile-based attacks, but not from
Force based attacks.
LEVEL 2: Jedi are protected against 50 percent of the damage from
physical and energy and projectile-based attacks, but not from
Force based attacks.
LEVEL 3: Jedi are protected against 90 percent of the damage from
physical and energy and projectile-based attacks, but not from
Force based attacks.
FORCE DRAIN
-----------
Allows Jedi to transfer a person's life essence to him or herself.
Jedi must hold down the Force Drain to continue to take energy
from their target.
LEVEL 1: Jedi can drain life essence from another person and
transfer it to him or herself by making direct physical contact
with that person.
LEVEL 2: Jedi can drain life essence from another person and
transfer it to him or herself by making direct physical contact
with the targeted character, or from a short distance away.
LEVEL 3: Jedi can drain life essence from another person a short
distance away and transfer it to him or herself by making direct
physical contact with the targeted character. From a distance,
multiple people can be drained at once.
FORCE LIGHTNING
---------------
This dark side power hurls a devastating electrical attack against
enemies. Once an enemy is targeted, press and hold Use Force Power
to begin the Force Lightning attack.
LEVEL 1: A quick burst of lighting emanates from the Jedi's hand,
shooting straight forward.
LEVEL 2: Hold down the Force Power key to shoot a continuous beam
of lightning (until Force power is drained).
LEVEL 3: Lightning shoots out in an arc, allowing it to hit
multiple targets at once.
NOTE: Using this Force power after retracting a lightsaber will
allow the Jedi to shoot two continuous beams of lightning from
both hands, and will increase the damage per second.
FORCE GRIP
----------
When used, this Force power allows the Jedi to choke a living
being.
LEVEL 1: Select an enemy using the targeting reticle, and then
choke the enemy until out of Force power or by releasing the
specified key. The enemy is immobilized but not hurt. Jedi may
walk away while the enemy chokes.
LEVEL 2: Once an enemy is targeted, this level's power will choke
the enemy and also raise him off the ground. Hold down the Force
button to keep the enemy in the air and inflict damage. Looking
away causes the enemy to drop to the ground.
LEVEL 3: The strongest grip, Jedi can move and look around while
carrying an enemy.
FORCE RAGE
----------
Affords Jedi protection against damage, an increase in speed, and
an increase in damage potential, all at the expense of the Jedi's
health. Jedi need some recovery time after Force Rage ends.
LEVEL 1: The Jedi is protected against 50 percent of all damage,
has stronger attacks, and cannot die. The Jedi loses a small
amount of health, and must wait 10 seconds after the rage before
it can be used again. Jedi must have 25 health to use this power.
LEVEL 2: The Jedi is protected against 75 percent of all damage,
attacks 25 percent faster, has stronger attacks, and cannot die.
The Jedi loses health rapidly and must wait 10 seconds after the
rage before it can be used again. The Jedi must have 25 health to
use this power.
LEVEL 3: The Jedi is protected against 90 percent of all damage,
attacks 50 percent faster, has stronger attacks, and cannot die.
The Jedi loses a small amount of health, and must wait 10 seconds
after the rage before it can be used again. The Jedi must have 25
health to use this power.
LIGHTSABER THROW
----------------
(Press the MOUSE 2 button when using the lightsaber)
The secondary attack for the lightsaber, this Force power enables
the Jedi to throw their lightsaber at enemies. It will eventually
boomerang and return to the rightful owner.
LEVEL 1: Lightsaber flies forward, covering a short range.
LEVEL 2: Lightsaber flies out over a longer range and spins
faster. Jedi can aim their throw by changing their forward
direction.
LEVEL 3: The lightsaber spins even faster and the Jedi is able to
easily seek out enemies to hit by sensing them through the Force.
NOTE: It is possible for the lightsaber to be knocked out of a
Jedi's control while in flight, causing the lightsaber to drop to
the ground. To retrieve the lightsaber, press Primary Attack
(MOUSE 1 button: default). If the lightsaber is not located after
an extended period of time, it will automatically return to the
Jedi.
-------
WEAPONS
-------
Jedi seek to resolve encounters without conflict, and prefer using
a lightsaber rather than a blaster. However, there are times when
alternative modes of force are necessary. Students can select
weapons they've acquired by pressing the appropriate keyboard key,
or scrolling through them using the mouse wheel or keyboard.
DL-44 HEAVY BLASTER PISTOL
--------------------------
Slow to fire but incredibly accurate against foes.
Primary Attack: A slow single shot
Alternate Attack: Single-player mode, none. Multiplayer mode, hold
down Alternate Attack (Mouse 2 button) to charge the blaster.
Release the button to unleash a more powerful shot, although it is
less accurate.
Ammo Type: None
E-11 BLASTER RIFLE
------------------
The primary weapon for Imperial forces, this is a sturdy rifle
that packs a powerful punch, although it is not the most accurate
of weapons.
Primary Attack: Slow, highly damaging shot
Alternate Attack: Rapid-fire burst shots
Ammo Type: Blaster Pack
TENLOSS DISRUPTOR RIFLE
-----------------------
Affecting matter at the molecular level, this rifle rips apart
living material with ease. It is outlawed across the galaxy.
Primary Attack: Single, fast-moving shot with a slow rate of fire.
Alternate Attack: Press to activate the weapon's scope. The longer
the Alternate Attack key/button is held, the further the scope
zooms in. Press and hold the Primary Attack key/button to prepare
a shot. The charge indicator on the bottom of the scope lets the
student know when the weapon is powered to its disintegration
level, which is usually lethal to the target. Release the Primary
Attack key/button to fire the shot. Press the Alternate Attack key
to turn off the scope.
Ammo Type: Power Cell
WOOKIEE BOWCASTER
-----------------
It might look archaic, but this weapon fires powerful bolts of
metal enveloped in energy pockets. A self-cocking attachment
allows creatures weaker than Wookiees to fire them.
Primary Attack: One press fires a single accurate shot. Hold down
to power up the weapon to unleash up to five bolts at once.
Alternate Attack: Unleash a reflective shot that bounces off
surfaces.
Ammo Type: Power Cell
IMPERIAL HEAVY REPEATER WITH CONCUSSION LAUNCHER
------------------------------------------------
A deadly and destructive projectile weapon that fires a rapid
stream of metal bullets, this gun is capable of covering an entire
area with deadly suppressive fire. It also features a unique
Alternate Attack mode.
Primary Attack: Hold down trigger to fire a rapid succession of
bolts.
Alternate Attack: Launches an energy-based explosive from an
undermounted barrel.
Ammo Type: Metallic Bolts
DESTRUCTIVE ELECTROMAGNETIC PULSE 2 (DEMP 2) GUN
------------------------------------------------
This gun fires high-powered ion bursts that wipe out electrical
systems. It is very effective against droids and electrical
devices, although the latest version can also cause damage to
living tissue.
Primary Attack: A single shot that stuns humans and damages
droids.
Alternate Attack: Offers three charge levels, each level creates a
larger expanding shell of electromagnetic energy that damages
humanoids, droids and turrets.
Ammo Type: Power Cell
GOLAN ARMS FC-1 FLECHETTE WEAPON
--------------------------------
Firing a blast of metal shards in a wide spread capable of hitting
multiple targets, this weapon is the favorite of the Corporate
Sector Authority's police squads. Be wary of stray shards
ricocheting off surfaces, as they may prove harmful.
Primary Attack: Fire a spread of shots.
Alternate Attack: Launch two mines that bounce off surfaces. Mines
will explode after a 1.5 second duration, or on contact with an
enemy.
Ammo Type: Metallic Bolts
STOUKER CONCUSSION RIFLE
------------------------
Fires a concussive blast with a maximum range of 30 meters,
creating an explosion that spreads about 4 meters in diameter.
Primary Attack: Single shot, large explosive effect. Damages
everything, including the user. Slow firing rate.
Secondary Attack: Fires an even slower beam designed to throw most
targets into the air or hurl them into other enemies.
Ammo Type: Power cell
MERR-SONN PLX-2M PORTABLE MISSILE SYSTEM
----------------------------------------
A dangerous weapon that fires Arakyd 3T3 missiles.
Primary Attack: Fires single missiles that streak straight ahead
and detonate.
Alternate Attack: Target-seeking missile. Press and hold Alternate
Attack when an enemy appears in the targeting reticle. After a
short time, missile system will lock onto intended target,
indicated by a full red circle. Release key to fire missile.
Ammo Type: Rockets
THERMAL DETONATOR
-----------------
Famous throughout the galaxy, a thermal detonator releases a
barrage of energy and heat that destroys everything around it.
Primary Attack: Throws the time-delayed grenade over a short
distance. It bounces, and then explodes after a few seconds.
Alternate Attack: Throws the grenade, which explodes on impact.
Hold down the key/ button to throw the detonator further.
TRIP MINE
---------
Best placed on walls, these trip mines come in triangular-shaped
explosive casings. A laser beam is emitted from the casing and
extends to the nearest parallel surface. If the beam is broken or
the explosive casing fired upon, the mine detonates and damages
anything in close proximity.
Primary Attack: Place the mine and activate the laser beam.
Alternate Attack: Fires a proximity device that auto-detonates
after about four seconds.
DETONATION PACK
---------------
This is a small explosive pack with a remote activator. Students
can place multiple detonation packs, and then explode them from a
distance. Typically used to ambush enemies or blow open sealed
doors.
Primary Attack: Look at surface where you want to place the
detonation pack. If it can't be attached there, the detonation
pack drops to the ground.
Alternate Attack: Detonate all dropped packs with remote trigger.
LIGHTSABER
----------
Selecting the lightsaber switches the game to third-person
perspective.
Primary Attack: Different slashing/swinging attacks depending on
player movement. Note: A student's lightsaber attack is also
influenced by their Lightsaber Combat Style.
Alternate Attack: If Force energy is available, the player can
perform a lightsaber throw. The lightsaber will eventually return
to the player's hand. Remember that this maneuver will drain Force
power.
--------------------------------------------------------------
NEW MULTIPLAYER GAME TYPES IN THE FULL VERSION OF JEDI ACADEMY
--------------------------------------------------------------
SIEGE
-----
The objective of Siege is for an attacking team to complete
multiple objectives in a designated time limit while a defending
team prevents them from doing so. After one match is finished, the
teams switch with the new attacking team trying to complete the
objectives in less time than the first team did. Two matches make
up one game of Siege. Siege maps are set up so that the defending
team has a stronghold or location to defend against an attacking
team. There are multiple objectives on each map, with each
objective getting successively more difficult to capture. Siege
incorporates specific teams and a player-class system. Default
teams are set on a per map basis. Thus, if the map is Hoth, the
teams will be Rebels and Imperials (as opposed to Mercenaries and
Jedi).
------------------------------------------------------------------
CLASSIC MULTIPLAYER GAME TYPES IN THE FULL VERSION OF JEDI ACADEMY
------------------------------------------------------------------
FREE FOR ALL
------------
Best summed up as every person for him or herself, players score
points by eliminating other players, and no one can be considered
an ally. Weapons and equipment are acquired in the field, unless
otherwise specified on the server. Some options include whether to
allow Force powers or not and the maximum Force level available.
DUEL
----
Duel pits two combatants in a small, enclosed arena to battle with
lightsabers. Both competitors start a round with full health,
their lightsabers, and a blaster pistol (server option), and must
face off against one another. Any number of players can
participate in Duel, but only two are in the arena at once.
Remaining players observe until a match is complete; the loser is
put at the end of the observer queue, and the next person in line
is brought in to fight the winner. Once again, both competitors
are fully replenished with health. The winner continues to compete
against new opponents, scoring points until he or she is
eliminated or the match limit is reached.
TEAM FREE FOR ALL
-----------------
Team Free For All pits two Jedi teams against each other in a
battle of supremacy. Each player scores points for eliminating
opponents, but players on the same team can work together to
eliminate tougher foes. All players on a team combine their scores
for a single team score. Weapons and equipment are acquired in the
field, unless otherwise specified on the server. Some options
include whether to allow Force powers or not and the maximum Force
Level available.
CAPTURE THE FLAG
----------------
In Capture The Flag, two teams compete to capture the flag of the
opposing team and return it to their home base. Any member of a
team can pick up the opposing team's flag. When the flag is taken,
all players on the map are alerted to the event. The flag carrier
must then escape from the enemy's territory and return the flag to
their own base to score. If the flag carrier is eliminated, the
flag is dropped at the point of elimination. If a member of the
flag owner's team touches the flag, it is automatically returned
to their base. If a member of the eliminated player's team picks
it up, they can continue to try to return it to their home base.
The flag carrier's own flag must be "home" at its base position
for the carrier to score with the opposing team's flag.
AI BOTS
-------
Star Wars Jedi Knight: Jedi Academy's Bots are computer-controlled
characters meant to simulate human opponents in the multiplayer
game. Players can choose from a number of characters, all of which
have different personalities. Some Bots use their lightsaber and
attack head-on, while others tend to run around and gather every
weapon before launching an offensive. The server administrator can
add Bots to the game at any time, but it's better if all Bots are
added before play begins. In the Server Setup menu, the server
host can open up slots for Bots and set their overall difficulty
level before starting the game. Just like having a lot of human
players on a server, too many Bots will slow down the gameplay-
don't overload the server. To add Bots during a game, press the
ESC key to access the in-game menu, and then click Add Bot to add
Bots one by one and set their difficulty level. NOTE: Bots cannot
be added to Siege games.
-------------
GAMEPLAY TIPS
-------------
WISDOM FOR THE SINGLE PLAYER
-----------------------------
SHOOTING ALLIES AND OTHER "FRIENDLIES" IS A BAD IDEA. Allies are
critical to your mission. Check your fire!
EXPERIMENT WITH THE ALTERNATE ATTACKS. Every weapon has an
alternate attack accessible via the Mouse 2 button (default
function key). Being familiar with all the functions of your
weapons can mean the difference between survival and a date with
an interrogator droid.
ONCE YOU MASTER THE FORCE, USE IT TO YOUR ADVANTAGE. Sometimes
it's the only edge you have to conquer the overwhelming enemy
forces.
REMEMBER: YOU WILL NEED TO USE FORCE POWERS TO PROGRESS THROUGH
THE GAME. Some powers, like Force Push, can be used to manipulate
sliders, buttons and objects in the environment.
IF IT SEEMS LIKE YOU ARE STUCK WITH NOWHERE TO GO, try pressing
the Use key on consoles, doors, and what may be buttons or levers.
Also, look for air ducts or other passageways that might lead out
of the area.
PAY ATTENTION TO THE COLOR OF YOUR CROSS HAIR. It will tip you off
to how you can interact with the environment. (Allies turn the
cross hairs green.)
THIRD-PERSON VIEW ALLOWS EVASIVE AND ACROBATIC MOVES that you
cannot do in first-person view, though it is slightly harder to
aim in third-person. Use the mode that best suits your style of
play- third-person for maneuverability, first-person for better
precision.
WHEN FIGHTING A SQUAD OF IMPERIALS, TRY TO TAKE OUT THE OFFICERS
and high-ranking stormtroopers first. This may cause remaining
troops to panic or retreat.
USE THE JEDI MIND TRICK OFTEN TO SNEAK THROUGH AN AREA. It allows
you to momentarily avoid enemy detection.
BE SURE TO LOOK UP AND DOWN. Students do not live in a two-
dimensional world, and neither do their enemies.
TOGGLE THE LIGHTSABER OFF (DEFAULT: 1 key) to silence it while
sneaking around.
YOU CAN USE FORCE SENSE to find hidden passages and puzzle items.
DON'T FORGET TO SEARCH officers and other fallen enemies for keys.
Search them by walking over their fallen bodies.
IF YOU ARE HAVING A LOT OF TROUBLE ON A TIER MISSION, on the
mission fail screen you can select a new mission to play. You can
always return to that mission later when you have learned new
force powers.
------------------------
HOW TO CONTACT LUCASARTS
------------------------
LucasArts has set up a variety of services to provide you with
information about our latest games, hint and gameplay assistance,
and technical support.
WHERE TO FIND US ONLINE
-----------------------
Visit the LucasArts Technical Support Website at
Support.lucasarts.com. From there, you can receive online
technical support through Yoda's Help Desk, browse technical
documents, or leave a message for an online representative.
YODA'S HELP DESK
----------------
We are proud to feature Yoda's Help Desk, an interactive knowledge
base, which is available in the Technical Support section of the
LucasArts Web site at Support.lucasarts.com.
Yoda's Help Desk offers solutions to technical issues based on
information you provide. Visitors to Yoda's Help Desk will be able
to receive technical support 24 hours a day, 7 days a week. If
Yoda's Help Desk is unable to provide you with a solution, you can
send an e-mail message to an online representative.
LUCASARTS COMPANY STORE
-----------------------
Safe, quick, convenient shopping is just a click away. You can
visit our secure online company store at
Companystore.lucasarts.com for great deals on games and
unique items you won't find anywhere else-hats, T-shirts and so
much more. Place your order online or call us toll free at 1-888-
LEC-GAMES. [Technical support is not available on this line.]
################################################################
LucasArts and the LucasArts logo are registered trademarks of
Lucasfilm Ltd. (c) 2003 Lucasfilm Entertainment Company Ltd.
or Lucasfilm Ltd. & (R) or TM as indicated.
All rights reserved.
Preview
Post a comment
2.1MDownload
FULLThe Force Unleashed Animations SP
11411.77mbFULLRalph Pootawn
21.62mbFULLCrimson Dynamo
1941.43kbFULLCaptain Malcolm Reynolds 1.0
63.94mbFULLPrequelConversionMod
58980.23mbFULLJaden NPC
71.06kbFULLShane Bluestar
23.34mbDEMOWS HUD and UI v0.1
1.5K232.14kbDEMOdfmod 2008
1.3K421.15mbPATCHJedi Knight: Academy Linux compatibility
93312.78mb
Icon
Developer
Raven SoftwarePublisher
LucasArtsEngine
id Tech 3Contact
Send MessageHomepage
Ravensoft.comRelease date
Game watch
Follow
RTX Remix
RTX Remix is a modding platform by NVIDIA, which allows modders to create stunning HD remasters of classic games (see all supported), with ray tracing and DLSS.
Learn more about this games compatiblity with RTX Remix and ModDB's collaboration with the Remix community to organize all compatible games. Hide this dialog.
Related Games
Star Wars: Jedi Academy
First Person Shooter
Tags