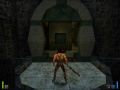
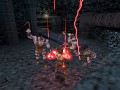
This new perspective on the Heretic/HeXen universe was the biggest critical success in Raven Software's storied history. With dozens of awards and numerous accolades, Heretic II showed the world that third-person action games could be fun and intuitive, while it solidified Raven's reputation as one of the industry's top game developers. The game was published by Activision Inc. and released to the public in 1998. Heretic II was one of the last 3-D action games to ship with fully playable co-operative gameplay. Heretic II has since inspired a new generation of third-person action game development and MODS... a testament to the groundbreaking impact of the title.
Location
Games : Heretic II : FilesFilename
tool-gwynflex.zipCategory
Modelling ToolUploader
LithTechGuruAdded
Size
5.93mb (6,213,943 bytes)Downloads
3 (1 today)MD5 Hash
98d9c95ff0745664ba0bbffdd42cc548Embed Button
Embed Widget
Description
Gwynflex allows you to import an unanimated bipedal mesh, weight the verts of the mesh to bones in the skeleton, and apply all of the Heretic II player model animations to the mesh. This saves you the trouble of hand-animating 1500 frames. GwynFlex creates models compatible with Heretic II and all Heretic II mods, and automatically adjusts to differences in body proportions between models.
This is an extremely valuable tool for Heretic 2 that allows you to rig custom party members to the game's male and female skeletons. Created by Christopher J. Burke. It is mirrored here for archival purposes.
Some quick notes on GwynFlex version B19...(14 January, 2004)
-------------------------------------------------------------
GwynFlex is my freeware DirectX animation tool. It uses an
animation database I captured from the original male and female
Heretic II player models. To create the mocap data, I assumed
an augmented bipedal skeleton and wrote code to track clusters
of vertices on the models across every animation frame, then
to perform matrix transforms to derive bone and joint position
and rotation information.
Gwynflex allows you to import an unanimated bipedal mesh, weight
the verts of the mesh to bones in the skeleton, and apply all of
the Heretic II player model animations to the mesh. This saves
you the trouble of hand-animating 1500 frames. GwynFlex creates
models compatible with Heretic II and all Heretic II mods, and
automatically adjusts to differences in body proportions between
models.
The short movie "corvus.avi" shows the original male player model
performing an acrobatic movement and attack sequence. The short
movie "q2gal.avi" shows the female space marine mesh from Quake 2
performing an identical sequence after being processed with
GwynFlex. These two models have very different body proportions,
yet the animations in "q2gal.avi" appear identical to those
There's an obsolete GwynFlex news site at:
Shrine of the Ovum (http://www.hereticii.com/models)
The best source for current information on GwynFlex is
Thanks to the programming team at Raven for their help with
technical information on the Heretic II model format!
NOTE TO MILKSHAPE USERS:
Gwynflex can import and export models in .OBJ format, which
is also used by Milkshape 3D (a popular shareware modeling
program). However, you will have to flip the V texture
coordinates of your models, and reverse all of the triangle
vertex orders (that is, flip all the triangle normals) when
moving .OBJ files between GwynFlex and MS3D. Both GwynFlex
B18 and MS3D provide tools for doing this.
As GwynFlex is nearing end-of-life (soon to be replaced by
Pygmalion, see www.runenews.com/rigfolk for more information),
I'm not going to put effort into fixing these compatibility
issues in GwynFlex so you don't have to flip things.
New in Version B19:
- Added Skeleton->Full Body Armor. When checked, GwynFlex will
look for a group named ARMOR and will automatically add all
triangles and verts belonging to this group to the armor
mesh node. Similarly, all members of the ARMOR group will be
subtracted from all other mesh nodes. This allows you to
make form-fitting body armor that animates according to the
bones of the skeleton (e.g. arm, leg, torso) but that is
displayed in-game according to the state of the armor mesh
node.
- Fixed bug in flexmodel export code that sometimes caused
incorrect assignment of verts to mesh nodes.
New in Version B18:
- Added Model->Flip Skin U and Model->Flip Skin V. These are
useful after importing from .OBJ and .3DS files, which
often use a different defintion of texture coordinate (0,0)
that Gwynflex.
- Added Model->Assign Skin... (formerly Model->Texture... but
was not discussed in previous release notes). This lets you
view the model with texture from a TGA, BMP, or PCX file.
- Moved texture-related menu items together under Model.
- Modified .OBJ export to use the material name "SKIN0"
instead of "X". For some reason, certain rendering programs
(like Poser 4) would not see texture coordinates if the
material was named "X".
New in Version B17:
- When you have View->Hit Point selected, the cone indicating
the hit point now snaps to the nearest triangle vertex, and
the triangle vertex number and face number are displayed in
the status bar.
New in Version B16:
- The default mesh node assignments were modified slightly.
In previous versions, the "reference bones" and "anchor
joints" for weapons and armor were part of the body mesh
nodes. Now they are part of the armor and weapon mesh nodes.
The new assignments were required for .MD2 and .FM motion
capture support. The new assignments are fully compatible
with bindings and bone files created under previous
versions of GwynFlex, since the skeleton topology was not
changes and reference bones have no bindings.
- The main message handler was modified to reduce excessive
re-rendering of the 3D scene even when nothing had changed
on-screen.
- A bug in the ,MD2 and .FM import routines that caused
incorrect Z-axis placement of imported meshes was fixed.
NOTE: Orientation (.ORI) files saved under previous
versions of GwynFlex will not work correctly with version
B16; at the very least, the Z-axis placement of the model
will have to be adjusted after loadinf the old .ORI file.
- A bug in the ,MD2 and .FM import routines that left files
open mistakenly was fixed.
- A new option, Skeleton->Lock Armor To Torso, forces GwynFlex
to use the upper torso animation data when animating the
armor. This reduces or eliminates problems with the torso
moving outside the armor during bending of some models.
- Most of the Load... and Save... menu items for bones, poses,
etc. have been moved to two new menus: File->Load Speacial,
and File->Save Special, to clean up the main menu.
- The File->Export menu has been modified to better support
exporting to Quake 2 and Heretic II models,
- Added Quake 2 model export capability at
File->Export Model->Quake 2 Model...
- Added menu selections and new code to control camera zoom.
Camera->Zoom In (move camera closer to model)
Camera->Zoom Out (move camera farther from model)
Camera->No Zoom (restore default camera distance)
- Various menu selections and new routines were added for
loading, modifying, and playing animation sequences. New
menu items include:
Animate->Load Animation (loads an animation squence from .spz)
Animate->Save Animation (saves an animation sequence to .spz)
Animate->Delete Animation (deletes sequence from .spz file)
Animate->Store Frame (overwrite named pose in animation)
Animate->Insert Frame (renumber frames and insert new frame)
Animate->Erase Frame (delete a frame from the animation)
Animate->Play Animation (play an animation sequence)
Animate->Use Animation Pose (pose model to a given frame)
Animate->Key Frames (not implemented yet)
Animate->Interpolate Frames (not implemented yet)
- Various menu selections and new routines were added to
provide flexibility in naming of bones, joints, and mesh
nodes, and also in assignment of bones to mesh nodes. New
menu items include:
File->Load Special->Load Node Map (load a file describing
the names of the mesh nodes, and which bones are bound to
each mesh node)
File->Save Special->Save Node Map (save the names of the
mesh nodes and a description of which bones are bound to
each mesh node)
Skeleton->Bone/Node Map (assign and reassign bones to
mesh nodes, also used to rename mesh nodes)
Skeleton->Split Torso (when checked, the same set of
bones are bound to the Front_Torso and Back_Torso mesh
nodes, and GwynFlex automatically assigns mesh to these
nodes based on whether it is in front of or behind the
plane of the model's spine; leave this checked normally)
Skeleton->Rename Bone (change the name of a bone)
Skeleton->Rename Joint (change the name of a joint)
- The Load Bones... and Save Bones... menu items were
modified to load and save bone and joint names in addition
to bone lengths. If you load a set of bones saved with
a previous version of GwynFlex, default names will be
used for all bones and joints.
- A new option, Skeleton->Make RefPoints, was added to control
whether reference and skeleton data are included in the
flexmodels output by GwynFlex. This option should ALWAYS be
turned on for player models, and should usually be turned
off for monster models.
NOTE: If the option is turned on for a monster model, the
monster will have the same reference points and skeleton as
a player model, and the model is likely to malfunction unless
it uses the default GwynFlex skeleton and node-bone mappings.
- A new option, Skeleton->Anchor to Feet, was added to allow
animation of models with shorter or longer "leg lengths" than
Corvus using Corvus animation data. When this option is enabled,
each frame of the model is repositioned so that either the left
ankle of the generated model matches the left ankle joint
position of the motion data, or the right ankle of the generated
model matches the right ankle joint position of the motion data,
whichever is lower.
NOTE: When animating a model with different leg lengths, use
either this option, or Skeleton->Scale to Ground, but not both,
or you may get unexpected results.
NOTE: You must turn this option off when creating or saving
new poses and animations. It is intended only for use with
pre-existing Corvus animation data.
New in version B14:
- A bug that caused GwynFlex to miscalculate the number of
triangles in the model was repaired.
- Several bugs that caused "silent" skin generation and
animation and normal repair failures due to the preceding
bug were repaired.
- The code that makes the difference between the Win 9X and
WinNT versions of GwynFlex was moved to a central module.
This should not have any impact on operation, but may
allow a future NT / 9X version in the future.
New in version B13:
- When importing from both .FM and .MD2 files, the normals
are not recalculated since they are already correct in
these files. This was initially released in version B11,
but was broken so normals were recalculated (and wrong).
- A new feature, Group->Reverse Normals, has been added to
reverse the normals of the currently selected group.
- A new feature, Group->Add Near Neighbors, has been added
to add disconnected triangles to the currently selected
group.
- A new feature, Group->Fix Neighbor Normals, has been
added to update the normals of adjacent triangles based
on the known-good normal of a selected triangle or group.
- A bug that caused selection of the wrong triangle when using
the mouse to add triangles to a group was repaired.
- Several bugs that caused incorrect display of the group
of selected triangles were repaired.
New in version B12:
- A serious bug in the File->Export->Merged Skin feature
was fixed. The bug caused improper skn texture mapping
on all generated models.
New in version B11:
- Imports from flexmodel (.fm) files
- File->Save saves current model geometry as Wavefront (.obj)
file.
- File->Export->Merged Skin will auto-merge and auto-scale
skins for the model and any props that have been merged;
GwynFlex can read files in .BMP, .PCX, and .TGA format,
and outputs the merged skin in 24-bit .TGA.
- When importing from both .FM and .MD2 files, the normals
are not recalculated since they are already correct in
these files
- The Model->Clone Hands function now correctly positions
the model after cloning
- The Model->Flip X, Flip Y, and Flip Z now correct the
model's normals after flipping the 3D coordinates.
- Several crashing bugs and ASSERT errors fixed
- Several memory leaks fixed
- Several unimplemented menu items now return informative
messages to reduce confusion, or have their menu items
grayed-out, or have been removed from the menu.
- A bug that caused models to be imported as "mirror images"
of the original was fixed. Use Model->Flip X if you need
to create a mirror image model for use with poses created
using previous versions of GwynFlex.
New in version B10:
- A duplicate set of hands can be created for the player model
using the Model->Clone Hands menu item. Heretic II player
models use separate hand mesh for the bare hand and the hand
holding a weapon.
- Weapons can be imported, positioned, and made part of the
player model using the File->Open Prop and Model->Merge Prop
menu items. GwynFlex finds a place in the skin texture of
the player model, scaling or rotating the texture if needed,
to store the skin texture of the weapon, This allows a single
256x256 texture can be used for the player and weapons. The
log file generated by GwynFlex includes a description of how
the player mesh and weapon textures were merged, so that a
skin can be edited to match.
- The release package includes .obj (mesh) and .tga (skin)
files for the standard Corvus BladeStaff, HellStaff, Stored
Staff, and Bow weapons. These can be imported as props to
give an imported mesh standard weaponry.
BladeStaff.obj Standard Corvus blade staff
HellStaff.obj Standard Corvus hellstaff
StoredStaff.obj The cylinder on Corvus' hip when both
staves are stored. Also the cylinder
in Corvus' closed right hand when using
the blade staff or hellstaff.
Bow.obj The bow in Corvus' left hand when using
either the storm bow or the phoenix bow.
StoredBow.obj The bow over Corvus' shoulder when
the bow is stored.
BladeStaff.tga A texture map for the blade staff,
when it is not powered up to flame
BladeGold.tga A texture map for the blade staff,
powered up to gold / flame level.
HellStaff.tga A texture map for the hellstaff
StoredStaff.tga A texture map for the stored staff
StormBow.tga A texture map for the storm bow
PhoenixBow.tga A texture map for the phoenix bow
- You can save the orientation of the player model, or of an
imported prop, using the File->Save Orientation menu item.
You can then re-load this orientation using the
File->Load Orientation menu item.
- You can automatically scale the model so that its legs touch
the ground using the Skeleton->Scale To Ground menu item.
GwynFlex measures all distances from the hips of the player
when posing the mesh, so if the legs are shorter than those
of Corvus and you are using Corvus motion capture data, the
model will appear to float above ground unless the new
Skeleton->Scale To Ground option is used.
- A bug which caused the player to look the wrong direction
when pivoting left or right has been fixed.
- A bug which caused duplicate group names in the Groups
menu item has been fixed.
- Various minor bug fixes.
New in version A09:
- Import single poses and texture coordinates from Quake 2
(.md2) models
- New mesh-to-bone binding algorithm produces much more accurate
animation than previous versions
- All normals of the mesh are automatically corrected during
import (still a bit buggy, but very good results)
- Manually add and subtract faces or groups of faces to the
bone-mesh association
- Preserves texture coordinates of imported mesh
- Save bone sets, and save bone-mesh associations, and save
poses, so that animation can be divided up among several
work sessions.
Known bugs / missing features:
- The normal correction isn't perfect - a few triangles appear
to be missing or to have reversed normals
- The GLCmd generation is one triangle per GLCmd, which makes
the generated models a bit bigger and makes your graphics
card work a bit harder. This will be optimized once the
other known bugs are fixed.
- No mesh is generated for the arrow that is normally visible
when the player draws the bow. However, the flaming arrow
special effects generated by Heretic II make it clear to
other players when the bow is drawn.
- Save and Save As... only support .OBJ format at this time.
Installation:
- Just make sure that the default.spz and mocap.spz files are in
the same folder as gwynflexb10.exe. The default.spz file holds
the default pose for the skeleton, in frame 'default'
Mini-Tutorial: A Model With No Weapons
- Ideally the your mesh should be modeled in a pose as close to a
"spread eagle" (like the DaVinci drawing of a man with arms out
and legs spread) as possible. A standing pose with the arms at
the sides can also be used, but it may be difficult to select
triangles on the sides or inner arms with such a pose.
- Turn off all of the weapons in GwynFlex. To do this, select
Skeleton->Mesh Nodes, and make sure NONE of the following boxes
has an X:
Right Grip, Left Bow/Grip, Armor, Blade Staff, Hellstaff,
Stored Staff, Stored Bow
All other boxes should have an X. Click OK when done.
- Make sure Skeleton->Normalize Poses is checked.
- In this mini-tutorial we will work with the standard Corvus model
that is included with Heretic II. Begin animation by importing the
'conjure14' pose from mocap.spz using the Model->Load Pose menu.
- Now import the Corvus mesh into GwynFlex. Use the File->Open
menu, set the file type to WaveFront OBJ (.OBJ), and import the
file conjure14EC63 that was included in the GwynFlex B10 archive.
- Make the mesh solid using the Model->Solid menu, and align the
base of the mesh's spine with the "hip anchor" joint of the
standard GwynFlex skeleton. Also align the hips of the mesh
roughly with the hips of the skeleton. When you are happy with
the positioning, save the orientation of the model using the
File->Save Orientation menu item. Use the name tutorial.ori
for now.
NOTE: When you import your mesh, GwynFlex may display a message
similar to, "Some closed sub-meshes in this model don't have
their own group. Create groups for them?" If this happens, click
Yes.
HINT: Use both the front and side camera views to center the hip
anchor inside your model, and switch between solid and wireframe
to get it aligned right. Use the menu item Model->Lock Position
to lock the model into this position. Use the Edit->Control Device
menu to select between the mouse and the keyboard for positioning
control. Often the keyboard gives finer control than the mouse.
- Make sure Skeleton->Rigid Bones is not checked, then use the
mouse or keyboard and different camera views to grab joints (other
than the hip anchor) and position them within your mesh.
For example, position the "right wrist" joint inside the right
wrist of your mesh. This will automatically adjust the length of
the bones to match your mesh. For fine adjustments, check the
Skeleton->Rigid Bones option and move the joint; this will
position the joint without changing the bone length.
HINT: To see what this should look like when you're done, start
by importing the "conjure13" pose and the q2gal.bnz bone set,
and the "conjure13EC63.obj" mesh. This mesh is already perfectly
aligned with the correct bone lengths for the Quake 2 female
space marine model in conjure13EC63.obj.
- When you are satisfied with the results, save your bones and
your pose (File->Save Bones, and File->Save Pose). Save them
as tutorial.bnz and tutorial,psz. This will make it easier to
start again if you have to quit GwynFlex for any reason before
the model is fully animated.
- Now it's time to associate parts of the mesh with bones.
Select Group->Add... and a "Select Group" dialog box will
appear. Each group is a set of related triangles in your mesh.
You want to select all of the triangles. Usually, the first
group listed (which might have the name of a pose, the name
of your model, or the name "mesh", for example) is a group
containing all of the triangles. Select this group and click
OK. Your model should turn blue. If any part of it stays
white, add more groups until it is all blue (be sure to use
the different camera views to verify that all is blue)
- Select Skeleton->Guess Bindings. This tells GwynFlex to guess
which parts of the mesh belong with each bone. It may take
a few minutes.
- Review the choices GwynFlex made - most likely, some of them
will be incorrect. To do this, check View->Bone Bindings, and
uncheck Model->Solid. Then click on a bone (not a joint). Most
of the model will be a white wire frame, but the triangles
that GwynFlex associated with the bone will have blue outlines.
Hint: use the Tab and Shift-Tab keys to move from bone to bone.
Use Model->Solid, and the camera views, to get a better look.
Note that if a bone itself is blue, it is a "reference bone"
and should not ever have any mesh bound to it. Reference bones
will be used in future versions of GwynGlex to attach weapons
and armor to the model.
- If you need to change the triangle set for the bone, make the
model solid, and click on the triangle you want to add or
delete. You can also use Group->Add and Group->Flood Add to
add triangles. Once you have adjusted the set of triangles
for a given bone, use Skeleton->Bind To Bone to update the
estimate that GwynFlex made. Repeat this for all bones.
- When you are satisfied with the results, save your bindings
using File->Save Bindings. Use the name tutorial.bnd for now.
- To make sure that your model's legs will touch the ground
when it is exported, verify that the Skeleton->Scale To Ground
menu item is checked.
- Now part 1 of the big finish. Here, GwynFlex will convert
the bone bindings into a set of poseable body parts and tell
you about any errors it encounters. For example, if there is
a triangle that is not bound to any bone, GwynFlex will
complain. It will also complain if the same triangle is
bound to multiple bones.
To start the process, select Model->Make Poseable and watch
the status bar. If an error occurs, GwynFlex will display
an error dialog box, and highlight the problem triangles
in blue for you to repair them. If no error occurs...
CONGRATULATIONS!
- One you finish making the model poseable, you can try different
Corvus animation poses on it. To do this, check View->Generated
Model, and then use File->Load Pose to bring in poses from the
motion capture database mocap.spz. If the poses look funny, you
might need to re-think which triangles are assigned to each
bone, and go back a few steps to try different bone / mesh
bindings.
- If you try a few poses and they look OK, you can make a flexmodel
(tris.fm file) to use in Heretic II. To do this, select menu item
File->Export->Flex Model. Name your output file "tris.fm".
It takes about 1/2 hour to generate a flexmodel, depending on
the speed of your computer. A flexmodel takes up several
megabytes of hard disk space - make sure you have enough free.
- Some errors can occur during flexmodel generation. GwynFlex
will tell you about these, and usually they mean you have to
go back and re-do your bone / mesh bindings. If you don't
get any errors...
CONGRATULATIONS!
- To try the model out, create a new folder in your Heretic II
folder called "base/players/tutorial". Copy the tris.fm
file that GwynFlex generated to there. You will also need
some skins for your model (that is a whole 'nuther story...)
For a start, use the skins from the Corvus model. They will
look very strange, but Heretic II won't load a model without
skins. The skins you MUST have in your base/players/tutorial
folder are:
!skin.m8, !skindmg.m8, corvus.m8, corvusdmg.m8, reflect.m8
Hint: You can take any skin you want and copy it to each of
these names for starters. An all-black skin will probably
look best at this point.
- To play-test your model, put in your Heretic II CD, start
Heretic II and use ~ to bring up the console, then type these
commands:
deathmatch 1
skin tutorial/corvus
map dmandoria
- I hope this mini-tutorial works well for you! We will be
publishing better tutorials and more complete documentation
about GwynFlex as soon as the rest of the bugs are fixed.
Sample meshes:
- The ZIP file includes three sample meshs, conjure11EC63.obj,
conjure13EC63.obj, and conjure14EC63.obj, to play with.
conjure11EC63.obj is the Styx1 model as he appears in the
conjure11 animation frame.
conjure13EC63.obj is the Quake 2 female space marine
model posed like the Corvus conjure13 animation frame.
conjure14EC63.obj is the Corvus model, as he appears in the
conjure14 animation frame.
- You can use the sample pose file, conjure11.spz, to load the
conjure11, conjure13, and conjure14 poses onto either of
these meshes, in case you haven't downloaded mocap.spz (2.5MB)
- The file voodoo.bmp is the Voodoo skin for the Quake 2 space
marine, modified to be 256x256 as used by Heretic II player
models and mapped onto the conjure13EC63.obj mesh.
Contacting the Author:
- You can reach Gwynhala, the author of GwynFlex, at any of
these addresses:
serotonin@earthlink.net
gwynhala@hereticii.com
ICQ 38345327
- GwynFlex is Copyright 1999-2000 by Christopher J. Burke
Portions are Copyright 1996 by Nigel Thompson
You can use GwynFlex and its output as you please,
but you are not allowed to sell GwynFlex.
Preview

Post a comment
Icon
Developer
Raven SoftwarePublisher
ActivisionEngine
id Tech 2Contact
Send MessageHomepage
Ravensoft.comRelease date
Game watch
Follow
RTX Remix
RTX Remix is a modding platform by NVIDIA, which allows modders to create stunning HD remasters of classic games (see all supported), with ray tracing and DLSS.
Learn more about this games compatiblity with RTX Remix and ModDB's collaboration with the Remix community to organize all compatible games. Hide this dialog.
Related Games
Heretic II
Adventure
Related Engines
id Tech 2
GPL
Related Groups

Activision
Developer & Publisher
Raven Software
Developer & Publisher
Tags