Tabu's XED modding site: Nuf.dk
Lightwave 7 download: Archive.org
Model Files: Moddb.com
Blender lwo export: Gitlab.com
Blender lwo import: Github.com
Texturing a Model for Showbox
This tutorial is not a modelling tutorial for LightWave, I presume you have some modelling skills before starting this, or have completed a model. I have included a model, scene and texture for you to play with.
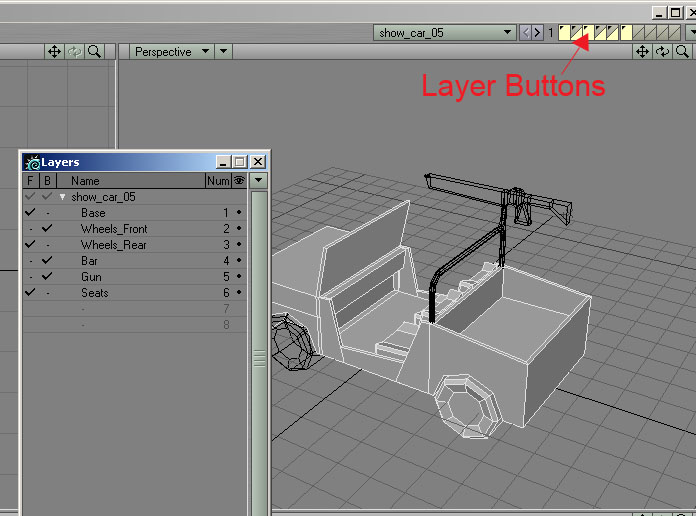
Now to get started load up your model in LightWave: modeler, it is important that all the parts you want to animate at a later time are put in different layers. As you can see on the showcar, I included 6 different layers, one with the base, one with the front wheels, one with the rear wheels, etc. The reason for this will be explained in the tutorial "Animating a Model for Showbox"
After the model has been loaded up in modeller, it is time to start making a UV map.
We are lazy, so we make an automatic UV map for this car, instead of making it manually, which of course will give a much better result. Make sure that all layers are completely visible, as you can see, some of the layers are in the background (the black parts). Only the fully selected layers will be affected (Yea.. I make mistakes too).
- Start by unwelding you model by pressing "Ctrl + u", this will unweld all points so each poly is an individual, and not share points with other polygons.
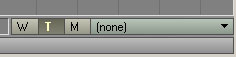
- Go to the bottom right in modeller and click the 'T'
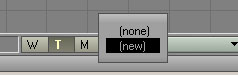
- Click on the dropdown menu where it says (none) and select 'new'.
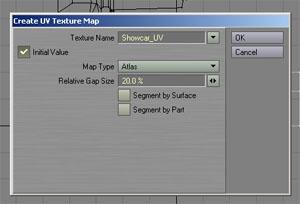
- Set up the following setting in the window that pops up, and press ok.
- Select the UV map you just created from the dropdown menu, where it said (none) before, it should be selected automatically, but if you reload the model, this is how you select the UV map again. (If we should be correct its not called a UV map, but a texture map, however, its easier just to call it a UV map).
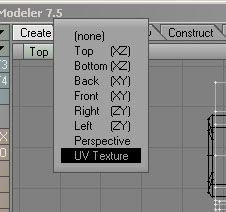
- In one of the viewports select UV texture from the dropdown.
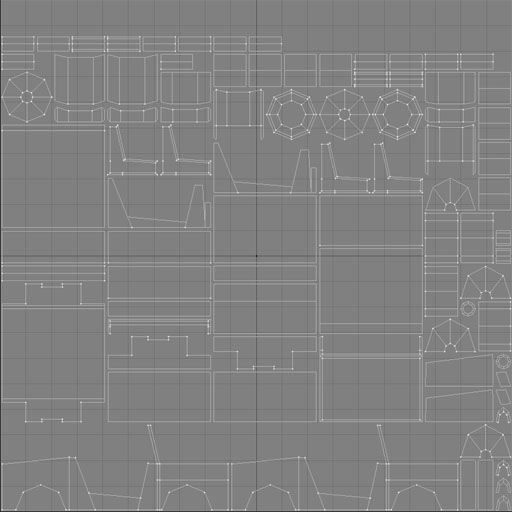
- Press '0' on the numpad to maximize the viewport.
- Press 'a' to make the model fill the entire viewport.
- Take a screendump by pressing the "Print Screen" button on your keyboard. Load up Photoshop.
- Create a new image, and paste the screendump into it by pressing "Ctrl + v".
- Crop the image down so it edges of the UV frame fit perfectly, using the crop tool.
- Resize the image to 512 x 512 (Image → Image Size…).
- Make some guidelines for where we can paint.
We need the white lines to stand out. Do this by going Image → Adjustments → Brightness/Contrast… - Set brightness to -8 and contrast to 100.
- With the marquee tool select a piece of the black part.
- Select -> Similar and then press the delete button.
- Deselect the marquee tool.
- Create a new layer between the background and layer 1.
Start painting, you will notice that the white guidelines are there now. I'll insert a coloured number image for now.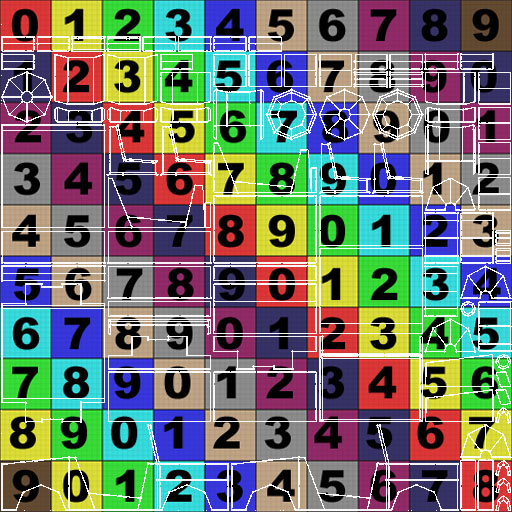
- Deselect the guideline layer so only the coloured numbers are left, then save it as a TGA image.
- Go back to Modeller and press '0' to go back to normal viewport mode.
- Select all surfaces by right clicking and dragging around the entire model.
- Create a new surface by pressing 'q'.
- Name it, I'll call mine "Showcar UV texture".
- Go to surface editor by pressing "Ctrl + F3".
- Click the 'T' for the colour channel.
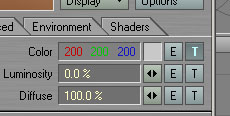
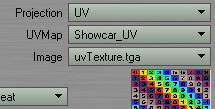
- Set the projection to UV, set the UV Map to the one you created and set the image to the TGA you exported from Photoshop.
- Save your model in your units library together with your textures, the path should look something like this: "c:\games\GC2_testbed\units\f1_cc\showcar"
- Load the car into LightWave: layout, do this by pressing the dropdown right of the layer settings, select "Send Object to Layout".
- In the layout, select file and save scene as Showcar in the same library (remember to add .lws at the end of your scene file).
- Fire up Showbox and load the scene file.
- Select the (stand) state when asked, and press ok.
Congratulations, you now have your first working model in Showbox. Save it and it will be ready for implementation.
Animating a Model for Showbox
This tutorial will take you through the steps of animating a model for Ground Control 2. Implementing the model into the game is not part of this tutorial, this is strictly about Lightwave and Showbox. Before starting on this tutorial, it's a good idea to read the "Texturing a Model for Showbox" first, as it will take you through some stuff that you will need to know in order to complete this tutorial.
Once you've loaded up your model in modeller, it is time to start rigging it.
- Start by selecting the layer called "Wheels_Front", so only that layer is active.
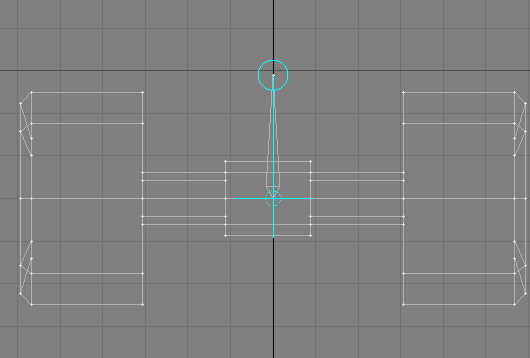
Hint: To bring up the layer browser press "Ctrl + F5". - In the top view, place a skelegon with its base exactly in the centre of the wheel. To place a skelegon: Create → Elements → Skelegons
- Deselect the skelegon tool by pressing the button again.
- Switch to polygon selection mode by pressing "Ctrl + h".
- Select the bone and then rename it to "Front_Wheel_Bone".
To rename a skelegon: Detail → Other → Rename Skelegon - Select the "Wheels_rear" layer and follow the steps again to place a skelegon on this layer as well, and rename it to "Rear_wheel_Bone". Be sure to deselect the skelegon tool before selecting it again to draw the skelegon, or it will draw from the first bone.
Info:
It is not strictly necessary to place the bones in the layers they shall represent, I do this to make it simple, you could create a layer all for bones instead. - Now select the "Base" layer and create a skelegon in the middle of the model. Name it: "Base_Skelegon"
Weightmapping
Now we want to put a weightmap on the different parts of the model connected to the skelegons.
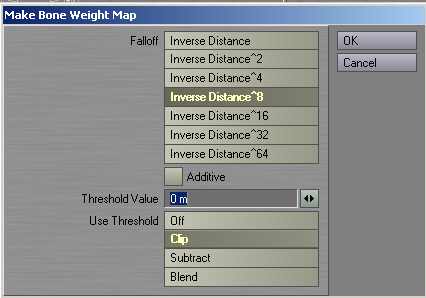
- Create a weightmap for each skelegon, by using the "Bone weight" tool:
Map → Weight & Colour → Bone Weights - Set the "Threshold Value" to '0m' and "use threshold" to 'clip'. Press ok.
- In the bottom right select the weightmap called "Rear_Wheel_Bone". Make sure that the 'W' is selected.

- Select the "Rear_Wheel" layer and select all polygons in the layer.
Important: Make sure that only the polygons for the rear wheel animation are selected, if any other polygons are selected they will be part of the animation as well, and it'll be a mess to get rid of them. - Set the map value, using the "Set Map Value" tool, to 100% for the selected polygons.
The "Set Map Value" tool can be found at: Map → General → Set Map value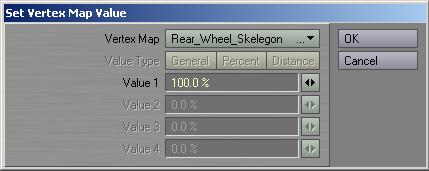
- Repeat step 3 - 5 again for the front wheels.
- Select the weightmap "Base_Skelegon"
- Select all layer except for Rear_Wheel and Front_Wheel and select all polygons.
- Set the map value to 100%.
Animating in Layout
Here we create the stand scene where no animation is present and the walk scene where the wheels will turn.
- Merge all layers so there is only one layer.
Details → Layers → Flatten Layers - Send your object to layout.
In top right corner to the right of the layer buttons, select "Send Object To Layout"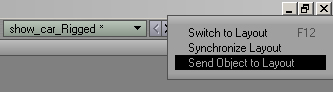
- Switch to layout.
- Bring up the "Scene Editor" by pressing "Ctrl + F1".
- Select show_car, and convert skelegons to bones.
Items → Add → Bones → Convert Skelegons into Bones
It should say 3 bones created. - You should now have 3 bones and the "scene editor" should look something like this:

- "Save Scene As..." and name the scene "show_car_Stand"
File → Save → Save Scene As…
Or by pressing "Shift + s" - In scene editor, select the "Rear_Wheel_Bone".
- Select the rotate tool:
Items → Tools → Rotate
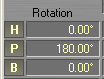
Or by pressing: 'y' - In the lower left corner, set the pitch rotation to 180
- Set a key at frame 30.
Press return until the "Set Motion Key" dialog appears.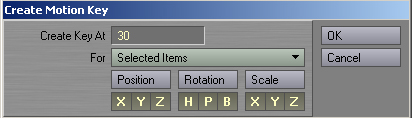
- Set the pitch rotation to 360.
- Set a "Motion Key" at frame 60.
- Repeat steps 8-13 for the "Front_Wheel_Bone".
- Save the scene as "show_car_walk.lws"
Importing into Showbox
The final step!
Info:
Showbox cannot have polygons with less than 3 vertices. Skelegons only have 2 Vertices, and if left in the model, it will make Showbox crash with the “BOOOOOOMM!!” error we have learned to love so much.
I suggest that you save the model with the skelegons in under another name, for future use.
- Switch to modeller.
- In polygon selection mode, select all 3 skelegons and delete them (press the delete key).
- Save the model.
- Open your file explorer and copy all models, scenes and texture files to your working directory. The path should look something like this: "c:\games\GC2_testbed\units\f1_cc\showcar\"
- Launch Showbox
The Showbox executable should located somewhere like this: "c:\games\GC2_testbed\Showbox\" - Open the "showcar_stand.lws" and select the (stand) state.
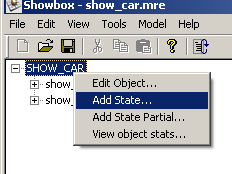
- Right-click on the capitalized "SHOWCAR" and Select "Add State..."
- Open "showcar_walk.lws" and select the (Walk) state.
You should now have a working, animated model ready to implement into Ground Control 2.
Tip:
To watch the working animation open the set active state dialog, and click back and forth between the stand and walk state.
Do this by selecting: Model → Set Activation State
Note:
In order for your model to work, it is important that it has a UV map, ONE surface and a texture.