
Probably the most important tool is the Object Properties window:
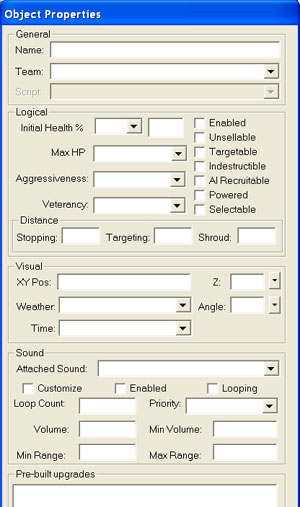
This window pops up whenever you open up World Builder. It will be used to do anything from picking textures (the look of the terrain) to resizing how big your dig/mound tool is.
These are the tools in the bar at the top of the World Builder:
![]()
- A: New World Builder Level (note that this allows you to choose how big your map is and how high the ground is)
- B: Open (opens a previously saved map)
- C: Save (save current map)
- D: Cut (cuts everything in your map into the clipboard, allowing you to paste it into another)
- E: Copy (makes a copy of everything in your map, allowing you to paste it into another)
- F: Paste (pastes the cut/copied terrain)
- G: Ruler (can be used to see if lengths are even; click circular measurement for measurements in a circle)
- H: Arrow (allows you to look around, left-click to select objects)
- I: Lock Angle (makes it so that you can't spin the camera angle of the map)
- J: Height Tool
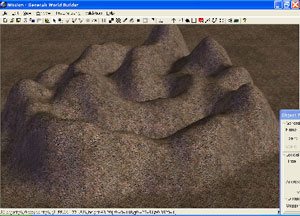
- K: Mound (raises the height of the ground for hills, mountains, etc.)
- L: Dig (digs into the ground; for rivers, lower terrain, etc.)
- M: Smooth height
- N: Mesh mold
- O: Water (creates a water area)
- P: Paint single tile (paints a single square on the terrain map for finer detail)
- Q: Paint large tile (select which number tiles you want to paint; good for mountains)
- R: Eye dropper (select terrain that's already on the map, for quick selection)
- S: Spill paint (Fills entire map with a certain texture)
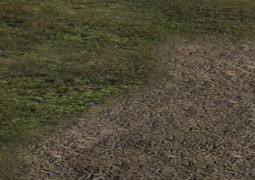
- T: Auto edge out (blend tiles together to make a non-blocky look; examples follow)
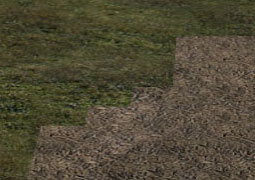
![]()
- U: Auto edge in (used for blending three different textures together)
- V: Blend single tiles (like auto edge in and out, but so that you can create a finer-detailed look)
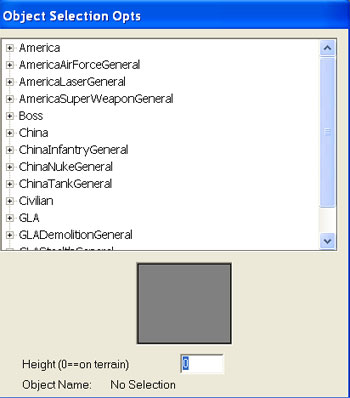
- W: Place object (used for placing objects on the map, such as buildings)
- X: Road/bridge creator (place roads on the map, helping players see paths to destinations and making cities look realistic. Bridges can be placed on the map to allow units to cross a body of water or over high ground.)
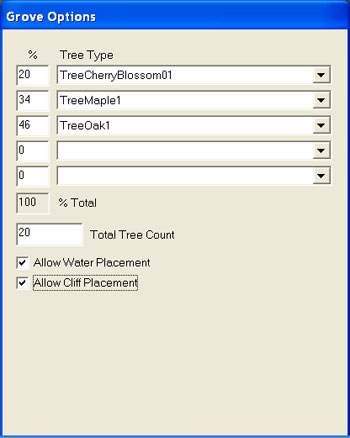
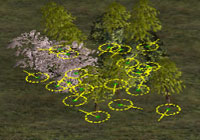
- Y: Shrubbery placer (useful for placing a lot of trees/shrubs on a map: examples below)
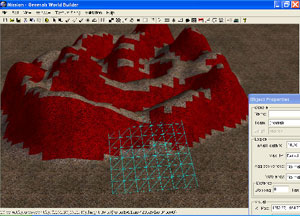
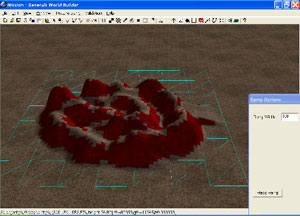
- Z: Ramp tool (place passable paths through mountains or level land [examples follow]. You can press CTRL+I to see impassable areas.)
View -> Show Impassable Areas (CTRL+I) (before and after):
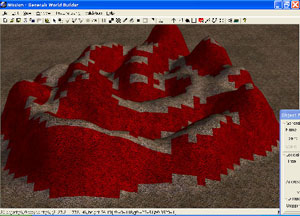
Using the Ramp Tool (before and after):
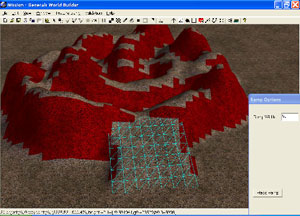
WARNING: If you make a ramp bigger than 350 and place it, World Builder will crash!
- 1: Smudge placement (adds burn marks and smudges to the map)
- 2: Fence creator (places a straight line of objects [i.e. a fence] quickly)
- 3: Build List (Removes object from build list; not recommended)
- 4: Waypoint (adds waypoints to the map; explained in more detail later)
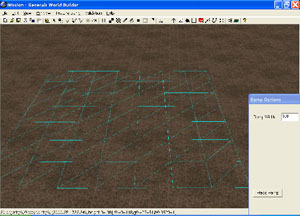
- 5: Polygon/area tool (creates an area on the map; more explained later)
- 6: Border (creates a new map border [note that it must be activated with scripts])
- 7: Scripts (scripts allow you to do control various aspects of your map [everything not related to terrain, lighting, and weather])
- 8: Teams (sets teams of units that can be created for a specific players; activated by scripts)
- 9: About (tells you World Builder's version information)
CnC Labs


A very great tool !
Cheers.
thanks so much for this tutorial now I can easily make any map without cliking on those things on up