
We'll start off by putting a nice looking texture on the ground.
World Builder always starts you out with that ugly gray ground that you see. Go to your ![]() paint spill tool and pick a terrain inside of your object property box. You will see a number of choices, but to start, click the
paint spill tool and pick a terrain inside of your object property box. You will see a number of choices, but to start, click the ![]() button and then click 2%grassmediumtype3 and spill it on the ground. Everything should now look like this:
button and then click 2%grassmediumtype3 and spill it on the ground. Everything should now look like this:
Making Mountains with World Builder
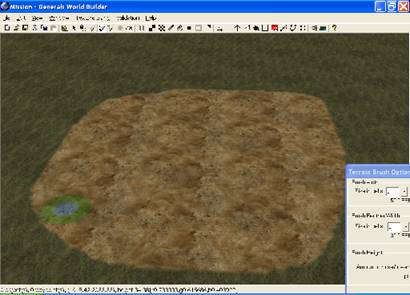
Now use the ![]() mound tool to create some mountains. In your object property box, click Brush Width: 5, Brusher Feather Width: 3, Amount to raise/lower: anywhere between 15 and 25 is fine for now (I usually use 25 for mountains). Note that the highest height is 316 (very tall).
mound tool to create some mountains. In your object property box, click Brush Width: 5, Brusher Feather Width: 3, Amount to raise/lower: anywhere between 15 and 25 is fine for now (I usually use 25 for mountains). Note that the highest height is 316 (very tall).
While we're doing this, be sure to turn on show impassible areas in the view menu (CTRL+I).
The trick to making realistic mountains is A: texture, B: how misshaped and unsymmetrical it looks. I’ll show you how easy it is to make good looking mountains. Try to follow along as close as you can, or create your own style.
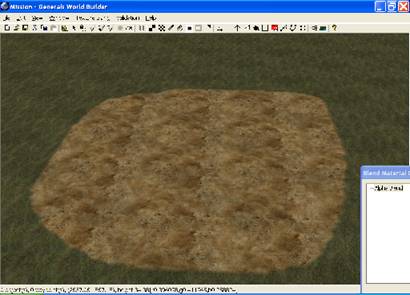
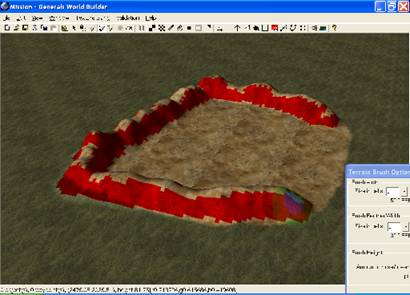
First lay down texture using the ![]() large tile tool like so (I used desert2 > 11%clifflargetype12):
large tile tool like so (I used desert2 > 11%clifflargetype12):

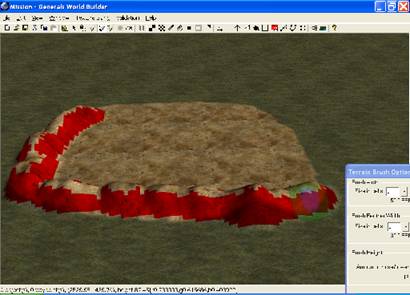
Then use the ![]() auto edge out tool (click and hold at the new texture, letting go when at the other texture) and blend the tiles to make it more realistic looking. This is what you get:
auto edge out tool (click and hold at the new texture, letting go when at the other texture) and blend the tiles to make it more realistic looking. This is what you get:
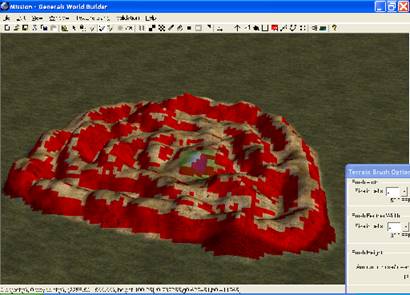
Now, use the mound tool to make some mountains (note that you can hold down the mouse to use this tool, instead of repeatedly clicking).

Be sure to fill in the gaps in the middle...

You can then press CTRL+I to see what it looks like inside the game:
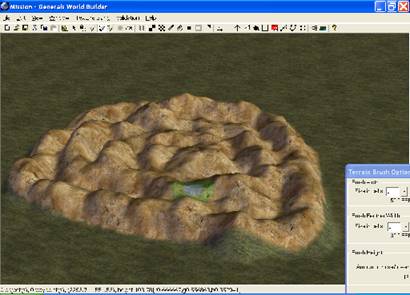
Note: A little grass on the mountain is alright. In fact, I think it makes it look like the mountain has some natural moss on it.
» Adding Water
Now, you might have noticed a blue area around your map if you zoomed out far, or if you went to the edges of your map. That blue area is the default water area. However, you can delete this using the Delete (not backspace) button. Note that the same holds for all objects/waypoints/areas/etc. The default water area is set to a height of 7. However, if you dig your land to below 16, it will go into the water. This makes it confusing because the terrain height and the water height are using different measurement systems.
Create a pool of water using the dig tool, similar to the example below:
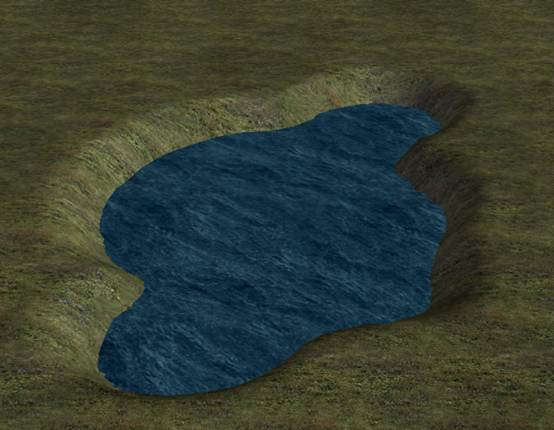
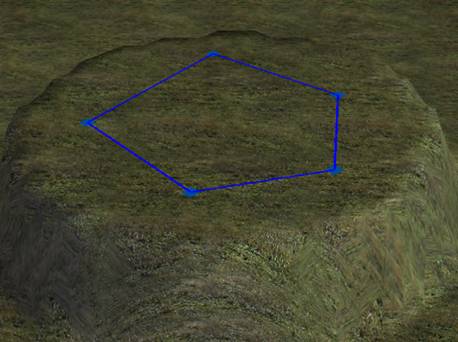
That is one way to make a simple pool of water. You can also make water on top of a mountain, as seen in Tournament Desert. To do this, click the ![]() water tool and click on the map about 5 times (note: you cannot zoom in/out or move the camera at all while you are putting down water, for some reason). Then make a flat mountain by using the mound tool and using these settings:
water tool and click on the map about 5 times (note: you cannot zoom in/out or move the camera at all while you are putting down water, for some reason). Then make a flat mountain by using the mound tool and using these settings:

Then move/place your water handles (the little blue square things) on the cliff, like so:
Next, dig a small hole (about 25 feet) into the middle of it.
Then use the object property box to raise the height of the water, like so:
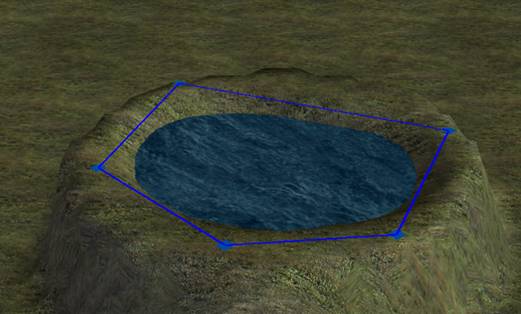
You can then use your cliff skills to make it look a bit more natural:


If you are unsure how that was just done, you should go back to the second lesson.
Your map doesn't have to look exactly like my sample one. In fact, I encourage you to just "go with it" if you make a mistake. It doesn't have to be perfect, especially since it's your first map. Now let's move on...
» Some Mapmaking Tips
First of all, you should have some plan for what you are doing before opening up World Builder. For each map, you should start by drawing or opening up Paint (comes standard with Windows) and just painting what you want it to look like.
After you've taken a few minutes to decide what the basis of your map is, now it's time to open up World Builder.
Pick your terrain/texture type from the spill paint tool, and choose the one you'd like inside the object property box.
For this example I used the 2% grass medium type 3:
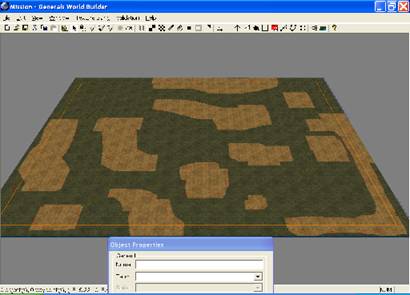
I'd start out by, not using the dig/mound tool, but by marking every section by placing areas with the ![]() polygon/area tool. Areas can be used to remind you where you want your mountains.
polygon/area tool. Areas can be used to remind you where you want your mountains.
Here's what I did: (I put a mountain-looking texture on the areas I wanted mountains as a reminder; note: unlike the water tool, you can zoom in/out and move the camera during the placement of areas)
Note that the simplest of ideas are usually the most enjoyable.
You've probably noticed that I went outside of the areas with the mountain texture. That's because it doesn't need to be exact for now. You just need to be able to get an image in your head about what it's going to look like. This is probably the fastest/easiest way to see what you need to do. Now all we have to do is color in the lines (paint the mountains).
This can take anywhere between 5 minutes and 2 hours to do. But for this simple 1v1 map, it only took me 18 minutes. Here's what I got:
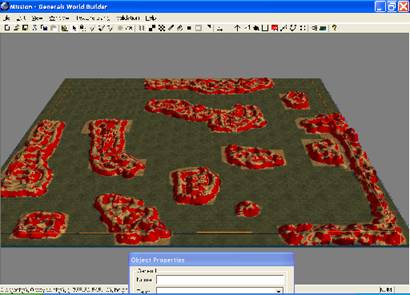
Now we have to shape it up a bit to get rid of the excess mountain textures.

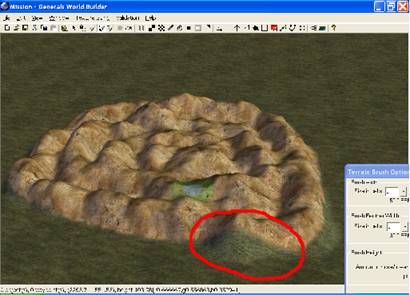
One thing you'll most likely see is that you'll have a straight line of red (impassable), but then you'll have a small hole that's not red (passable). What is passable/impassible terrain?
- Passable: units can cross over it
- Impassable: units cannot go on it (i.e. mountains, water). Anything that has an angle over 89.99 degrees is impassible.
We need to make the outside mountains all impassible, otherwise when units come close they'll go onto the mountains. To do this we need to use the mound tool a bit more, or we can use the paint large area tool and check the "Paint passable/impassible terrain" option, shown below:
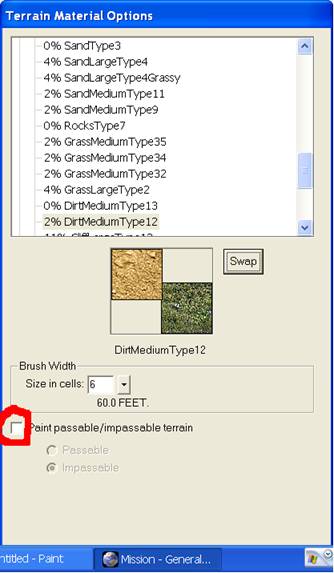
Selecting the impassible option will make everywhere you paint impassible. This works vice versa with painting passable terrain.
You'll notice that when you click the paint passable/impassible terrain option, the dialog will look like this:
This is normal.
Something else you might consider doing is this:

Having a small opening inside a mountain by someone's base is good for people who like to use Hero units or other sneak attacks. But the opening as shown above stands out, so we want to elevate it a little:

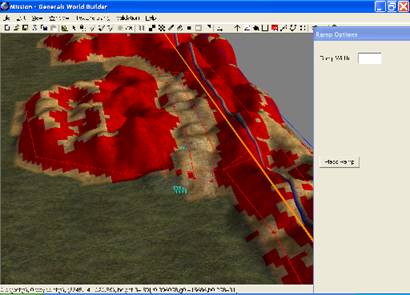
Now use the paint tool to give it its own unique pattern color to stand out. Then use paint passable/impassible areas to make it passable. (If World Builder won't let you paint passable use the ![]() ramp tool to level it out.)
ramp tool to level it out.)
To use the ramp tool simply click and hold on the places you want the ramp. Then, inside the object property box, select how wide you want it, and then click place ramp.

Repeat until it is all flat enough to move over...
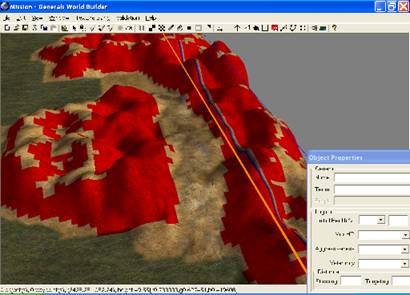
If you have trouble making it flat, use a smaller width for the ramp.
A few general tips on how to make terrain creation easier:
- You can go to View->Show impassible areas, or press Ctrl+I
- View->Show from top down view
- View->Show map boundaries
- You can hold down most tools when you use them [i.e. mound and paint tools] to cover large areas.
- If you have a mountain near the border of the map, make it a little outside the border to make it look more realistic in game. This will make the mountain appear as though it continues on, instead of abruptly ending.
- When using the mound tool, the greater the brush feather width is, the more the "mound" will resemble a "hill".
- In the object property box, when selecting water areas, you can transform it into a river.
- Ctrl+Z = Undo: undo the last thing you did (very useful)
- Shift+Ctrl+Z = Redo: used to undo whatever you just undid by mistake
CnC Labs

Is this a new tutorial or a reupload?
New tutorial
thanks so much bro I was asking a lot of how the map makers make mountain bases passable and how do they even do the terriran, thank you so much for this it helped me lot I appericate your work, I wish if I can make tutrial on how to make cinematics to help the community but idk how, can you say how you make toturials like this, anyway thanks so much:)