| Posts | ||
|---|---|---|
| Adding color and textures | Locked | |
| Thread Options | ||
| May 25 2009 Anchor | ||
|
I just started trying to learn some of 3D S Max and Softimage to get a jump start on how it works before my Modeling class start in a few months. I have been playing with shapes and manipulating them but I cant figure out how to give the shapes texture like stone or metal or brick ect. I have uploaded a file so that anyone can see what I have and maybe help me figure out how o add fire in the spheres or a stone texture to the rest of the shapes. URL of my file... savefile.com/files/2115611 Sorry about the shabby link. I havent been registered for 7 days yet so I can put links in my posts yet |
||
|
|
May 25 2009 Anchor | |
You should be looking up tutorials for UV Mapping. --
|
||
| May 25 2009 Anchor | ||
|
Thank you. I have been watching tutorials and have learned a few things. Thanks for letting me know what to look for since I'm not familiar yet with much of the terms |
||
|
|
May 26 2009 Anchor | |
No worries, its hard to get into this biz without knowing the terms. --
|
||
| May 26 2009 Anchor | ||
|
Ok, I figured out how to save custom textures I have made with photo shop into the pictures folder under addons in the Softimage directory and apply them to my objects using textures/add new/image using xz or yz or spherical and cubical. I'm not sure what UV does. What I can't figure out is how I put a face skin on a moddeled head or how to add oradjust the lighting. I cheated and loaded a premade head from the program and changed it up some. Anyone know the simplest way to put a face on the head or what kind of tutorial I should be looking for. Leonard from the Soft Image community has many nice tutorials on there, but I find him using short cut keys often and what he is explaining things and I only know a few short cut keys at the moment. |
||
|
|
May 26 2009 Anchor | |
As I said UV mapping is the easiest way possible. UV mapping basicly means that your mapping faces of a model to a flat surface, once you have created the uv map you then export a overlay that you can apply any image and simply paint your face on. After that you just simply apply the image you drew over the top of the overlay (it does not have to be the same image) and it should correctly bind. A great example of this would be if you created a cube out of paper, the flat surface before you fold it into a cube would be the result of a uv map. --
|
||
|
|
May 26 2009 Anchor | |
|
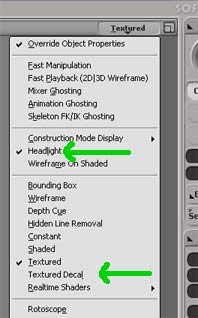
You can save the texture images anywhere, not just in the project directory (this just helps keep all your files organized). Default Projections: Once you get into more complex shapes, UV mapping can become trickier as you'll have to start applying sub-projections, and manually tweaking the UVs. This is where you are going to want to find tutorials for Softimage's Texture Editor (shortcut is Alt+7), and read up on help-file articles such as "Creating Subprojections". There are programs and plugins you can get which speed up the unwrapping process as well. I use Roadkill UV. Two ways to get a quick lighting boost during texturing, is to either change the viewport to Texture Decal, or to enable Headlight. Headlights will light the scene from several angles (handy for modeling), and Texture Decal gets rid of lighting and simply displays the color at 100% values (handy for texturing) Edited by: Cryrid |
||
| May 26 2009 Anchor | ||
|
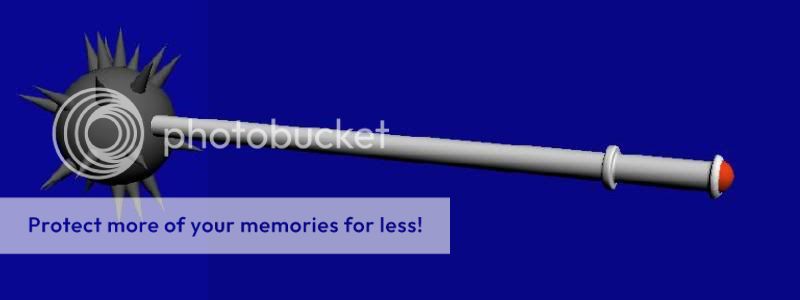
Thanks Cryid, that reply was a big help Well thanks to all of everyone's help in stearing me in the right directions on where to find material to learn to model. I finally created my first model after a week of reading and watching tutorials. |
||
| Jun 22 2009 Anchor | ||
|
Softimage XSI also has a really nifty projection method called Walk on Mesh, which can create distortion-free UV mapping on curved and irregular shapes which would otherwise be complicated or tedious to UV map properly. You won't need it for the simple models you're doing (good job on the spiked skullbasher :) ), but remember it when you get to more complex shapes, it can be a real timesaver! When you are done UV mapping and have arranged your UV map in the XSI texture editor, another good thing to remember is the Edit->Stamp UV Mesh command. Edited by: ManSh00ter |
||
| Jul 29 2009 This post has been deleted. | ||


Only registered members can share their thoughts. So come on! Join the community today (totally free - or sign in with your social account on the right) and join in the conversation.