Tutorial originally posted on Massassi.net. Mirrored here for archival purposes
Terrain in Bryce
What you will need:
- Bryce 4
- Paint Shop Pro (or any paint program that crops images)
- Desktop at 800x600
- 10 Minutes :)
Load up Bryce, make a new terrain, doesn't matter about the shape for now. Select the top view from the 1st triangle menu on the left

We need to use the Top View, because a 3D view from the top doesn't work, you will not see all the sides of the mountain!

We can't zoom in top view, but there's a work around for that, in a bit.
Right, now make a terrain, Press the small "E" button, which is at the bottom right of the mountain, in top (vector) view.
Make a nice terrain, however you want, but try to avoid solid black colours as bryce doesn't texturize these ?.. I've made a little valley

Also avoid using noise and spikes, as these may be too complex for our valley. Eroded is cool though, makes nice slopes.
Right, now the tricky bit, Bryce unfortunately doesn't save its height maps, as far as I know, so press PRINTSCREEN on the keyboard,to copy the entire screen into the clipboard. Load up Paintshop Pro. Paste as a new Image, and you should see the entire Bryce screen.
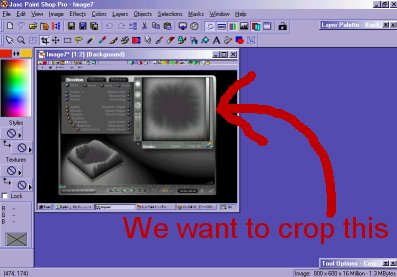
Zoom into the top left corner of the height map (the flat picture), so we can crop to a perfect pixel.Select the crop tool, and select the top left, make a small box for now. (I made the crop box green, so we can see what's going on)
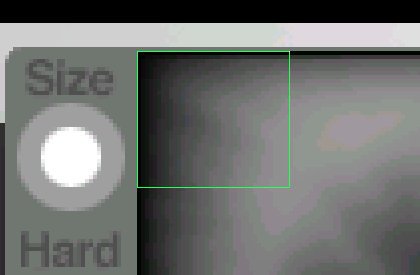
Make sure its on the image, and not the gray border like above. Let go of the mouse button, because its easer to crop horizontal,then vertical..... So select the right of the box, and drag it to the far right of the heightmap, Keep an eye on the size (at the bottom left of PSP) ,it should end at 256 pixels in width.

Now select and drag the bottom line down to the bottom of the heightmap, again keeping an eye on the size, and again 256 pixels high. When you have your crop box set to 256x256, double click inside it (careful not to move it whilst doing this) and Ta da! a 256x256 grayscale heightmap is born. Save it as HEIGHTMAP.PCX, in the root of your SS:SE folder.
Now the texture. Return to Bryce, and click the "tick" in the terrain editor, at the bottom right (if you haven't done already) to make our valley. Now were back in the main view.
Press the "M" button which is above the "E" you pressed before. And were in the "Materials Lab". I'm not going into depth on texturing, just play around. I selected "Planes & Terrains" and "Sunset Sandstone". Click the tick at the bottom to apply the texture.
Ok, last bit in bryce. Select the "File" menu at the top, and "Render to disk" Make the output size 1128x846. Why this size? well, its going to render all of the blank area around the mountain as well, but the texture in the middle will be 256x256 (this took me hours and hours of trial and error to get right!)
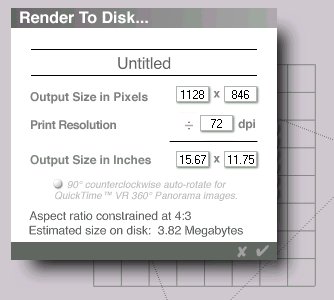
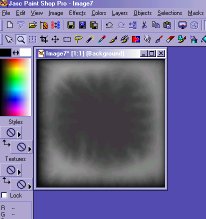
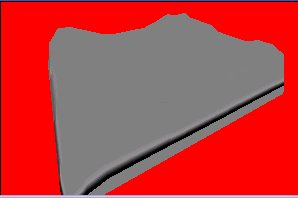
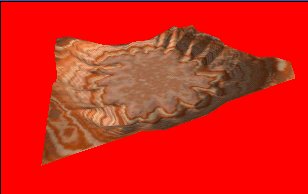
Hit the Tick, and save as a bitmap.......wait.....depending on your CPU and render settings.......This will be quite a large bitmap 3Meg at least, but don't worry. When its done, exit bryce, and back to PSP, Load the image you just made, is will look like this:

Again, we need to crop this down to 256x256, the same as the heightmap, but a little harder this time. Zoom to the top left, make sure you select all of the square as the edges might be slightly lighter, depending on Bryce's light and height etc. Forget the shadow on the gray plane, we don't need it.
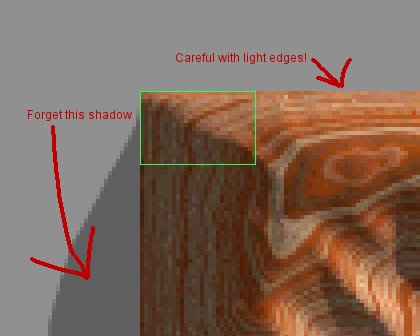
Now say our mountain heightmap, had pure black edges, they would not be rended, and would be gray on our output texture, this would make cropping and aligning a nightmare, so never use full black in terrain making.
Ok, crop to 256x256, save as TEXTURE.PCX, in the SS:SE root, and we have our texture for our level! Exit PSP.

Load up SS Ed, first we'll make a Texture out of our PCX. Hit the "Create Texture" button, and select normal texture. Find the TEXTURE.PCX, and load it in. Make the size in meters 1.00 x 1.00, and hit create.
Start a new world, and make a terrain primitive with these sizes
W = 256 Slices per W = 16 L = 256 Slices per H = 16 H = 0 Amplitude = 100
You can make it any size you want for W and H, but use 256 for now. Lastly select "..." button for the displace, and load out HEIGHTMAP.PCX. Now add the terrain to the main worldbase.
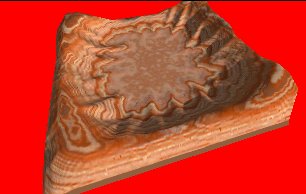
Almost done! Goto polygon mode, and double click the valley, so it all lights up yellow hit Q for the "tools info", and select the texture tab. Hit the ".." button, and load our "TEXTURE.PCX" in....ta da! a nice looking valley with shadows!
No for some quick optimization. Whilst the whole valley is selected in polygon mode (yellow), right click on it, and select "polygon manipulation", then "Join all possible polygons"
Goto the underneath of the valley, and select the one big polygon only. right click on it, and select "polygon manipulation", then "delete"
Now, if you have edges around the back, like my example, you might want to get rid of them...This is because I used the eroded feature in Bryce, which make these unneeded slopes
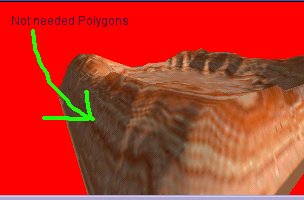
So, holding shift, go around the outside of the valley, selecting the edges.

When your all the way around, select "polygon manipulation", then "delete" and you should have this..
And that's it folks!
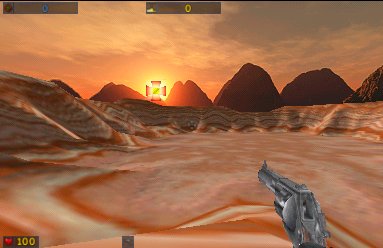
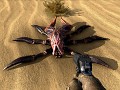
Have you ever seen sandstone like that before in serious sam?
-AMBience