Tutorial originally created by Dave Foster and posted at Morrowind-oblivion.com. Mirrored here for archival purposes. I've included the plugin that was originally downloadable here: Moddb.com
This tutorial is aimed at modders with moderate Construction Set skills. In it, I hope to provide a good grounding on how to make the transition from the Morrowind Construction Set to the Oblivion version. They are not completely different, although there are some differences that can seem somewhat confusing at first glance. I'll take it in steps, with step one explaining how to setup the auto-backup feature, and the rest of the steps explaining how to setup a quest which consists of the stages, the topics and the dialog. So, here goes.
- Step 1
Open up the CS and arrange it to suit your needs. Go into the preferences and navigate to the 'misc' tab. Set the autosave option to save every five minutes, then close the preferences screen. I have had a lot of crashes with the Oblivion CS, although they weren't attributable to the quest making functions. But, it pays to play safe with some of these Beshesda tools which can be quite flaky at times. You may get an error when you attempt to save this preference. If so, ensure that there is a folder called 'backup' in your 'data' folder, then create a file with notepad called 'AutoSaveDEFAULT.bak' and save it in the backup folder. Now, if you get a crash in the middle of your work, you will only lose five minutes at the most. Should you need to restore to this backup file, just take a copy of it, move it into the 'data' folder, move your current .esp file somewhere else, then rename the backup file to the name of your original .esp file.
- Step 2
So, lets get started with the mod. This is going to be one of those simple 'kill the baddy' quests that you've seen many, many times before. There are two characters, so we need to create two new NPC's for our quest. The best way, as always, is to copy an existing NPC, change some of the stats, AI etc. then save with a new ID. I like to save time, so that's what we'll do. In the object window, scroll down to the NPC branch, then Breton, Male, and find 'AntoineBranck'. Double Click on him for his personal details screen. Here it is.
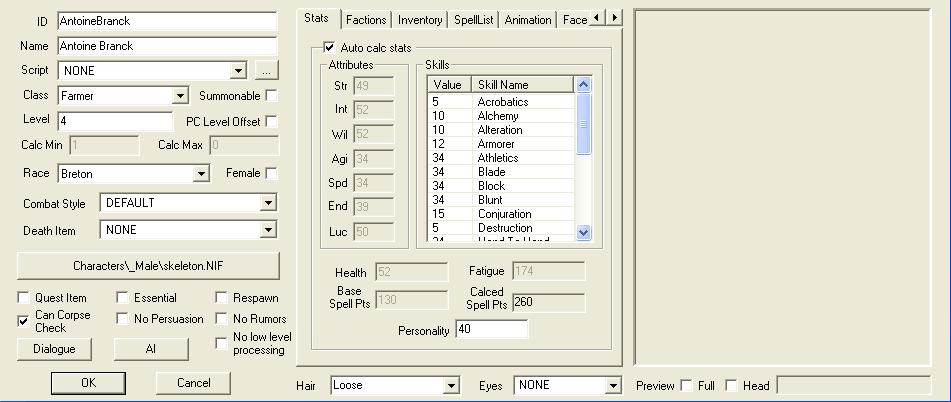
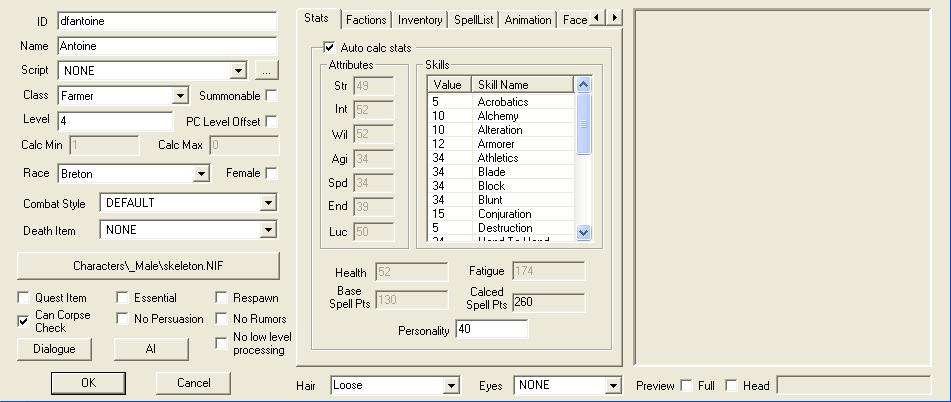
Change his details to those in the image below. *IMPORTANT* Ensure you change the ID right away and save it, otherwise, if you forget, you could end up getting into a bit of a mess, and we don't want that. I also removed his faction memberships to make sure that nothing could mess up the quest.
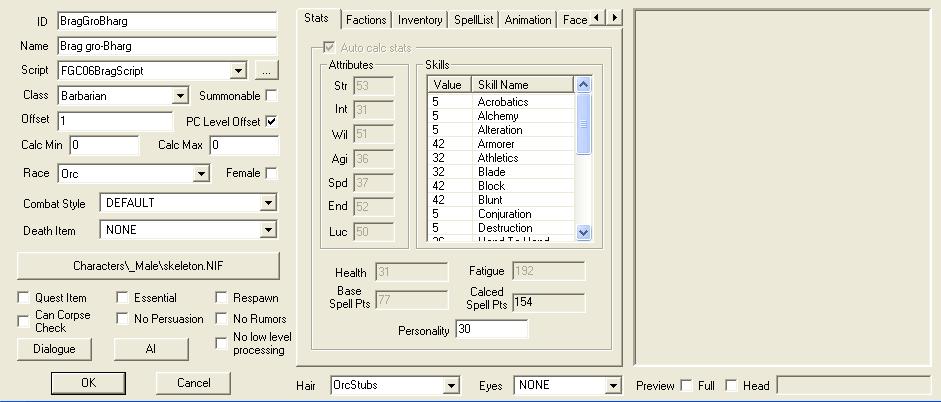
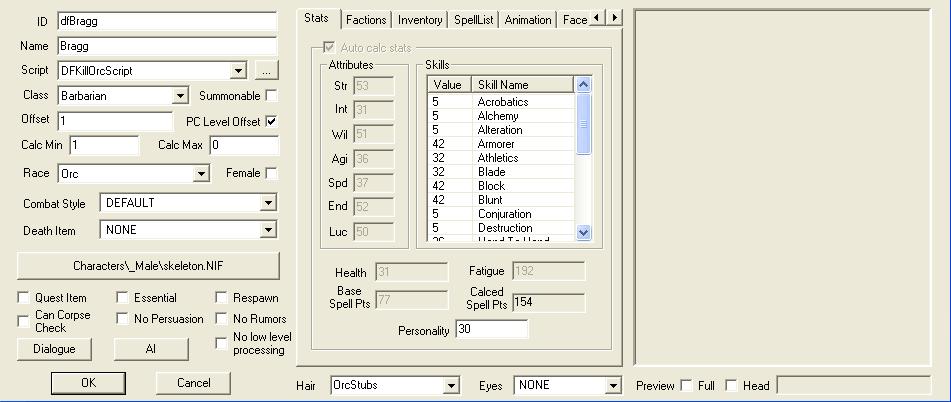
Now do the same with the second protagonist. His name is BragGroBharg and he is an Orc. Here are the two screens for Brag. Just ignore Brag's script for the moment, and I'll come back to it. I removed his Fighter's Guild faction stuff as well.
You now need to find a suitable cell to put these two character into. Choose either an interior or exterior cell, preferably one with no other NPC's to get in the way and spoil the fight.
- Step 3
Go to the Character menu and select Quests. This brings up the Quests screen as shown below.
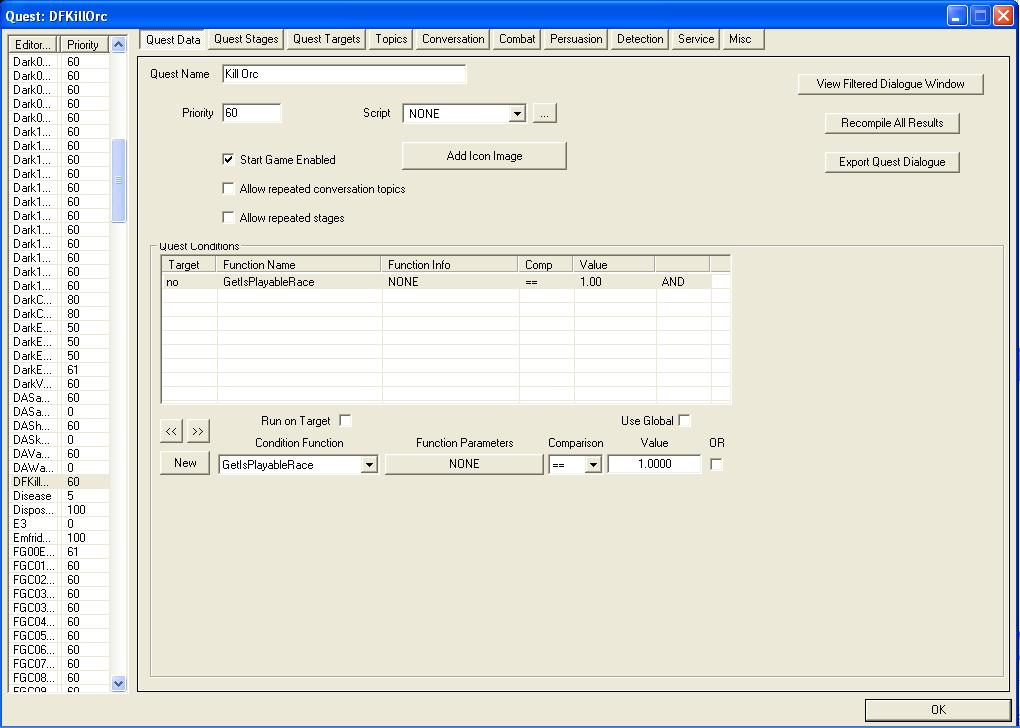
Click in the left panel, select 'New', and call it 'DFKillOrc'. This is the quest ID. Now, scroll down the quest list, find your new quest and select it. Give the quest a name 'Kill Orc', priority 60, and check the box 'Start Game Enabled'. Now, you need to ensure that this quest is made for a playable race, since, unlike Morrowind, the NPC's in Oblivion can have everyday quests. To do this, go to the bottom left of the quest conditions and click on the 'New' button. Set the conditions according to those in the image. This completes the step of setting up the quest data.
- Step 4
Click on the quest stages tab. This is similar to setting up the journals in Morrowind. There are three stages to this quest, so we need three entries in the index column. I have used 10, 20, 30, although the numbering scheme is not important. For now though, since this quest is based on my numbering, set them up accordingly. Right click on the top line, select 'New', and insert the value 10. Do the same for index 20 and 30. Here's the screen for index 10.
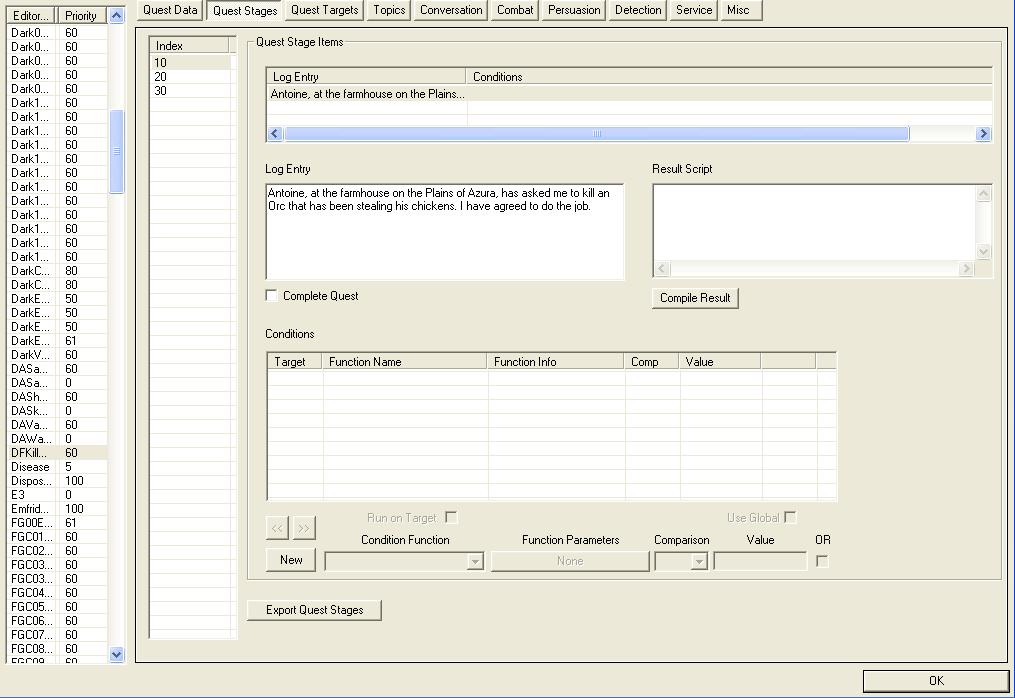
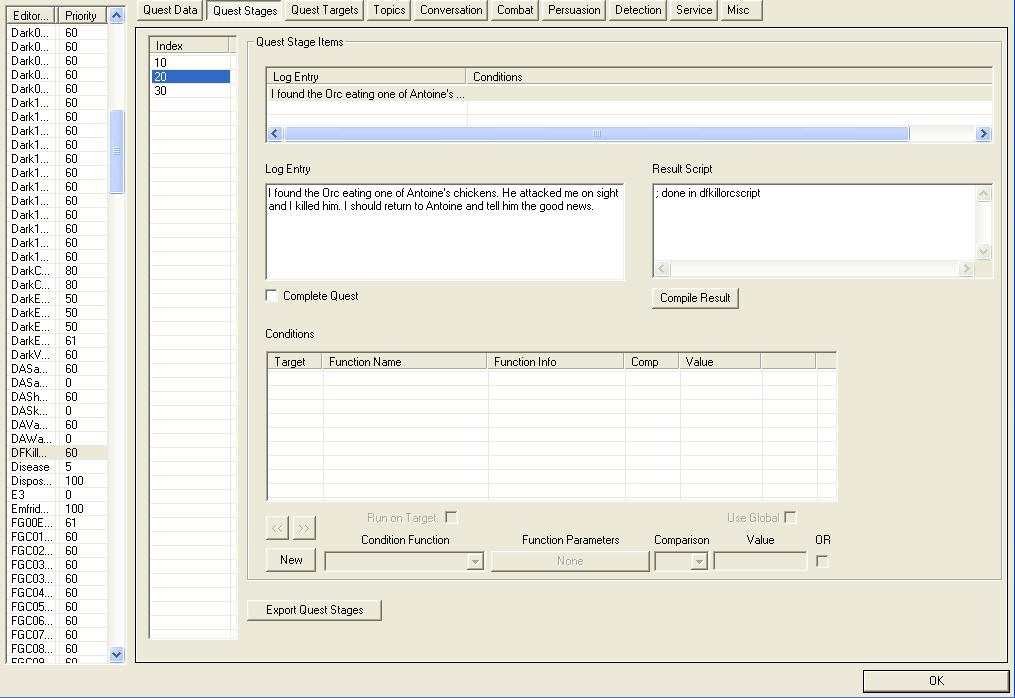
Complete the 'Log Entry' box as shown. Now select index 20 and do the same.
Finally, complete the 'Log Entry' box as shown for index 30.
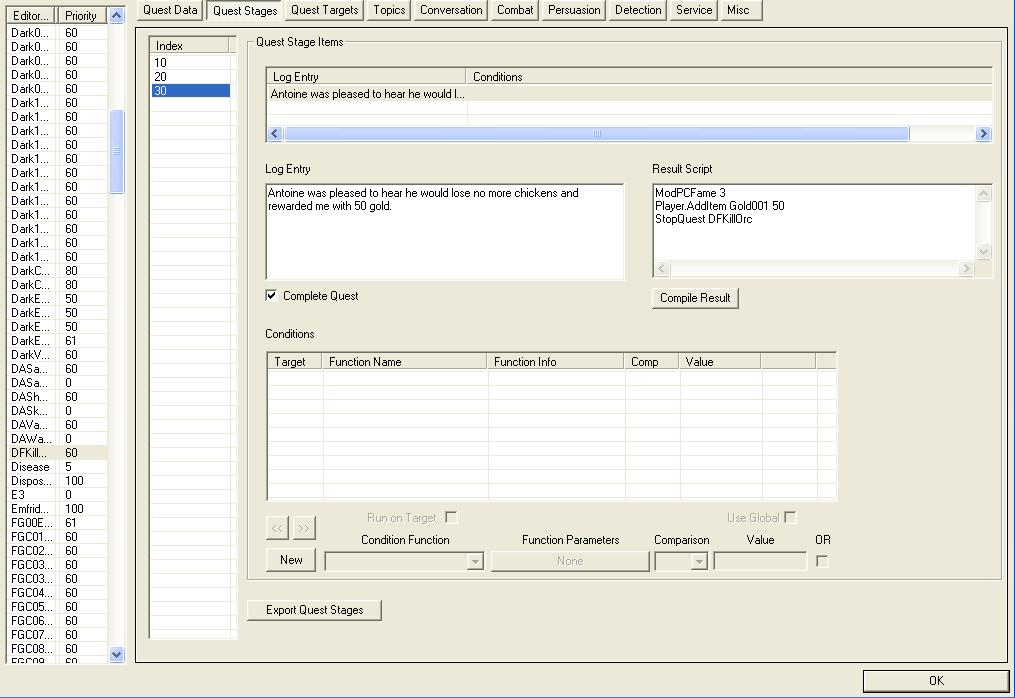
Since this is the last stage of the quest we need to mark the end and set some results. Mod the players fame, ModPCFame 3, give the player a reward, Player.AddItem Gold001 50, and stop the quest, StopQuest DFKillOrc. Don't forget to tick the 'Complete Quest' box. That's the stages done.
- Step 5
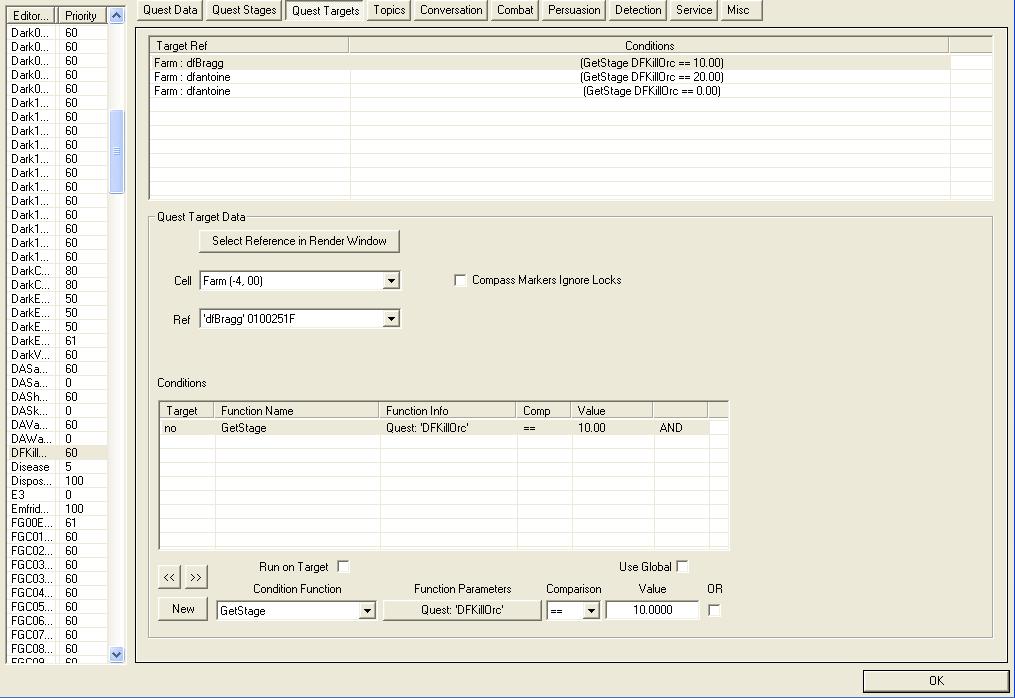
Now onto the quest targets. These are the NPC's that are involved in the quest, their location, and the stages in which they have some dialogue. Click on each of the targets in turn, and you will see the individual screen that relates to each one. Note: I have only included a screen shot here of the screen as it looks for Brag. What you see on each of the other two are the conditions for Antoine.
- Step 6
The next three screens show the topics that are used in this quest. There is one for 'greeting, one for 'killanOrc' and one for 'stealingchickens'.
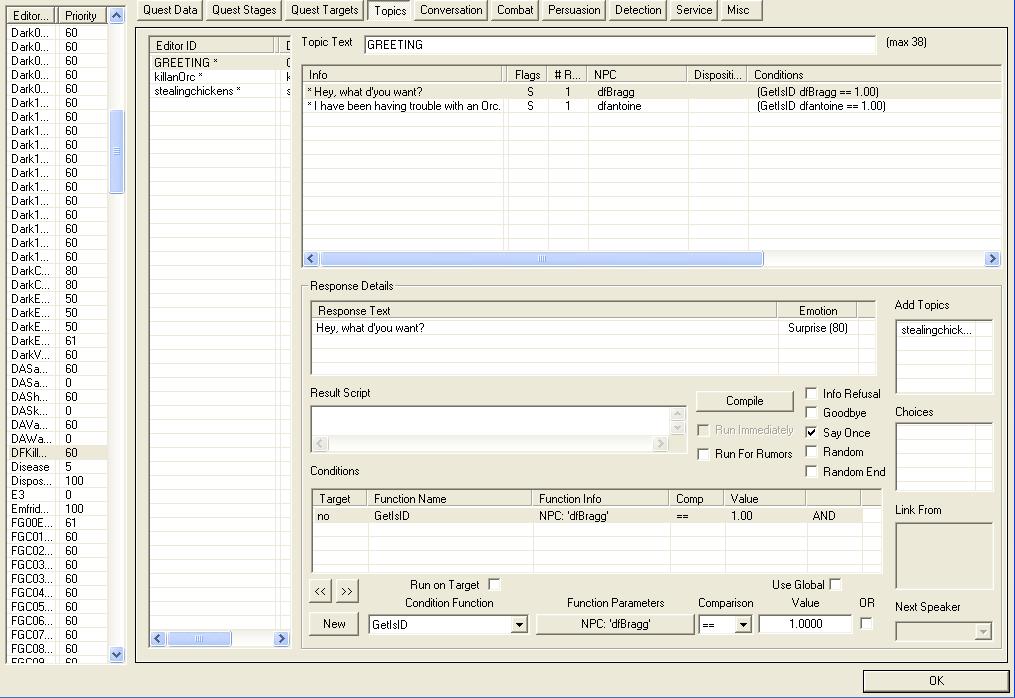
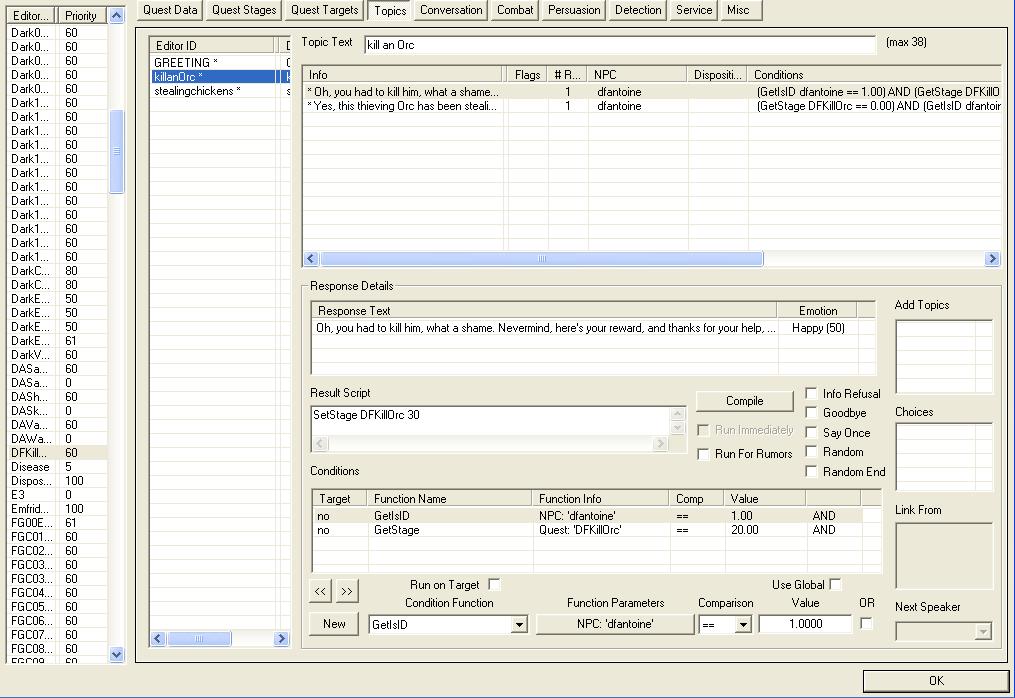
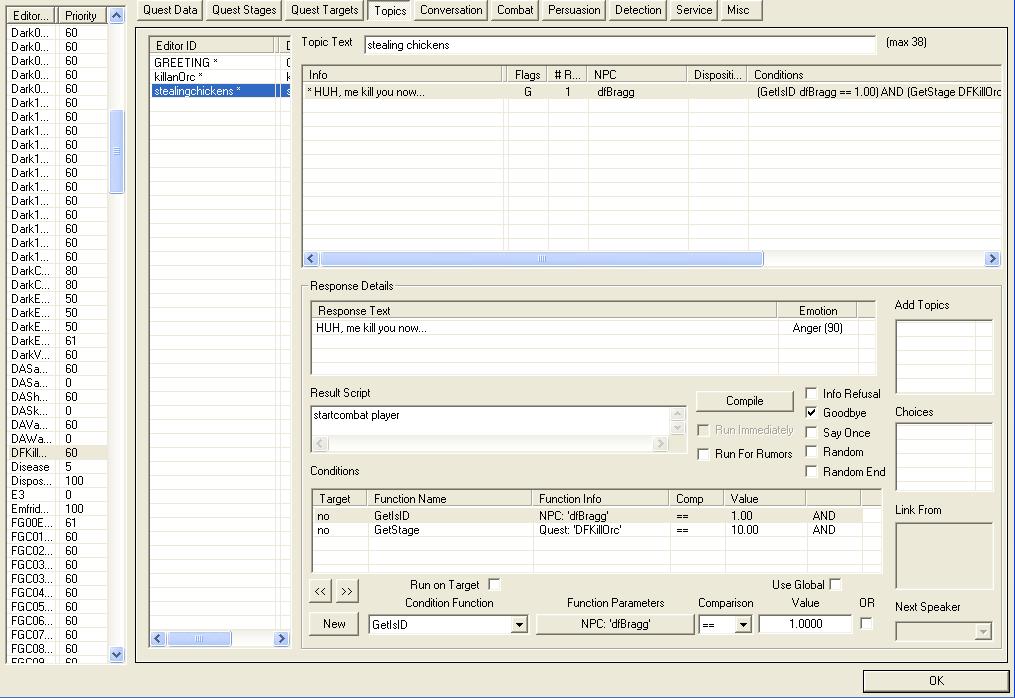
For each topic's one or more lines of dialogue, you need to create the response details, result script, conditions and add Topics etc. As you can see, for 'greeting' and 'killanorc,' there are two dialogue lines. I have only shown screen shots for the first dialogue line for each of these two topics. I will provide the others later.
- Step 7
Go into Gameplay, Edit Scripts and create a new script as follows :
Script name DFKillOrcScript
begin OnDeath
if ( GetStage DFKillOrc < 20 )
setstage DFKillOrc 20
endif
end
Now, go into Brag's character screen again and using the script drop-down box, assign the 'DFKillOrcScript' to Brag.
This ensures that quest stage 20 is performed when you kill Brag, which, unlike the others, is done by a script rather than in dialogue.
- Conclusion
Well, that pretty much wraps it up. All you have to do now is save the mod then test it. Good luck, and I hope you found this tutorial useful. Here's the plugin to go with the tutorial.
I have uploaded the plugin here on moddb: Moddb.com
You will need to get direct to the location of the fight using the Console.
Type in : COC "Farm" to get there. Happy modding...


Please can you make a tutorial of how to make a merchant/vendor? I can't get it to work. (wasn't logged in)
I didn't write this tutorial it's a reupload.