INTRO
I have decided to put down how I managed to get 3DS MAX 8 & it's DOW plug-ins to work to try to see if I can reduce some of the variables & help people new to this get a regular trustworthy DOW>3DS MAX 8>OE>DOW design process. If it works, it's easy, but when you're new & something goes wrong with your 1st model Import/Export & you can't trust that you have set the DOW Tools file structure set-up correctly, that all the plug-ins are installed correctly etc etc that this guide (I hope) becomes invaluable. Follow it to the letter & it WILL work. It will give you peace of mind & allow you to concentrate on what (if you do have a problem) is really stopping you getting your model out of DOW or getting it from 3DS MAX back into the game. I'm not concerning myself with how the model is altered in 3DS MAX or the OE (DOW Tools 'Object Editor') I'm just interested in the various parts of the process used by the Mod Tools & 3DS MAX plugins & also the file structure involved.
STAGE 1 - THE SETUP
In this tutorial I will use the mod name 'My_Mod' & the race name '*race name*' in the references to file structure. You would replace all my references to 'My_Mod' with the name you have chosen for your mod (If you decide to change it) & replace my references to '*race name*' with the name of the race/races you are modding ('space_marines' or 'chaos' etc for example). Also, in this tutorial I am using Dark Crusade as the DOW example game to mod. If you are modding another DOW game you would replace my references to 'Dawn of War - Dark Crusade' with the name of the game you are modding ('Dawn of War - Soulstorm' for example).
Note: I have actually left 'My_Mod' as is in my own mod so there is no need to mess with the pipeline.ini file to start with (It's just as easy to change the 'My_Mod' name & references to 'My_Mod' in the file structure & the pipeline.ini at a later date anyway & if you do leave it as 'my_mod' it also means if you do have a problem early on you can rule out the pipeline.ini as the cause).
If you did however at this stage want to call your mod 'Metallicus' for instance, the bottom of the pipeline.ini file would look like this:
Pipeline.ini Setup
; NOTE: Replace "my_mod" with the name of your mod folder below!
[project:Metallicus]
Description = Metallicus
DataSource = ModTools\DataSrc\Metallicus
DataIntermediate = ModTools\DataInt\Metallicus
DataGeneric = ModTools\DataGeneric\Metallicus
DataBurn = Metallicus
DataFinal = Metallicus\Data
DataExtra =
LocaleFolder = Metallicus\Locale\English
Parent = DXP2
DataSourceShared = ModTools\DataSrc\Metallicus
DataPreview =
AttrLoc =
You would then find EVERY SINGLE reference to 'My_Mod' in (in this case)
C:\Program Files\THQ\Dawn of War - Dark Crusade
& change them all to (in this case) 'Metallicus'.
Folder Structure & Folders you will be using the most
These are the three folder structures that you will probably be most concerned with while using the DOW Tools (this is how I have them set-up anyway & they work)
C:\Program Files\THQ\Dawn of War - Dark Crusade\ModTools\DataGeneric\My_Mod\art\ebps\races\*race name*\troops
C:\Program Files\THQ\Dawn of War - Dark Crusade\ModTools\DataSrc\My_Mod\art\ebps\races\*race name*\troops
C:\Program Files\THQ\Dawn of War - Dark Crusade\My_Mod\Data\art\ebps\races\*race name*\troops
Notice the folder structure's are the same bar the extra '\Data\' in the last one, the Mod Output.
Essential Programs, Plug-ins, Tools & Downloads
3DS MAX 8 (Install in C:\Program Files\Autodesk\3dsMax8).
OR
3DS MAX 7
Dark Crusade Mod Tools 1.2
IBBoard's Texture Tool (to convert .RSH files to .DDS & .TGA).
dawnofwarunsga_v1.0 (to unpack the games .sga files)
Install all of the above at this point before continuing
Santos tools 0.4 (for import/export)
Setting up 'Santos Tools' & 'DOW Mod Tools' Plug-ins (these are what allow you to import & export the units to & from MAX)
You would copy the 'scripts', 'UI' and 'help' folders from 'Santos Tools 0.4' into
C:\Program Files\Autodesk\3dsMax8 or C:\3dsmax7 (if using 3DS MAX 7)
You would then copy folders 'plugins', 'scripts', 'ui' & Dxtc.dll, libguide40.dll, msvcp71.dll & msvcr71.dll from
C:\Program Files\THQ\Dawn of War - Dark Crusade\ModTools\3dsmax
into
C:\Program Files\Autodesk\3dsMax8 or C:\3dsmax7 (if using 3DS MAX 7)
.SGA Extraction
Here you would extract (using dawnofwarunsga.exe) the games .sga archive/archives which contain the models of the units.
I'll use the Dark Crusade archives as example here to give you an idea of what you are required to do.
Open dawnofwarunsga.exe (a box should appear with 'Path:' & 'Save to:' boxes in it)
Click on the '[...]' box to the right of 'Path:' (a new box will appear)
Navigate to:
C:\Program Files\THQ\Dawn of War - Dark Crusade\DXP2
& '[Open]' 'DXP2Data-Whm-High.sga'
Now select the '[...]' box right of 'Save to:' & navigate to your Desktop (You can extract the archives to wherever you want, Desktop works for me).
***Warning***:If you use the default 'Save to:' path in dawnofwarunsga.exe this will mean the game will look to your extracted version of the .sga archive rather than the archive itself & any changes to the extracted files will change your default game & possibly break online play!
hit '[OK]' & then '[Extract]' (the chosen archive is then extracted to your chosen location).
Repeat this process for 'DXP2Data-SharedTextures-Full.sga' & any other archives you wish to extract.
Basically the ????Data-Whm-High/Med/Low.sga's contain the meshes & the ????Data-SharedTextures-Full.sga contain the textures.
Note: You will find all the archives for meshes & textures you have in the 'W40k', 'WXP' & 'DXP2' folders within the main game directory of the game/games you have installed.
Here are the Dark Crusade examples:
C:\Program Files\THQ\Dawn Of War - Dark Crusade\DXP2
C:\Program Files\THQ\Dawn Of War - Dark Crusade\W40K
Next go into
Desktop (*or wherever you extracted them to)\__DXP2Data-SharedTextures-Full.sga\data\art\ebps\races\*race name*\
& copy the 'texture_share' folder of the race/races you are modding to:
C:\Program Files\THQ\Dawn of War - Dark Crusade\ModTools\DataSrc\My_Mod\art\ebps\races\*race name*
Why? This is where 3DS MAX will look for the textures when you import the models mesh into MAX later on.
Also now is a good time to put all of the xxx-Whm-High.sga troops folders that you extracted to you Desktop (or wherever you put them) in their respective race folders in 'DataScr'.
ie. The 'space_marines' 'troops' folder would go in:
C:\Program Files\THQ\Dawn of War - Dark Crusade\ModTools\DataSrc\My_Mod\art\ebps\races\space_marines
I do this really just for my own benefit & clarity of thought (& to keep my Desktop clean). I find it makes it a lot easier to work out what I am doing if I keep everything I am going to be altering in one place & everything I have altered in another. I've seen people putting them in:
C:\Program Files\THQ\Dawn of War - Dark Crusade\My_Mod\Data\Art\EBPs\races\space_marines
I don't like doing that as this is where all the finished models will end up & it's a lot easier to see what you are doing when only the new models appear in this file structure. Also if you intend on releasing your mod you won't have to go through the hassle of removing files to try & keep the overall file size of the mod to a reasonable level.
It's your own preference as I don't think 3DS MAX really cares where you get the files from as long as the textures are in the right place.
Converting .RSH Texture files to .DDS & then .TGA
At this point it's a good idea to use IBBoards Texture Tool to convert the .RSH files in the 'texture_share' folder you moved from your extracted __????Data-SharedTextures-Full/Med/Low.sga to:
C:\Program Files\THQ\Dawn of War - Dark Crusade\ModTools\DataSrc\My_Mod\art\ebps\races\*race name*
into first .DDS & then .TGA format by extracting them.
Why? The textures need to be converted to .TGA for 3DS MAX to be able to use them. If 3DS can't find textures when you import a .WHM it will show you the file structure it requires, create the file structure & convert needed .RSH>.DDS>.TGA files (usually in the texture_share folder of that file structure).
Open IBBoards Texture Tool>select '[Extract RSH]'> & navigate to:
C:\Program Files\THQ\Dawn of War - Dark Crusade\ModTools\DataSrc\My_Mod\art\ebps\races\*race name*\texture_share
The best way to do this is to select all of the .RSH files you have in this texture_share folder at one time, highlight them all & press '[Open]'. they should now all be extracted as .dds files in the same folder as the original files. Next hit '[DDS->TGA]' (Note: You have to be in '[Advanced Mode]' ('[Edit]'> '[Advanced Mode]') to see the [DDS->TGA] button), select all the files again & hit '[Open]' (Note: Sometimes the newly created .DDS file is of a differing name to the original .RSH) to convert them to .TGA format.
STAGE 2 - USING 3DS MAX
Step 01: Using 'WHE Convert' to create a .ebp file
Open 3DS MAX 8, go to the [Utilities tab] (a hammer symbol, usually top right. See pic below for more detail)
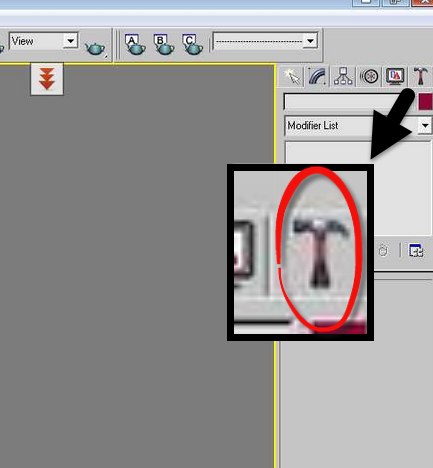
Click on the [Hammer Icon] & select >'[MAXScript]'> & then '[WHE Convert]' from the drop down box.
The WHE Convert box should then open below this. Then '[Set Output Dir]' to
C:\Program Files\THQ\Dawn of War - Dark Crusade\ModTools\DataGeneric\My_Mod\Art\EBPs\races\*race name*\troops
Now select '[Convert WHE]' & choose a .WHE file from:
C:\Program Files\THQ\Dawn of War - Dark Crusade\ModTools\DataSrc\My_Mod\art\ebps\races\*race name*\troops
Upon hitting '[Open]' the window should close & you will me given the message 'Conversion successful!'. Navigate to the Set Output Directory (...ModTools\DataGeneric\My_Mod\Art\EBPs\races\*race name*\troops) & change the name of the .ebp file you just created to the name of the eventual new model you wish to create.
Example: C:\Program Files\THQ\Dawn of War - Dark Crusade\ModTools\DataGeneric\My_Mod\Art\EBPs\races\space_marines\troops\predator_plasma_cannon.ebp
Note: If you intend to just alter already existing units there is no need to change the name of the .ebp
Step 02: Using 'XREF Tool' to import animations to created .ebp file
Select 'XREF Tool' from the drop down menu in the MAXscript tab (same place you found 'WHE Convert'). The 'XREF Tool' will allow you to take animations from a .whe/.whm file & give them to the .ebp file you created in Step 01. The XREF box opens below, you select '[XREF Tool]' in the XREF box & then '[<<< Select Source WHM or WHE File >>>]' & choose the .whe/.whm (I usually use the .whm) file of the same name as that of the .whe that you converted to a .ebp in Step 01.
Select the .whe/.whm & hit '[Open]'. Now select '[<<< Select EBP File >>>]' & choose the renamed .ebp you created in Step 01, hit '[Open]'> '[Add All]'>[Save]>[OK]. (Don't know if you have to save but I do).
Step 03 - Using 'WHM Import' to import model to MAX
Now go back to the '[MAXScript]' drop down box & select '[WHM Import]', the WHM import box opens.
'[Set Dawn of War Dir]' as:
C:\Program Files\THQ\Dawn of War - Dark Crusade
&
'[Set Mod Dir]' as:
C:\Program Files\THQ\Dawn of War - Dark Crusade\My_Mod
Next hit '[Import WHM]' & select the .whm of the model you wish to mod. 3DS MAX will then ask you to '[Select where to save your file...]'. You navigate to:
C:\Program Files\THQ\Dawn of War - Dark Crusade\ModTools\DataSrc\My_Mod\Art\EBPs\races\*race name*\troops
& create a folder in the 'troops' folder with the name of your new model.
Example: C:\Program Files\THQ\Dawn of War - Dark Crusade\ModTools\DataSrc\My_Mod\Art\EBPs\races\space_marines\troops\predator_plasma_cannon
3DS MAX then creates 'ANIMATION' & 'REFERENCE\Ref.max' folders/structure in the folder named *your model name* (ie your *renamed .ebp name*) using the example above both the 'ANIMATION' & 'REFERENCE' folders end up in the 'predator_plasma_cannon' folder).
The model should then appear fully textured in 3DS MAX (as stated previously in the 'Converting .RSH Texture files to .DDS & then .TGA.' section above MAX will let you know at this point if it needs any other textures). You would then (using MAX) alter the model to your liking (another tutorial me thinks). On to...
Optional: Setting 3DS MAX to default to TCB rotation (***Recommended***)
At this point I think it is a good idea to set 3DS MAX 8 so that it uses TCB rotation as it's default. I have encountered ***problems with weapons not pointing straight ahead*** (Land Raider Lascannons actually pointing 30-40 degree's right etc) while sitting in their home position if 3DS MAX has defaulted to Euler XYZ rotation. This is easy enough to fix but is much simpler if you use TCB rotation from the start.
Open 3DS MAX & import any WHM (see Step 03 below), it doesn't matter which model you use, you are not going to be altering this model as such anyway, once imported select a part of the model & then click on the '[Motion]' Tab (2 places left of the '[Utilities]' hammer. Looks like a wheel), open the '[Assign Controller]' tab (in '[Parameters]') & you should see a small box with 'Rotation :' ('Rotation : Euler XYZ' or 'Rotation : TCB Rotation'. Something like that) to the right of it. Note: Even if it says 'Rotation : TCB Rotation' it is still a good idea to do this anyway just to make sure TCB Rotation is the default for all rotations.
Click on the line to highlight it & then click on the little box on the left under '[Assign Controllers]'' (mine has a '?' on it), this will bring up a box where you can set the choice of rotation, select '[TCB Rotation]' & then '[Make Default]' & '[Yes]' to continue.
You can now forget the model you are using & import another safe in the knowlege that your guns will always face the right way.
Step 04: Using 'Warhammer Model Export' to export the model
Once you are finished kitbashing/modding your model within MAX you can export it by selecting 'Utilities' (The Hammer button)>'[MAXScript]'>'[Warhammer Model Export]' (in the drop down menu)>'[Export]'
This creates a *your model name*.sgm file in
C:\Program Files\THQ\Dawn of War - Dark Crusade\ModTools\DataGeneric\My_Mod\Art\ebps\races\*race name*\troops
& a '*your model name*.whm' file & a '*your model name*_whm_burn.txt' file in
C:\Program Files\THQ\Dawn of War - Dark Crusade\My_Mod\Data\Art\EBPs\races\*race name*\troops
& also the various textures the model uses are exported in .RSH format to:
C:\Program Files\THQ\Dawn of War - Dark Crusade\My_Mod\Data\Art\EBPs\races\*race name*\texture_share
The same .RSH files also appear in:
C:\Program Files\THQ\Dawn of War - Dark Crusade\ModTools\DataGeneric\My_Mod\Art\ebps\races\*race name*\texture_share
Note: For some reason the .RSH files that appear in the DataGeneric's texture_share folder don't function in-game (model will be all pink). Just in case this is a universal thing & not just restricted to my set-up, always use the .RSH files from the texture_share folder in:
C:\Program Files\THQ\Dawn of War - Dark Crusade\My_Mod\Data\Art\EBPs\races\*race name*\texture_share
***Not the ones in the ModTools/DataGeneric folder structure!
Error: 'Mesh 'xxxxxxx', vertex 'xxx' has an invalid bone weight! Make sure it is normalized!' Fix
Sometimes when exporting you get an error like 'Mesh 'xxxxxxx', vertex xxx has an invalid bone weight! Make sure it is normalized!' This is easy so fix (if you know how, lol, this one stuck me for quite a while). Make a note of the problem vertices first then click on the mesh it told you had an error ('xxxxxxx'), now go to the '[Modify]' tab (4 left from the Hammer, looks like blue rainbow (see above pic)) & click on '[Skin]', scroll down until you find a box called '[Weight Table]', click on it & find the first of the problem vertices, (make sure there is a 'X' in the 'N' column on the left. This means it is normalized & will be when you hit Enter after altering values) there are usually 3 sets of numbers all adding up to 1, alter one of these values by about 0.002 & hit enter, do this for all the vertices it warned you about in the error dialogue & then save your REF file.
Now go to '[WHM Import]' & click on '[Fix Skin]', select your REF file & get ready to press '[Ok]' more times than you ever have before! lol, it does end, basically it's taking your corrected values from the REF file & correcting them in all the animations files for you (It takes a while but trust me on this one, it's WAY quicker than doing them all manually!). Once you & your finger are done try to export again & hopefully this time it works perfectly! If not try altering a different value column.
STAGE 3 - USING THE DOW MOD TOOLS 'OBJECT EDITOR'
Opening a .ebp in the Object Editor
Open up the DOW Object Editor select '[Open]' ('Open' to open a .ebp file & 'New' to open a .sgm file. I think choosing 'New' & selecting a .sgm file will create a .ebp file with the same name (Not for any use in this tutorial but the info might stop you getting stuck in future) & proceed to:
C:\Program Files\THQ\Dawn of War - Dark Crusade\ModTools\DataGeneric\My_Mod\Art\ebps\races\*race name*\troops
& select the '*your model name*.ebp' file. The model should then appear in the Object Editor (not sure what is to (& can) be done in the OE so I'm leaving that to another tutorial too). What I do know is that even if you do nothing in the OE & then close it a '*your model name*.whe' file is burned to
C:\Program Files\THQ\Dawn of War - Dark Crusade\My_Mod\Data\Art\EBPs\races\*race name*\troops
That's it, now it's time to test your model in-game. Load up DOW & select '*Your Mod Name*' (or 'My_Mod' if you did it that way) in the game manager screen.
Hopefully this tutorial helps you to be confident that some variables have been eliminated as such & allows you to concentrate on figuring out how to get the best custom Dawn of War models out of 3DS MAX & into your mod.
How to set it all up Mod Tools/File Structure/Plug-ins/3DS MAX 8
Tutorial by a63nt archived from forums.relicnews.com. Tutorial for setting up everthing you need for importing and exporting models for dawn of war WA/DC/SS.
Posted by tollan86 on - Basic Installers


When I install the Dark Crusade Mod Tools they go to the main directory of my C drive and it doesn't install on the directory where my Soulstorm game is located. I purchased the game on Steam and the modding tool for the Gold Edition installs in the proper place but not this one. Moving the files didn't solve the issue as it just gives me an error.
This comment is currently awaiting admin approval, join now to view.
Good guide but it doesnt mention one crucial tool, the dow properties browser
launch 3dsmax
right click the top toolbar and click customize
in the new window scroll down to the dow properties browser, drag it to the main toolbar
Also it should say were to get 3ds max because these old versions are not sold anymore and I think the torrents are dead too.
This comment is currently awaiting admin approval, join now to view.