Tutorial originally posted on Massassi.net. Mirrored here for archival purposes.
Brush Mipping/LODing #1
![]()
This writeup only scratches the surface of the use of brush mipping/LODing (distance based level-of-detailing, used to avoid having the rendering process unnecessarily spend time and effort on details that cannot be seen anyway due to the distance at which a brush is being viewed). I don't understand some of the mipping buttons functions and behaviour, so I left them unused and undiscussed. This is just an initial exploration, carried out by an absolute beginner on this topic. You should assume that it contains a significant number of misassumptions and errors. A large number of related implications, questions and uses are not discussed here. There is tremendous power in brush mipping/LODing, both of the sort covered here and also of a sort that it will likely take a while to think of (per instance actual/apparent movement, rotation, scaling......drastically/deliberately different appearance of the different instances.....applicability to buildings containing moving entities(?)....etc.). I would guess that some/most of the time, mip brushes will likely be created in otherwise empty worlds, for use as prefabs for drag-and-drop placement into larger worlds, via the virtual tree. I am unclear as to whether brush mipping/LODing was actually employed in Serious Sam (model mipping definitely was, but that's a different topic).
Start a new world. Add a 128x128x128 room (may want to use a different/darker texture than will for the mip brush). Add a light (falloff 128, hotspot 64, type ambient), so can see. Drag and drop a PlayerMarker on one side of the room.
Join (L) a conus primitive (4Wx4Lx16H with 16 Base vtx.) into the world, on the other side of the room (joining it gives it independence from the room, due to it being assigned its own worldbase). The PlayerMarker and the primitive should each be near their respective walls, so as to assure sufficient distance between them for the most distant mipping/LODing to be able to take effect.

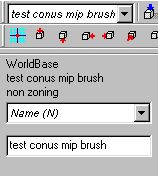
Name the conus brush (example: "test conus mip brush"). Select that name as the "current brush" in the drop down list in the upper left hand corner of the screen (start of the second button bar).
Make sure the brush is selected and click the "Clone current mip brush to more precise mip level" button (![]() ), to create a second instance of the brush.
), to create a second instance of the brush.
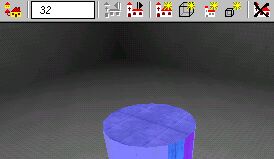
At this point, both the first (1/2) brush that we are on and the second brush (2/2) are identical, but the first (1/2) brush now has a smaller Edit Mip Switch Distance (field just to left of Previous Mip Brush button near end of third button bar) value of 500000 while the second (2/2) brush has the larger distance of 1e+006 (scientific notation for 1 and six zeros, i.e. 1000000).
![]()
This means that the first brush will be visible when viewed from closer up, while the second brush will be visible when viewed from farther away. This in turn means that the first brush should typically have more detail (more polygons) so as to withstand upclose viewing.....while the second brush should typically have less detail (fewer polygons) due to being viewed from a greater distance where the lack of as much detail will not be noticeable and will avoid wasting rendering time and effort that would otherwise be spent on rendering details that cannot be seen from such a distance anyway.
So we should leave the first brush (1/2) alone, as we already have it adequately curved (at least for the purpose of this tutorial) and detailed due to its 16 sides (Base vtx.).

We should, however, switch to and modify the second brush (2/2)......reducing its detail/polygon count (Base vtx.), so that less time and effort will be spent rendering it when it is viewed from a greater distance at which this missing detail/polygons won't be noticed.
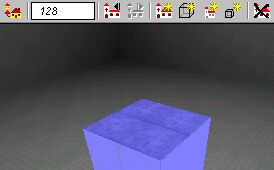
To switch to the second brush (2/2), click the Next Mip Brush button (![]() ). In the status bar, you should now see mip=2/2.
). In the status bar, you should now see mip=2/2.
![]()
To reduce the detail/polygon count on the second brush, one would normally carry out conventional brush editing, vertex editing or ????????? on it. For the sake of simplicity in this exercise, we're going to enclose it in another conus having the same general dimensions, but fewer Base vtx. (polygons/sides). To do this.....make sure the second brush is selected, make sure its name is selected/shown in the "current brush" field at the start of the second button bar...and add a conus primitive (4Wx4Lx16H with 8 Base vtx.) (make sure that when you change Base vtx from 16 to 8 that you hit the Enter key to assure that the change of value takes.....then do the add).
We now have two instances of the mip brush......the smoother looking 16 sided first brush (1/2) meant to be viewed from up close and the cruder looking 8 sided second brush (2/2) meant to be viewed from farther away.
To verify this, use the Previous Mip Brush and Next Mip Brush buttons ( and
and  ) to switch back and forth between the two and observe the change.
Let's do an even cruder less detailed third brush (3/3), for viewing (and rendering economies) from even further away. Use the Next Mip Brush button to make sure you are viewing the second (2/2) brush. Make sure the brush is selected and that its name is selected/displayed in the "current brush" field at the start of the second button bar. Click "Clone current mip brush to more precise mip level" button (near end of third button bar), to create what will now be a third instance of the brush. At this point, we are still viewing the second (2/3) brush, which is now showing a Edit Mip Switch Distance of 750000. Switch to the third brush (3/3) by clicking the Next Mip Brush button (located to the left of the "Clone current mip brush to more precise mip level"). In the status bar, you should now see mip=3/3. Reduce the detail/polygon count on the third brush, similarly to what we did with the second brush (in this case, make sure the brush is selected and add a conus primitive (4Wx4Lx16H with 4 Base vtx.) to it).
We now have three instances of the mip brush, with #1 being the most detailed/smoothest, #2 being medium detailed and #3 being the crudest/least detailed.
Adjust the Edit Mip Switch Distance for all three, by using the Previous Mip Brush button to get back to the first (1/3) brush and then changing its Edit Mip Switch Distance from 500000 to 32 (meters) and hitting the Enter key. Note that the brush may seem to disappear. Use the Previous Mip Brush button to get back to the first brush and then use it and the Next Mip Brush button to cycle through all three instances. You will see the different instances of the mip brush appear. You will also see that due to our setting the first brush's distance to 32, the second was automatically assigned 64 and the third 128. These distances can be changed manually, but are fine for this exercise.
Do a save.
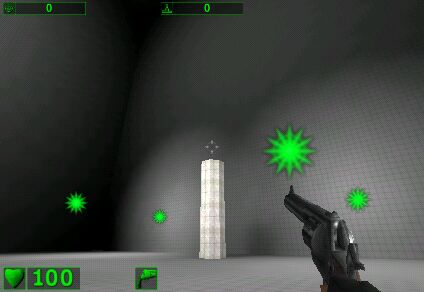
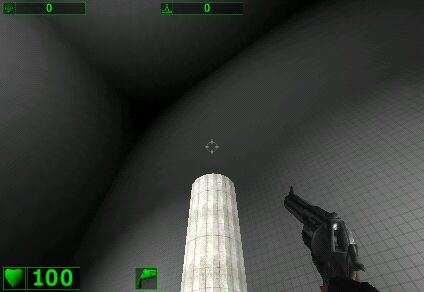
Test the level. As you move toward or away from the mip brush, you should see the various instances switch, depending on your distance
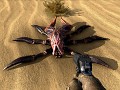
(Extra lights were added in the test from which the following shots were taken, to light the column sufficiently that its shapes would be clearly visible.)
(Note that adjustments should probably have been made to the column's texture, to assure its appearing consistent, regardless of the number of polygons.)
3/3, seen from a long distance (4 vertices)

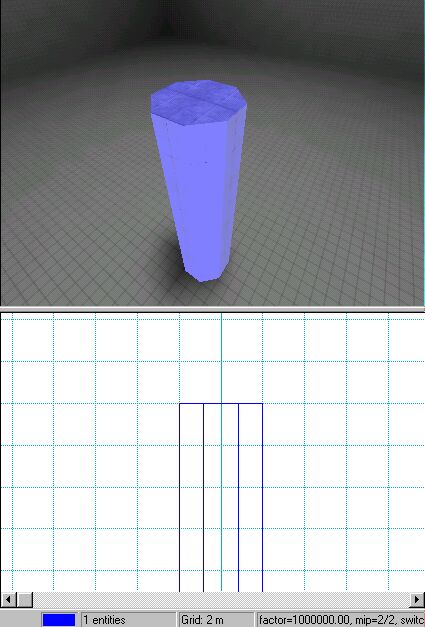
2/3, seen from medium distance (8 vertices)
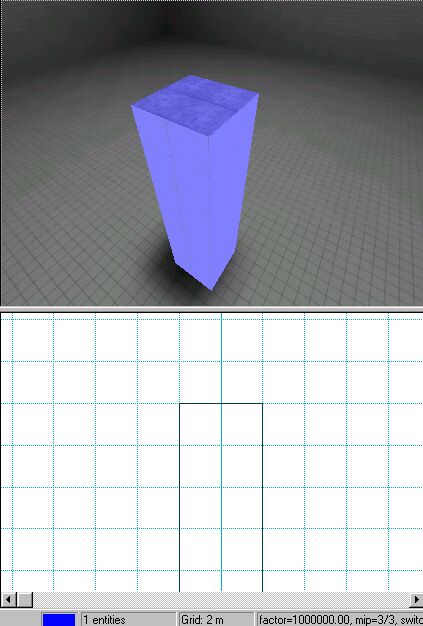
1/3, seen from up close (16 vertices)
- Michael Harris