"Boys, do you hear that musketry and that artillery? It means that our friends are falling by the hundreds at the hands of the enemy, and here we are... Let's go and help them. What do you say?"
~ Confederate General Nathan Bedford Forrest, addressing his men at the Battle of Shiloh.

Installation Instructions:
If you have installed the mod before, you must delete any previous versions of the mod and start a new game. Never overwrite any files or try to play a saved game from a previous version of the mod.
- Download the winrar package called, "The American Civil War Mod Revived v2.0", and save it to your desktop or another preferred destination that you can easily access.
- Open the package and extract the folder inside called, "The American Civil War Mod Revived", to your modules folder ( default location should be, "C:\Program Files (x86)\Steam\steamapps\common\MountBlade Warband\Modules").
- Start Mount & Blade: Warband, select the mod from the drop down menu, and play!
You can join the mod's discord server here: Discord.gg
If you are getting crashes: you need to enable load textures on demand and disable sound variation in your launcher settings. If that alone doesn't work, then you should lower your graphical settings. Don't put everything on max, avoid using resource intensive settings, and don't have more than 300 troops in a battle at once. If you still get crashes, then try loading the mod using warband script enhancer (WSE2). When using WSE2, turn off FXAA otherwise the screen will be black.
Right now, unfortunately, those with 2GB or less of video memory will crash because they run out of memory, however we are creating a new system that determines what types of units the AI generals use, so big battles will require much less video memory in the next update because the number of different uniforms and such that are loaded will be much lower. We're also making further optimizations in different areas that should help improve performance as well. For now, crashes can be fixed by following the above suggestions.
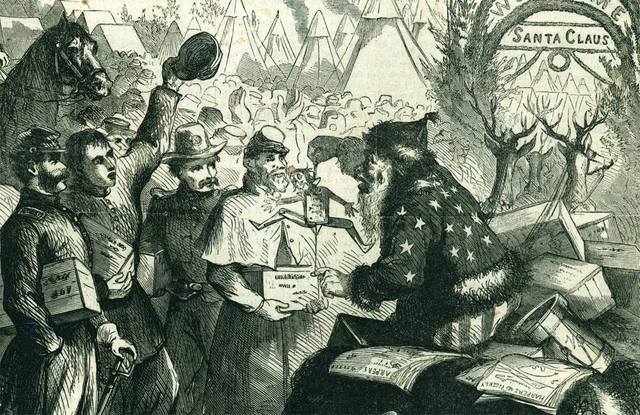
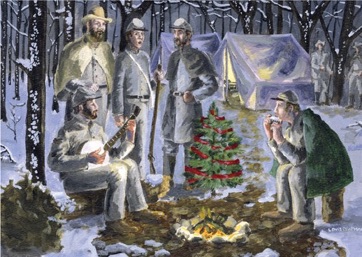
Ho Ho Ho! General Santa and his Elf Brigade have arrived, just in time for Christmas!
Over the course of the last several months, the mod has undergone an extensive overhaul, with virtually every problem having now been fixed, and a ton of new content being added. This miraculous change has only been made possible by the sublime efforts of madsci, who has gone above and beyond to repair the mod's source code and help add much of the new features which you will read about, and no doubt experience for yourself. On behalf of myself and everyone who plays and enjoys this mod, I offer madsci a must humble and sincere expression of our enormous gratitude and appreciation. In honor of his superb achievements, I am bestowing upon madsci the official title of developer, effective immediately. The amount of work he has done, as well as his commitment and patience to seeing the mod repaired, bringing it to it's most stable and complete state yet, has more than qualified him to receive the honor of this title. Together we have achieved something truly spectacular, and accomplished in a matter of a few months, specific goals that I didn't expect to achieve for a year or more, if ever. Please give madsci a warm reception, and three cheers for our most gallant developer, the savior of the American Civil War Mod: Revived! Hip hip huzzah! Hip hip huzzah! Hip hip huzzah!
Now, without further ado, let us begin our exploration of some of the most momentous changes and additions to the mod thus far.
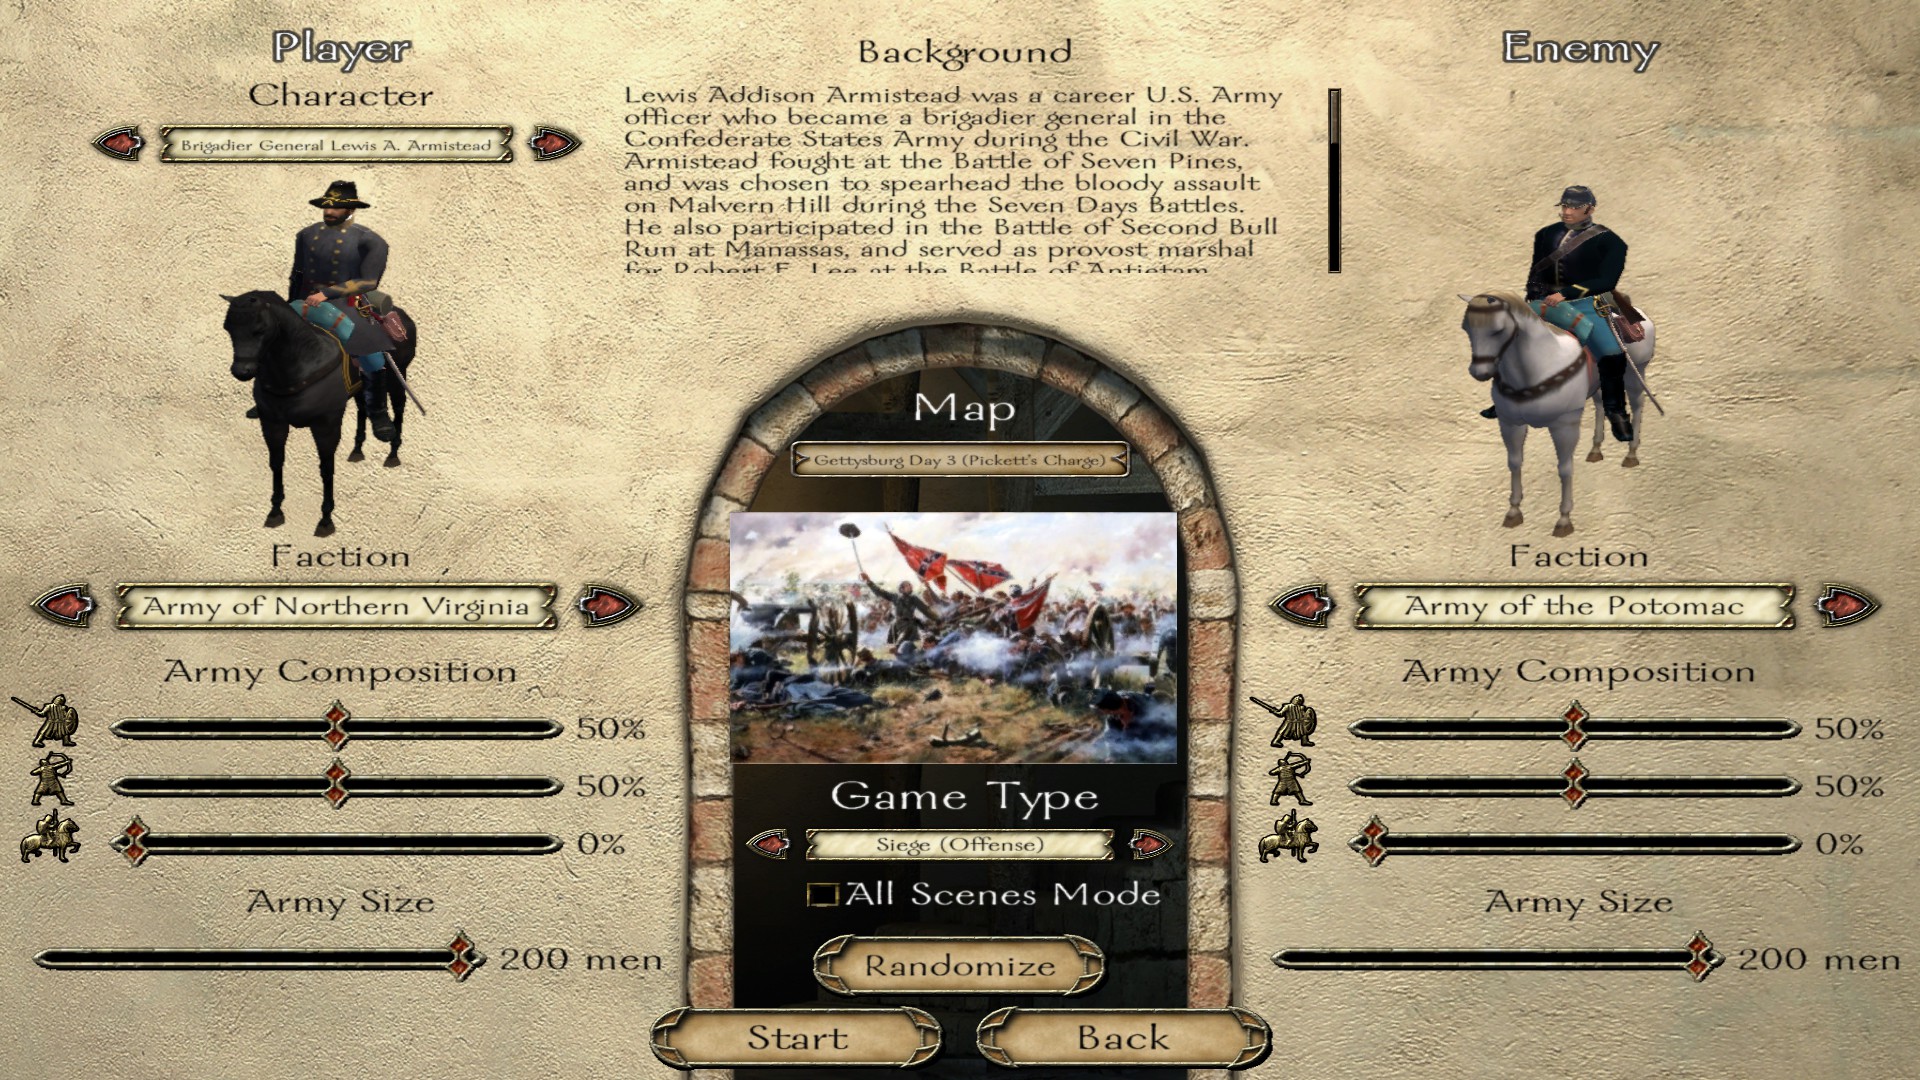
One of the biggest changes in the mod is the implementation of custom battles. This feature will allow players to fight on all of the historical battle maps included in the campaign, as well as a number of maps that are exclusive to custom battles, using all the main factions that are available in the mod. There are also numerous historical generals to play as, for both the Union and the Confederacy, along with a brief biography describing their service during the American Civil War. Included in the list of playable characters are two regular private soldiers, Billy Yank and Johnny Reb, whom the player can choose if they wish to play as a soldier with a rifle rather than a general. There is also artillery in custom battles with a limit of one gun per side (having any more than that causes bugs), as well as flagbearers and bugle calls.
Some important things to note:
- You should never play the "Battle" game mode, because it does not work properly. You can't choose whether to be on the attacking or defending side in that game mode, the AI on both sides will just charge by default, and since it is basically a worthless game mode, I haven't even bothered working on the entry points for it, so don't bother trying. You should always choose to play either "Siege (Offense)" or "Siege (Defense)".
- The three classes of troops available are the same as in Native M&B: Warband; infantry, archers, and cavalry. "Archers" and infantry both consist of standard infantry troops, and cavalry is just cavalry. Most maps don't really suit to the use of cavalry, but you're free to play around with it and see what works for you. You can use the sliders to determine what percentage of your army is made up of what type of troops, and you can have a maximum of 200 soldiers per side. If you have trouble with performance on any of the maps using the maximum amount of troops, I recommend lowering it to 150 vs. 150, or lower, depending on how good your system is at handling higher numbers of troops.
- All infantry, including "archers", are assigned to the second group (skirmishers) by default, so you will only command one group of infantry in any given battle. Although it is not intentional that all infantry troops are assigned to the second group, it ends up working out ok as this will essentially simulate you being in command of a single regiment. Cavalry and artillery are assigned to their own groups, however, so do not give orders to everyone, especially because if you give orders to the artillery, the crews may leave their cannons and join with the infantry group.
- You should always set the defenders to be 50% infantry and 50% "archers", including when you are playing as the defenders. This is because setting the defenders to be 100% infantry will result in all the troops spawning in a massive group from two entry points, and will ruin the flow of the map and the way it is meant to play out. You may even want to avoid giving movement orders when defending, because the AI will end up leaving all of their defensive positions to form into one single group. However you may want to give orders for the troops to form into a line when defending on some of the maps that have a few of your troops ahead of the main defensive line as skirmishers, so that they can fall back and rejoin your main group before they are all killed. You may also want to set the attacking side to be 50/50 as well when playing defense, because this will make the attackers' line more spread out rather than having them all spawn from two entry points, but of course you're free to experiment with different settings and find what works for you.
- When playing as the attackers, you can do it 50/50 if you want, but since you will be commanding the troops, and constantly on the advance as the attacking side, it is not a concern if all of the infantry spawn from two entry points in big groups. They will leave the big groups they spawned in and form into a single line once you issue a movement order. When commanding your infantry group, you should always set them to form into four rows if you have 150 - 200 men, otherwise the troops will end up clumping on the ends of the line because the AI can't all fit into the formation when using two or three rows with that amount of troops.
New Battle Scenes
Gettysburg: Little Round Top
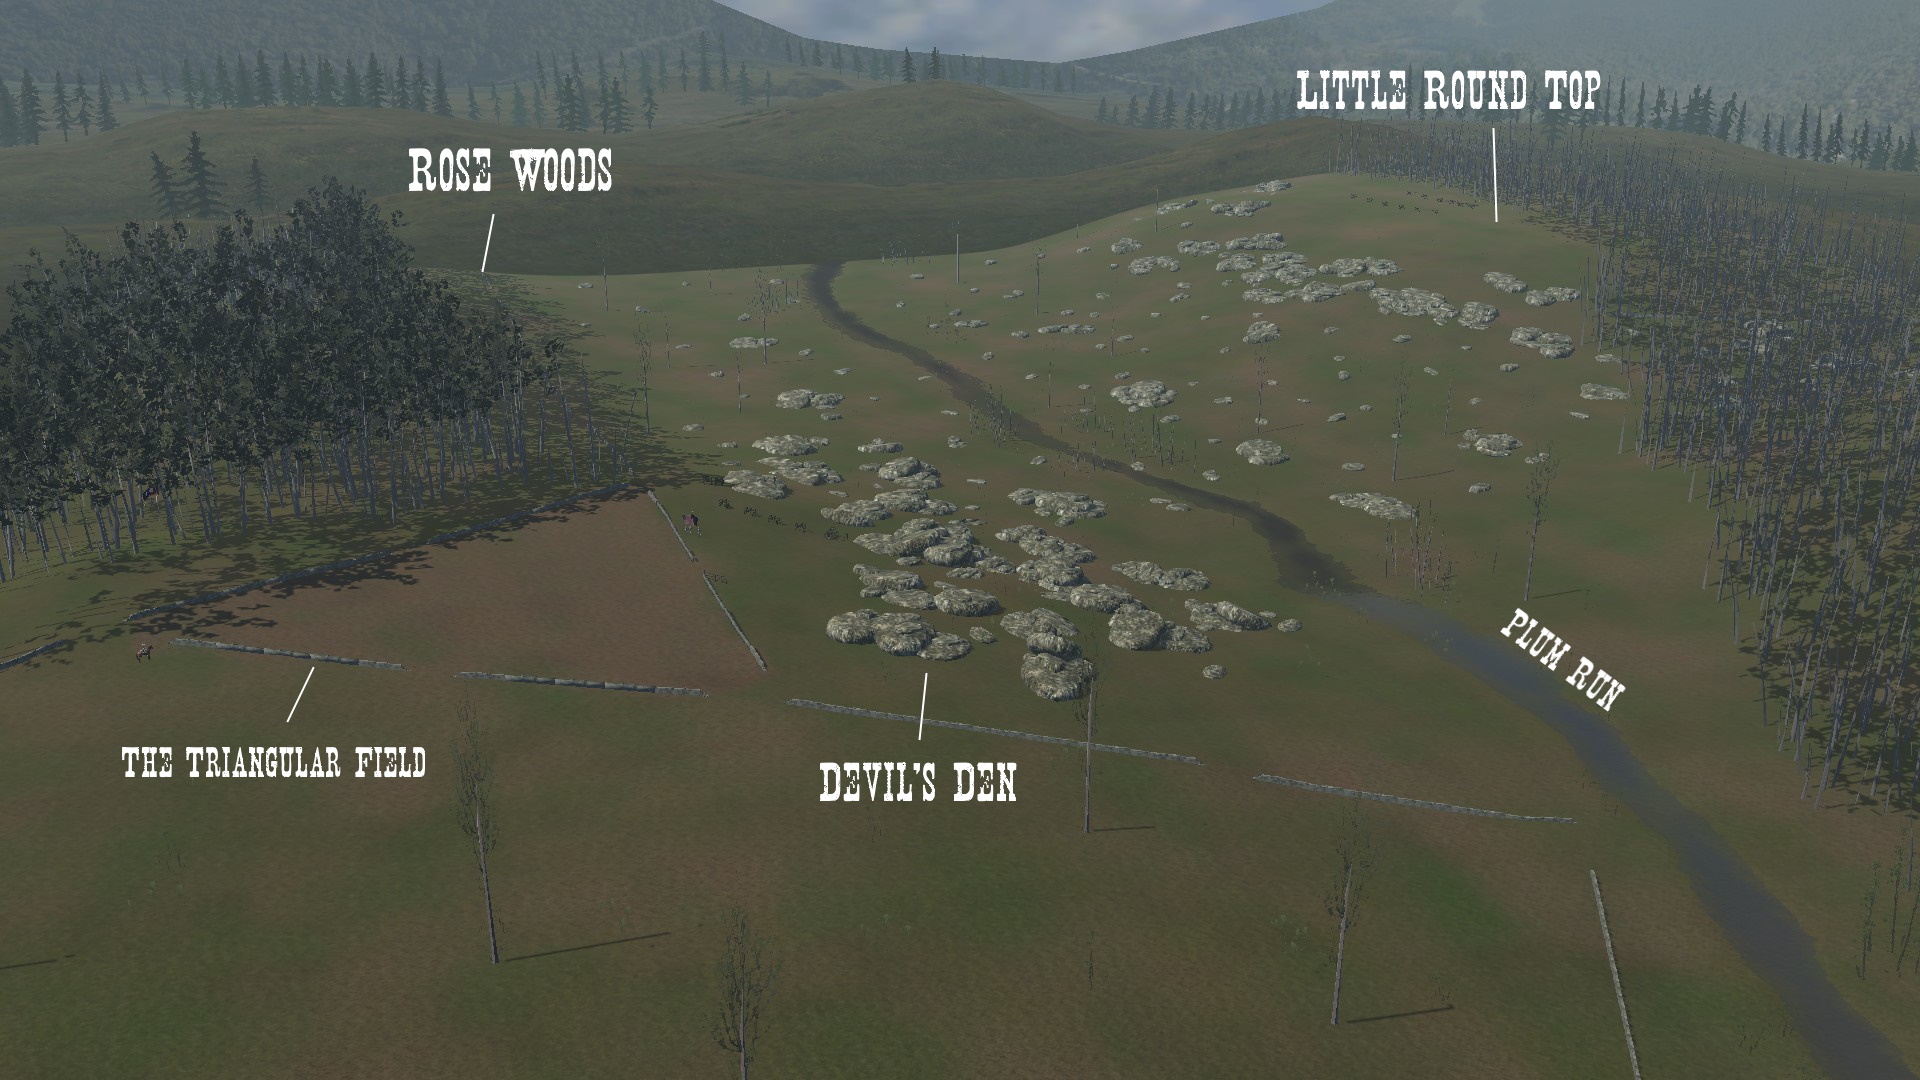
(Custom battle exclusive)
On the second day of the Battle of Gettysburg, the Confederates mounted a spirited attack on Little Round Top with the aim to flank the Union lines. Commanding the Alabama Brigade of Hood's Division, Confederate Brigadier General Evander M. Law dispatched the 4th, 15th, and 47th Alabama, and the 4th and 5th Texas to Little Round Top, ordering them to take the hill. The men were exhausted, having marched more than 20 miles (32 km) that day to reach this point. The day was hot and their canteens were empty; Law's order to move out reached them before they could refill their water.
Law's men were driven back by the first Union volley and briefly withdrew to regroup. The 15th Alabama, commanded by Colonel William C. Oates, repositioned further to the right in an attempt to find the Union left flank. The 386 officers and men of the 20th Maine regiment, under the command of Colonel Joshua L. Chamberlain, as well as the 83rd Pennsylvania, saw the Confederates moving around their flank, so Chamberlain stretched his line to the point where his men were in a single-file in order to repel the Confederate attack. Chamberlain and the 20th Maine held off multiple charges by the 15th Alabama and other Confederate regiments for a total of 90 minutes, despite sustaining heavy losses.
Chamberlain knew his men were out of ammunition, and having only half of their original numbers remaining, would not be able to repulse another Confederate charge. Chamberlain thus ordered his men to fix bayonets and ordered a downhill charge, which surprised the Confederates, breaking their ranks, and resulted in the capture of many of the men of the 15th Alabama. When Chamberlain ordered his bayonet charge, Lieutenant Holman Melcher, separate to Chamberlain's order, spontaneously initiated a charge from the center of the line that further aided the efforts of the 20th Maine. Thirty years later, Chamberlain received the Medal of Honor for his conduct in the defense of Little Round Top.
Despite this victory, the rest of the Union regiments on Little Round Top were in dire straits. While the Alabamians had pressed their attacks on the Union left, the 4th and 5th Texas were attacking Colonel Strong Vincent's 16th Michigan on the Union right. After rallying the crumbling regiment several times, Vincent was mortally wounded and Colonel James C. Rice took command in his stead. Vincent died on July 7th, but received a promotion to brigadier general on his deathbed. Before the Michiganders could be broken, reinforcements summoned by Brigadier General Gouverneur K. Warren arrived, which included the 140th New York and a battery of four guns from Battery D, 5th U.S. Artillery. Simply maneuvering these guns by hand up the steep and rocky slope of Little Round Top was an amazing achievement, however, this effort had little effect on the action of July 2nd because the artillery crews were exposed to constant sniper fire and they could not depress their barrels sufficiently enough to defend against the incoming Confederate attacks.
Upon their arrival, the 140th New York charged into the fray, driving the Texans back and securing victory for the Union on Little Round Top. Colonel Patrick "Paddy" O'Rorke, was killed while personally leading the 140th New York in the charge. Reinforced further by Brigadier General Stephen H. Weed's brigade of the V Corps, Union forces held the hill throughout the rest of the battle, enduring persistent fire from Confederate sharpshooters stationed around Devil's Den. General Weed was among the victims of these sharpshooters, as well as Weed's old friend, Lieutenant Charles Hazlett, commander of Battery D of the 5th U.S. Artillery, who was shot dead as he leaned over to comfort General Weed.
The fighting at Little Round Top became one of the most well-known actions of the Battle of Gettysburg, and of the entire war.
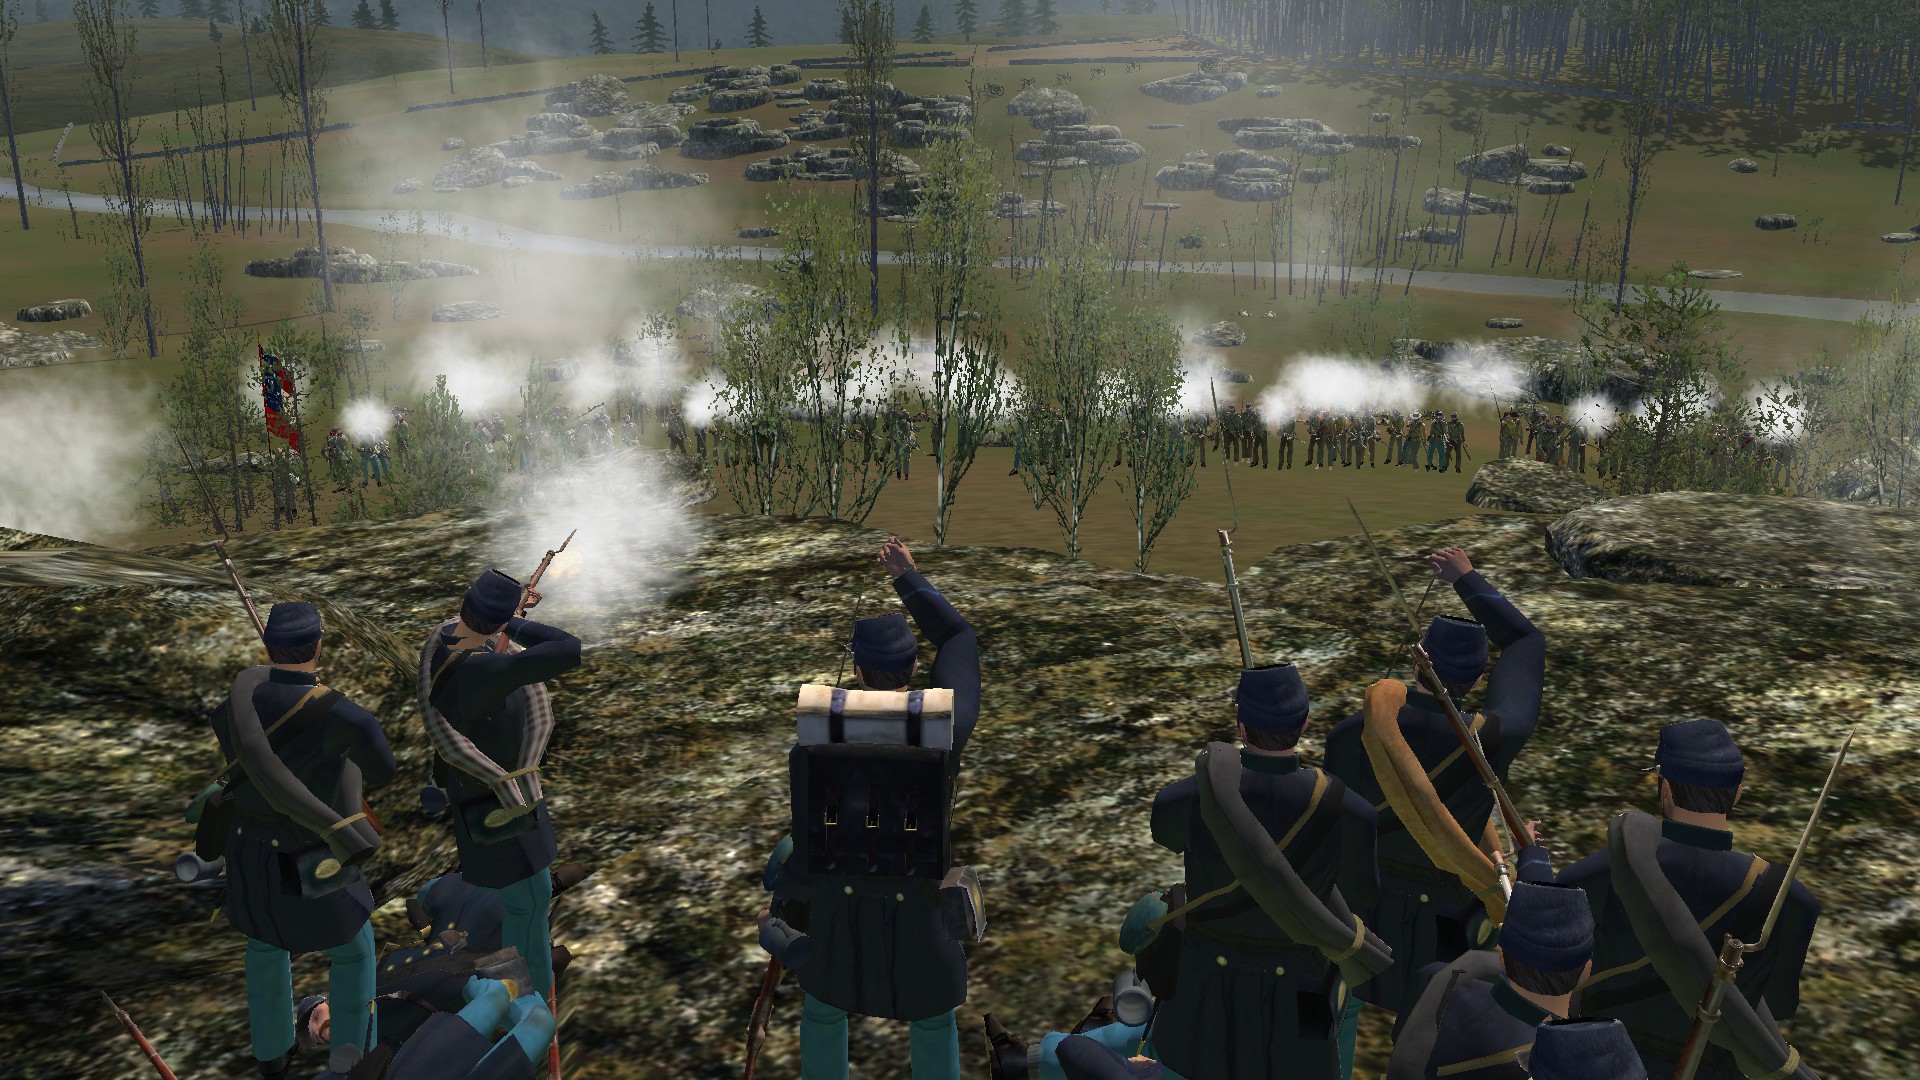
Gettysburg: Pickett's Charge
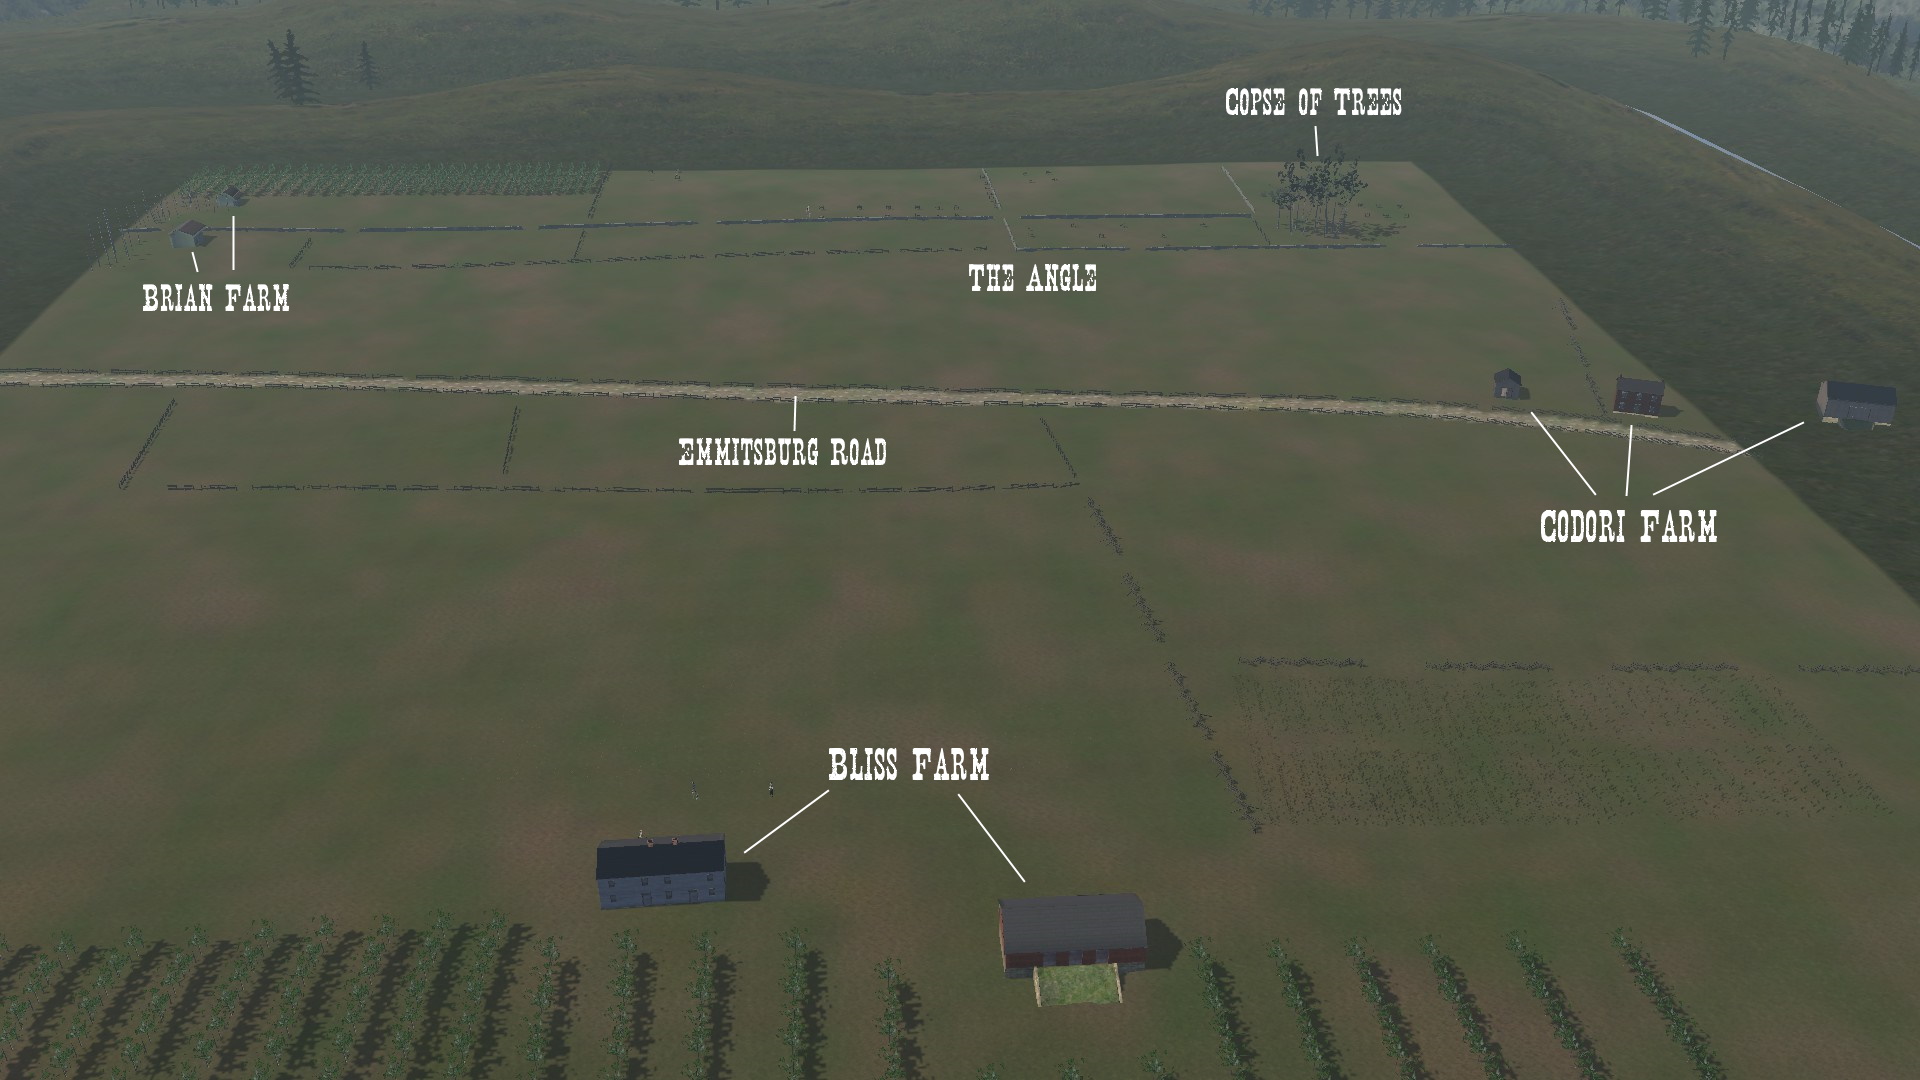
(Custom battle exclusive)
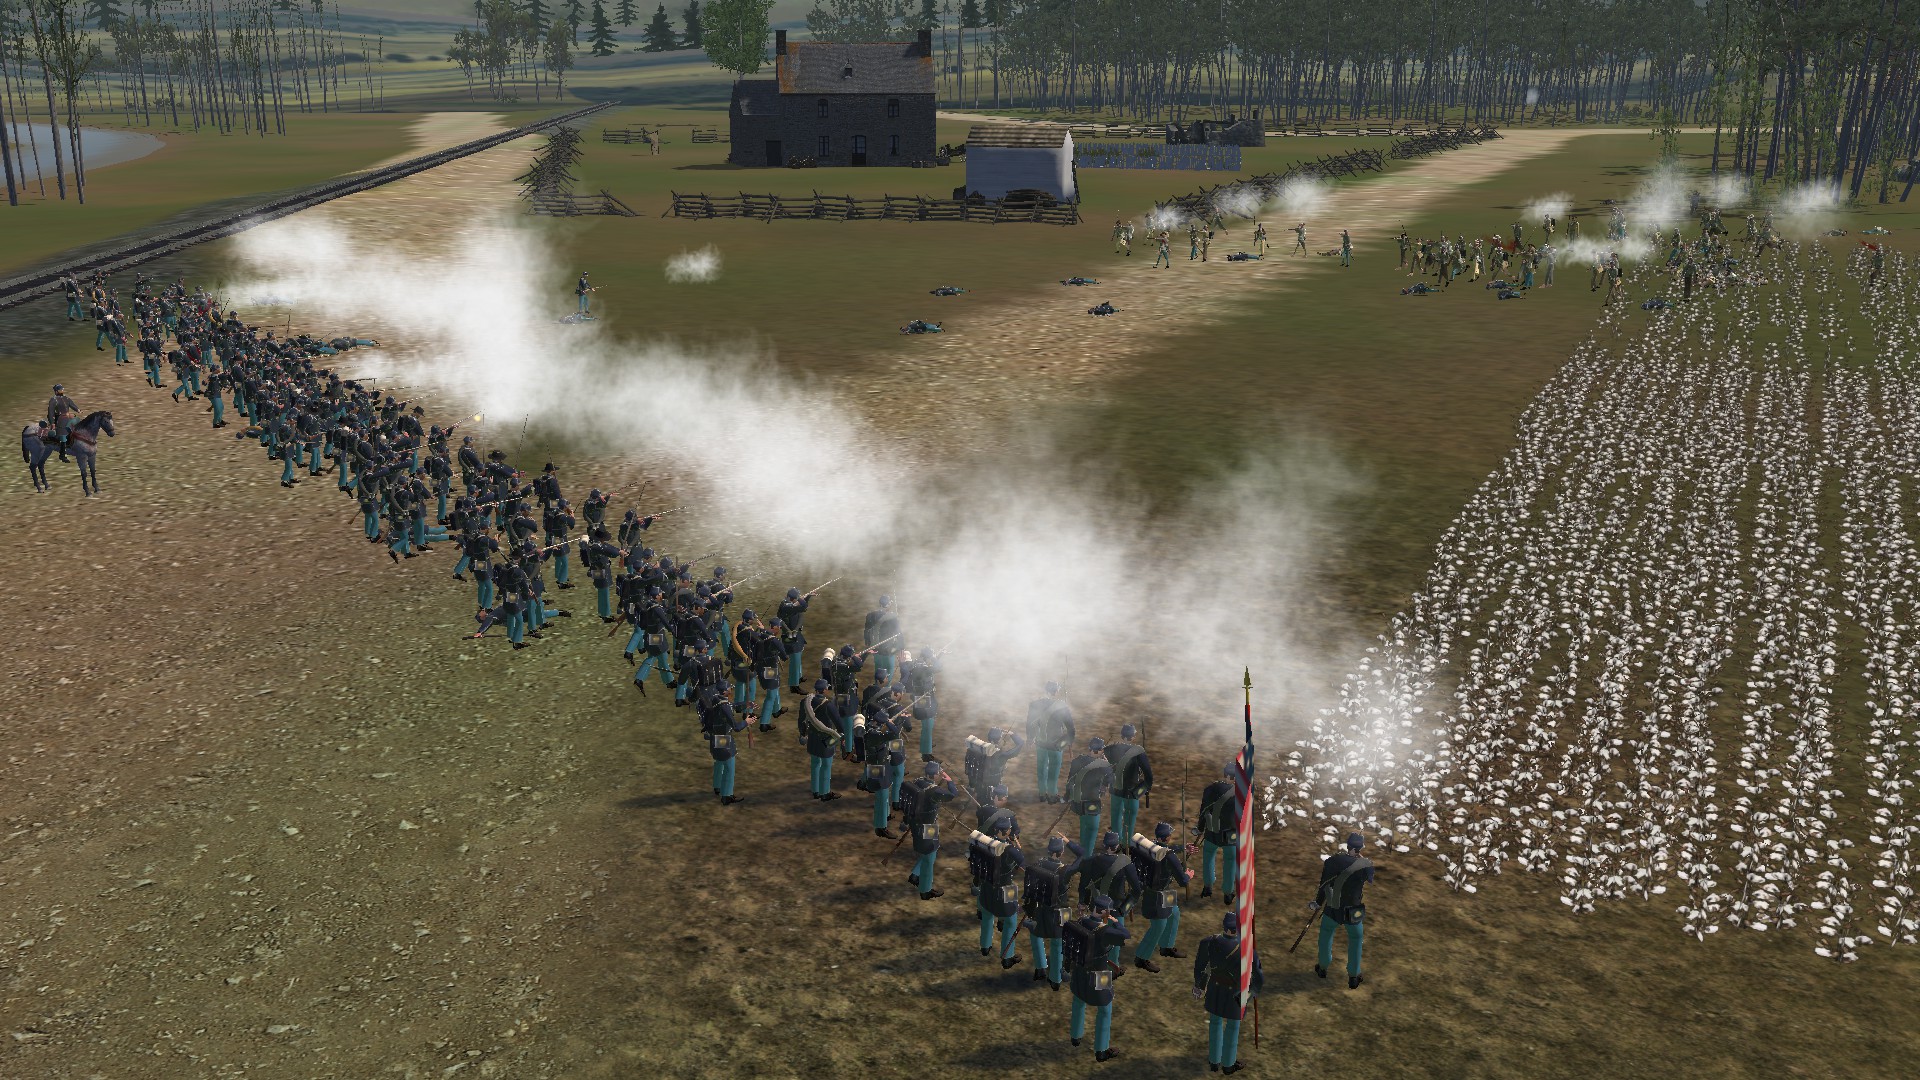
Please be aware that the large empty space you see in front of the Bliss Farm in the above photo is actually a wheat field, it just doesn't show up in the photo when the camera is at this distance.
On the third day of the Battle of Gettysburg, Confederate General Robert E. Lee believed that after the attacks his army made on both flanks of the Union lines on the previous day, Meade would concentrate his defenses on the flanks, leaving his center vulnerable. However, Meade correctly predicted that Lee would attack the center of his lines and chose to reinforce that area with additional soldiers and artillery.
The Confederate infantry charge was preceded by what Lee hoped would be a powerful and well-concentrated artillery barrage of the Union center, destroying the Union artillery batteries positioned there and demoralizing their infantry. The bombardment preceding Pickett's Charge was the largest of the war, and also the largest artillery bombardment that ever occurred on the North American continent. Starting at around 1:00 p.m., Confederate guns numbering between 150 and 170, fired along a line over two miles (3 km) long for between one to two hours, while Union artillery responded in kind. Confederate Brigadier General Evander M. Law wrote of the bombardment, "The cannonade in the center ... presented one of the most magnificent battle-scenes witnessed during the war. Looking up the valley towards Gettysburg, the hills on either side were capped with crowns of flame and smoke, as 300 guns, about equally divided between the two ridges, vomited their iron hail upon each other."
Despite its ferocity, the Confederate artillery fire was mostly ineffective. Their shells often overshot the Union infantry, in some cases because of inferior shell fuses that delayed detonation, as well as the smoke covering the battlefield concealing the ineffectiveness of their fire from the Confederate gunners. Union artillery chief Brigadier General Henry J. Hunt ordered his 80 available guns to cease firing to conserve ammunition, but also to fool the Confederate artillery chief, Colonel Edward Porter Alexander, Hunt ordered his cannons to cease fire slowly to create the illusion that they were being destroyed one by one. Still blinded by the smoke, Alexander fell for Hunt's deception and believed that many of the Union batteries had been destroyed.
The day was hot and humid, and the Confederates suffered under the sun as they awaited the order to advance. They also received significant casualties from the Union counter-battery fire, which would often overshoot their targets and hit the massed Confederate infantry. Confederate General James Longstreet had opposed the charge from the beginning, convinced the charge would fail, and wanted to avoid personally ordering the charge. General George E. Pickett asked Longstreet, "General, shall I advance?", and Longstreet recalled in his memoirs, "The effort to speak the order failed, and I could only indicate it by an affirmative bow." Colonel Alexander had run dangerously low on ammunition, and explained to Longstreet that replenishing his ammunition would take over an hour, and this delay would nullify any advantage the previous barrage had given them. Therefore the infantry assault went forward without the artillery support that had originally been planned.
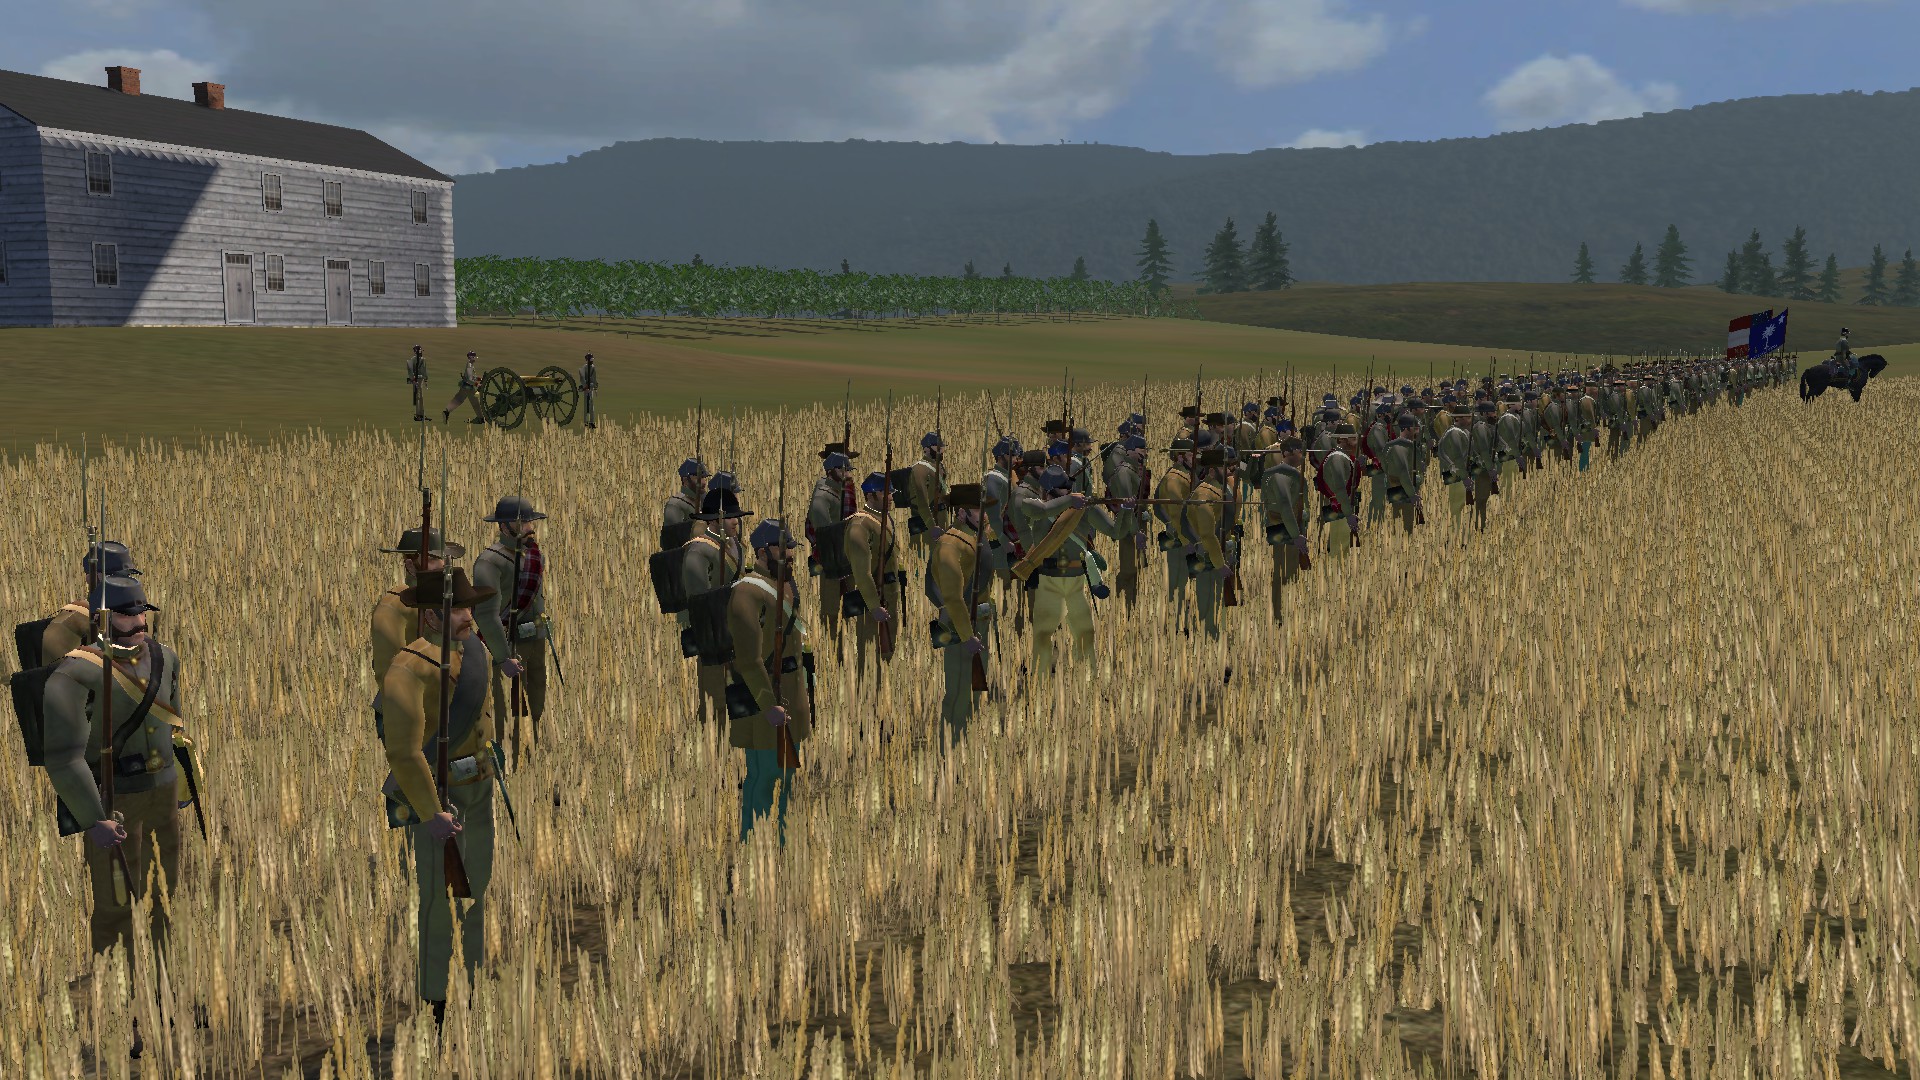
The entire Confederate force stepped off toward the Union positions at about 2:00 p.m., comprising a total of roughly 12,500 men. The nine brigades of men stretched over a mile in length (1,600 m), and marched towards the Union lines as if on parade. With flags flying and the orderly rows of soldiers moving steadily forward, Union troops were awed by this display of courage and martial pageantry. However the beauty of this scene was soon shattered by heavy artillery fire. The advancing Confederates were slowed by fences in their path, and shell and solid shot turned to canister and musket fire as the Confederates came within 400 yards of the Union line. At this point Confederate unit cohesion and morale began to break down. The last shelter before reaching the Union lines lay in the sunken depression of the Emmitsburg Road, and thousands of Confederates took to the ground there, refusing to advance any further, and many of them surrendered to Union troops after the battle. Over 2/3rds of the initial Confederate force may have failed to make the final charge.
Pickett's Virginians, however, crossed the Emmitsburg road and wheeled partially to their left. They marched in two lines, led by the brigades of Brigadier General James L. Kemper on the right, Brigadier General Richard B. Garnett on the left, and Brigadier General Lewis A. Armistead's brigade following close behind. As Pickett's men advanced, they withstood the fire of Stannard's, Harrow's, and then Hall's brigade, before approaching a minor salient in the Union center, known afterwards as "The Angle", and often referred to today as, "the high-water mark of the Confederacy". Assisted personally by artillery chief Henry Hunt, Captain Andrew Cowan ordered five guns to fire double canister simultaneously, and the entire Confederate line to his front disappeared. The Irishmen of the 69th Pennsylvania resisted fiercely the 2,500 to 3,000 men of Garnett's and Armistead's brigades in a melee of rifle fire, bayonets, and fists. As more Union reinforcements arrived and charged into the breach, the position became untenable and the Confederates began to slip away individually, with no senior officers remaining to call a formal retreat.

As the broken Confederate troops withdrew, Union soldiers began taunting them, shouting, "Fredericksburg! Fredericksburg! Fredericksburg!", in reference to the disastrous Union assault on Marye's Heights during the 1862 Battle of Fredericksburg. This time, the tables were turned and it was the Union behind a stone wall who had cut down the Confederates with vengeance. The entire infantry assault lasted less than an hour. While the Union lost about 1,500 men killed and wounded, the Confederate casualty rate was over 50%, and the casualties among the commanders of the charge were also high. Of the 15 regimental commanders in Pickett's division, the Virginia Military Institute produced 11 and all were casualties, with six being killed, and five wounded. Pickett was inconsolable for the rest of the day and never forgave Lee for ordering the charge.
Included on this map are a number of recreations of historical buildings that existed on the battlefield.
Bliss Farm
William and Adeline Bliss were in their early sixties at the time of the battle, and their two surviving daughters, Frances and Sara, were living with them. The farm lay in a broad valley of gently rolling fields on the west side of Emmitsburg Road and across from Cemetery Ridge, but this lovely spot was destined to be overrun by both Union and Confederate armies as it lay in the path of Longstreet's assault on July 2nd, and Pickett's Charge on July 3rd. At about 12:00 p.m. on July 1st, the Bliss family fled the property, leaving their noon meal on the table and the doors to their home open.
The Bliss Farm was in a no-man’s-land between Union forces on Cemetery Ridge and Confederate troops on Seminary Ridge. The Bliss buildings were the only substantial shelter in the open fields below the town of Gettysburg, and they were rapidly becoming the center of the action. The Bliss Farm changed hands multiple times throughout the battle, and by mid-morning on July 3rd, the Bliss buildings had already changed hands three times. In just over 24 hours, the struggle to control the Bliss Farm had involved more than ten Union and Confederate regiments.
When the Bliss family returned to their farm after the Battle of Gettysburg, there was virtually nothing left of their property. Union troops had deliberately burned down both the farm house and the barn on July 3rd to deny it's use to the Confederates. After filing claims with the U.S. government for $2,500 to $3,500 in damages, they received no compensation, but they did not seem to mind much. William and Adeline Bliss sold the remnants of their farm to Nicholas Codori in 1865 for $1,000, and according to legend, William said, "Let it go. I would give twenty farms for such a victory."
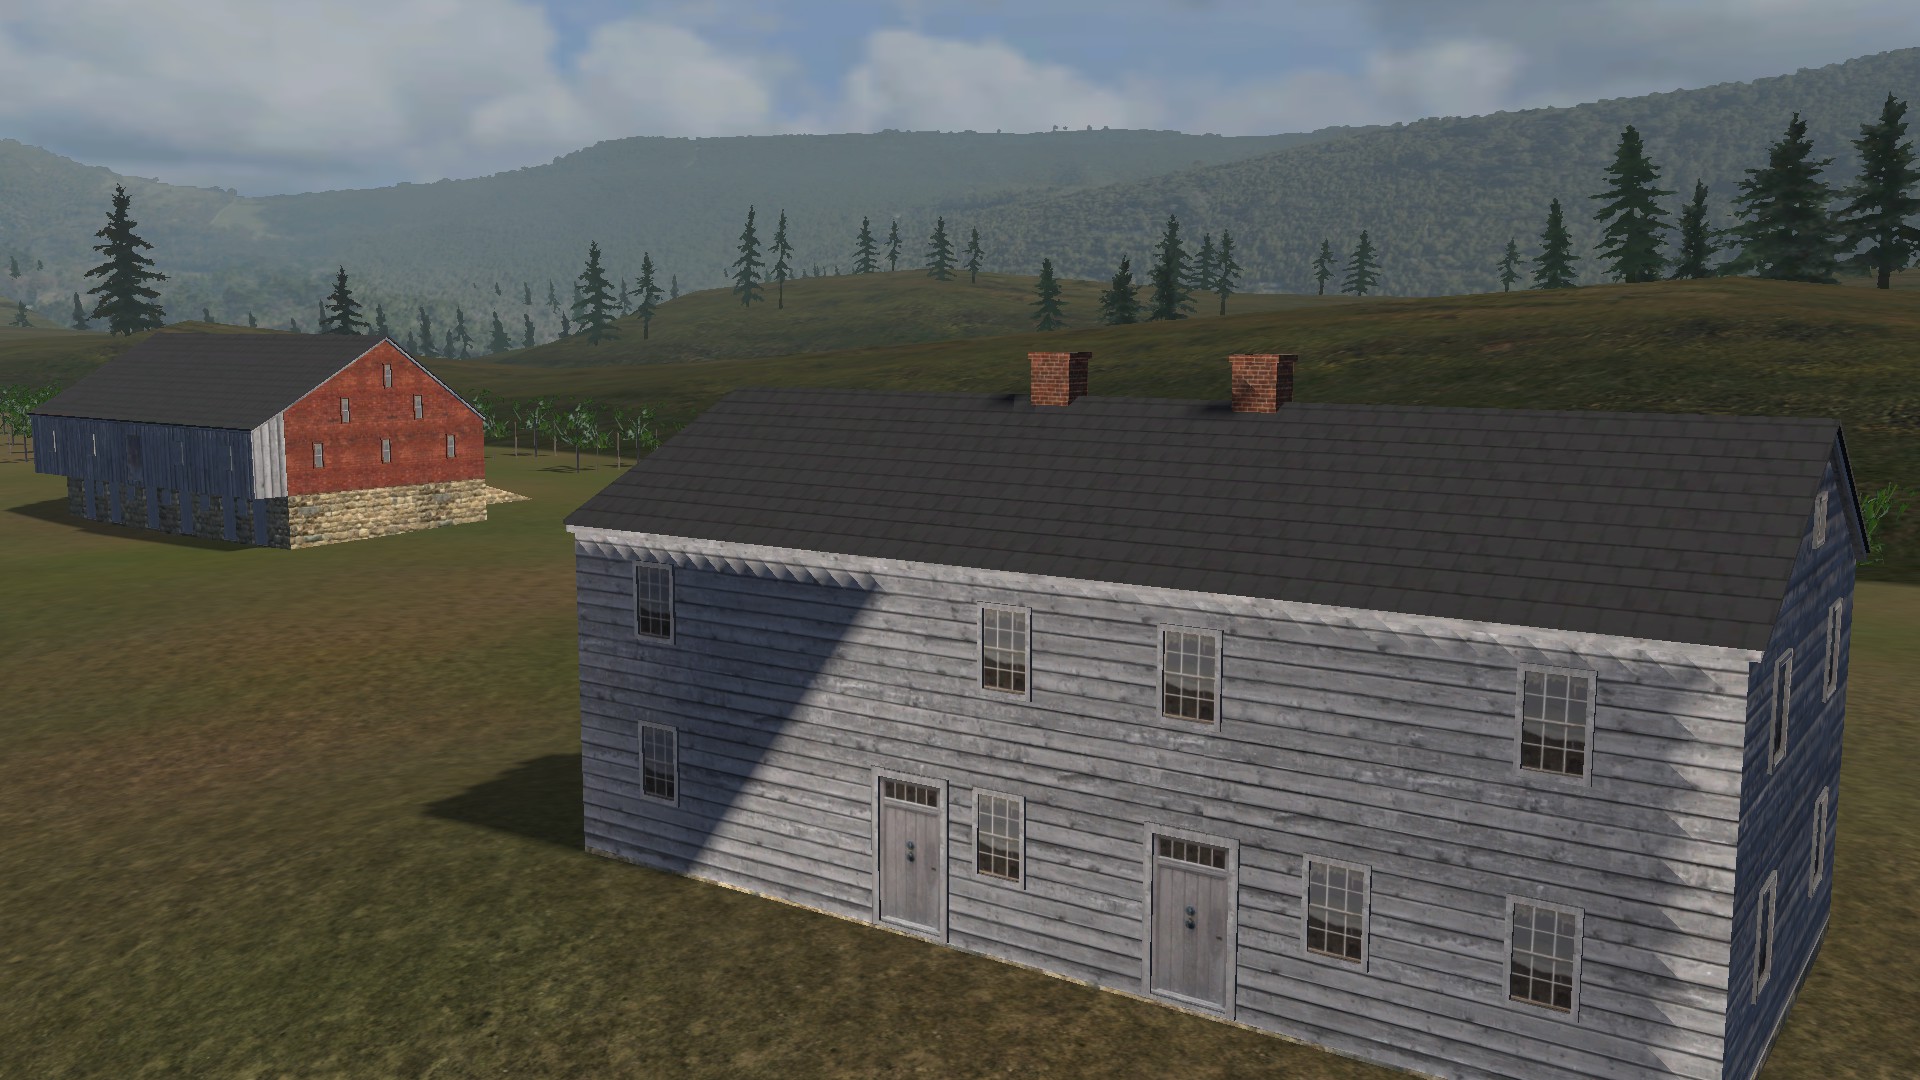
Codori Farm
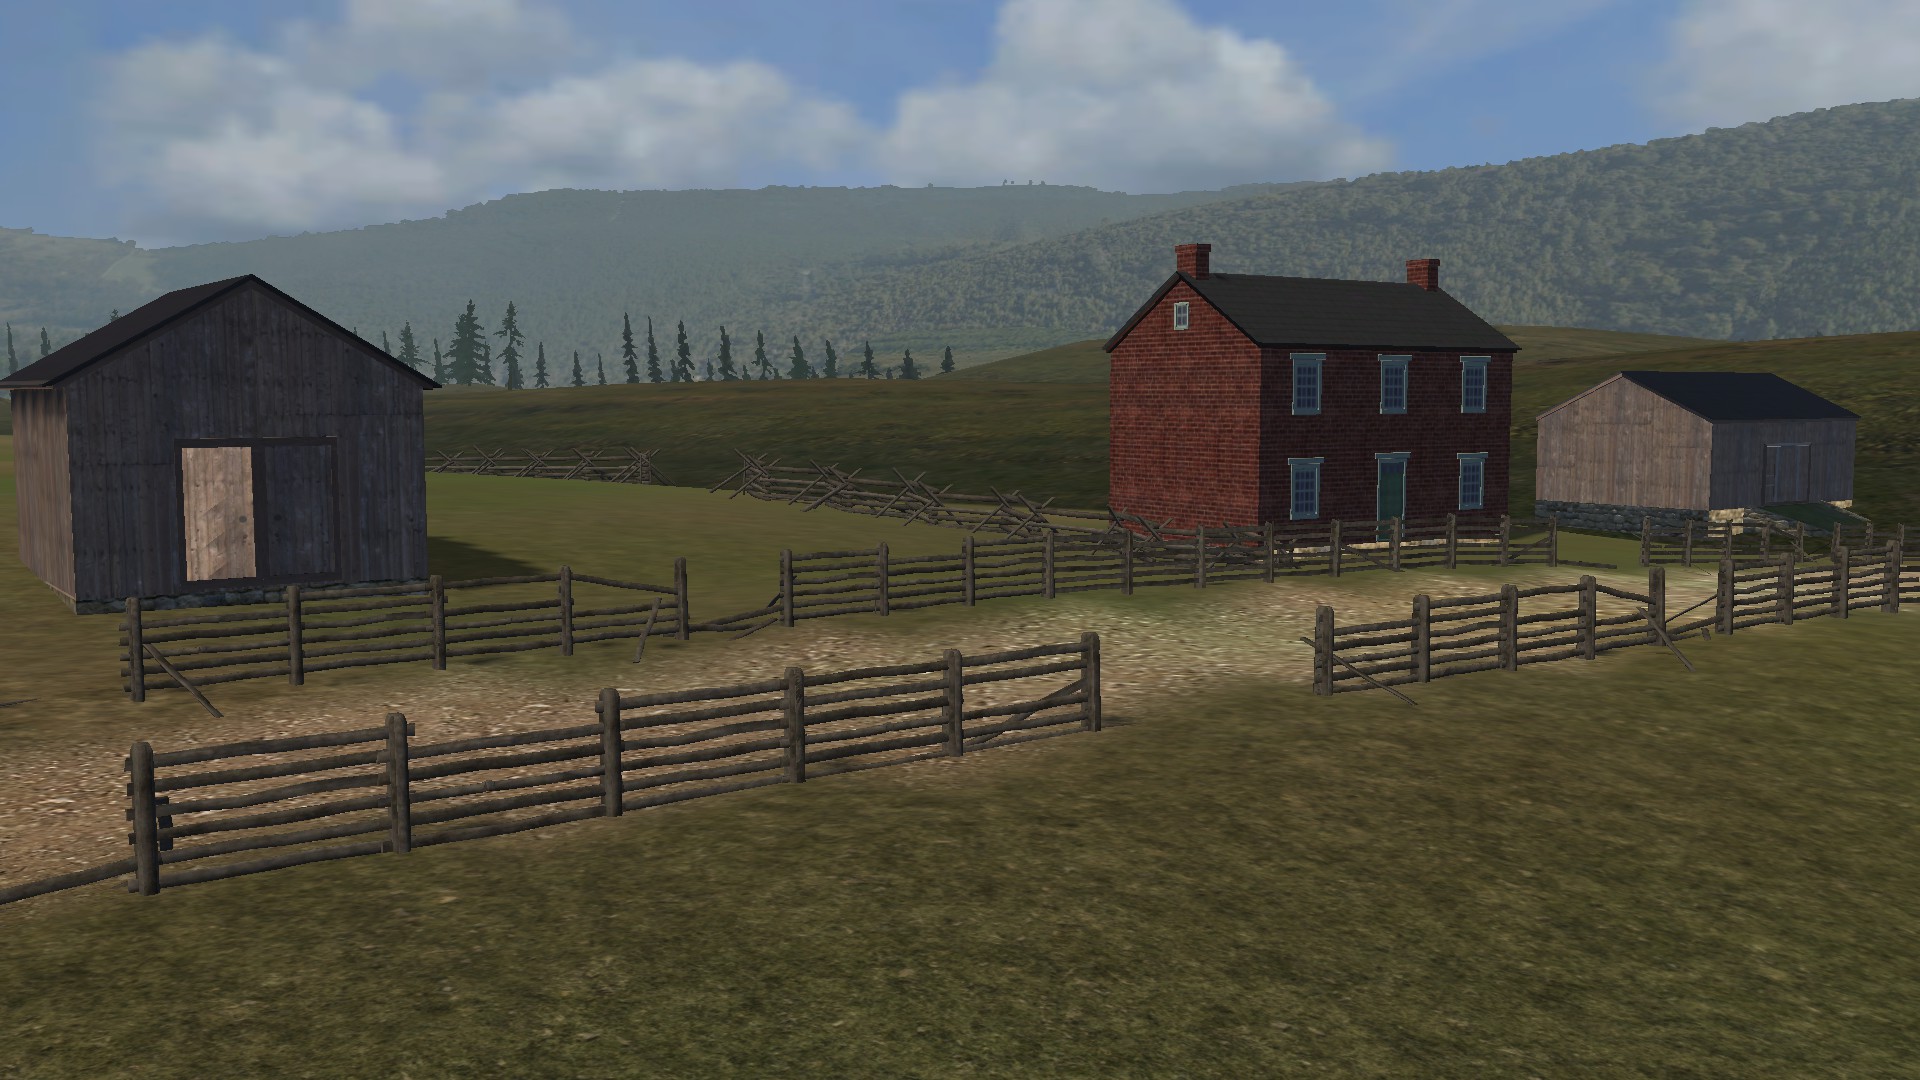
Nicholas Codori owned the farm during the battle, though it is not clear who occupied the farm at the time of the battle. Nicholas Codori came to America from Alsace, France, in 1828 at the age of 19. He bought the 273 acre farm in 1854, replacing the original log house with today’s two story frame building. Nicholas did not live in the farm, however, he instead rented the farm to tenants.
At the end of the Confederate artillery barrage that preceded Pickett's Charge, Pickett's division began their three-quarter mile advance across the Codori farm and up Cemetery Ridge. The veteran Virginian soldiers passed on either side of the house as they moved toward the Union center. Their first objective was the Codori barn, which they used as an orientation device. After the battle, reportedly about 583 Confederates were buried on this farm, including men from Brigadier General Ambrose R. Wright’s brigade who were killed here while attacking the Union center late on July 2nd, as well as those who were killed during Pickett’s Charge on July 3rd. There were more men buried here than on any other farm on the Gettysburg battlefield.
In 1868, Nicholas Codori sold his farm, since it was useless for farming purposes, being a mass grave for Confederate soldiers. However, by 1872, all of the remains that could be located were removed from the fields and shipped south, and so Codori bought the farm back.
Brian Farm
Abraham Brian was a free black man who purchased this farm in 1857 when he married his third wife, Elizabeth, after the death of his previous wife. Prior to the battle, Brian and several other African-American residents left the area to avoid capture and enslavement at the hands of the Confederate army. The small farmhouse which included two rooms and a loft, as well as an adjacent barn, became the headquarters of Brigadier General Alexander Hays’ Division of the Union II Corps, and the property was on the front lines during the fighting of July 2nd and 3rd. Union troops positioned around the Brian House and barn were assaulted by Confederate Mississippi troops under the command of Brigadier General J. Johnston Pettigrew.
When Brian returned to his home after the battle, he found it ransacked. The house walls were filled with bullet holes, windows were broken, and the furniture was tossed about. His fences were gone, crops trampled, his orchard trees were useless, and the field west of his house had become a huge graveyard. Brian put his property back into order and resumed farming the land until 1869, when he sold the farm and went to work in a local hotel. He petitioned the government for $1,028 in restitution but received only $15 for damages done by Union troops.
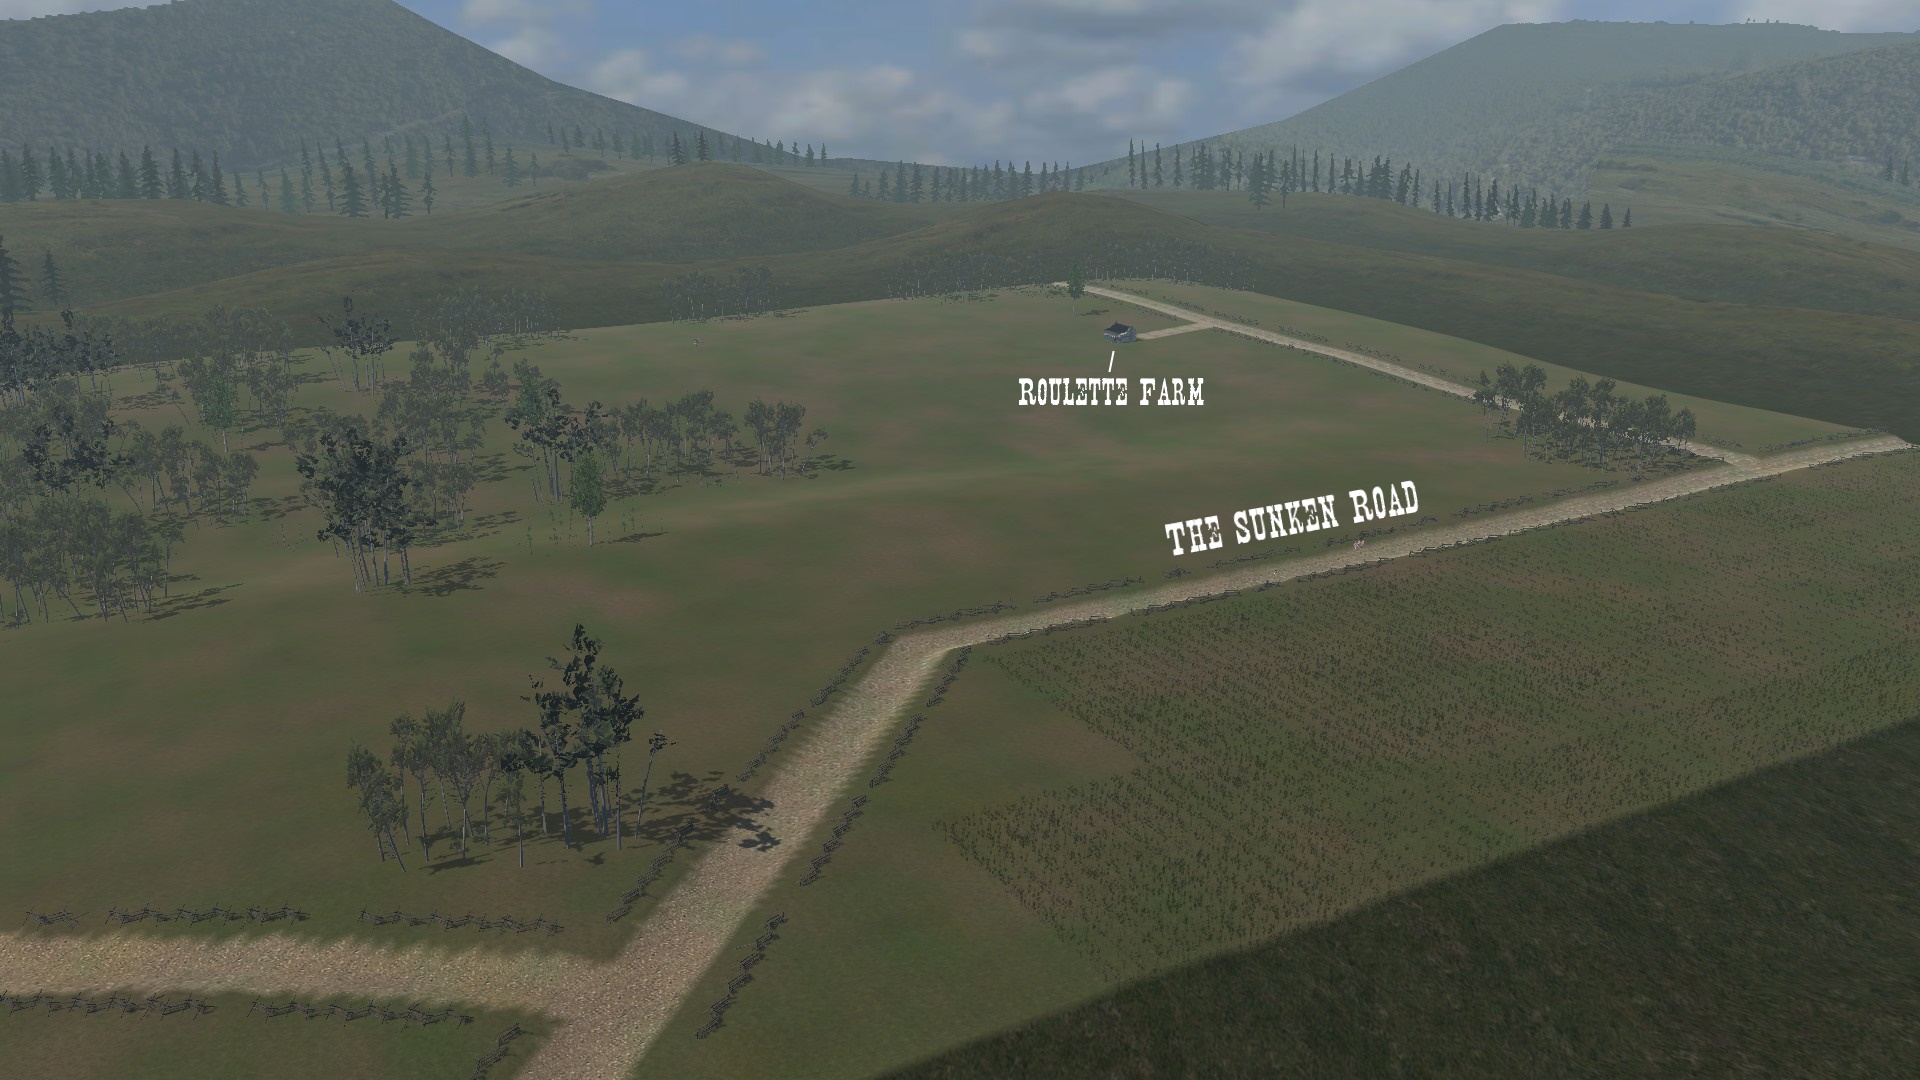
Antietam: The Sunken Road
(Custom battle exclusive)
By midday on September 17th, 1862, the main action of the Battle of Antietam had shifted to the center of the Confederate line. This sector of the line was theoretically the weakest, however Confederate Major General Daniel Harvey Hill's men were in a strong defensive position atop a gradual ridge, in a sunken road worn down by years of wagon traffic, which formed a natural trench. At around 9:30 a.m., Union Brigadier General William H. French launched a series of assaults against Hill's position in the sunken road.
The first brigade to attack were mostly inexperienced troops, and were quickly cut down by heavy rifle fire. The second attack consisted of more raw recruits and was likewise subjected to heavy fire, but managed to repel a counterattack by Major General Robert E. Rodes' Alabama Brigade. The third attack included three veteran regiments, but they also were repulsed by Confederate fire from the sunken road. In under an hour, French's division suffered 1,750 casualties out of his 5,700 men. By 10:30 a.m., reinforcements were arriving on both sides, and Robert E. Lee sent his final reserve division under Major General Richard H. Anderson to bolster Hill's line and extend it to the right. At the same time, the 4,000 men of Union Major General Israel B. Richardson's division arrived on French's left; the last of Major General Edwin V. Sumner's three divisions.
The Irish Brigade of Brigadier General Thomas Francis Meagher lead the fourth attack of the day against the sunken road. As they advanced, Father William Corby, a regimental chaplain, rode on horseback up and down the front of the formation shouting the words of the Catholic prayer of absolution, forgiving the sins of those who were about to die. As they first came into view of the Confederates, they were fired upon and a number of their men went down, but the Irishmen continued to press on. They then disappeared behind a rise in the rolling terrain for about a minute and a half, out of sight of the Confederate riflemen, and when they appeared again, they were only 30 yards from the Confederate line. Half of the 63rd New York fell in just the first volley unleashed by the Confederates. The Irish Brigade were armed with smoothbore muskets and loaded buck-and-ball ammunition, which at this close range, had devastating effects on the Confederate defenders. However the Irish Brigade suffered terribly in this action, and General Meagher frantically rode off to seek reinforcements. He found Colonel Francis C. Barlow, and shouted, "For God's sake, Barlow, come and help!", however Barlow insisted that he did not have orders from Brigadier General John C. Caldwell, and could not advance. Frustrated and helpless, Meagher rode off, knowing his men would have to continue to fight on alone.
Meagher tried to rally his men for a bayonet charge, but in the chaos of the battle, his attempts were in vain. A bullet then struck his horse, and the animal fell, nearly crushing Meagher, sending him into shock, and he had to be carried off the field. The Irish Brigade was running low on ammunition, and some units had lost more than half of their men and most of their officers. Major General Israel B. Richardson saw the Irishmen needed help, and rode off to find Caldwell's men, whom he had ordered to support the Irish Brigade, but they had not done so. Richardson found one of Caldwell's staff officers and demanded to know the whereabouts of Caldwell. He was told that General Caldwell was in the rear, standing behind a haystack, "observing". Furious, Richardson shouted, "God damn the field officers!", and ordered Caldwell's officers to immediately move the brigade forward to relieve the Irish. Caldwell's brigade formed up behind the Irish Brigade and took the place of their shredded ranks, which had lost 540 men before they were ordered to withdraw.
Confederate General Anderson's division had been of little help to the defenders after Anderson was wounded early in the fighting. Other key leaders were lost as well, including George B. Anderson (no relation), and Colonel Charles C. Tew of the 2nd North Carolina, who was killed minutes after assuming command. General Rodes was wounded in the thigh but was still on the field. Colonel John B. Gordon of the 6th Alabama received five serious wounds in the fight; twice in his right leg, twice in the left arm, and once in the face. The latter injury knocked him unconscious, and he fell face down in his cap. Gordon later told colleagues that he would have drowned in his own blood, except for the fact that a hole had been shot in his cap, which allowed the blood to drain out. As Caldwell's brigade advanced around the right flank of the Confederates, Colonel Barlow and his men seized a knoll commanding the sunken road. This allowed them to shoot down the length of the lane, turning it into a deadly trap.
Lieutenant Colonel James N. Lightfoot, who had taken command after John Gordon fell unconscious, went to General Rodes to ask permission to realign the men of the 6th Alabama to meet this threat. Rodes was caring for a wounded aide and told Lightfoot to do what he thought right. Lightfoot became confused and instead of ordering the regiment to shift to the right, he shouted out, "6th Alabama, about face, forward march!". As the 6th Alabama withdrew, word spread down the line that a full retreat was on, and all five of Robert Rodes' regiments began to scramble back toward Sharpsburg. Many Confederate troops were shot down as they left the relative safety of the sunken road, and Israel Richardson's men were in hot pursuit until massed artillery hastily assembled by General Longstreet drove them back. A counterattack of 200 men led by D.H. Hill got around the Union left flank near the sunken road, and although they were driven back by a fierce charge of the 5th New Hampshire, this stemmed the collapse of the Confederate center.
General Richardson reluctantly ordered his division to fall back, having lost about 1,000 men, with Colonel Barlow being severely wounded, and Richardson himself receiving a mortal wound. The carnage from 9:30 a.m. to 1:00 p.m. on the sunken road gave it the name, "Bloody Lane", leaving about 3,000 Union casualties, and 2,600 Confederates in it's wake along the 800-yard (700 m) road.
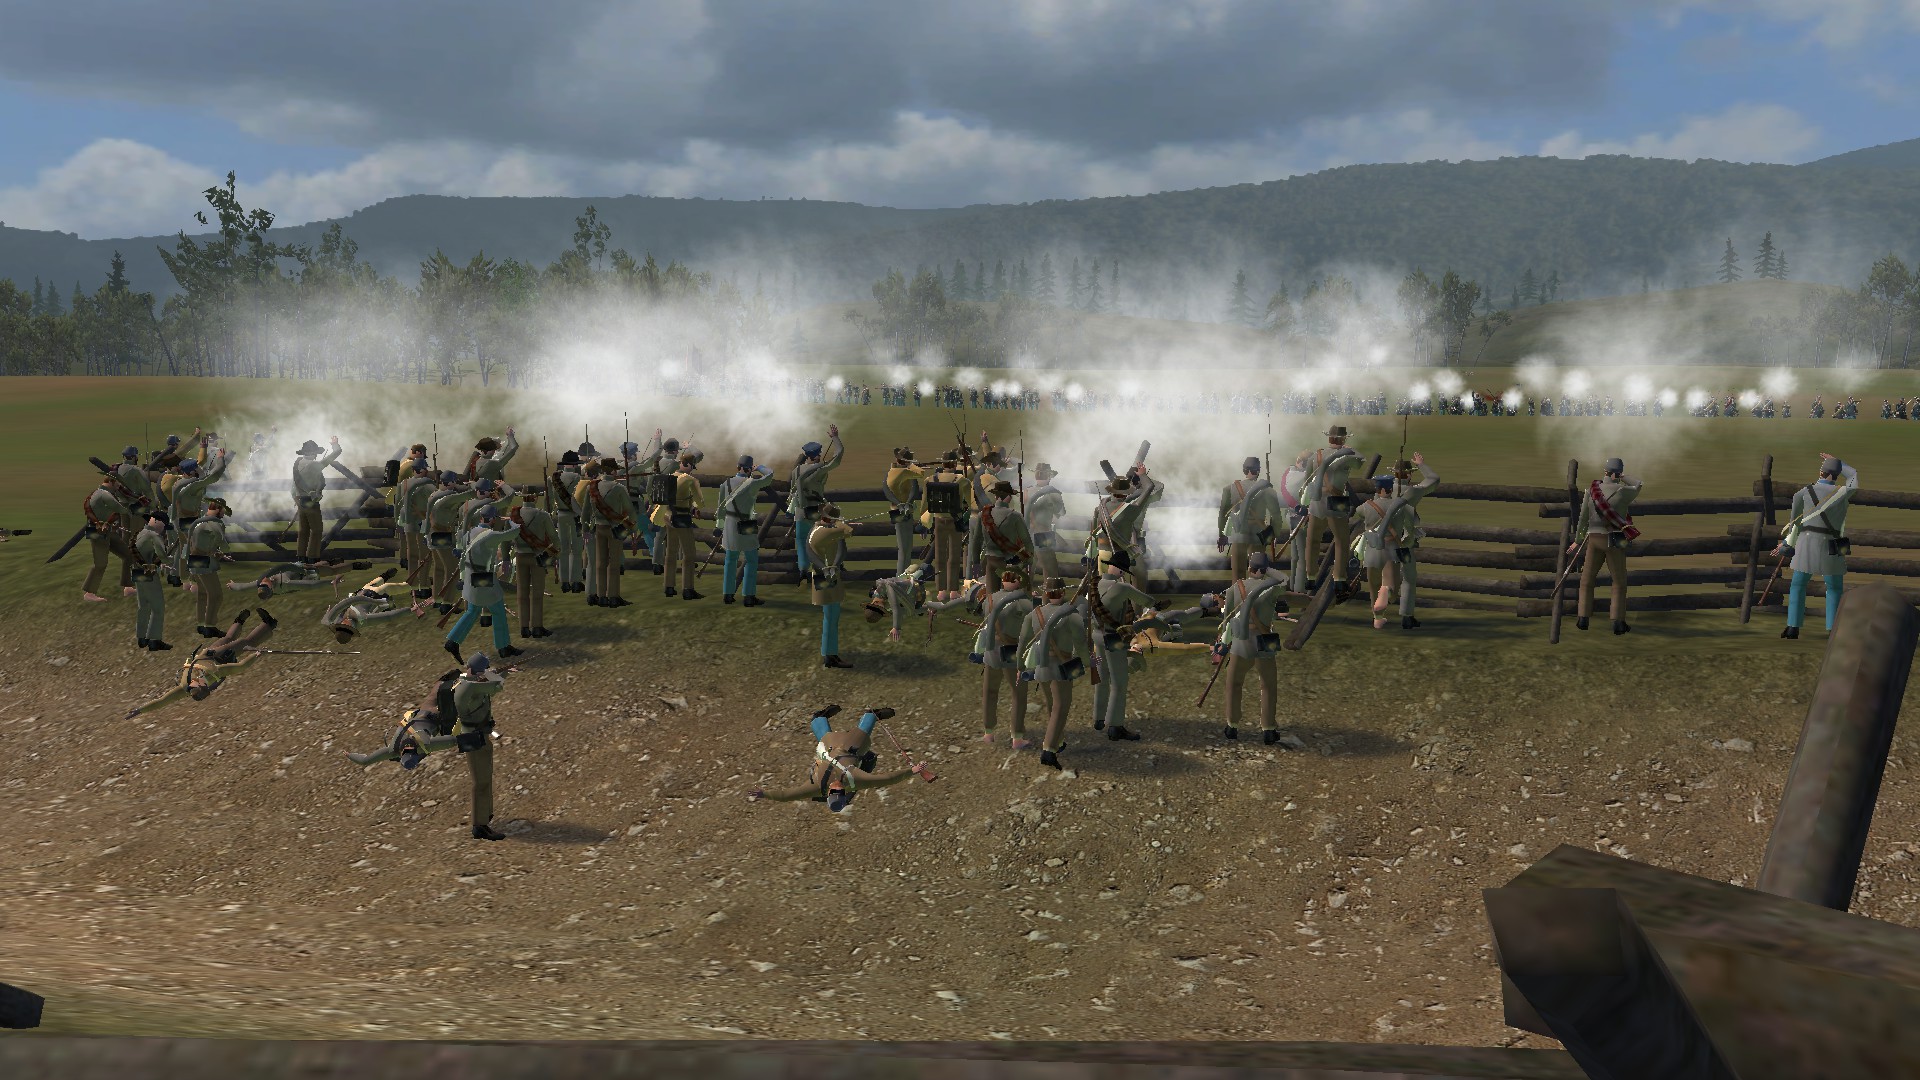
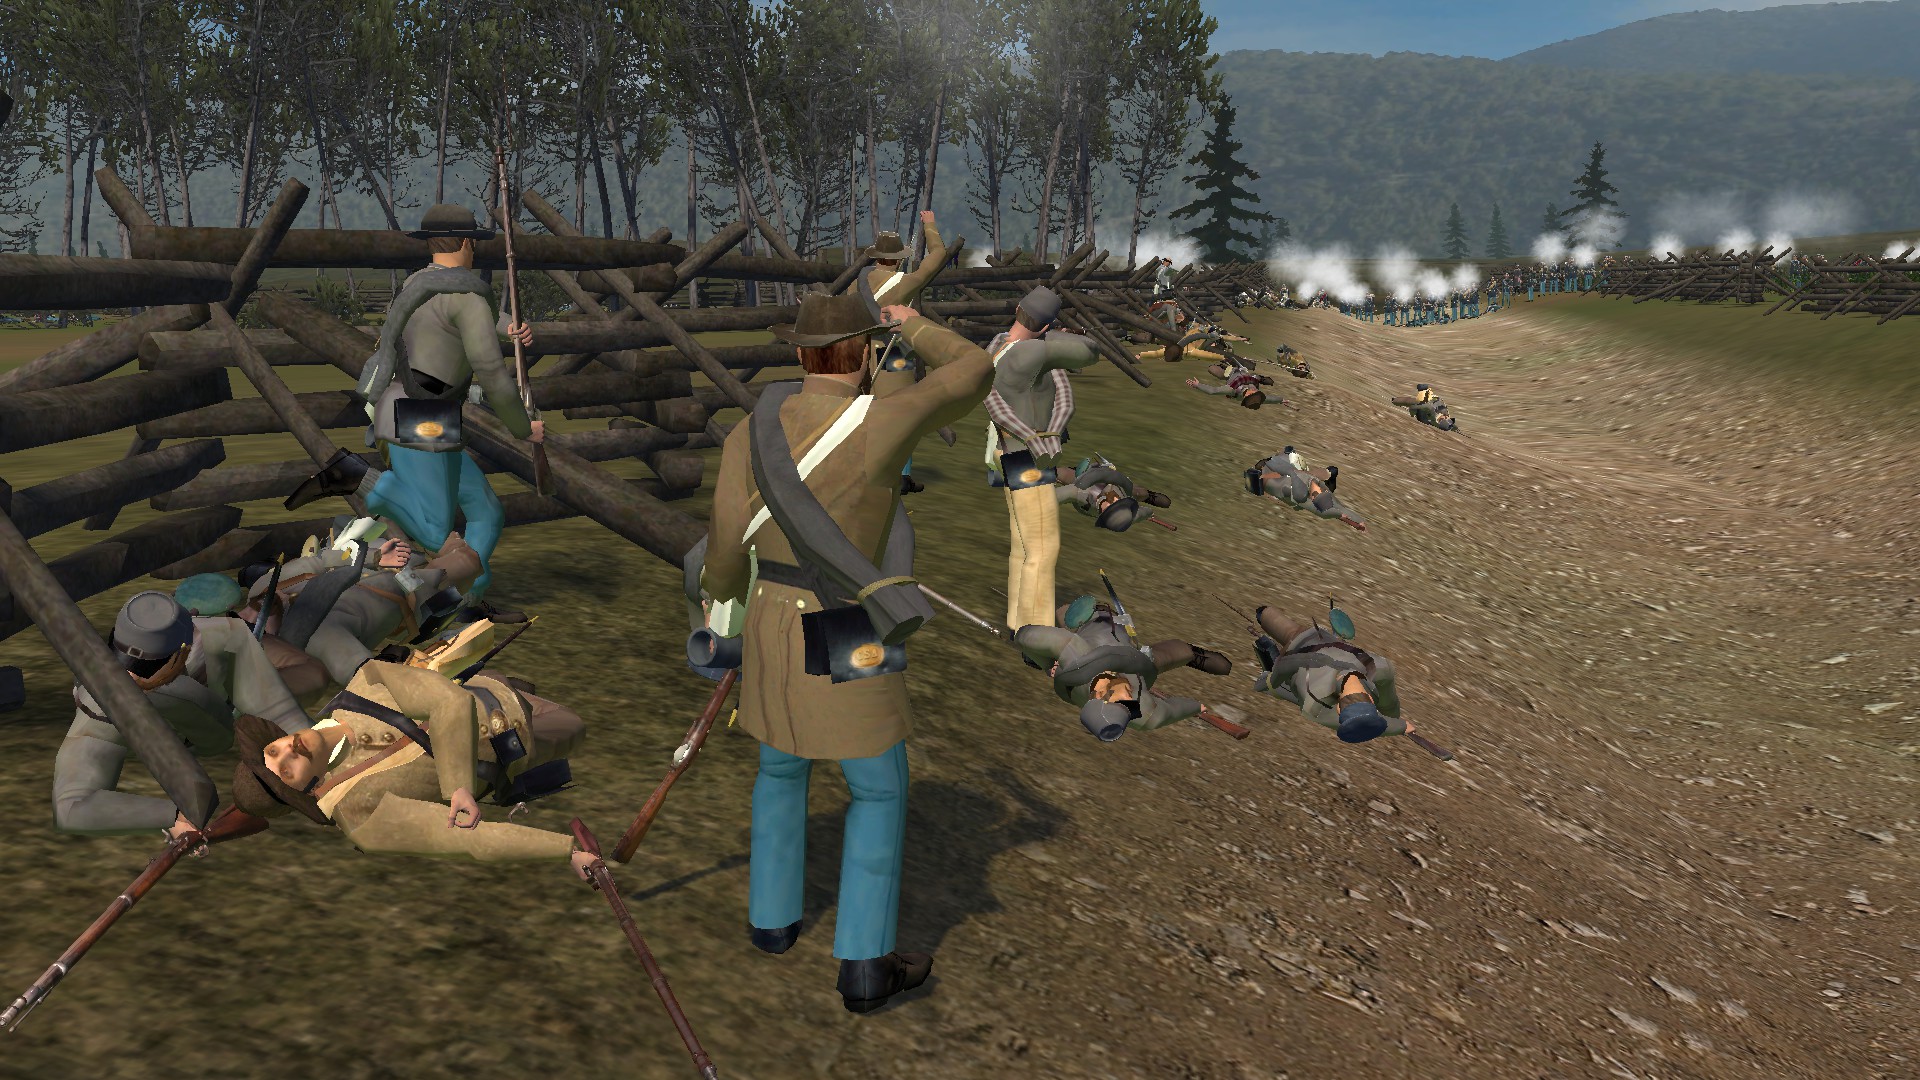
Antietam: Burnside's Bridge
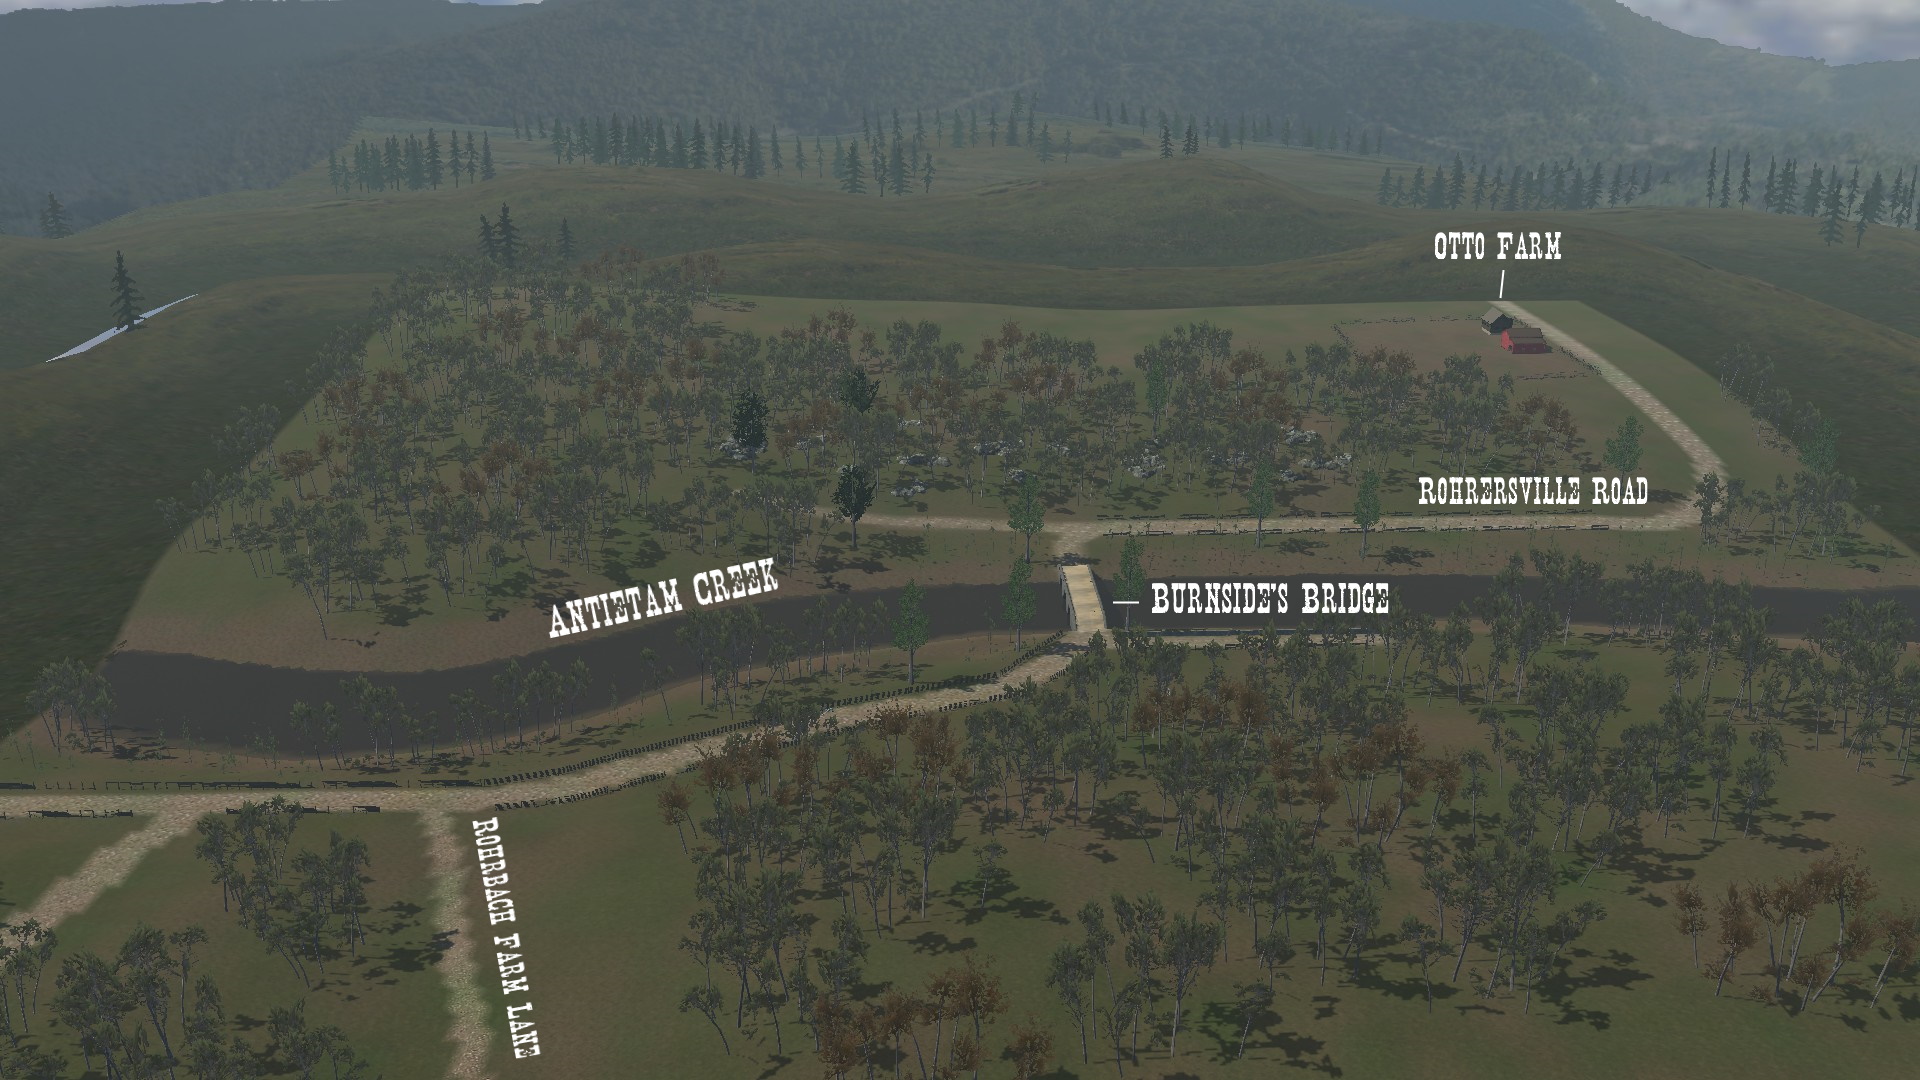
(Custom battle exclusive)
By 10:00 a.m., the fighting at Antietam had moved to the southern end of the battlefield. Major General George B. McClellan's plan called for Major General Ambrose Burnside and the IX Corps to conduct a diversionary attack in support of Hooker's I Corps, hoping to draw Confederate attention away from the intended main attack in the north. Burnside had four divisions consisting of 12,500 troops and 50 guns under his command. Opposing him was a force that had been greatly depleted by Robert E. Lee's movement of units to bolster the Confederate left flank. 400 men of the 2nd and 20th Georgia regiments, under the command of Brigadier General Robert Toombs, with two artillery batteries, defended Rohrbach's Bridge. It would become known to history as, "Burnside's Bridge", because of the notoriety of the battle.
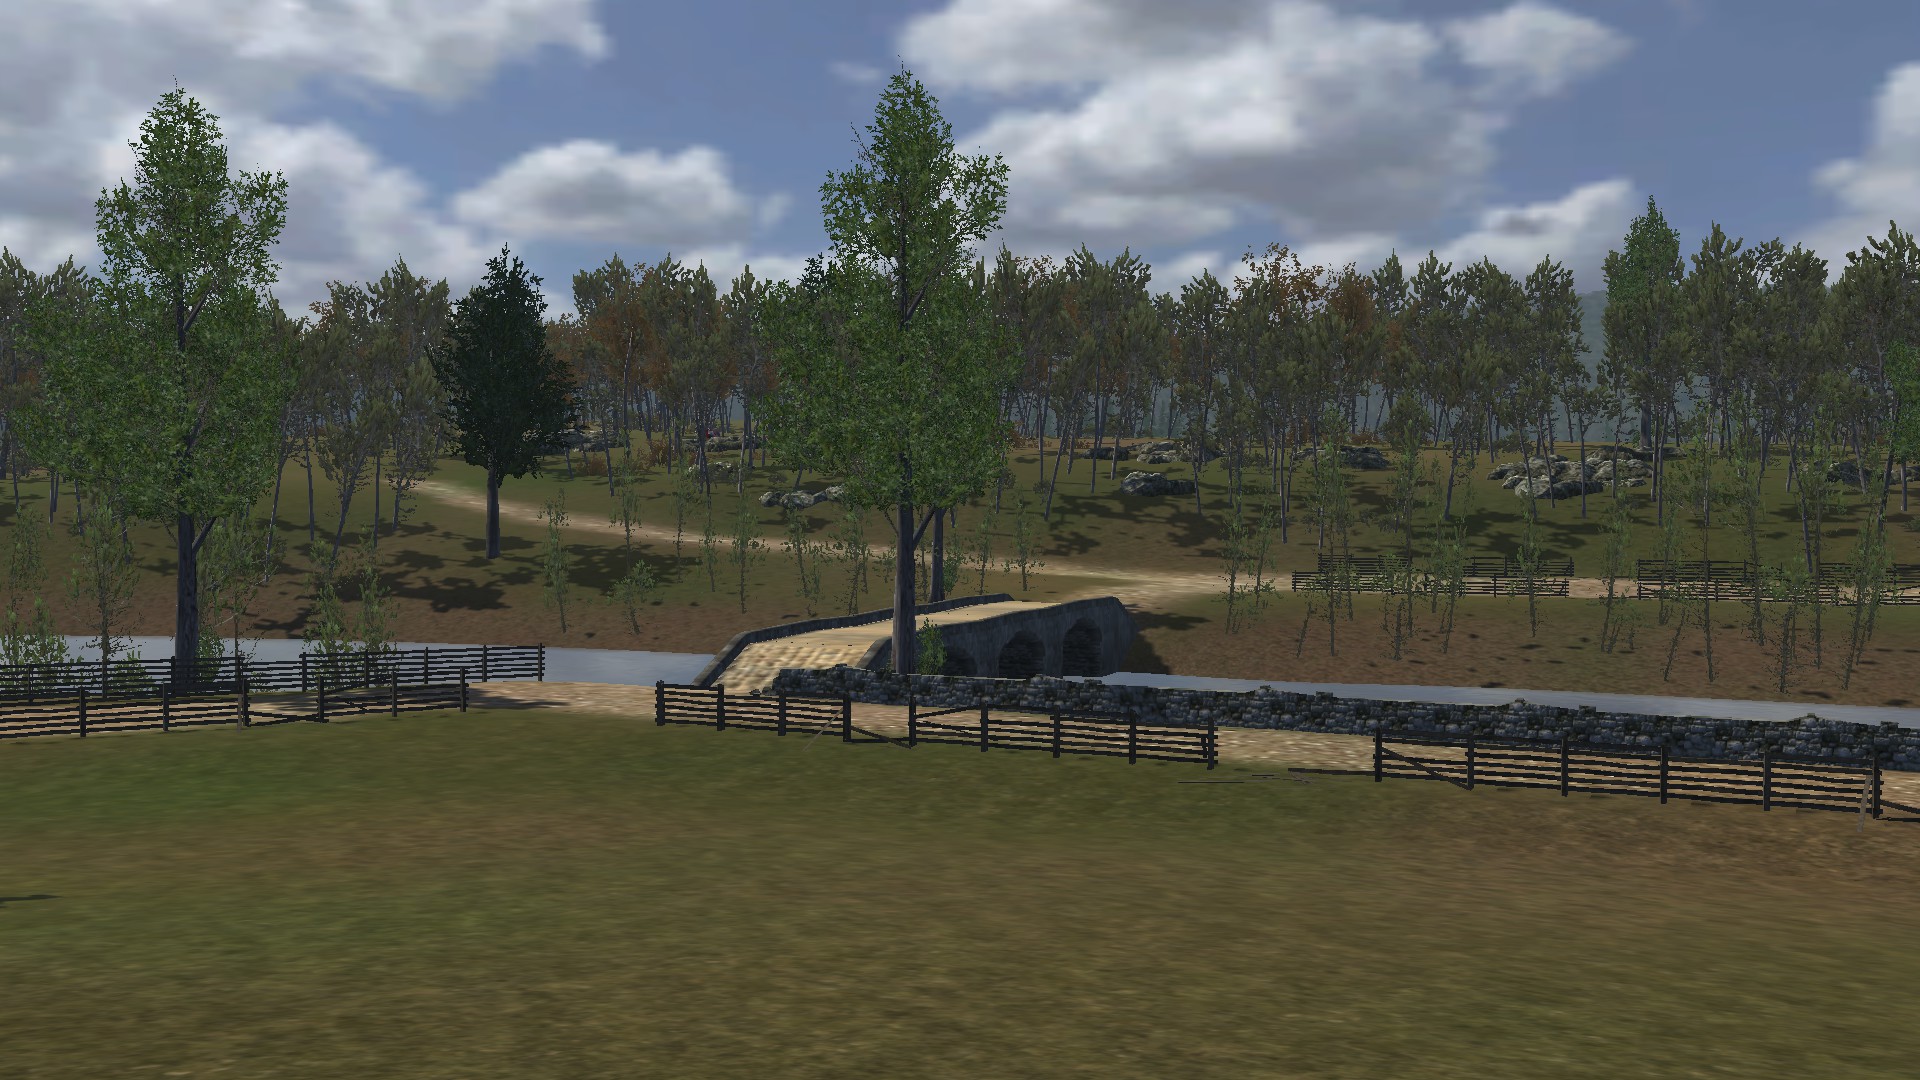
The bridge was a difficult objective, because the road leading to it ran parallel to the creek and was dominated by a 100-foot (30 m) high bluff, covered by trees and strewn with boulders from an old quarry, giving infantry and sharpshooters covered positions to fire from. In this sector, Antietam Creek was usually no more than 50 feet (15 m) wide, and several stretches of the creek were only waist deep and out of range of Confederate fire. Burnside has been widely criticized for ignoring this fact, and instead concentrating his plan on storming the bridge while simultaneously crossing a ford that McClellan's engineers had identified downstream. However when Burnside's men reached the ford, they found the banks too high to overcome.
Colonel George Crook's Ohio brigade was supposed to lead the first attack, and skirmishers from the 11th Connecticut, who were ordered to clear the bridge for the Ohioans to cross, received punishing fire for 15 minutes which forced them to withdraw with 139 casualties, 1/3rd of their strength, including their commander, Colonel Henry W. Kingsbury, being fatally wounded. Crook's main assault went awry when his unfamiliarity with the terrain caused his men to reach the creek a quarter mile (400 m) upstream from the bridge, where they exchanged volleys with Confederate skirmishers for the next few hours. General Burnside and Brigadier General Jacob D. Cox directed a second assault at the bridge with one of Sturgis' brigades, but they also fell victim to the Confederate sharpshooters and artillery, and the attack fell apart. By this time it was noon, and McClellan was losing his patience with Burnside. He sent a succession of couriers to motivate Burnside to move forward, and even ordered one aide to say, "Tell him if it costs 10,000 men he must go now."
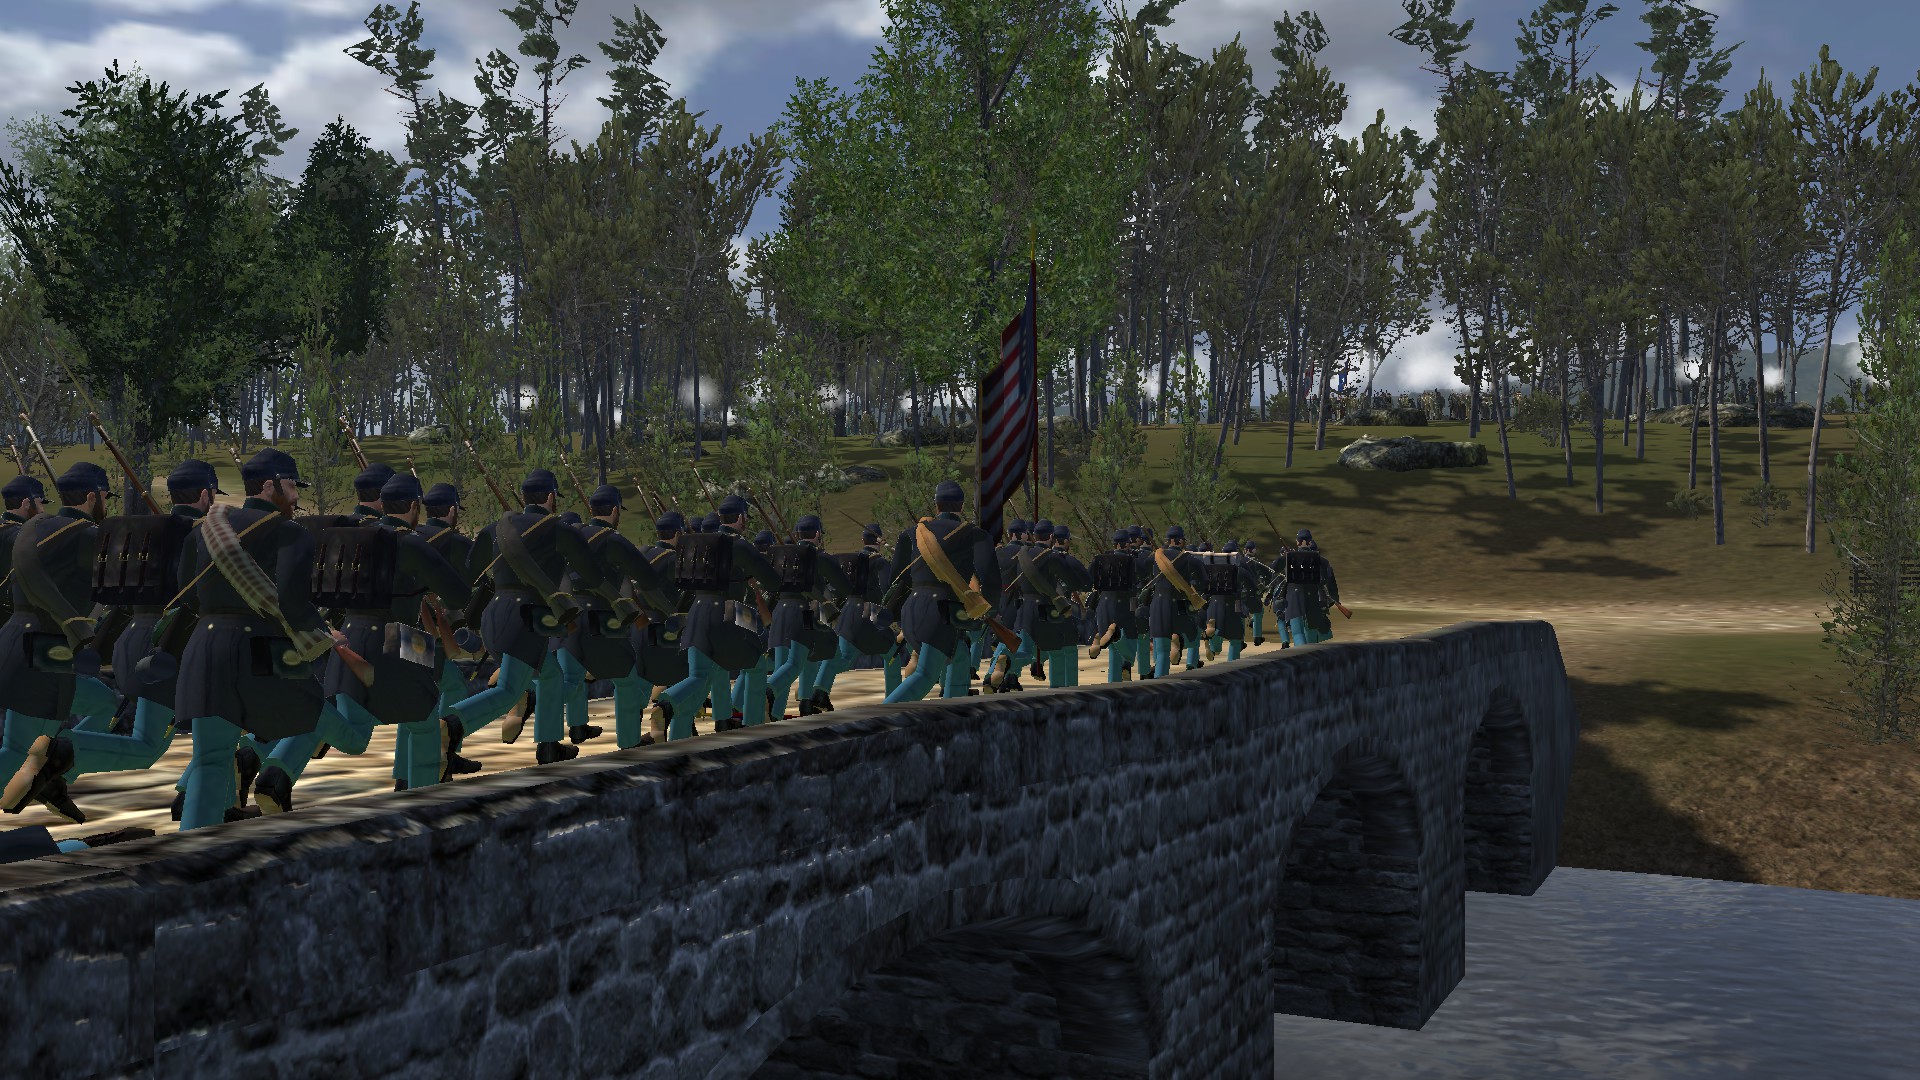
The third attempt to take the bridge was at 12:30 p.m. by Sturgis' other brigade, commanded by Brigadier General Edward Ferrero, and the 51st New York and the 51st Pennsylvania were chosen to lead the attack. Colonel Ferrero was a man that abstained from drinking alcohol, and had previously disciplined his brigade by taking away their whiskey ration. Ferrero rode up hard to his brigade and, ordering them to their feet, shouted, “It is General Burnside’s special request that the two 51sts take that bridge. Will you do it?” The cynical silence that followed was broken when Corporal Lewis Patterson shouted from the ranks of the Pennsylvanians, “Will you give us our whiskey, if we take it?” Ferrero wheeled around and exclaimed, “Yes, by God, you shall all have as much as you want, if you take the bridge!” The two 51st's, New York on the left and Pennsylvania on the right, charged downhill and took up positions on the east bank.
Maneuvering a captured light howitzer into position, they fired double canister down the bridge and got within 25 yards (23 m) of the Confederates. By 1:00 p.m., the Confederates were running low on ammunition, and word reached Toombs that Union Brigadier General Isaac Rodman's men were crossing Snavely's Ford on their flank, therefore Toombs decided to order a withdrawal. Toombs' Georgians had stalled Burnside's assault on the southern flank for more than three hours, and inflicted more than 500 casualties on the Union forces there, while suffering fewer than 160 casualties themselves.
Petersburg: The Crater
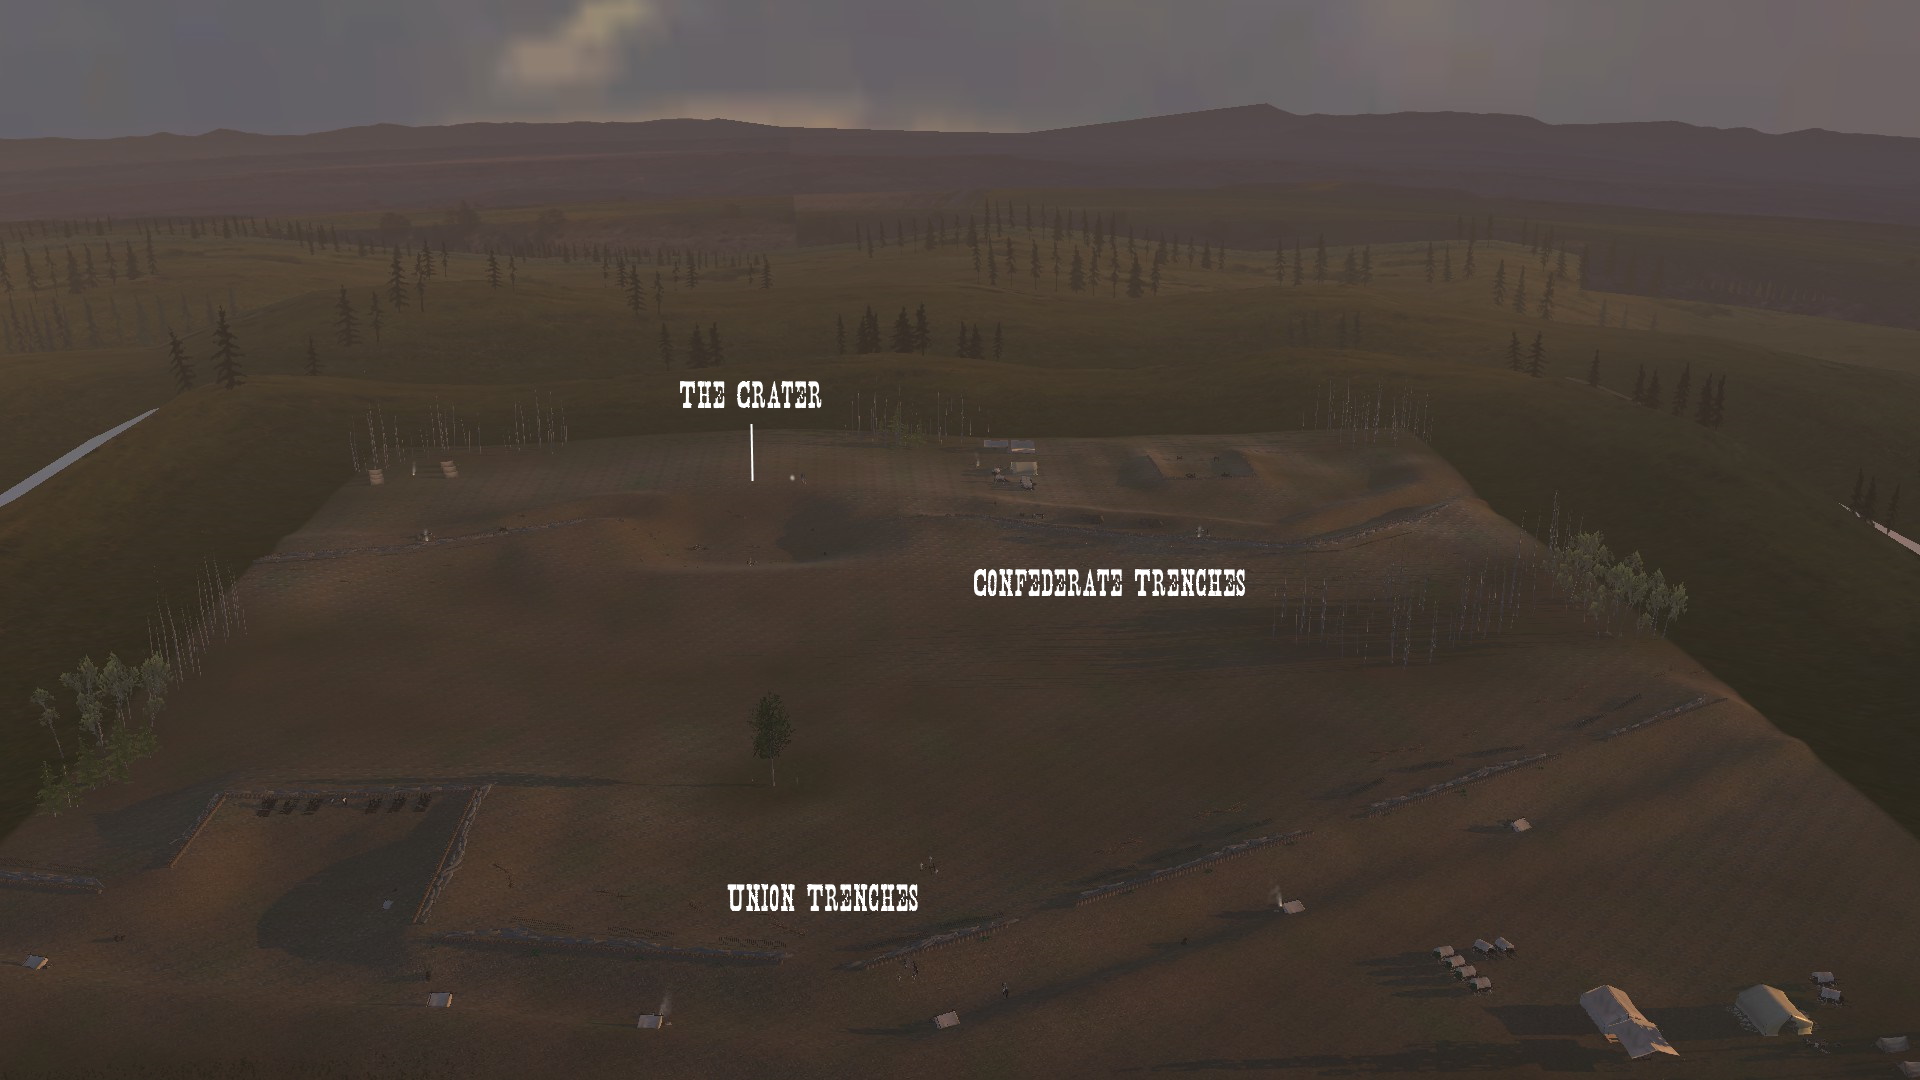
During the American Civil War, Petersburg, Virginia, was an important railhead, where four railroad lines from the south met before they continued to Richmond, the capital of the Confederacy. Most supplies to General Robert E. Lee's army and the city of Richmond funneled through that location, and the Union considered it vital for the Confederate defense of Richmond. As a result, Petersburg was put under siege in June, 1864, and the opposing armies aligned themselves along a series of fortified positions and trenches more than 20 miles (32 km) in length. The battle settled into a stalemate and General Ulysses S. Grant was frustrated at the inactivity to which he was confined. Lieutenant Colonel Henry Pleasants, a mining engineer from Pennsylvania in civilian life, proposed digging a long mine shaft under the Confederate lines and planting explosive charges directly underneath Elliott's Salient. General Ambrose Burnside agreed to Pleasants' plan, and digging began in late June, however Generals Grant and Meade saw the operation as a, "mere way to keep the men occupied", and doubted it would be of any actual tactical value.
Work progressed steadily, and on July 17th, the main shaft reached under the Confederate position. Rumors of the mine's construction soon reached the Confederates, but General Lee refused to believe or act upon them for two weeks before he commenced countermining attempts, which were sluggish and uncoordinated, and inevitably unable to discover the mine. Union soldiers filled the mine with 320 kegs of gunpowder, totaling 8,000 pounds (3,600 kg), and on July 28th, the powder charges were armed.
Burnside had trained a division of United States Colored Troops (USCT) for two weeks under Brigadier General Edward Ferrero to lead the assault, which consisted of two brigades, one designated to go to the left of the crater and the other to the right. Burnside's two other divisions, made up of white troops, would then move in, supporting Ferrero's flanks and race for Petersburg itself. Despite the careful planning and intensive training, on the day before the attack, General Meade ordered Burnside not to use the black troops to lead the assault, claiming that if the attack failed, there would be political repercussions as it would appear that the black troops were being used as cannon fodder. Some historians speculate that Meade may have actually ordered the change of plans because he lacked confidence in the combat abilities of black soldiers. Burnside protested this decision to General Grant, but Grant sided with Meade.
Rather than select the commander with the best combat record, Burnside erroneously selected a replacement division of white troops by having his three divisional commanders draw lots. Brigadier General James H. Ledlie's 1st Division was selected, however he was probably the worst commander to be given the job. He was known as an incompetent officer, and failed to brief his men on what was expected of them. During the battle, he was found to be well behind the frontlines, drunk, inside of a bombproof shelter. Ledlie would later be dismissed for his actions during the battle.
The plan called for the mine to be detonated between 3:30 and 3:45 a.m. on the morning of July 30th. Pleasants lit the fuse accordingly, but as more and more time passed and no explosion occurred, Lieutenant Jacob Douty and Sergeant Harry Reese volunteered to crawl into the tunnel to find out what the problem was. After discovering the fuse had burned out, they spliced on a length of new fuse, relit it, and rushed to exit the tunnel. Finally, at 4:44 a.m., the charges detonated in a massive explosion, gouging a crater from the earth that was at least 30 feet (9 m) deep. This crater can still be seen today. The explosion immediately killed 278 Confederate soldiers, and the stunned survivors did not direct any significant rifle or artillery fire at the Union troops for at least 15 minutes. However, Ledlie's untrained division was not prepared for the explosion, and reports indicate they waited 10 minutes before leaving their trenches. Footbridges were supposed to have been placed to allow them to cross their trenches quickly, but these footbridges were missing, further slowing down the attack.
Once Ledlie's men reached the crater, it's staggering spectacle stopped them in their tracks. Lieutenant William H. Powell, an aide to General Ledlie, described the scene as such: "Little did those men anticipate what they would see upon arriving there. An enormous hole in the ground, filled with dust, great blocks of clay, guns, broken carriages, projecting timbers, and men, buried in various ways. Some up to their necks, others to their waists, and some with only their feet and legs protruding from the earth." Instead of moving around the crater, Ledlie's troops entered the crater and were stupefied by the carnage. They began to take prisoners, attempted to help wounded Confederate soldiers, and even taking souvenirs. As more and more Union soldiers rushed into the crater, it quickly became overcrowded. What they thought would make a good rifle pit, quickly became a death trap, as the crater was much too deep and exposed for it to function as a rifle pit.
Confederate Brigadier General William Mahone gathered as many troops together as he could for a counterattack, and in about an hour, they had formed up around the crater and began firing rifles and artillery down into it, in what Mahone later described as a "turkey shoot." Instead of cutting his losses, General Burnside sent in Ferrero's colored troops. Faced with considerable flanking fire, they also descended into the crater seeking cover, and for the next few hours, Mahone's soldiers, along with those of Major General Bushrod Johnson, slaughtered the IX Corps as it attempted to escape from the crater. Union Captain William Gordon McCabe, describing what took place in the cater, wrote, "And now the scene within the horrid pit was such that might only be fitly portrayed by the pencil of Dante, after he had trod nine-circled Hell. Huge missiles fell at regular intervals and burst among the helpless masses huddled together. And every explosion was followed by piteous cries, and often times the very air seemed darkened by flying human limbs."
General Mahone seeking to end the battle, rushed his infantry forward and into the crater, where fierce hand to hand combat broke out. After even further intense bloodshed, suddenly a Confederate officer cried out, "Why in Hell don't you fellas surrender?!", and a reply came back, "Why in Hell don't you let us?!". And thus, the battle was over. Confederate troops killed many of the black prisoners, and shamefully some of the white Union troops also murdered their fellow black soldiers in an attempt to gain mercy from their Confederate captors. All of the black troops who surrendered likely would have been killed if not for General Mahone's direct intervention, begging his men to stop. One Confederate soldier wrote to his family that one of his comrades had killed several black Union prisoners and Mahone told him, "For God's sake, stop!", to which the soldier replied, "Well gen, let me kill one more.", whereupon he deliberately took out his pocket knife and cut one's throat.
Casualties for the Union totaled 3,798, and Confederate losses numbered 1,491. Many of the Union losses were suffered by Ferrero's division of the United States Colored Troops. General Grant wrote to Chief of Staff Henry W. Halleck that, "It was the saddest affair I have witnessed in this war." Despite the battle being a tactical Confederate victory, the strategic situation remained unchanged. Both sides remained in their trenches, and the siege continued.
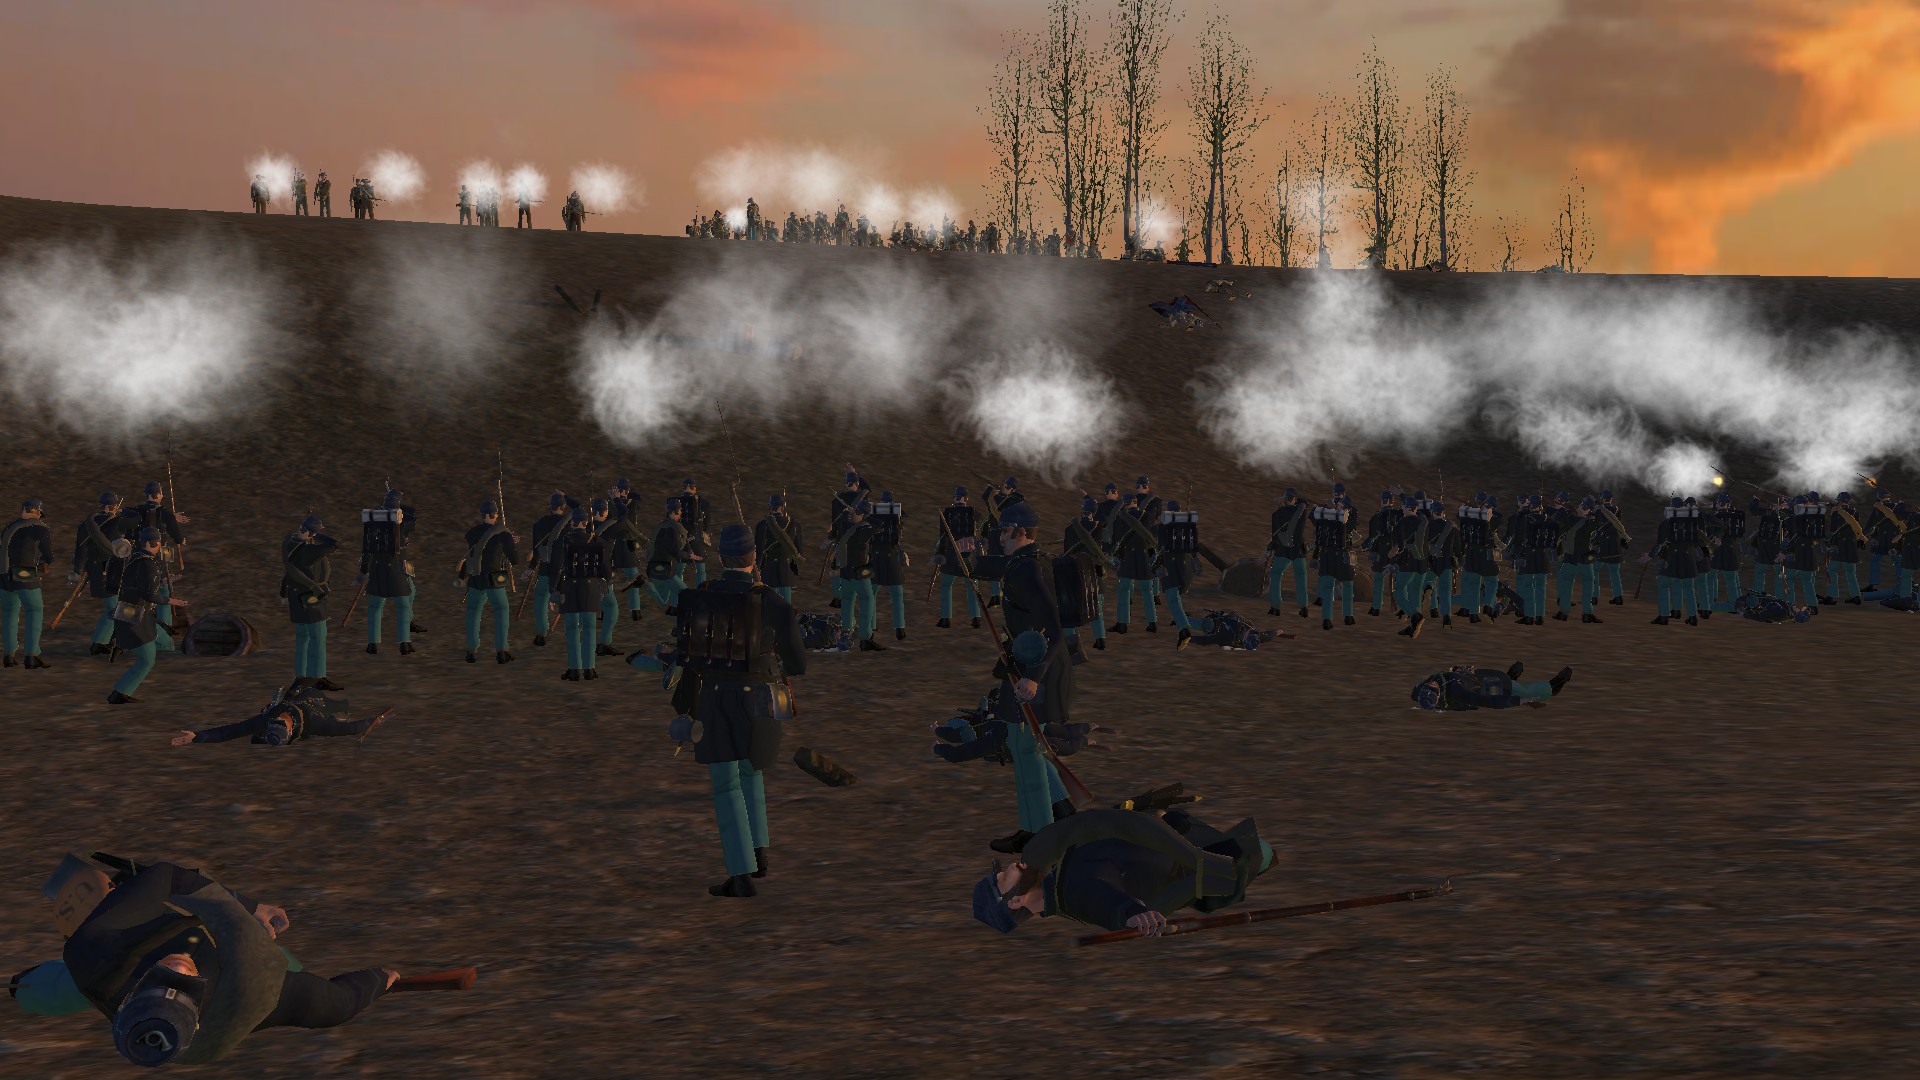
Chancellorsville
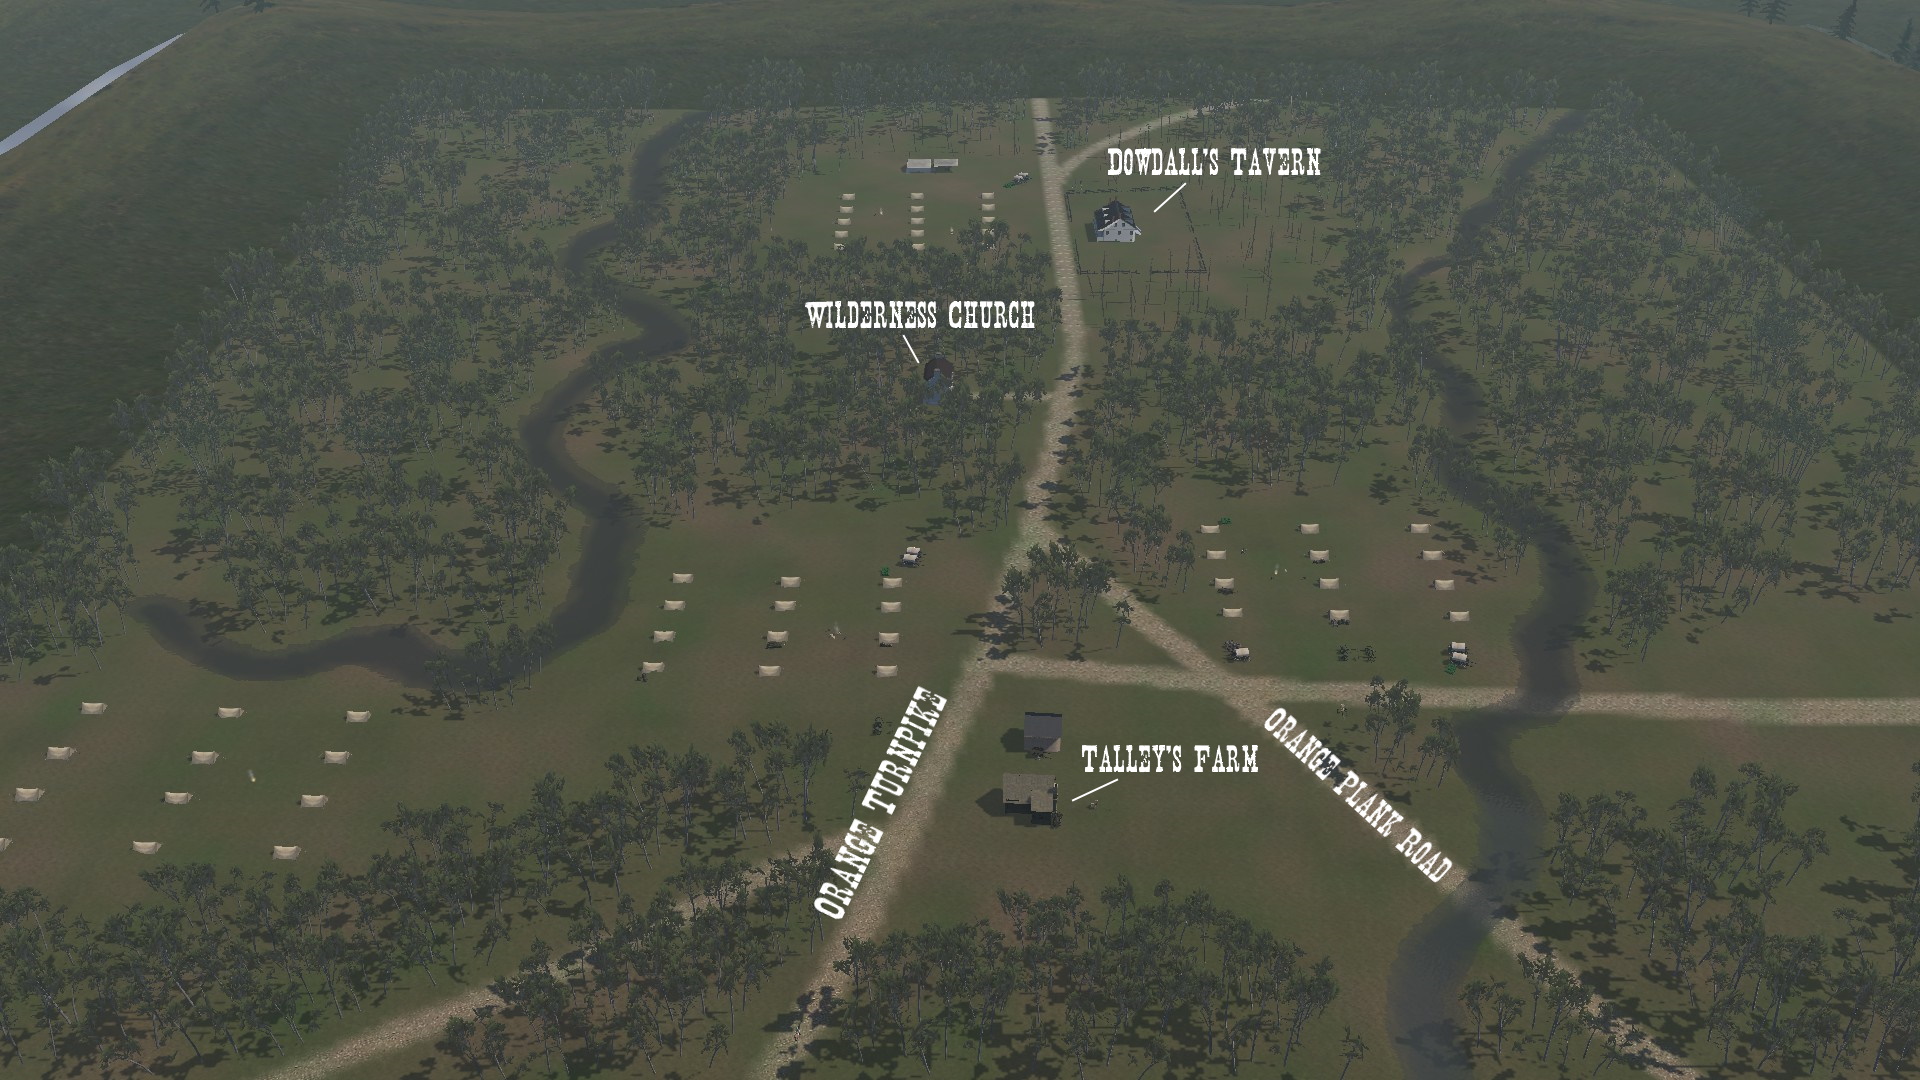
On May 2nd, the Battle of Chancellorsville had entered it's second day of fighting, and Confederate General Thomas J. "Stonewall" Jackson would make the most famous attack of his military career, but also his last. General Robert E. Lee made the audacious decision to divide his army for the second time in this battle, in the face of superior Union numbers, and ordered Jackson to lead his II Corps of 28,000 men around the Union lines to attack their right flank, while Lee exercised personal command of the remaining two Confederate divisions. Starting between 7:00 and 8:00 a.m., Jackson had to make a 12-mile (19 km) march via roundabout roads to reach the Union right, and Confederate cavalry under J.E.B. Stuart kept most Union forces from spotting Jackson on his long flank march.
Brigadier General Fitzhugh Lee and Stonewall Jackson ascended a hill with a sweeping view of the Union position. Jackson was delighted to see that Union Major General Oliver Otis Howard's men were resting, unaware of the impending Confederate threat. The attack formation consisted of two lines stretching almost a mile on either side of the Orange turnpike, followed by a partial line with the arriving division of A.P. Hill. Howard failed to make any provision for defending against a surprise attack, even though Hooker had ordered him to do so. The Union right flank was not anchored on any natural obstacle, and the only defenses against a flank attack consisted of two cannons pointing out into the Wilderness.
Howard's XI Corps was the smallest in the army, and eight of the 27 regiments in the corps had never been in battle before, while the remaining 21 had never been on the winning side of a battle. Many of its officers and enlisted men were immigrants from Germany and other parts of Central Europe, including a number of political refugees from the 1848 revolutions, and these German soldiers suffered from widespread ethnic friction with the rest of the army. Major General Joseph Hooker had no major plans for the XI Corps except for mopping up after the main battle was over, and it was placed out on the army's right flank where it was not expected to be involved in any fighting.
As the day wore on, the men of the XI Corps became increasingly aware that something was going on in the woods to the west of them, and Colonel Leopold von Gilsa went to Howard's headquarters warning him that an all-out enemy assault was imminent, but Howard dismissed this warning, insisting that it was impossible for the Confederates to get through the dense woods. At around 5:30 p.m., Jackson turned to Robert Rodes and asked him, "General, are you ready?", and when Rodes nodded, Jackson replied, "You may go forward then." Most of the men of the XI Corps were encamped, sitting down to eat, with their rifles unloaded and stacked. Their first clue to the impending onslaught were the numerous animals, such as rabbits and foxes, fleeing in their direction out of the woods. This was followed by the crackle of musketry, and then the unmistakable scream of the "Rebel Yell".
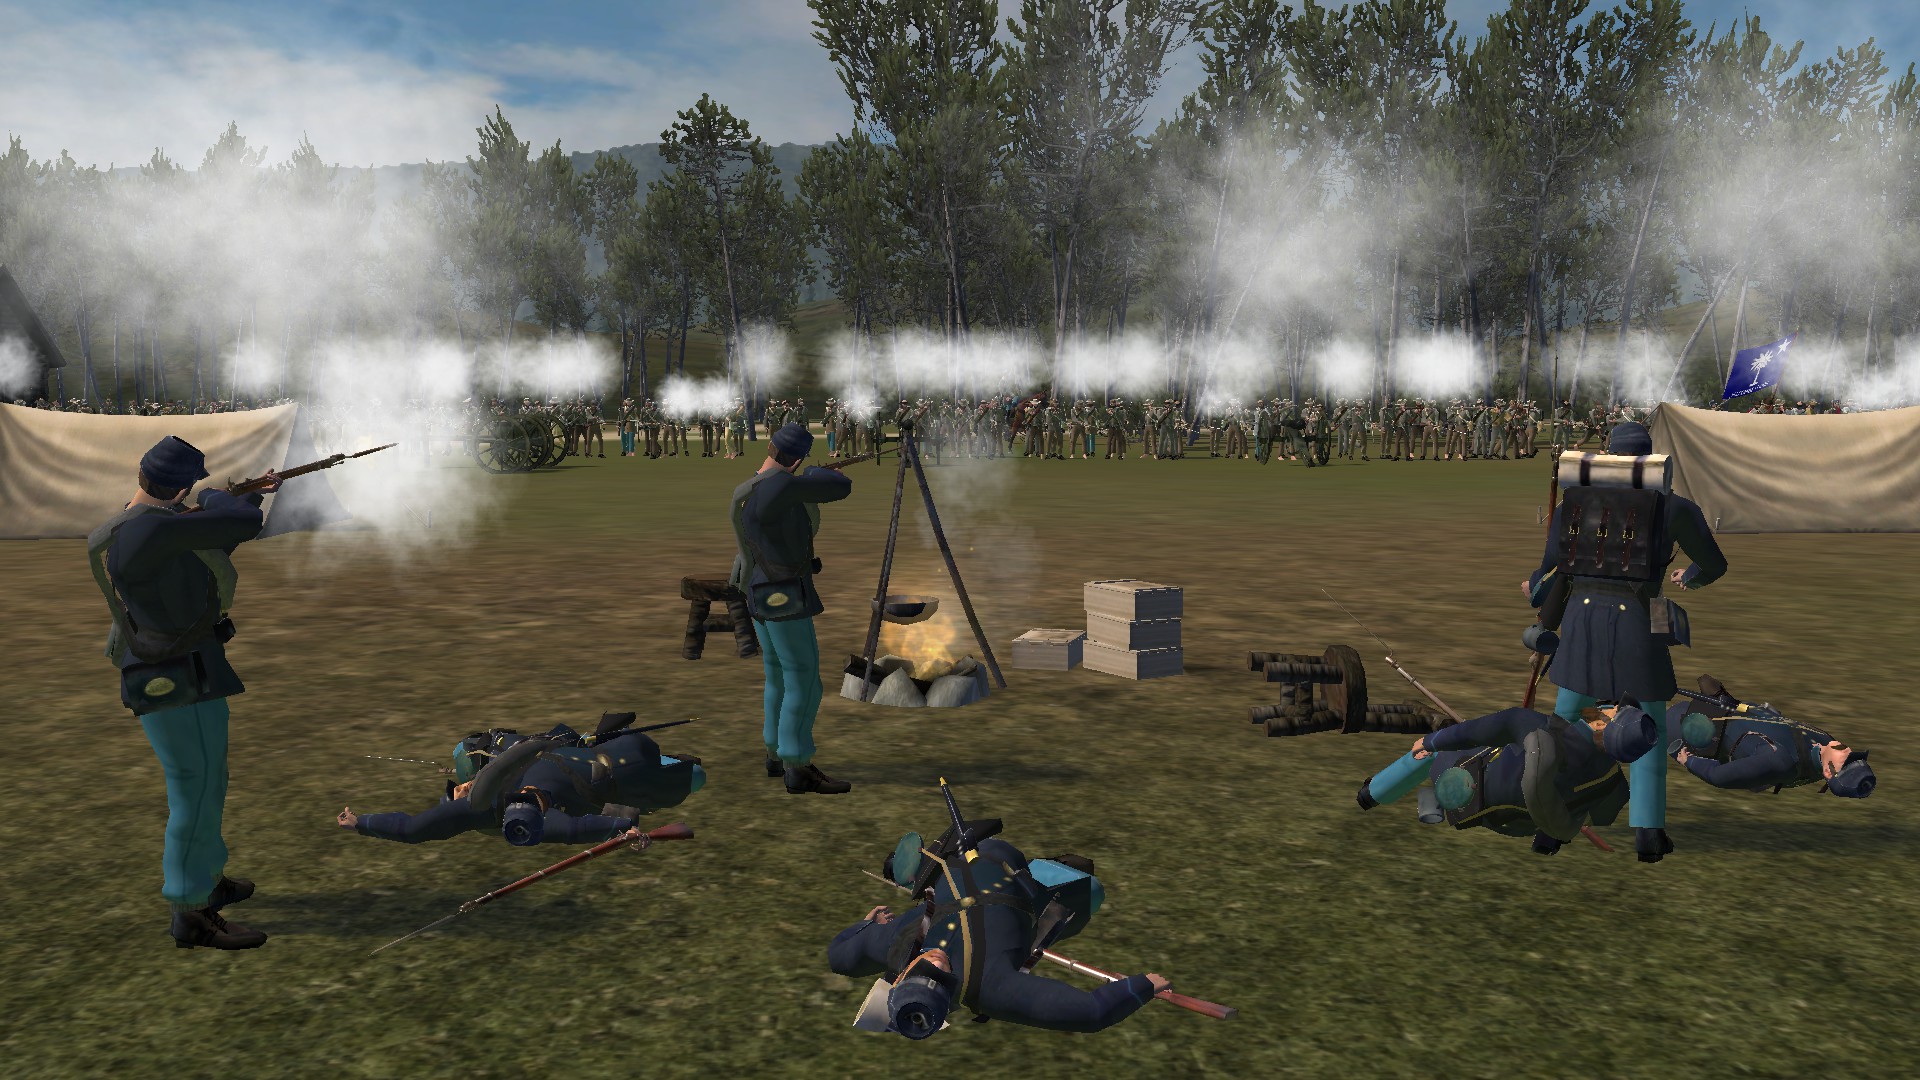
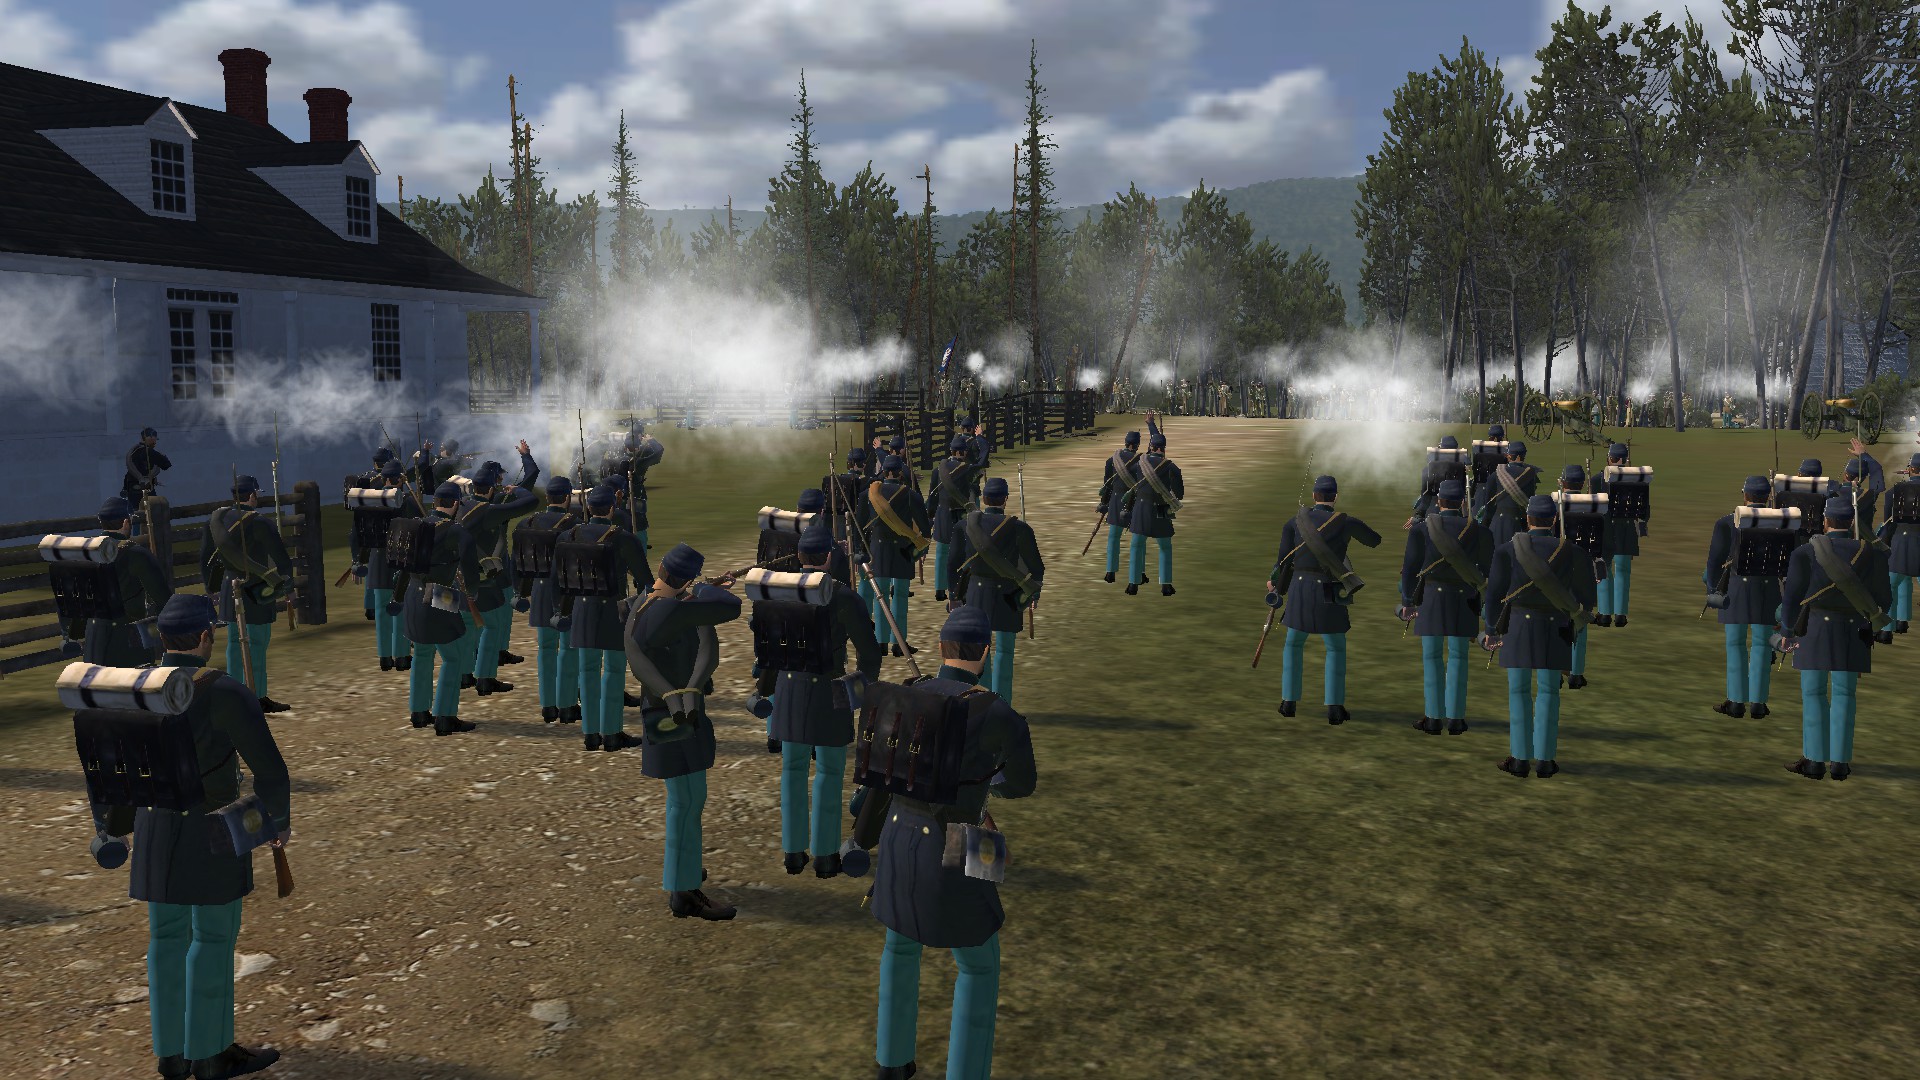
Two of von Gilsa's regiments had been placed forward as a heavy skirmish line, and the massive Confederate assault rolled completely over them. The pair of artillery pieces at the very end of the XI Corps line were captured by the Confederates and promptly turned on their former owners. Brigadier General Charles Devens' division collapsed in a matter of minutes, being attacked on three sides by almost 30,000 Confederates. Colonel Robert Reily and his 75th Ohio managed to resist for about ten minutes before the regiment disintegrated with 150 casualties, including Reily himself, and then joined the rest of the fleeing mob of Union troops. Some men tried to stand and resist, but they were knocked over by their fleeing comrades and a hail of Confederate bullets. Major General Carl Schurz ordered his division to shift to face the Confederate onslaught, and they held on for about 20 minutes. Captain Hubert Dilger, who commanded Battery I of the 1st Ohio Artillery, managed to drive the Confederates off the turnpike for a short time with his cannons, but the sheer weight of Jackson's assault overwhelmed them, and they had to flee.
General Howard attempted to rally the troops by shouting and waving a flag held under the stump of his amputated arm, but he could only gather small pockets of soldiers to resist before his corps disintegrated. Colonel Adolf Buschbeck's brigade put up a last-ditch stand along with Dilger's guns, but they too were forced to retreat. The chaos unfurling on the Union right had gone unnoticed at Hooker's headquarters until the sound of gunfire could be heard in the distance, followed by a panic stricken mob of men and horses pouring into the Chancellorsville clearing. Hooker jumped onto his horse and frantically tried to take action, ordering Major General Hiram Berry's division of the III Corps forward, yelling, "Receive them on your bayonets!", and artillerymen around the clearing began moving guns into position around Fairview Cemetery.
By nightfall, the Confederate II Corps had advanced more than 1.25 miles to within sight of Chancellorsville, but darkness and confusion was causing the attacking Confederates to be almost as disorganized as the routed Union defenders. The XI Corps suffered nearly 2,500 casualties, about one quarter of its strength, including 12 of 23 regimental commanders. Stonewall Jackson wanted to press his advantage before Hooker and his army could reorganize and plan a counterattack, so he rode out onto the Plank Road that night to determine the feasibility of a night attack by the light of the full moon. As Jackson and his staff returned to their own lines, they were incorrectly identified as Union cavalry by men of the 18th North Carolina Infantry, who shot Jackson in an incident of friendly fire. The three bullet wounds Jackson received were not in themselves life-threatening, but his left arm had to be amputated. Robert E. Lee is said to have remarked upon learning of Jackson's wounding, "Jackson may have lost his left arm, but I have lost my right." While recovering, Jackson contracted pneumonia and died on May 10th. His death was a devastating loss for the Confederacy, and Lee was never able to find a suitable replacement for Jackson.
At Chancellorsville, despite being outnumbered more than two to one, Lee won arguably his greatest victory of the war, with it sometimes being described as his "perfect battle". Jackson's flank attack is still considered to this day to be a prime example of military excellence, and continues to be studied in war colleges and by historians. However the Confederacy paid a terrible price for this victory, with Lee taking more casualties than he had lost in any previous battle, including at Antietam. With only 60,000 men engaged, he suffered 13,303 casualties, losing some 22% of his force. On the other hand, of the 133,000 Union men engaged, 17,197 were casualties, a percentage much lower than Lee's. Considering that the Union casualty figures includes 4,000 men of the XI Corps who were captured on May 2nd, there was almost no difference between the Confederate and Union losses at Chancellorsville when comparing only the killed and wounded.
Chickamauga
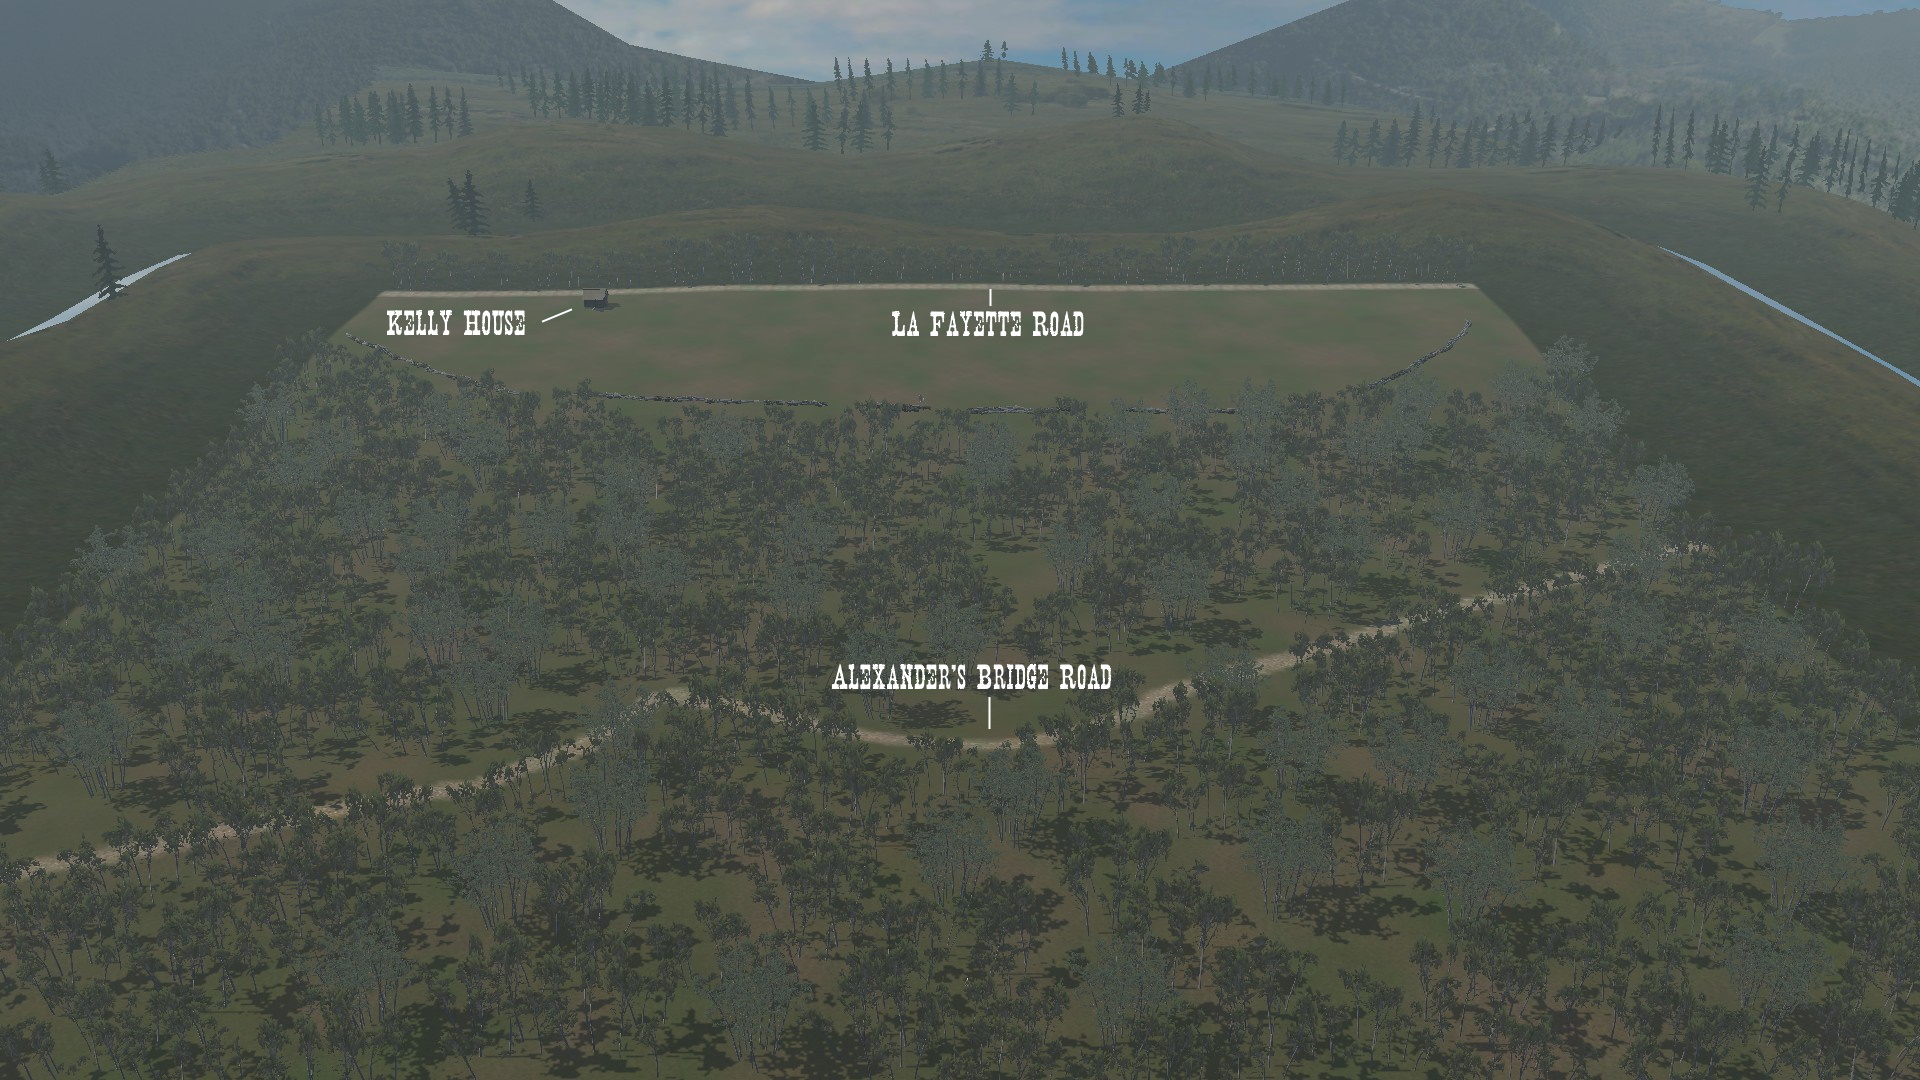
(Custom battle exclusive)
The Battle of Chickamauga, named for Chickamauga Creek, was the first major battle of the Civil War fought in Georgia, the most significant Union defeat in the Western Theater, and involved the second-highest number of casualties after the Battle of Gettysburg. Fighting began in earnest on the morning of September 19th, 1863, as Confederate General Braxton Bragg's men strongly assaulted the Union line, but failed to break it. Late in the morning, Major General William Rosecrans was misinformed that he had a gap in his line, and accidentally created an actual gap directly in the path of an assault by eight Confederate brigades under James Longstreet, whose corps had been detached from the Army of Northern Virginia to support Bragg in the Western Theater. In the resulting rout, Longstreet's attack drove one-third of the Union army, including Rosecrans himself, from the field.
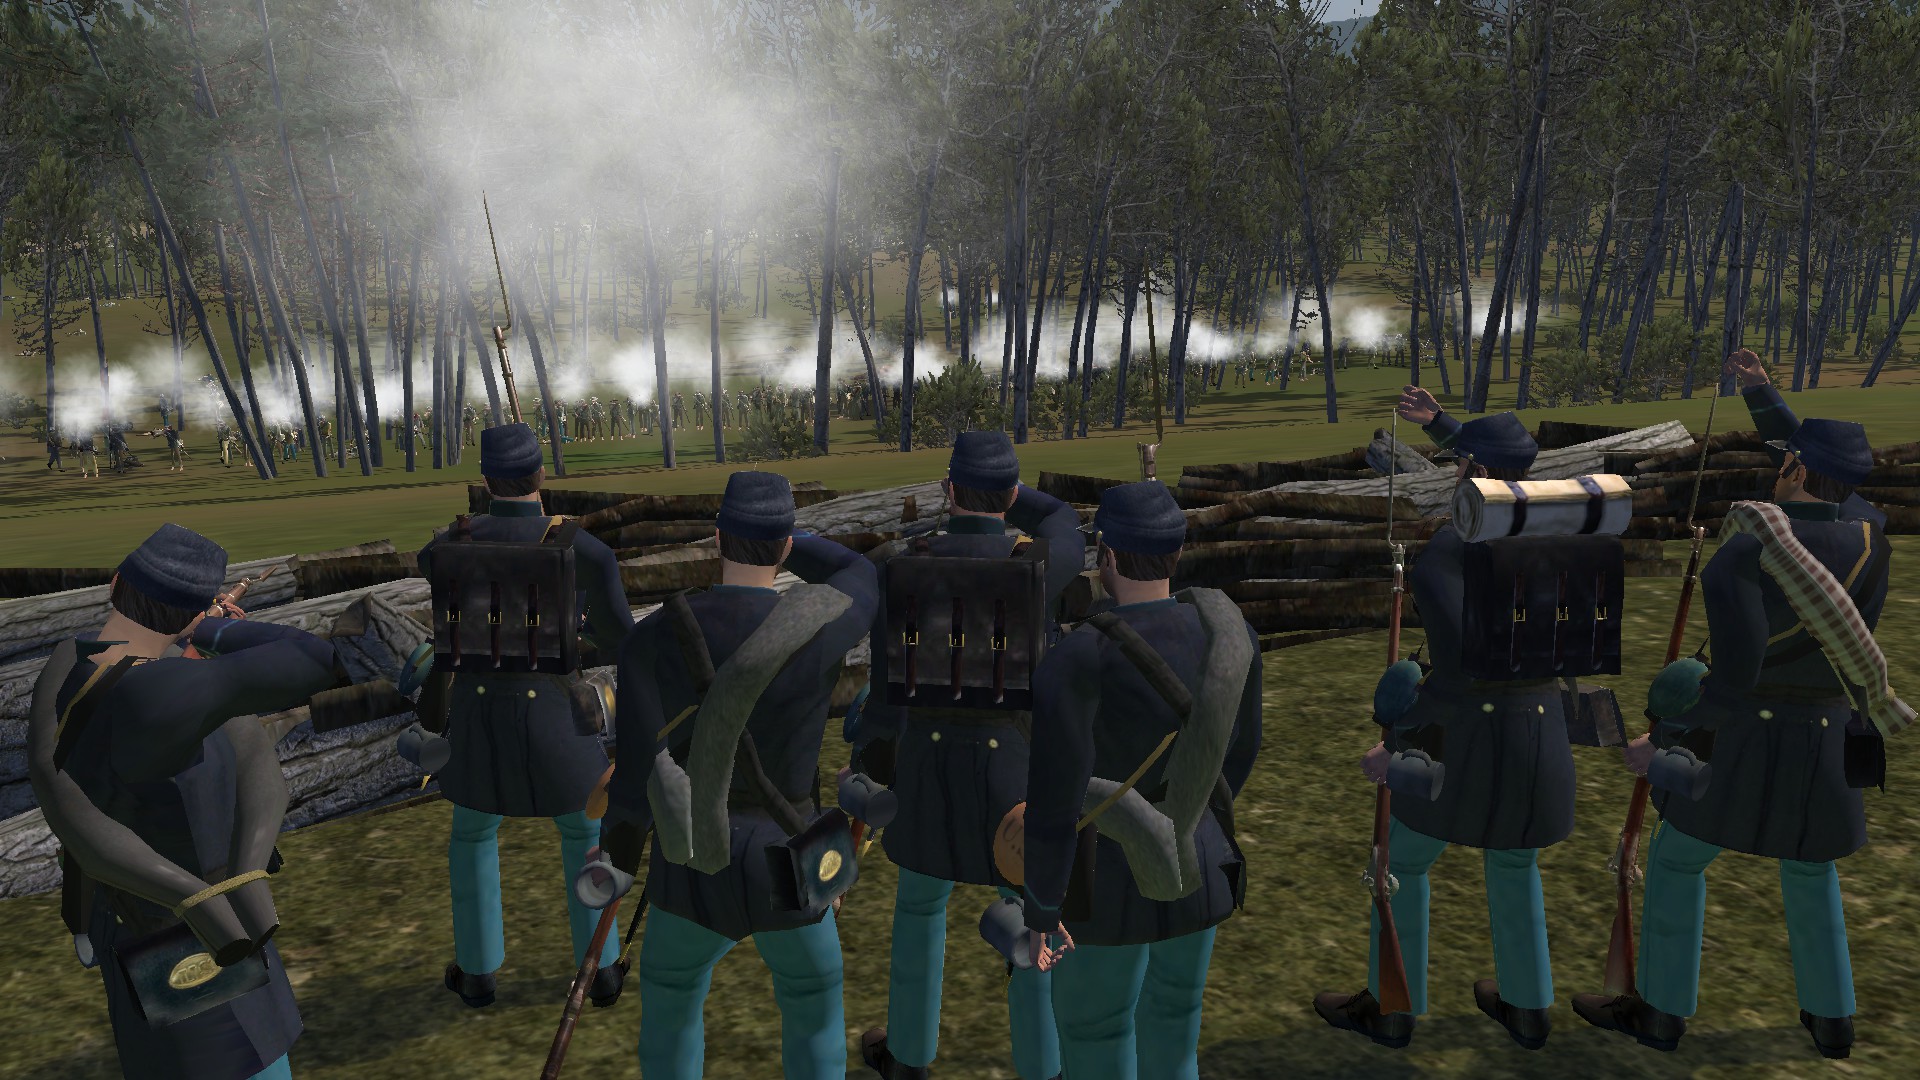
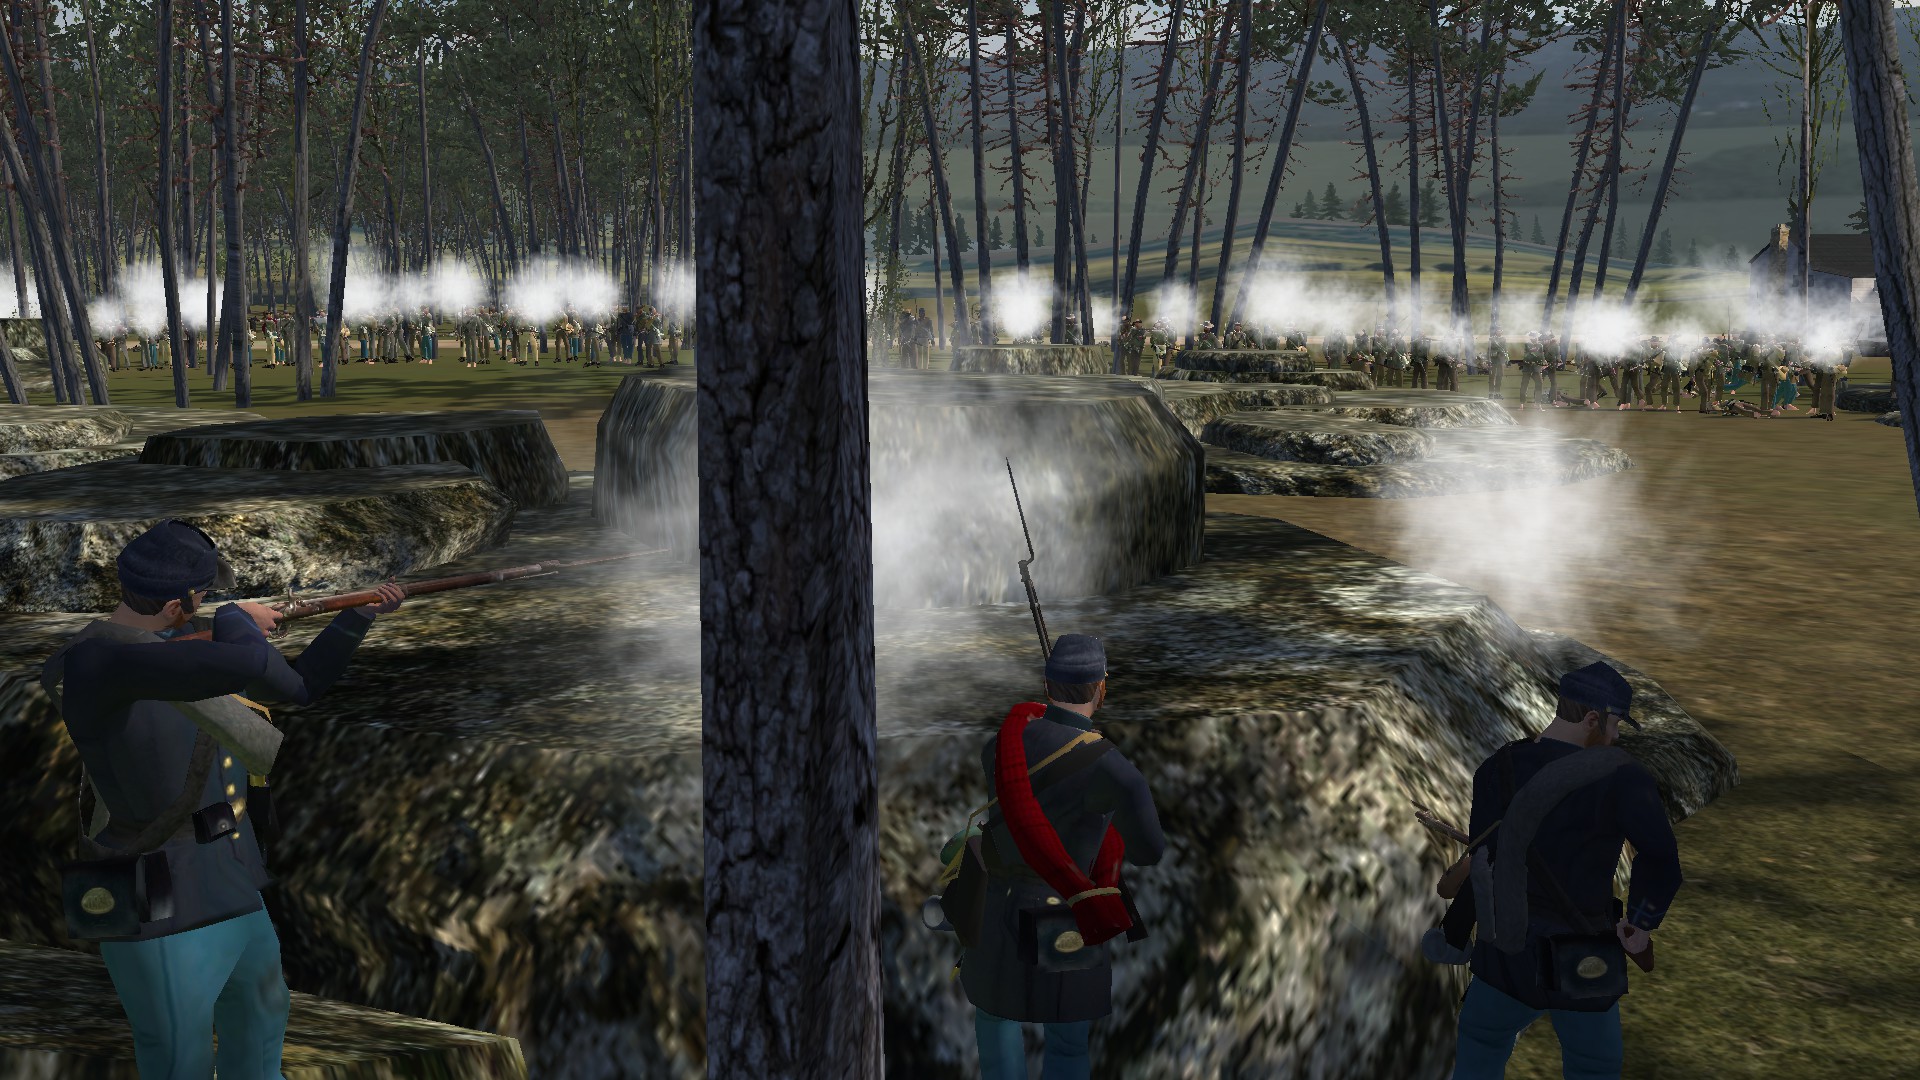
Union units spontaneously rallied to create a defensive line on Horseshoe Ridge ("Snodgrass Hill"), which is the focus of this scene in the mod, forming a new right wing for the line of Major General George Henry Thomas, who assumed overall command of the remaining Union forces. In the few hours before dawn, Union soldiers hastily created a breastwork using logs, fence rails, and any other pieces of wood they could find. Units continued to arrive on Horseshoe Ridge and extended the line, most importantly the 21st Ohio, which was armed with five-shot Colt revolving rifles. Without these men and their repeating rifles, the right flank of the position might have been turned by the 2nd South Carolina. The 535 men of the 21st Ohio expended 43,550 rounds in the engagement.
Throughout the day, the sounds of battle had reached three miles north to McAfee's Church, where the Reserve Corps of Union Major General Gordon Granger was stationed. Granger eventually lost his patience and sent two brigades of Major General James B. Steedman's division and the brigade of Colonel Daniel McCook south without receiving explicit orders. McCook's brigade was left behind at the McDonald house to guard the rear and Steedman's two brigades reached the Union lines in the rear of the Horseshoe Ridge position, just as Confederate General Bushrod Johnson was starting his attack. Several attacks and counterattacks shifted the lines back and forth as Johnson received more and more reinforcements, but many of the men who reinforced him were exhausted.
Despite all the furious activity on Snodgrass Hill, General Longstreet was exerting little direction on the battlefield, enjoying a leisurely lunch of bacon and sweet potatoes with his staff in the rear. Bragg was becoming distraught, and summoned Longstreet to a meeting, telling him that the battle was being lost, which Longstreet found inexplicable, considering the success of his assault column the previous day. However, Bragg knew that his success on the southern end of the battlefield was merely driving the Union to their escape route to Chattanooga, and that the opportunity to destroy the Army of the Cumberland had already come and gone. Starting at around 4:30 p.m., Longstreet finally deployed Brigadier General William Preston's division, which made several attempts to assault Horseshoe Ridge.
At the same time that Longstreet began his assaults, General Thomas received an order from Rosecrans to take command of the army and begin a general retreat. As the Confederates saw the Union soldiers withdrawing, they renewed their attacks, and a significant number of men from Brigadier General Absalom Baird's division were taken as prisoners. Thomas left Horseshoe Ridge, placing Granger in charge, but Granger departed soon thereafter, leaving no one to coordinate the withdrawal. Three regiments that had been attached from other units were left behind without sufficient ammunition, and ordered to use their bayonets. They held their ground until surrounded by Preston's division, and were forced to surrender. The personal determination of George Henry Thomas to maintain the Union position until ordered to withdraw, while his commander and peers fled the battlefield, earned him the nickname, "The Rock of Chickamauga", derived from a portion of a message that Brigadier General James A. Garfield (the future 20th president of the United States) sent to Rosecrans, stating that, "Thomas is standing like a rock."
Longstreet later wrote that there were a total of 25 assaults made on Snodgrass Hill, and over the course of the three days of fighting at Chickamauga, Union losses were 16,170 men, and the Confederates lost 18,454. Although the Confederates were technically the victors of this battle, driving Rosecrans from the field, Bragg had not achieved his objectives of destroying the Army of the Cumberland, or of restoring Confederate control of East Tennessee, and the Confederate Army suffered casualties that they could not afford.
Stones River
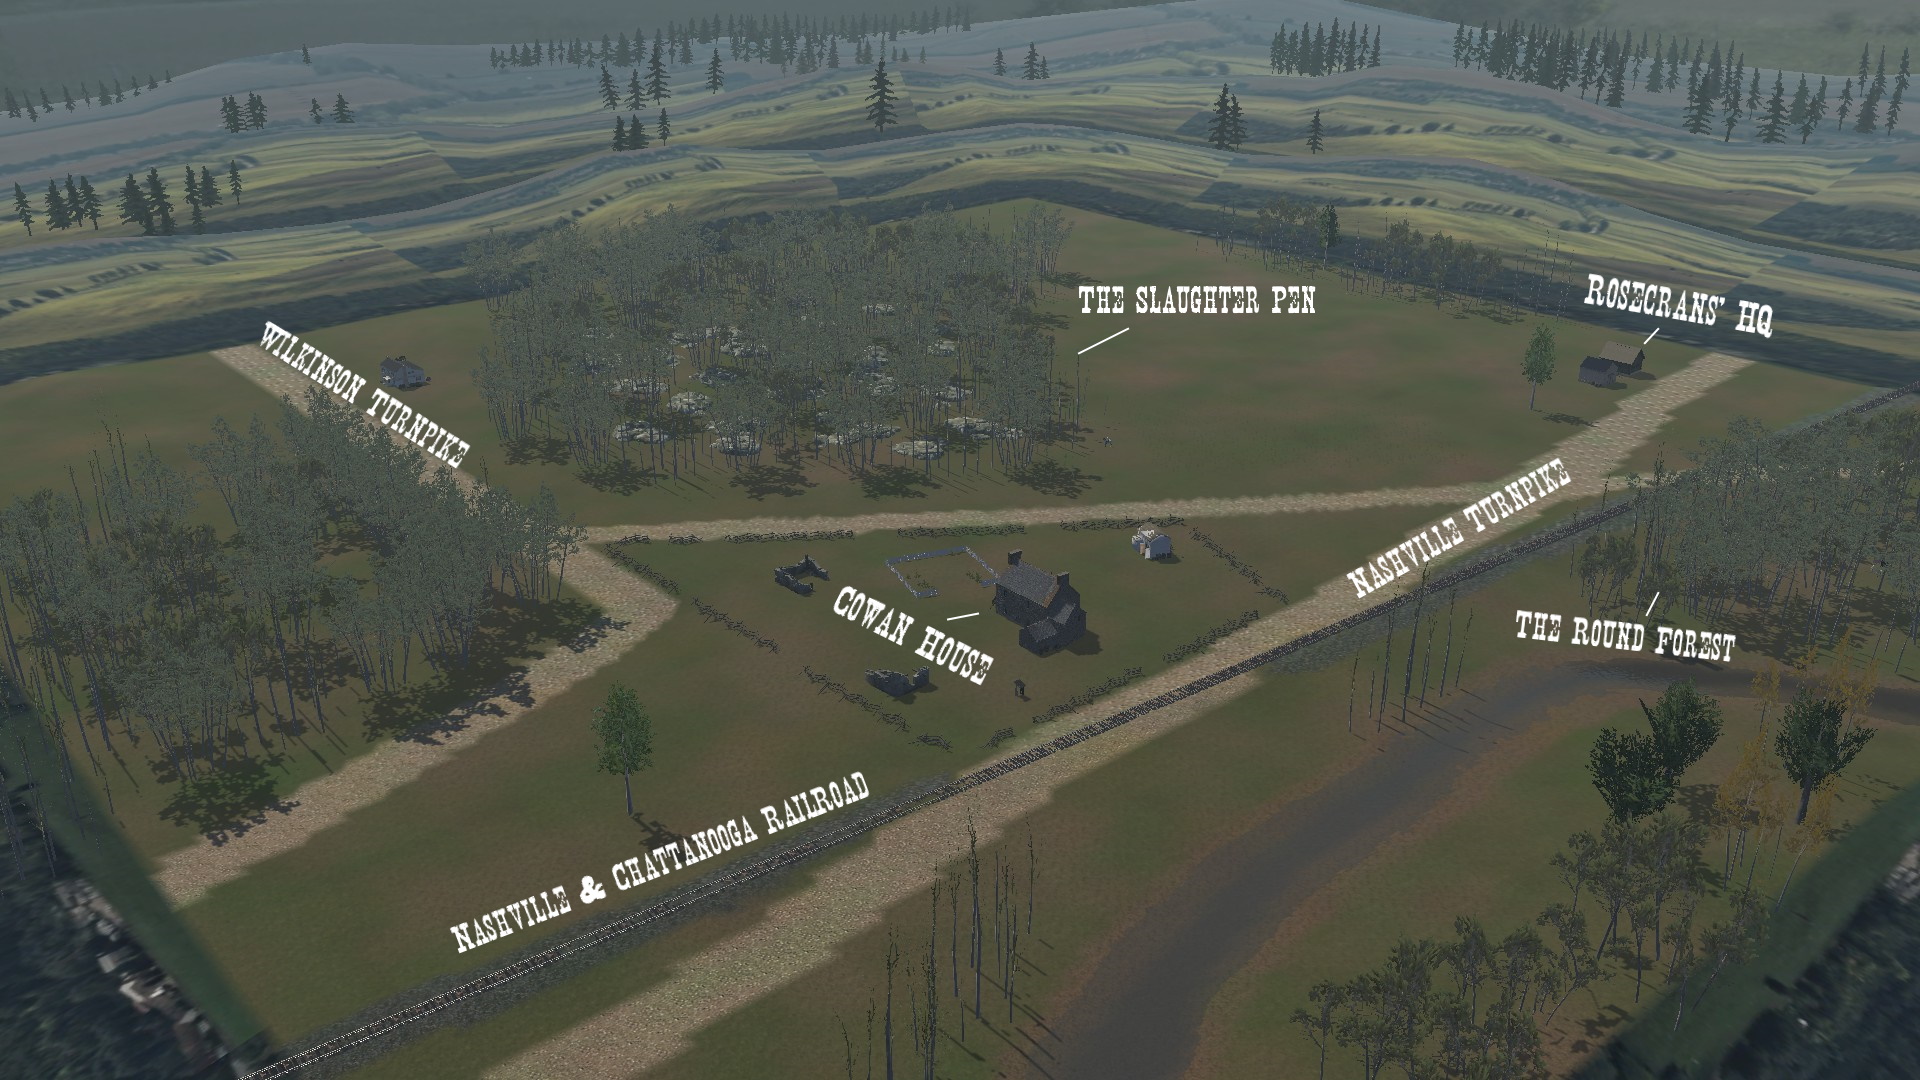
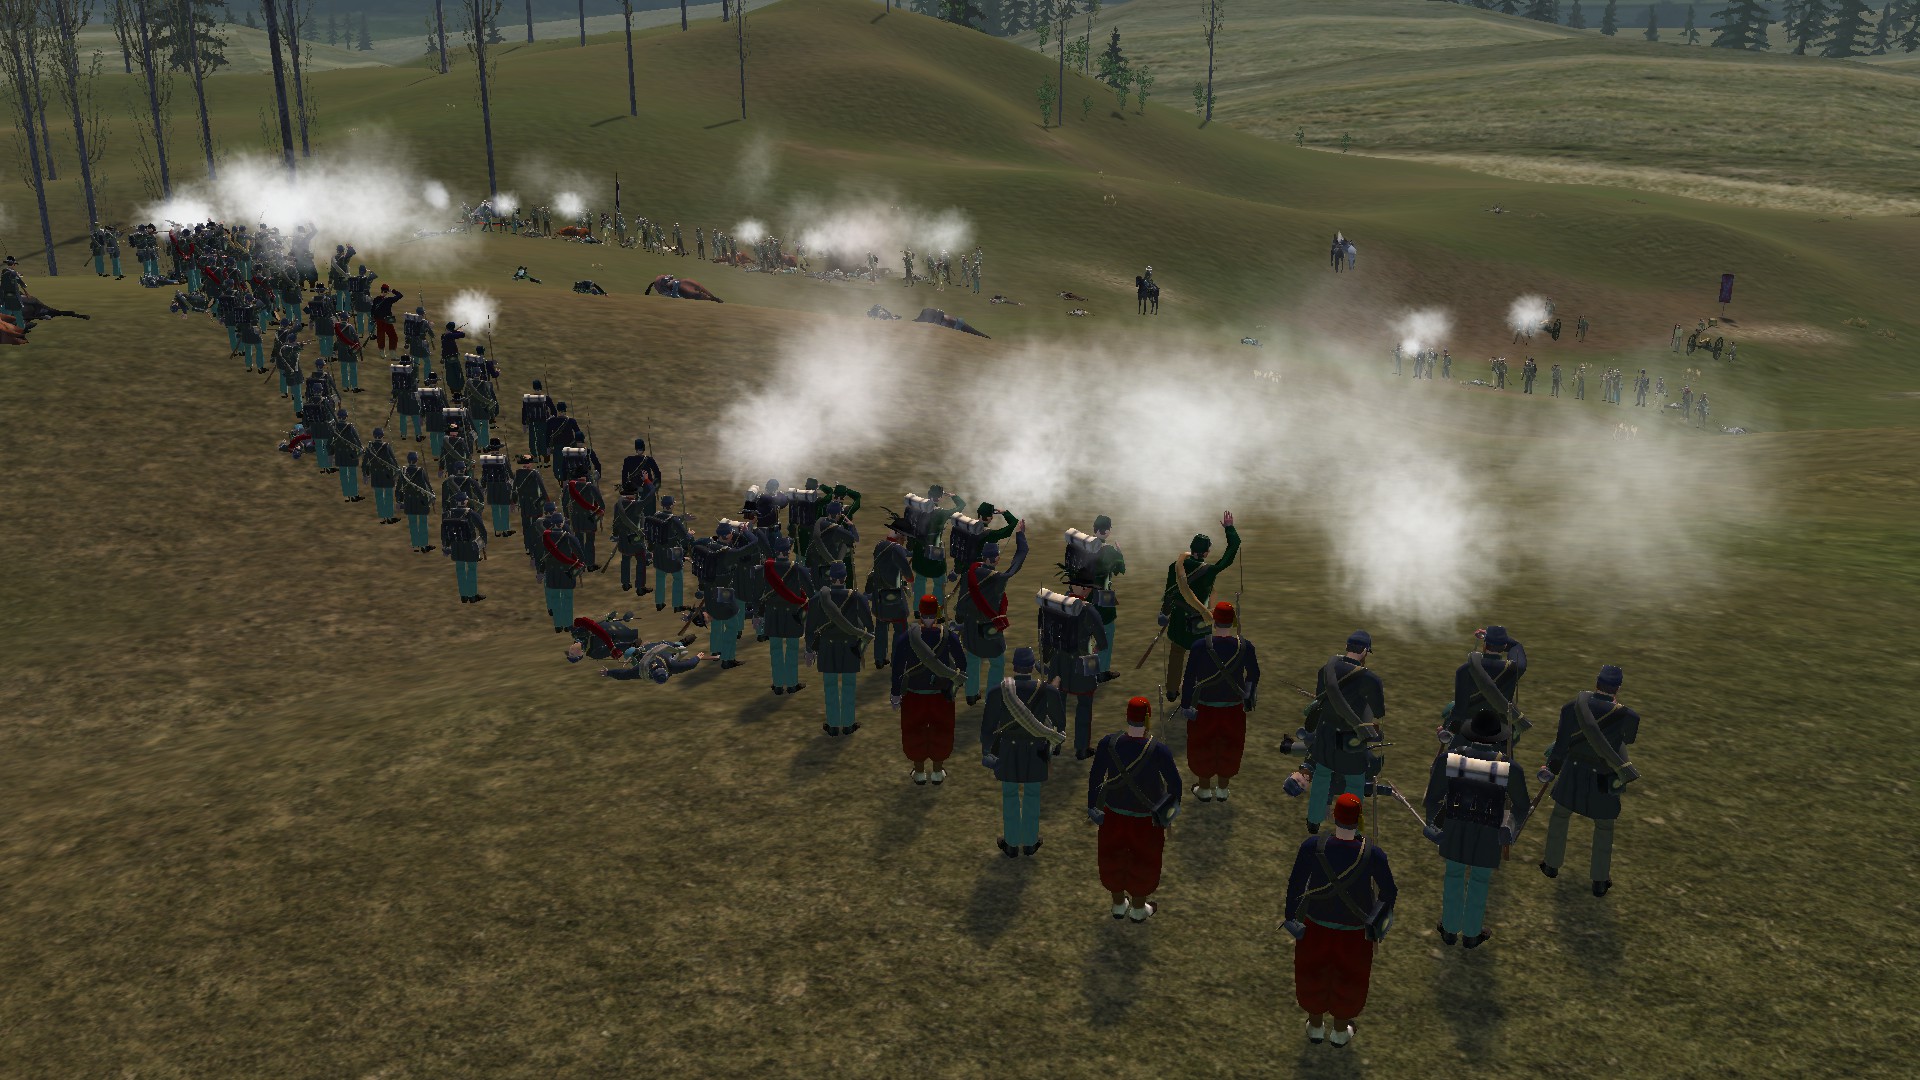
Please be aware that the large empty space you see between the Slaughter Pen and the Round Forest is actually a cotton field. Like with the photo of the Pickett's Charge map, the crop fields are not visible when the camera is at this distance.
On December 26th, 1862, Union Major General William S. Rosecrans' Army of the Cumberland marched from Nashville to challenge General Braxton Bragg's Army of Tennessee at Murfreesboro. The night before the battle, the Union and Confederate armies camped only 700 yards (640 m) away from each other, and their musicians started a veritable battle of the bands that became a non-lethal preview of the next day's events. Union musicians played "Yankee Doodle" and "Hail, Columbia", and were answered by the Confederates playing "Dixie" and "The Bonnie Blue Flag." Finally, one band started playing "Home! Sweet Home!" and the others on both sides joined in. Thousands of Northern and Southern soldiers sang the sentimental song together across the lines, and when they finished, there was nothing more but complete silence. Many of the men likely ruminated on thoughts of home and their families, and that this could very well be their final hours on earth.
On December 31st, New Year's Eve of 1862, both commanders had planned to attack their opponent's right flank, but Bragg had a shorter distance to cover and was therefore able to strike first. A massive assault by the corps of Confederate Major General William J. Hardee, followed by that of Leonidas Polk, overran the Union troops commanded by Major General Alexander M. McCook, catching them by surprise before they had finished their breakfast. McCook's deceptive campfires and the relative inexperience of Confederate Major General John Porter McCown, caused his division to drift away to the left, which left a gap in the front, but the gap was filled seamlessly by Major General Patrick R. Cleburne's division, and these two divisions swept all resistance aside. Although meeting stiff resistance, Hardee drove the Union troops back three miles (5 km) to the railroad and the Nashville Pike by 10:00 a.m. As Rosecrans raced across the battlefield directing units, his uniform was covered with blood from his friend and chief of staff, Colonel Julius Garesché, who had been beheaded by a cannonball while riding alongside Rosecrans.
What saved the Union from total destruction that morning was the foresight of Brigadier General Philip Sheridan, who anticipated an early attack and had his division up and ready in the center of the right half of the line by 4:00 a.m. Confederate Major General Jones M. Withers hit Sheridan's right flank first but was thrown back in three separate charges. Then Major General Benjamin F. Cheatham, with his reserve division, hit Sheridan's front as Cleburne struck his flank. Sheridan's division bent backwards as they struggled to hold off the Confederates in front of them. Two of Sheridan's brigade commanders were killed in the proceess, General Joshua Sill and Colonel George Roberts. Some of Sheridan's regiments lost more than half of their men before they moved north of the Wilkinson Pike to the cover of the dense cedar forest.
While Sheridan's division slowly bent backwards, Brigadier General James S. Negley's men stood their ground and beat back several Confederate attacks. By 10:00 a.m., the Confederates had pushed Sheridan and Negley into a "V" shaped salient, and though this dangerous position risked seeing both divisions cut off from the rest of the army, General Rosecrans ordered both generals to hold their positions to buy time for the rest of the army to regroup along the Nashville Pike. Upon receiving their orders, Negley's men sought safety among the limestone outcroppings among the cedar trees behind them. The Union forces here stalled nearly half the Confederate army for two hours, however at noon, Sheridan's lines finally broke. This allowed Confederate soldiers to begin to surround Negley's men from the rear, and the Union troops found their rocky shelter turn into a death trap. Some Union soldiers from Chicago later noted that blood could be seen running down the cracks of the rock outcroppings, into the low spots, and it reminded them of the floor drains in the slaughter houses at the stockyards of Chicago. This is where the area got its moniker, "The Slaughter Pen".
The Union troops regrouped and held the Nashville Pike, supported by reinforcements and massed artillery. Repeated attacks on the left flank of the Union line were repelled by Colonel William B. Hazen's brigade in a rocky, 4-acre (16,000 m2) wooded area named "Round Forest" by the locals, and which later became known as "Hell's Half-Acre". Hazen's brigade was the only part of the original Union line to hold. By the strong leadership of Rosecrans, and the rallying of the divisions under Brigadier Generals Richard W. Johnson and Jefferson C. Davis, the Union line was stabilized. Bragg attempted to continue the assault with the division of Major General John C. Breckinridge, but the troops were slow in arriving and their multiple piecemeal attacks failed. By 4:30 p.m., the battle was finished.
On January 2nd, 1863, Bragg resumed the fighting when he ordered Breckinridge to assault a lightly defended Union position on a hill to the east of the Stones River. Chasing the retreating Union forces, the Confederates were led into a deadly trap where they faced overwhelming artillery, forcing them to retreat with heavy losses. Probably fooled by false information, Bragg chose to withdraw his army the next day on January 3rd to Tullahoma, Tennessee. The Battle of Stones River saw the highest percentage of casualties of any major battle in the American Civil War. It was even higher in absolute numbers than the infamous battles at Shiloh and Antietam earlier that year. 12,906 men were lost on the Union side and 11,739 for the Confederates, totaling 31.4% of all troops involved in the fighting on both sides being casualties.
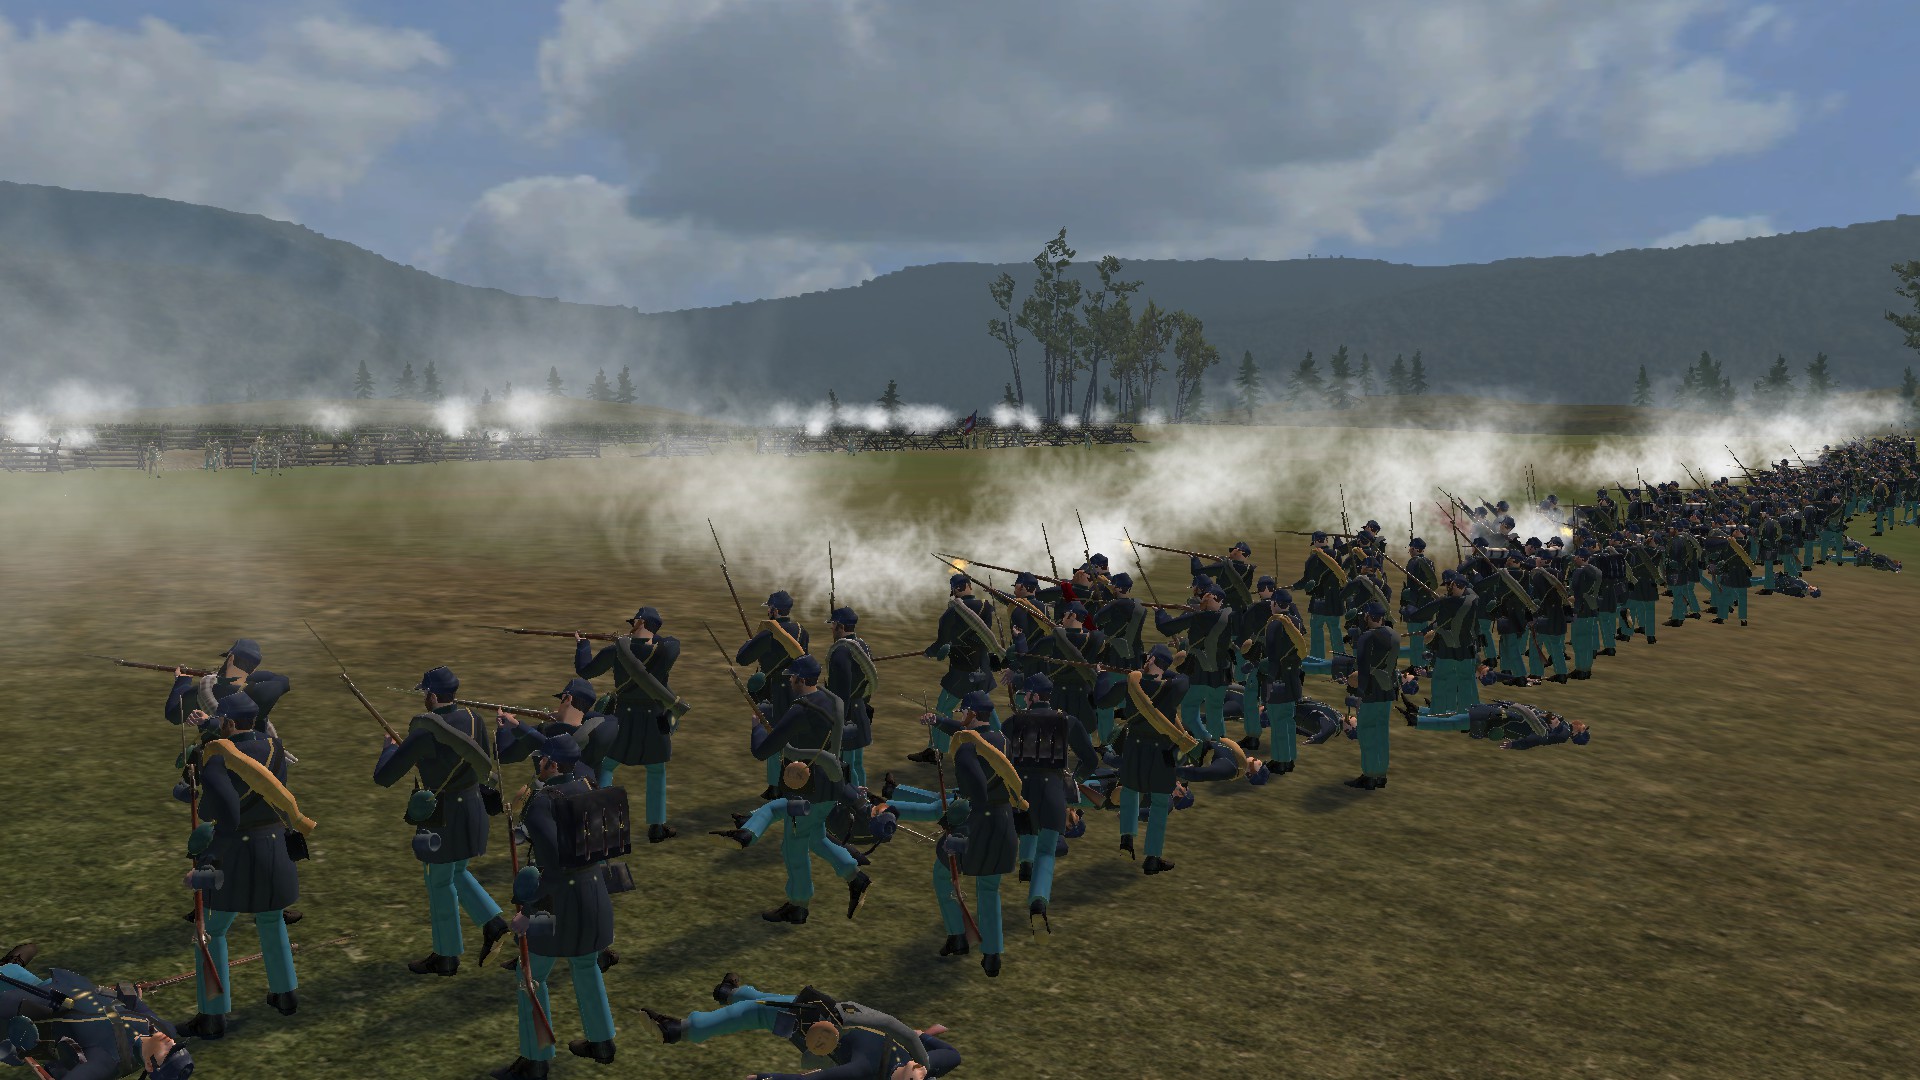
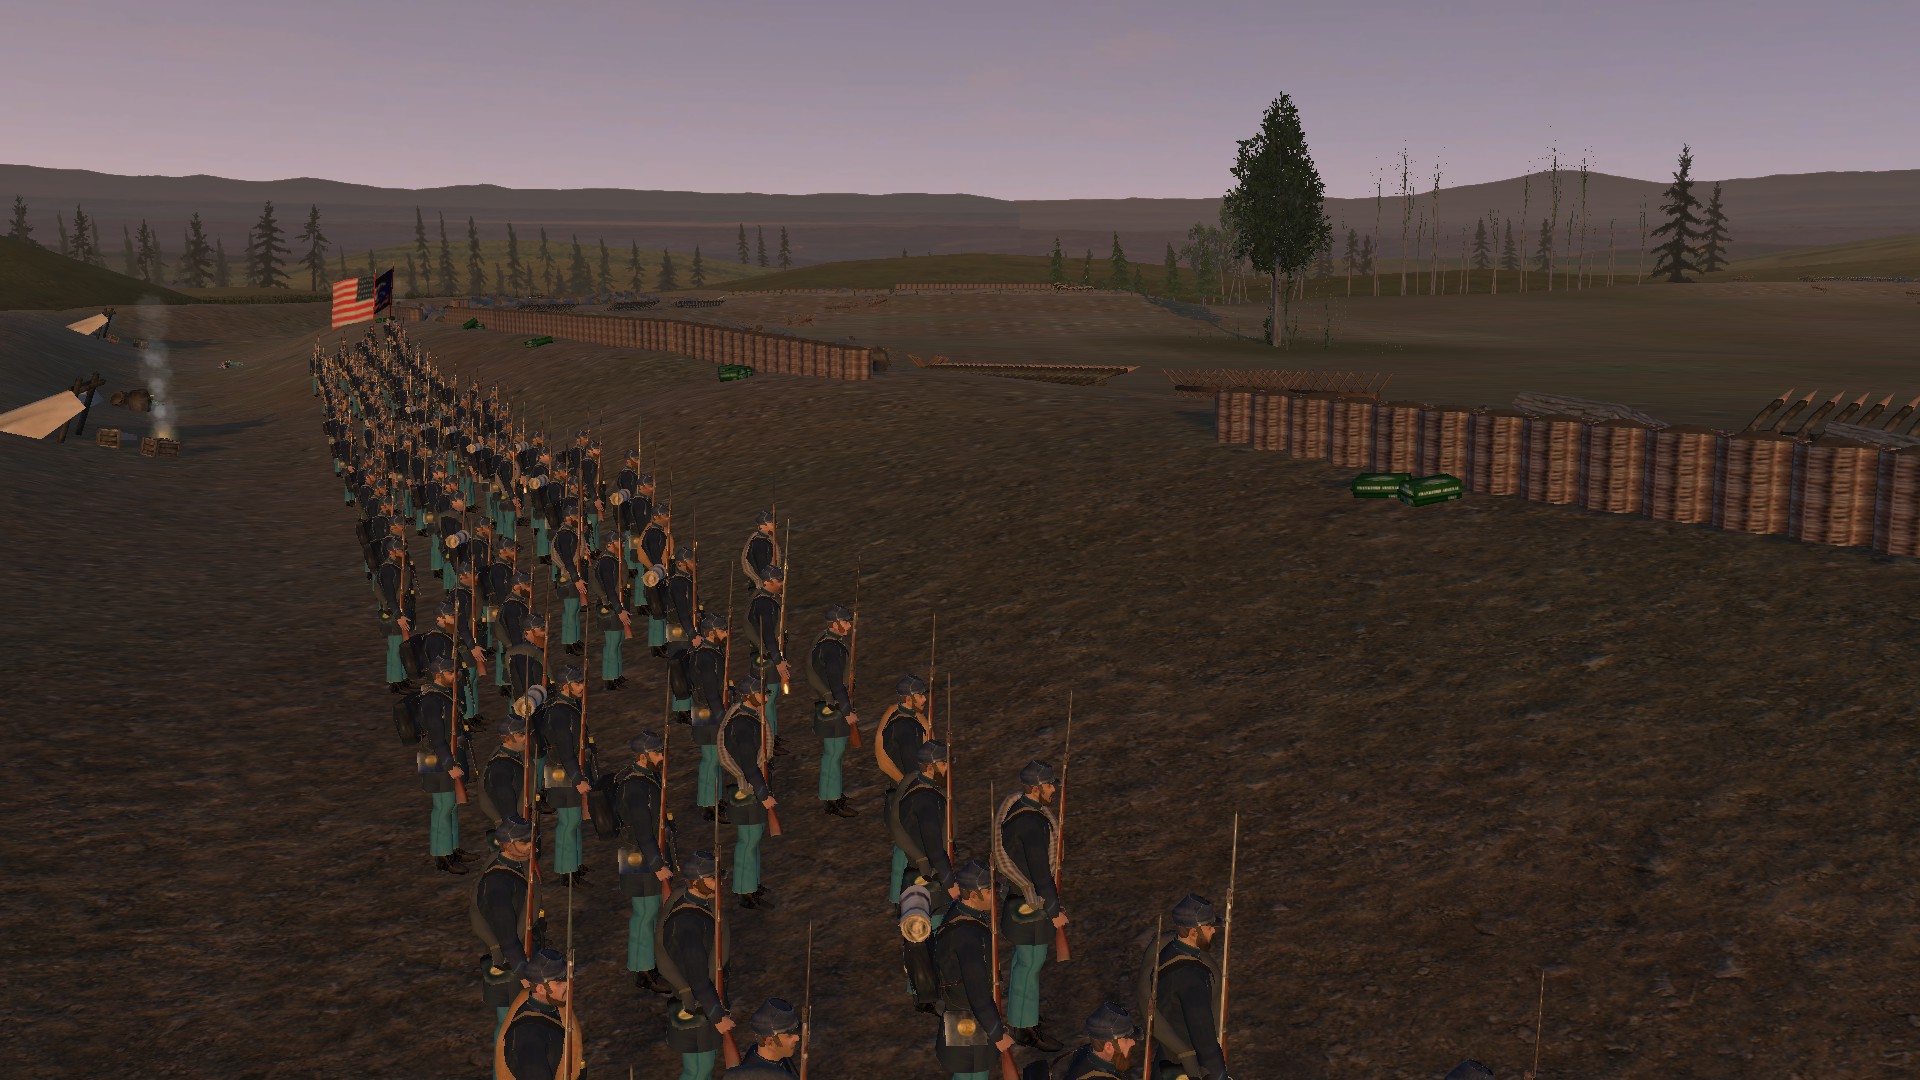
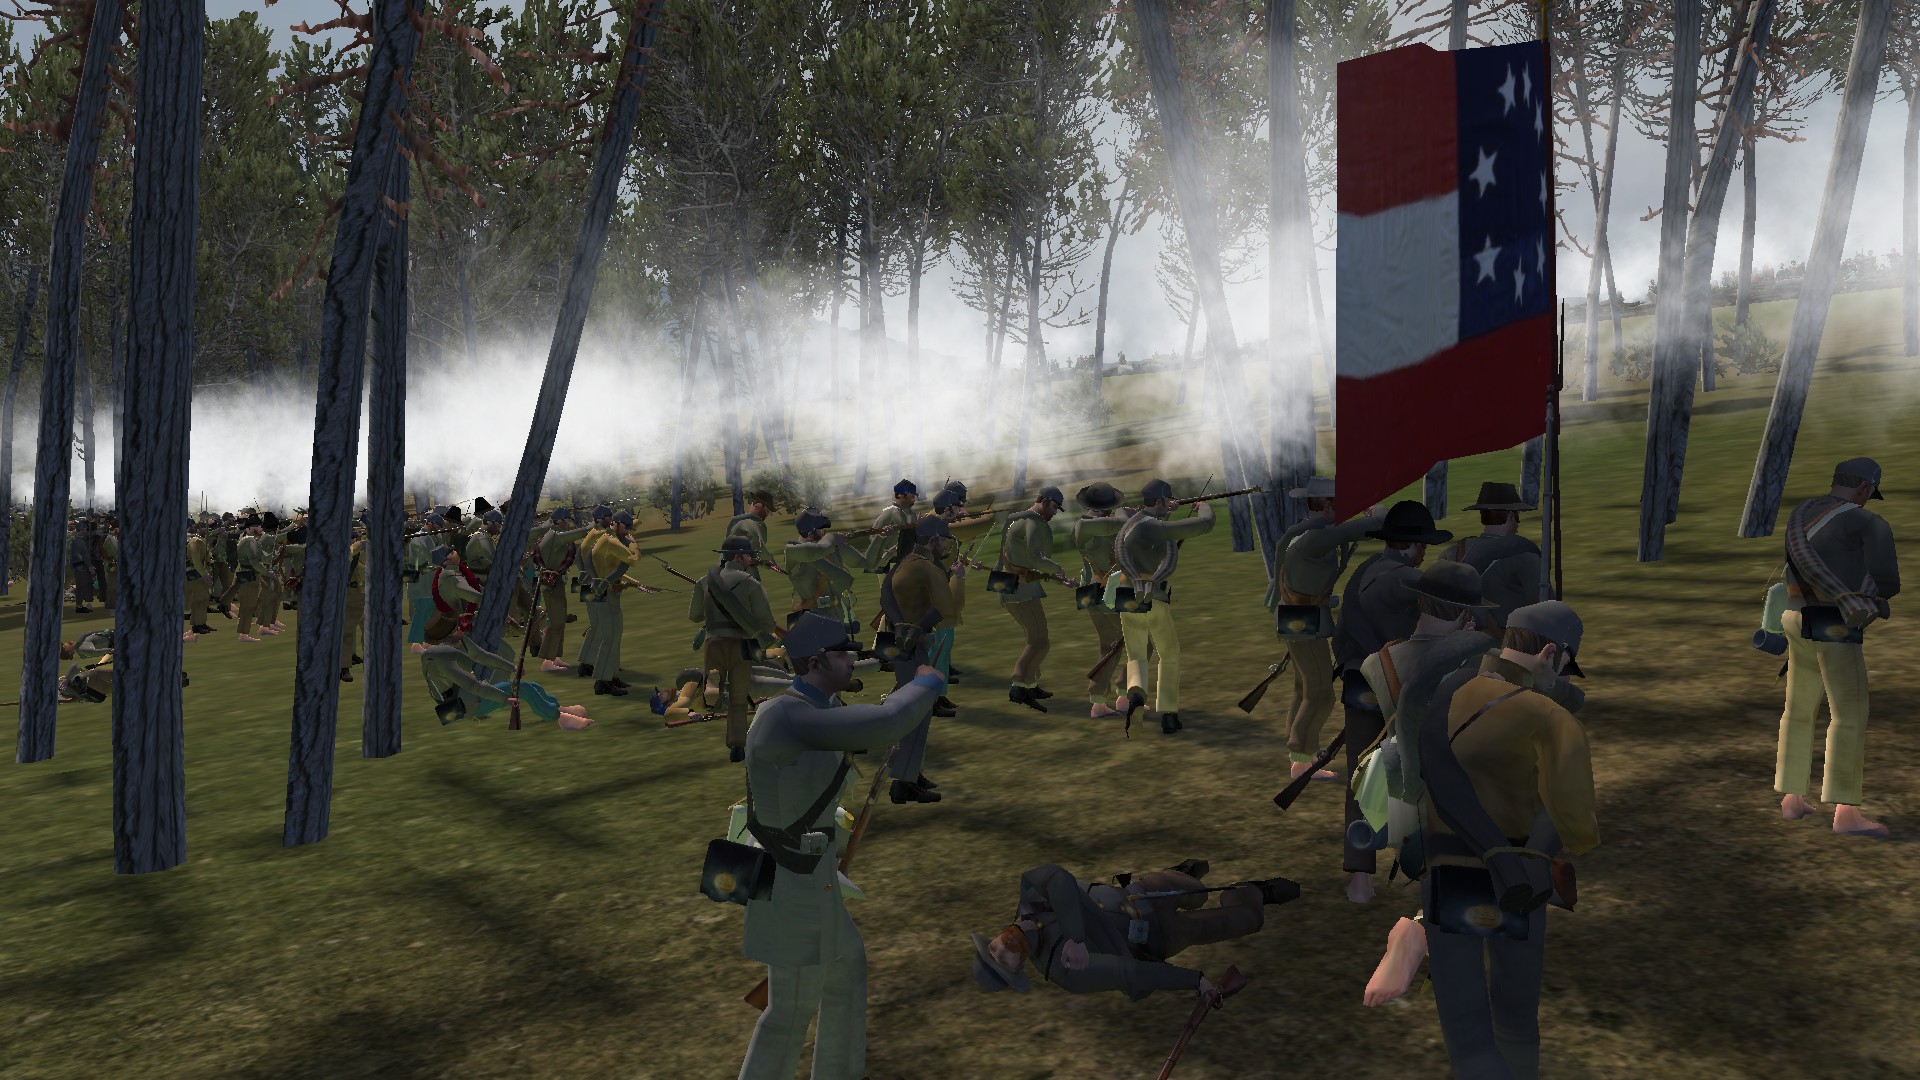
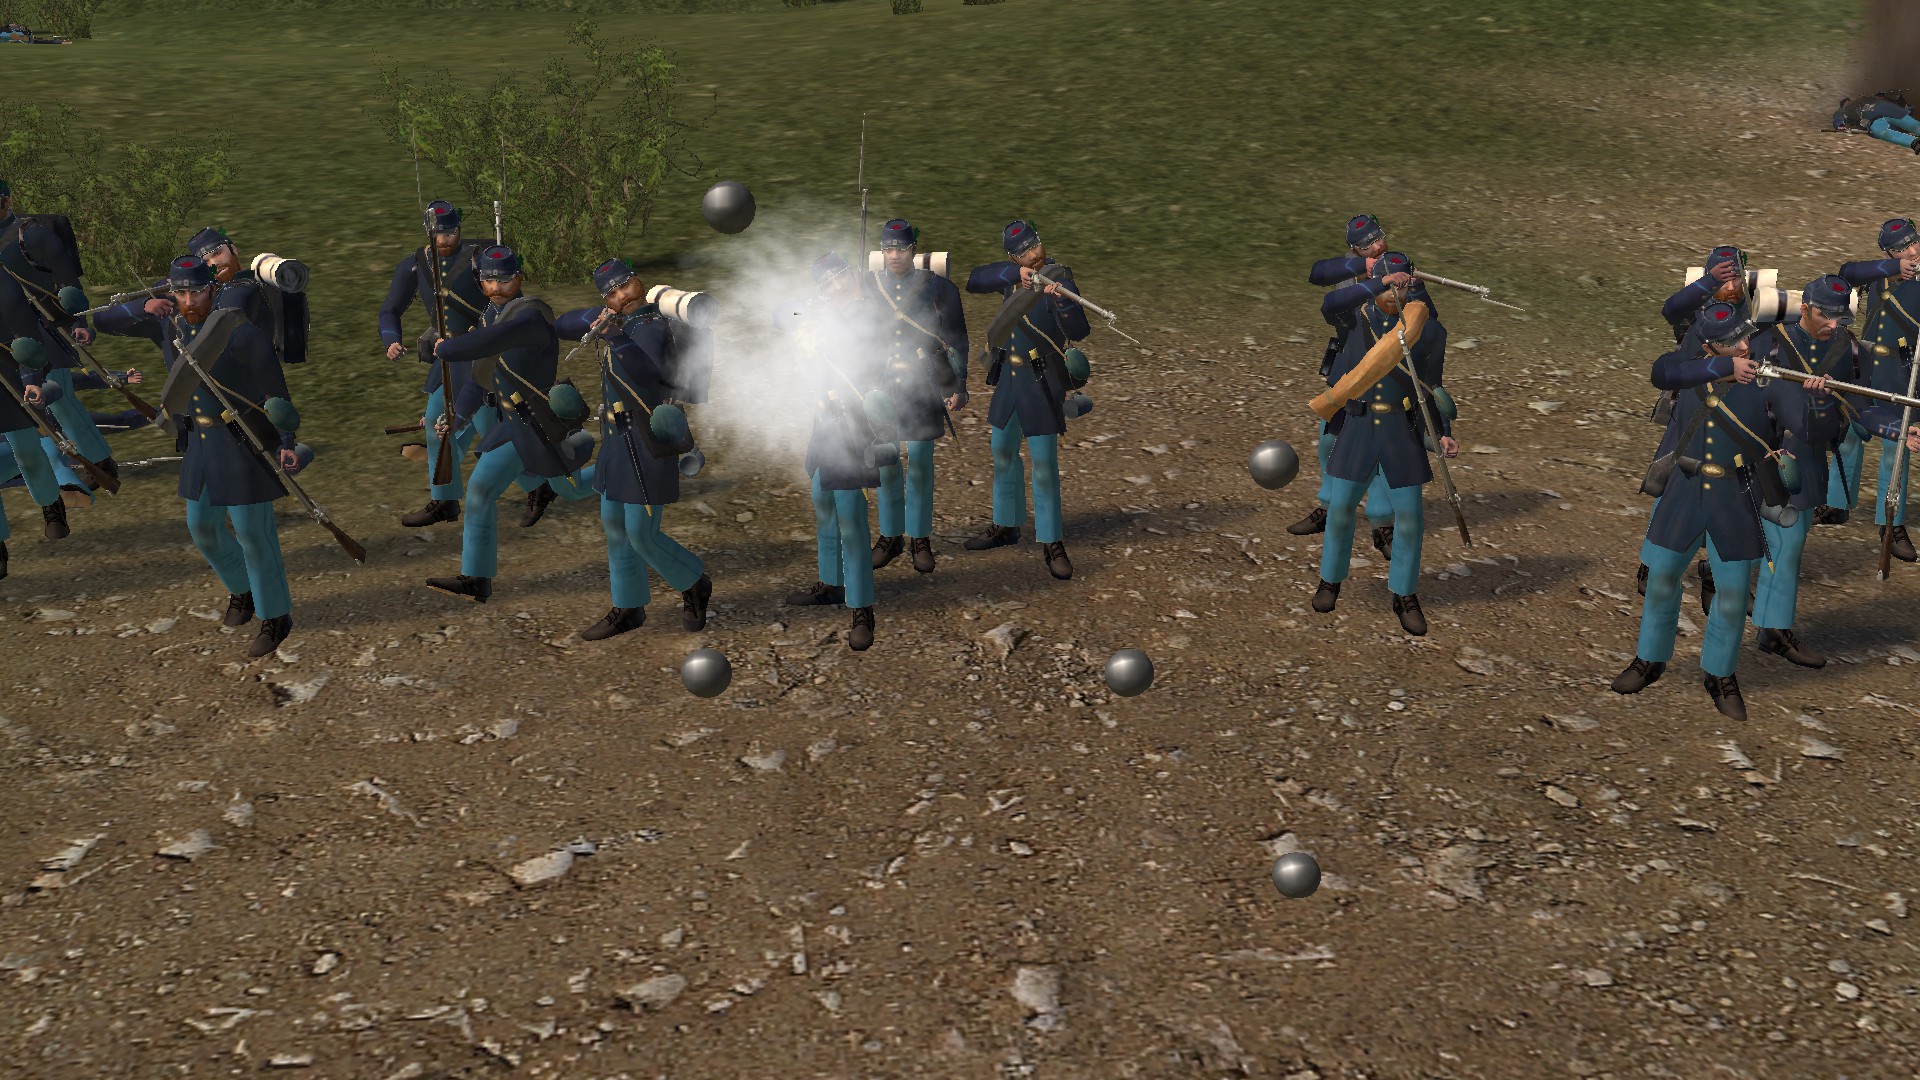
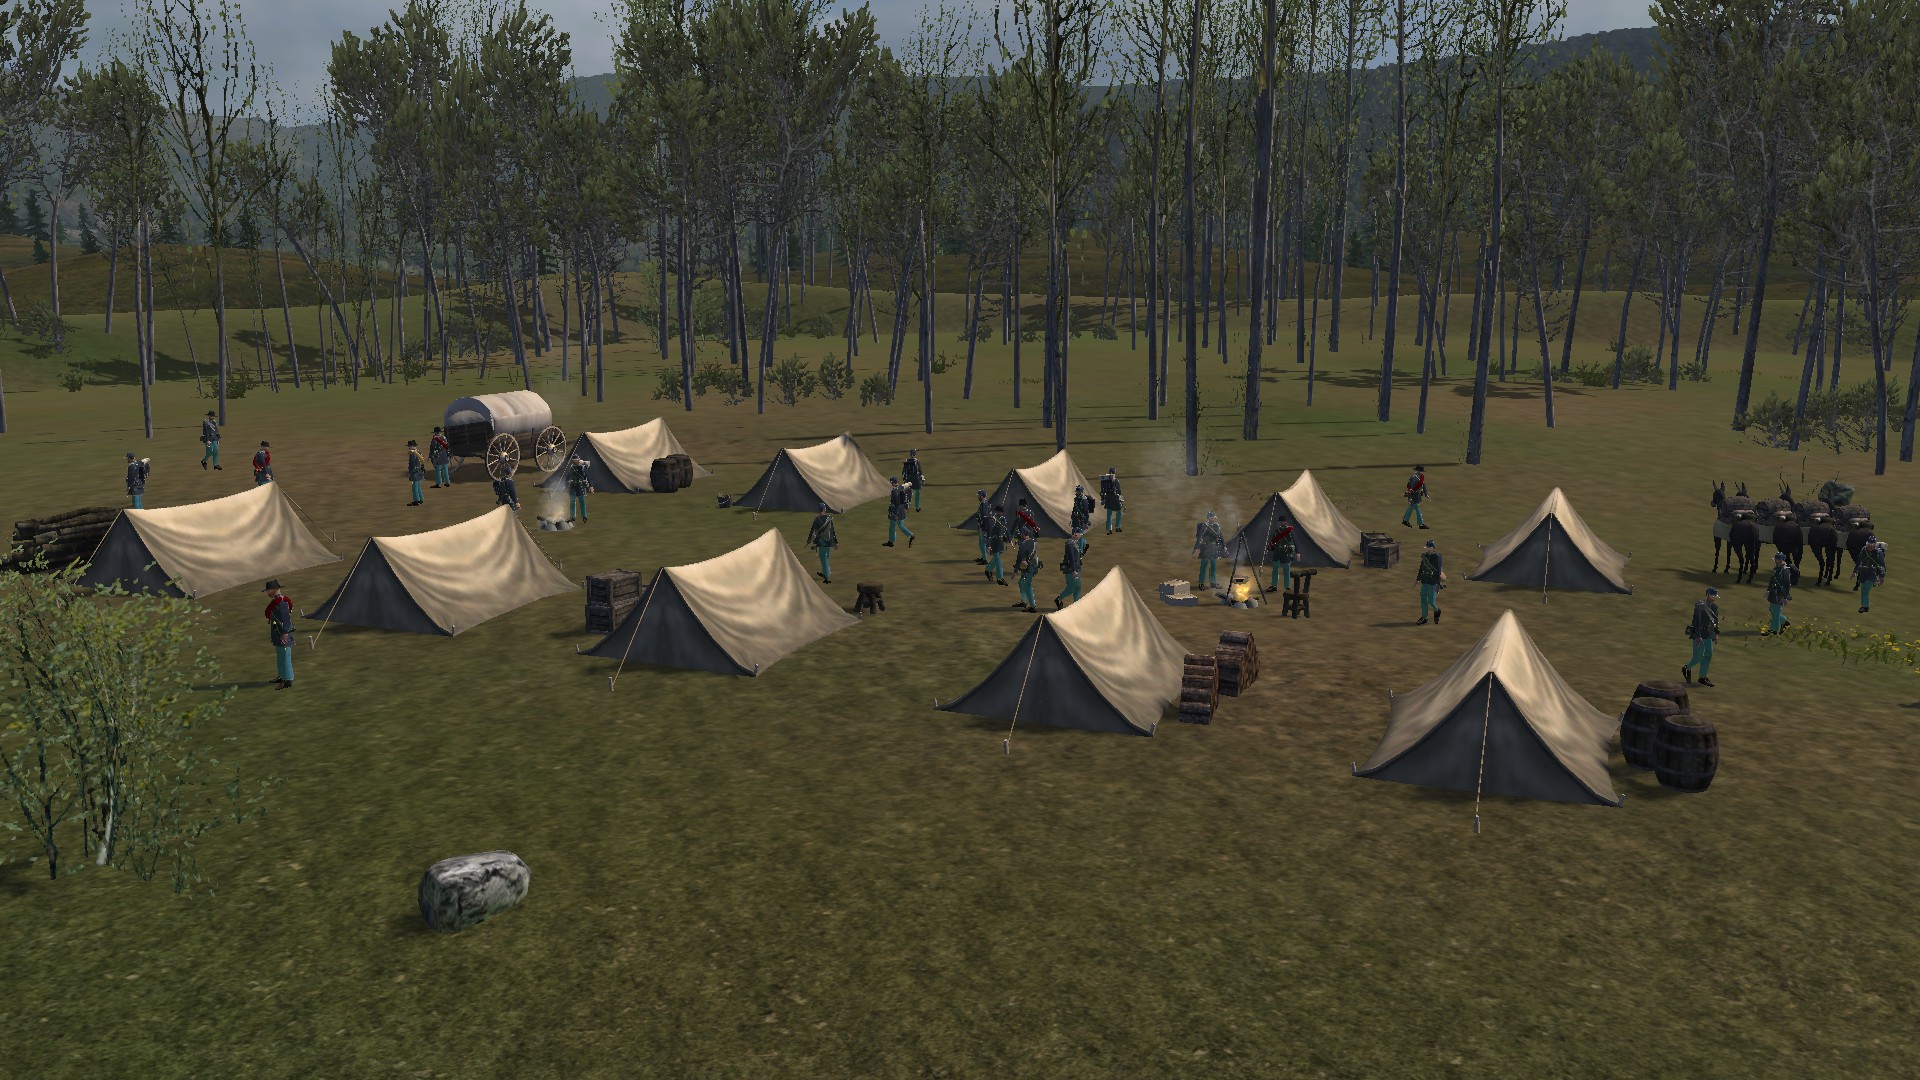
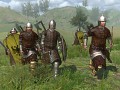
Updated AI Combat Behavior
The Union troops you see in the above photo you are under the control of the AI. Yes, it's true, you're not dreaming, the AI now actually forms into lines in campaign battles, and they will move around the map in formation, often attacking you from a distance while in a battle line. If they feel they have an advantage, they will charge and try to overwhelm you, but more often than not, they will hang back and shoot at you from their formation. Madsci did a wonderful job here, and the battles play out beautifully now. It is much more realistic, and much better than the AI either blindly charging forward as a mob, or holding at their spawn point, as they did in previous versions of the mod. Since the AI is smart enough to use formations, this also means that now the player no longer needs to command troops while enlisted as a soldier using the freelancer system, and both AI controlled armies will form lines and engage each other on their own, allowing you to focus more on fighting as a common soldier, rather than worrying about being in command.
Madsci also fixed the problem with the AI recruiting too many flagbearers by creating a script that limits them to using one regimental and one national color guard, and any extra that the AI recruits are automatically changed to be generic soldiers. Artillery has been completely fixed in the campaign as well, and both the player's and the AI's crews will operate their guns without issue. The price of cannons has been lowered a bit too, and if you can't afford to buy them, the option in the foundry will now appear greyed out and tell you that you can't afford it, instead of how it was before where the option simply didn't appear at all if you didn't have enough money.
The cost of each cannon is now more in line with history, so Parrot rifles are the cheapest that you can buy, Napoleons and howitzers are the most expensive, and 3-inch ordnance rifles are mid-tier. Also worth noting is that the impact effects of artillery has been changed from being a big cloud of smoke to dirt being kicked up. Artillery projectiles that impact close to the player will play a sound of dirt splashing and raining down in addition to the normal impact sound, and players and troops that are nearby to an impact that are not killed, will be knocked down. I think you all will really enjoy the way battles in the campaign play out now, with all of these new features, fixes, and special effects.
Tournaments Overhaul
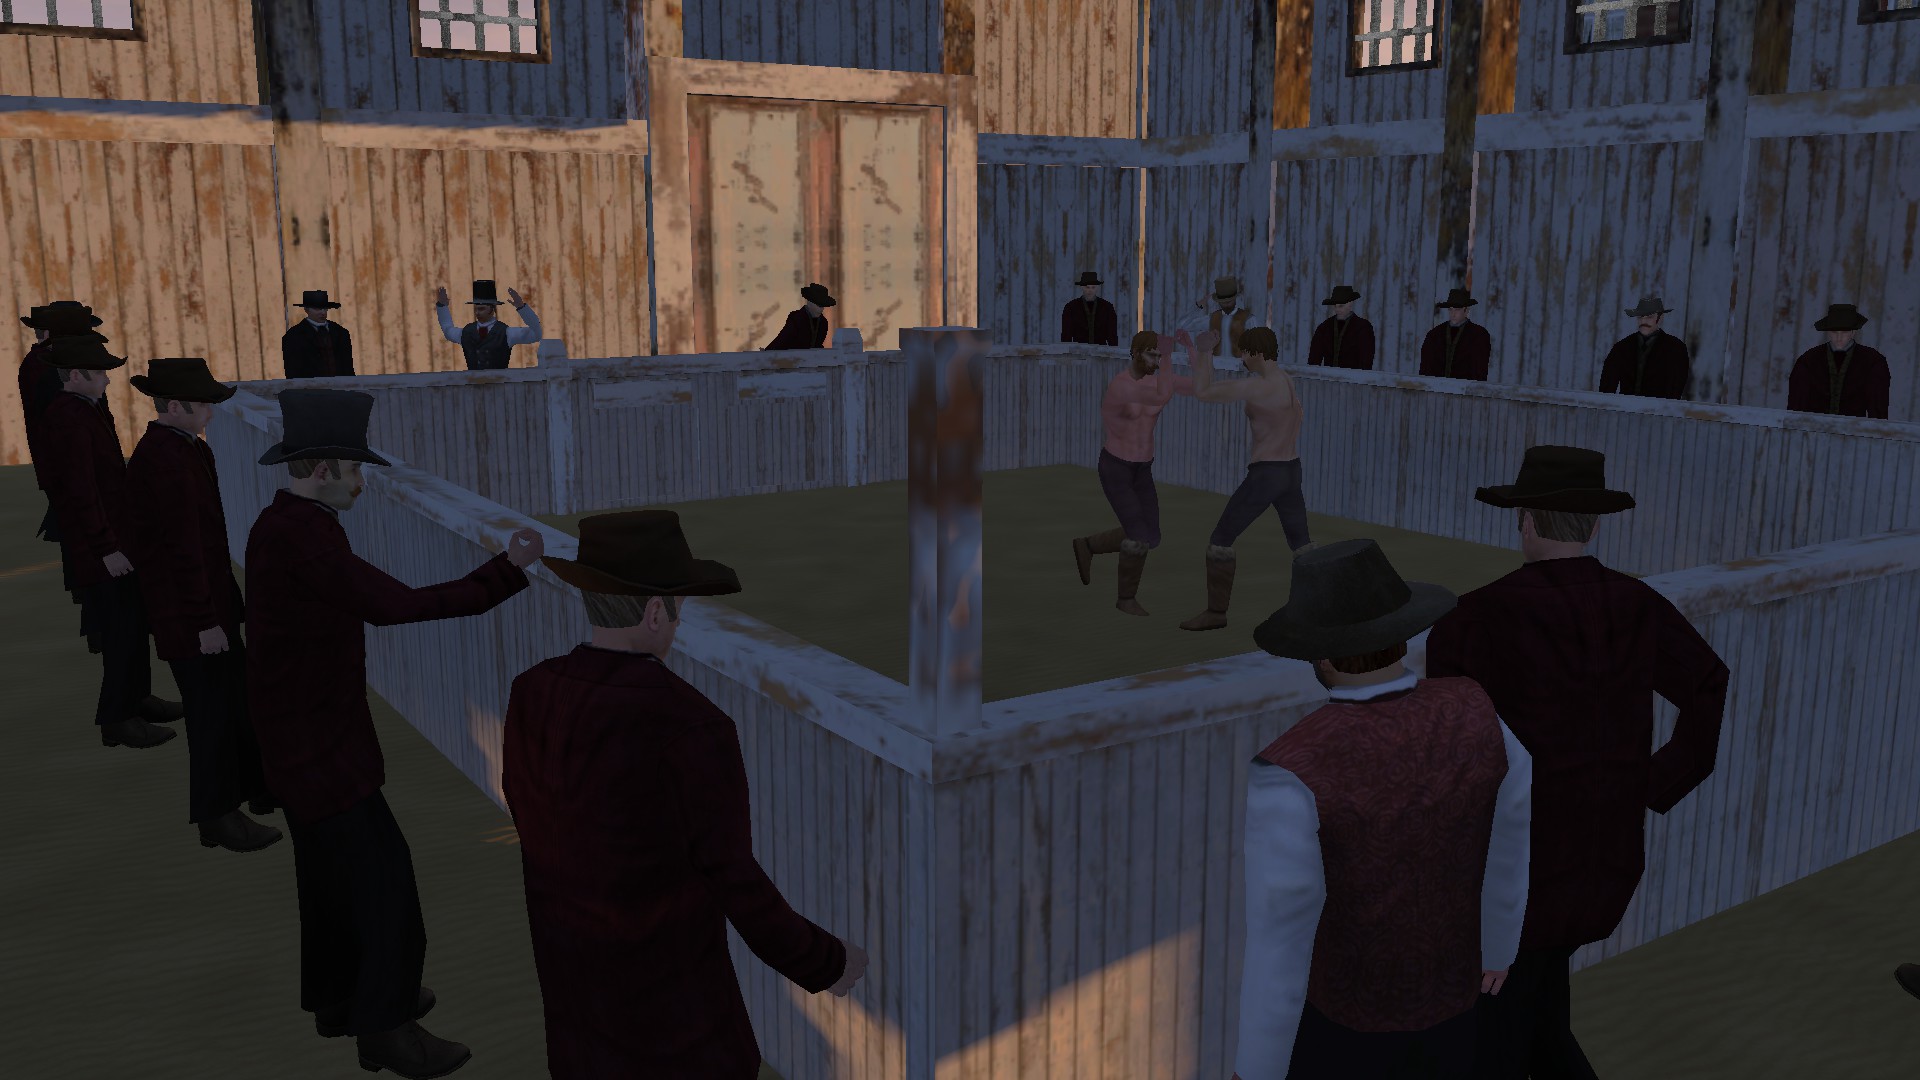
Tournaments have finally been overhauled and replaced, so the old, out of place medieval style fights from Native M&B are now gone forever. Tournaments are now instead called prizefights, and the melee fights that you would practice in when there were no tournaments are now called sparring matches. All of the weapons and arena outfits have been removed so the fights in the arena are now only with fists, turning the tournaments into boxing matches. You can also kick in these boxing matches, which may seem wrong at first to us today, but during this time period, kicking was actually allowed in boxing.
The tournament master is now a boxing coach, and the arena itself has been renamed, now being called the gymnasium. All of the dialogue related to the arena has also been changed to fit the boxing theme, and generals have been barred from participating, since generals would not be fighting in bare knuckle boxing matches, especially while they are busy fighting a war. When ladies mention your performances in the prizefights, their dialogue will now be from a perspective that they had heard about it from someone else, or that they had read about it, rather than how it was originally where they state that they had personally watched you fight, since high class women (and probably most women in general) wouldn't be going to these kinds of fights during this time period.
In Native American territories, the arena is instead called the fighting ring, and the tournament master is called the master trainer. The arena scene in Native American territory is also different from the scenes in the American cities.
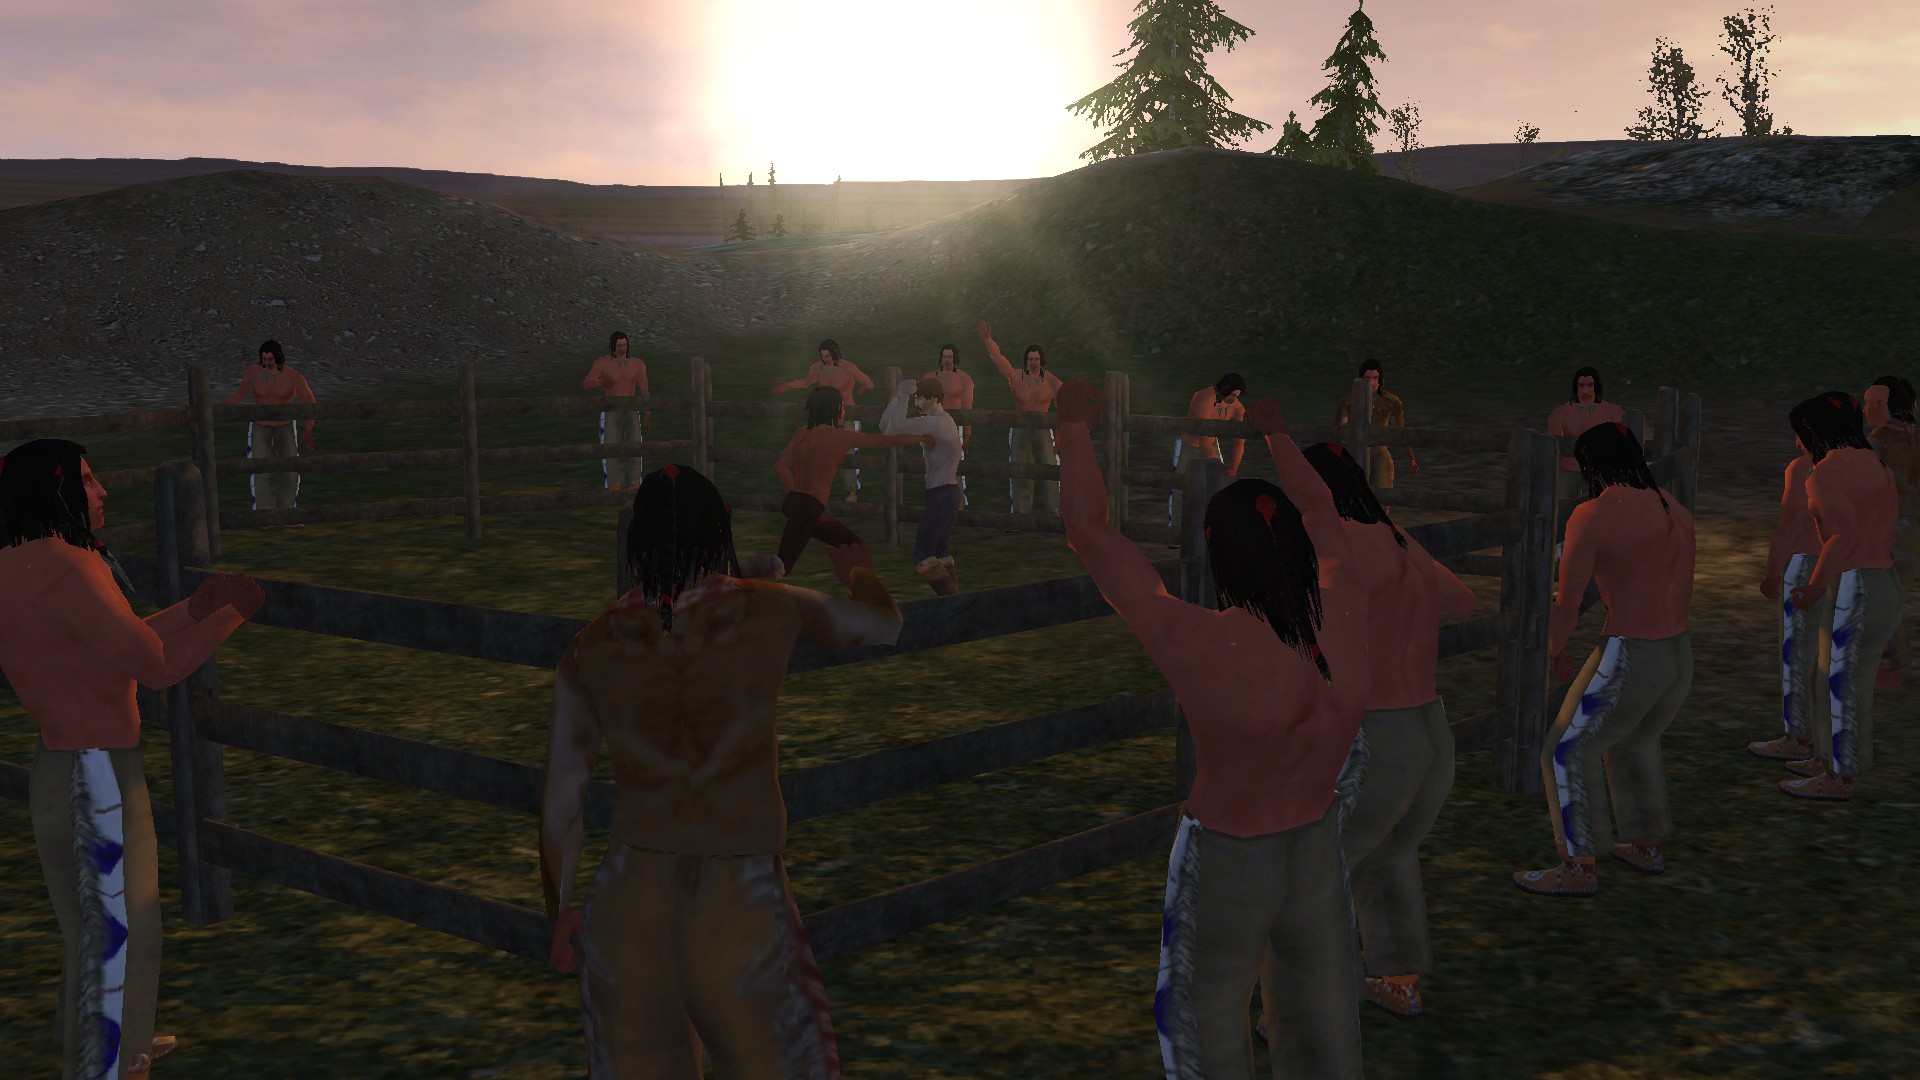
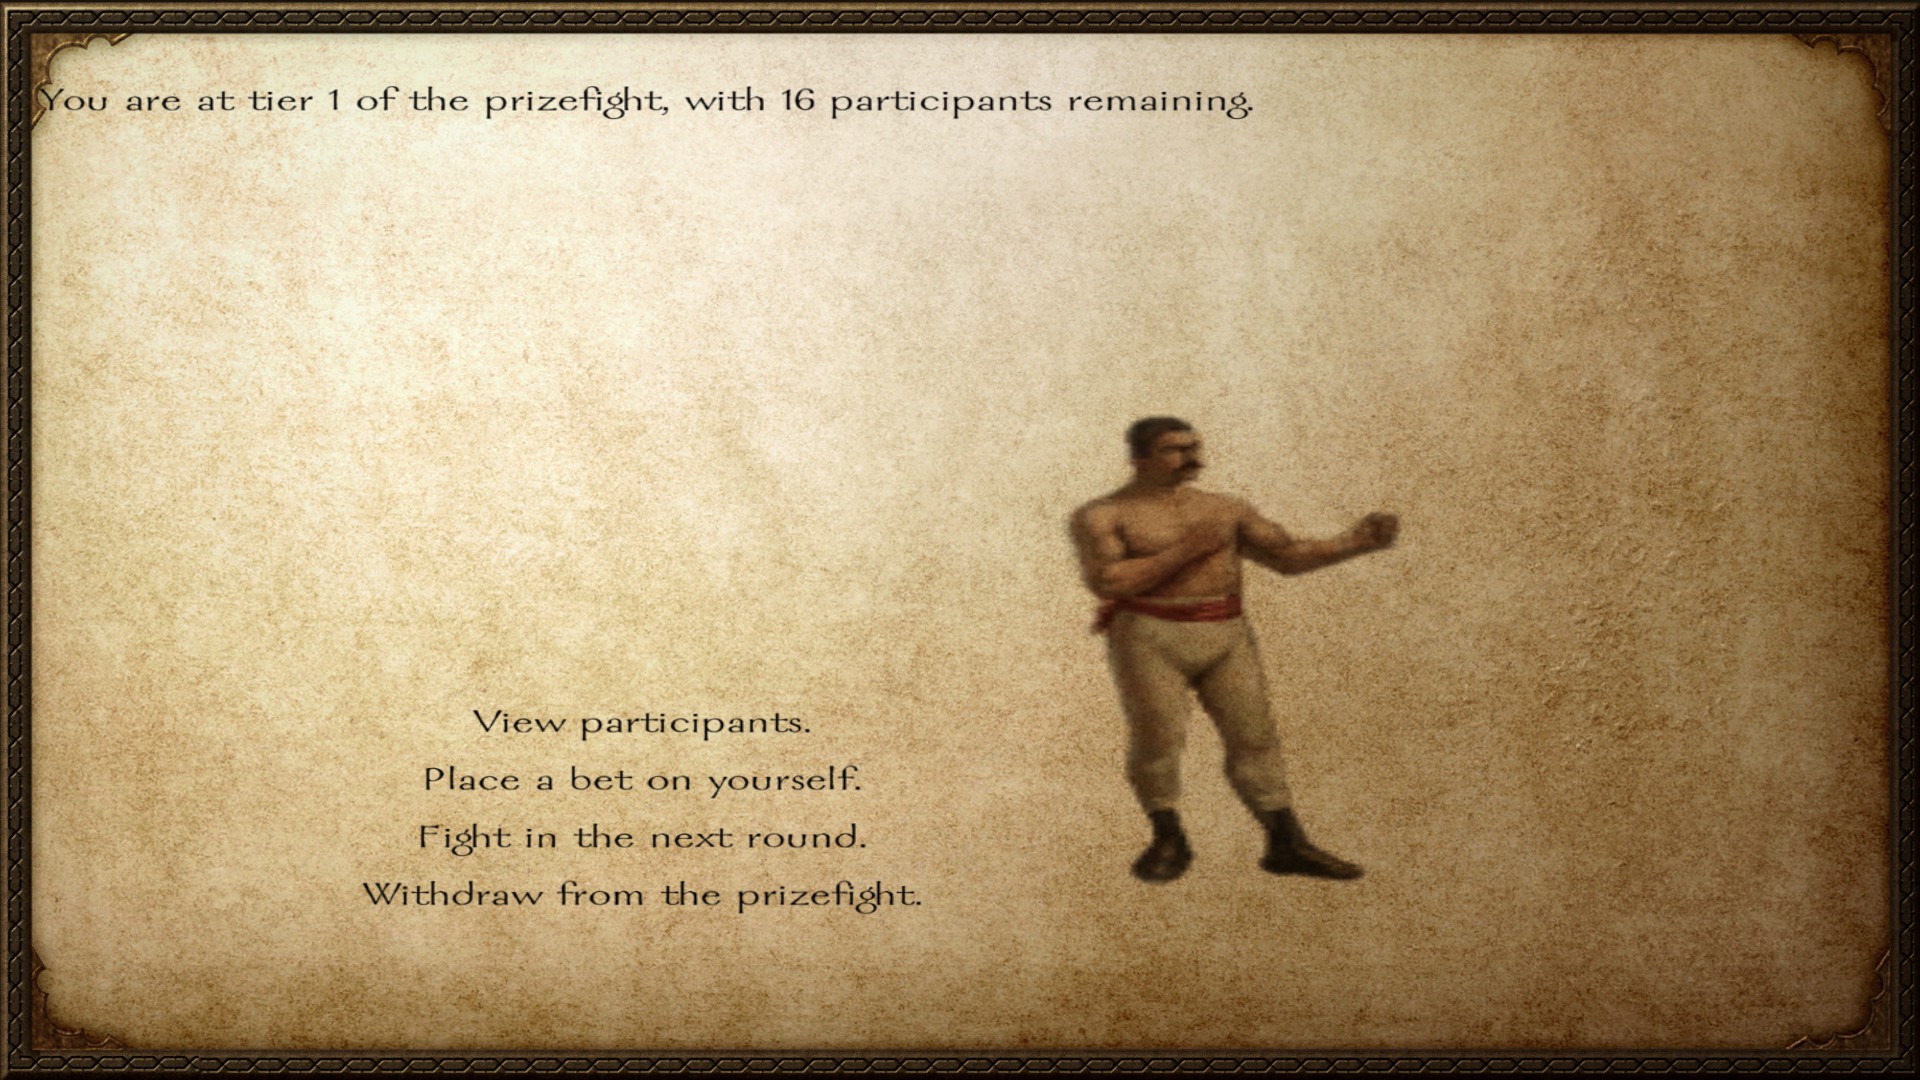
As you can see in the preview photos above, madsci has also added NPC's to be an audience watching you fight, and they even go through their own sets of cheering animations as well. Another interesting addition he made was to add a picture to the menu when you are participating in a prizefight, which you can see below.
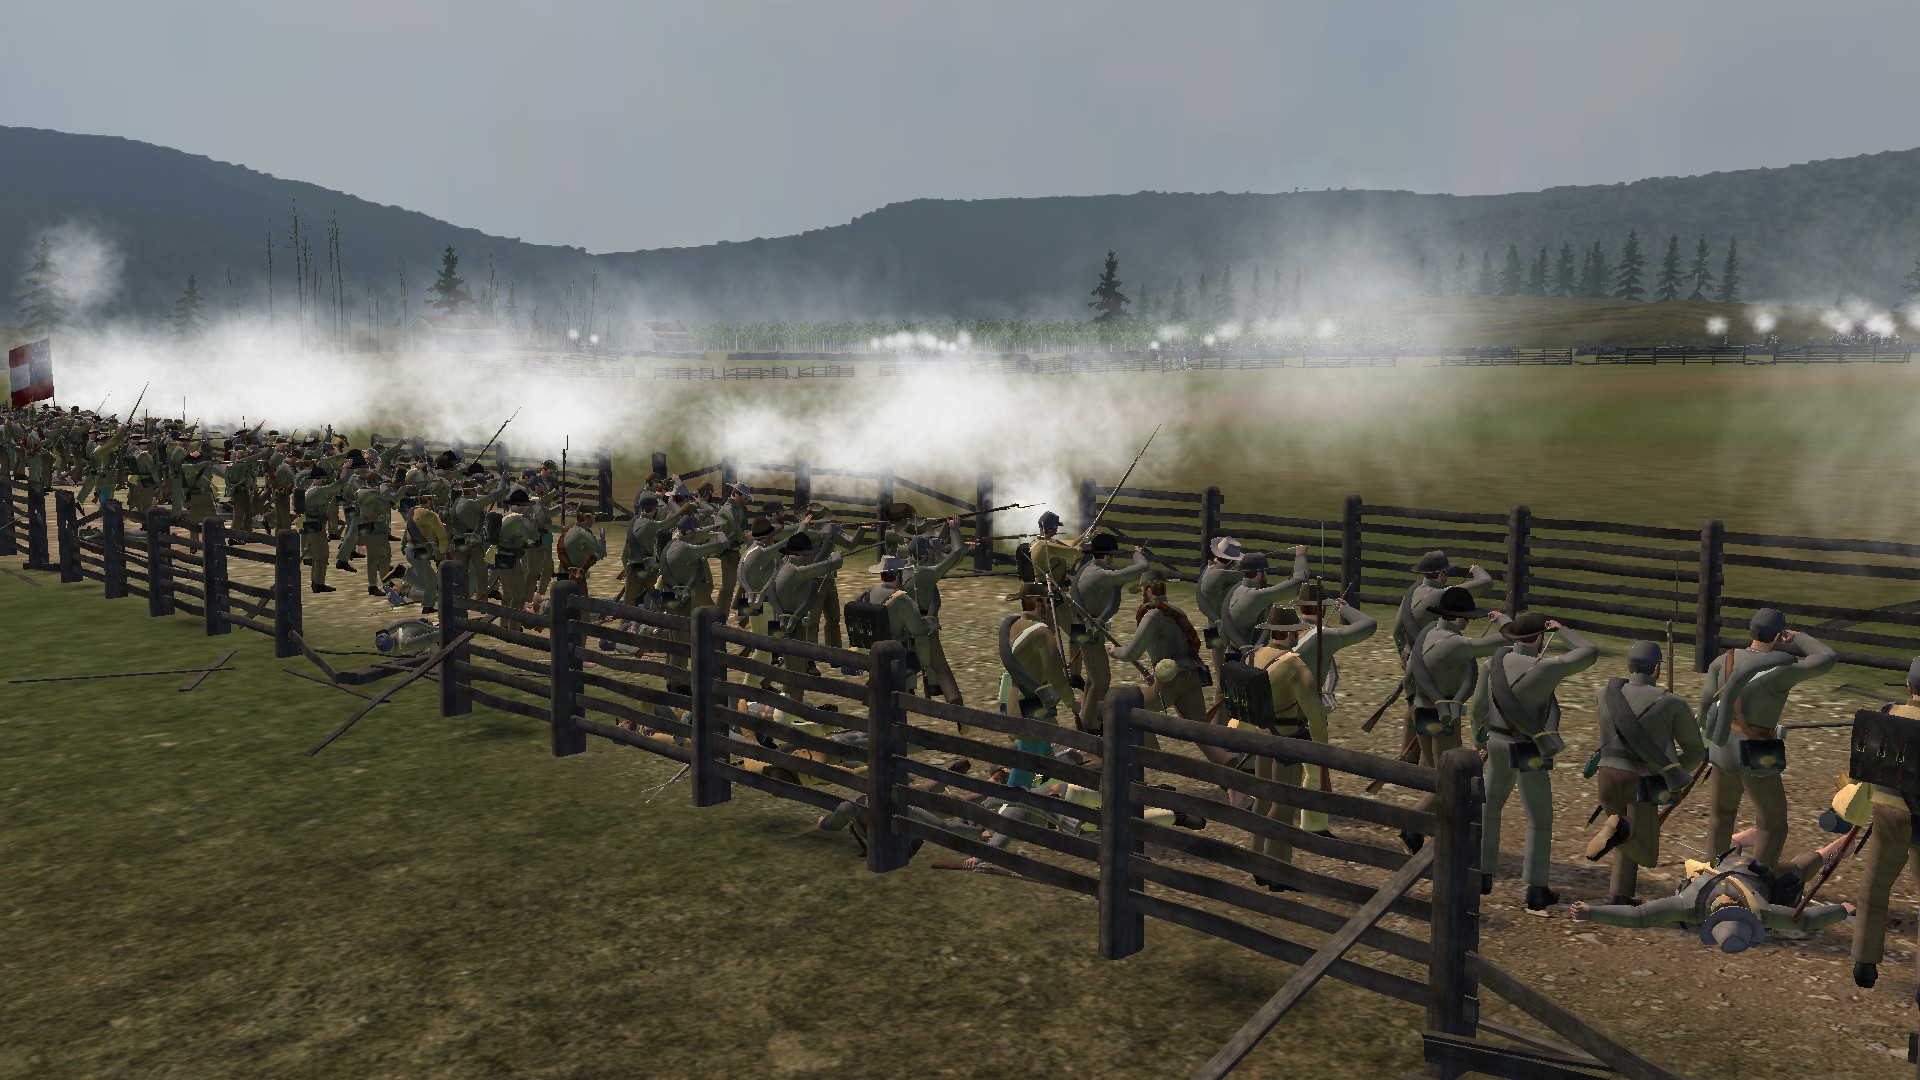
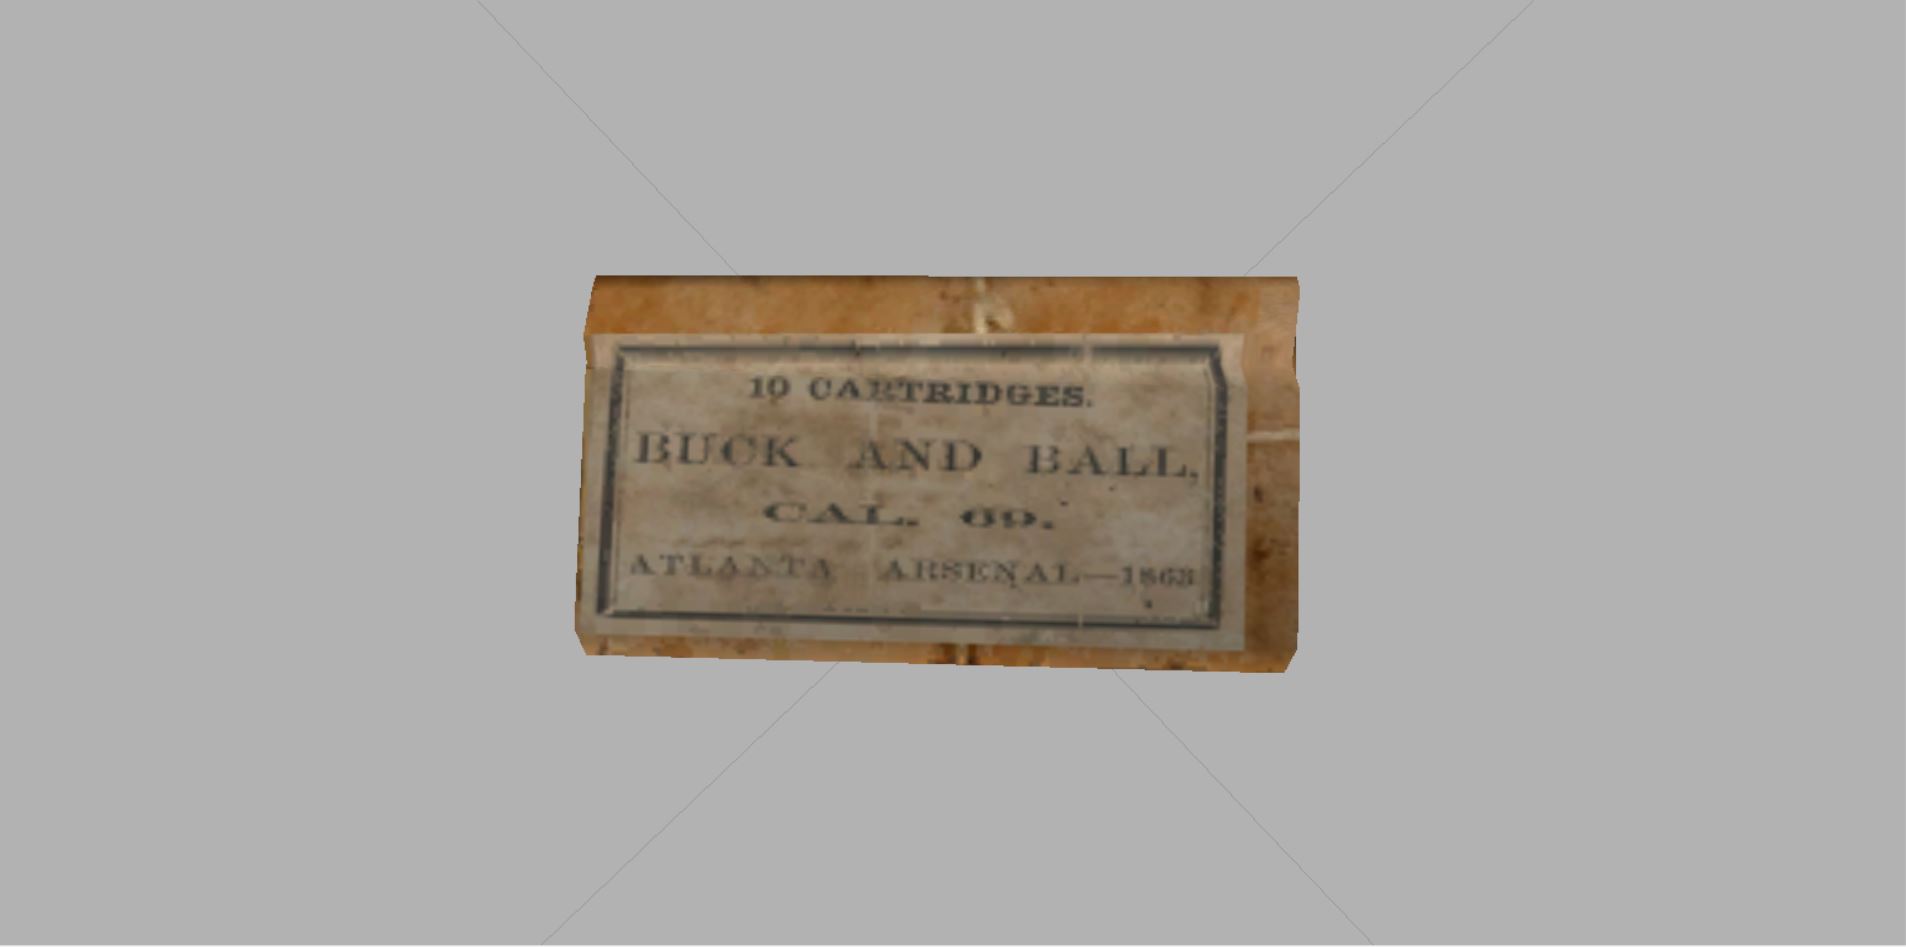
Buck and Ball
With the advent of rifled muskets in the Civil War, smoothbore muskets began to fade from common use on the battlefield. However there were not always enough modern rifles to go around, and as a result many old and obsolete smoothbore muskets were taken out of old armories and warehouses, refurbished, and pressed into action. Smoothbore muskets typically only had an effective range of around 100 yards, and so they were greatly outclassed by rifled muskets, which had an effective range that could reach up to 400 yards, or more. To help even out the playing field, many soldiers loaded their smoothbores with a special type of ammunition called "buck and ball". Rather than load the musket with one .69 caliber round ball, they would load them with a round ball as well as three or four .30 caliber buckshot pellets. This would essentially turn their muskets into shotguns, and in effect were very similar to modern day 20 gauge shotguns.
To make up for what they lacked in range and accuracy, the soldiers who used buck and ball were attempting to increase their firepower by being able to put more lead down range, and thus increase the likelihood that one or more of their bullets would hit an enemy soldier. Buck and ball was also a better choice when an untrained soldier felt the stress of battle and had to aim and fire rapidly through heavy smoke on a fast approaching enemy. Another benefit to buck and ball was that stopping a cavalry charge with a volley of buck and ball was much easier than with a single round ball or Minié bullet.
The Union Irish Brigade was well known for utilizing buck and ball because their leader, General Thomas Francis Meagher, believed his regiments fought better up close and wanted them equipped for such situations. They used the buck and ball ammunition to deadly effect at the Sunken Road at Antietam, and also against Pickett's Charge at Gettysburg. Reportedly the men of the Irish Brigade loved their smoothbores loaded with buck and ball so much, that they grumbled and were reluctant to give them up when the army replaced them with rifled muskets late in the war. There was also the 12th New Jersey Infantry who were known as the "Buck and Ball Regiment" because of their continued use of the special ammunition throughout the war. At Gettysburg, they used the buck and ball cartridges to devastating effect when repelling Pickett's Charge. The 12th New Jersey were given the order to wait until the enemy got close before firing and, when they did fire, it was reported that, "the storm of lead was beyond description," and that, "the rebels melted away like wax."
The way that buck and ball works in the mod is that every smoothbore musket in the game now has a buck and ball version of the weapon that has a script attached to it that will make it fire buck and ball. It is not possible to have a weapon use exclusively one type of ammunition, so it is the weapon itself that will create the buck and ball effect. Unfortunately this means that you can use any type of rifle ammunition with the buck and ball weapons, and it will still work, however I've included a new buck and ball cartridge item, and given it a +15 damage bonus, which is 5 more than round balls, so this should help incentivize the use of the buck and ball cartridges over the regular musket cartridges. In the end though, it's up to you as a player to decide if you want to roleplay and refuse to use other cartridges with your buck and ball weapon. Otherwise you can just use whatever type of ammunition you want and have fun.
The AI troops equipped with buck and ball weapons will, however, be equipped with the buck and ball cartridges. The only units that use buck and ball are the one's that exclusively use smoothbore weapons, which include the Union Irish Brigade and Garibaldi Guard, and the Confederate Orr's Rifles and 10th Tennessee. This is to avoid inconsistent damage and firing effectiveness with units that have a mix of weapons in their inventory, and also to make sure that it is not too ubiquitous in the game. This may change in the future, with the possibility of more units having buck and ball mixed into their inventories, after further testing and player reports determine whether or not it would be a good idea.
Buck and ball is not a wonder weapon, and works much like it did in real life; the buckshot travels at a slower rate and will fall off faster than round balls, ringtails, or Minié bullets. It is devastating to tight groups of enemies at close range, while being less effective against single targets and targets that are at long distances. It is also very effective against cavalry, since the horse and rider are a much bigger target than a single man on foot, and therefore the spread of bullets are more likely to hit them. Buck and ball can still be relatively effective at distances when you have one group in your party, or even your entire party, made up of troops armed with it, because 50 to 160+ troops all armed with buck and ball are bound to hit something with their volleys, just due to the sheer volume of bullets that are flying through the air.
Bandit Factions Overhaul
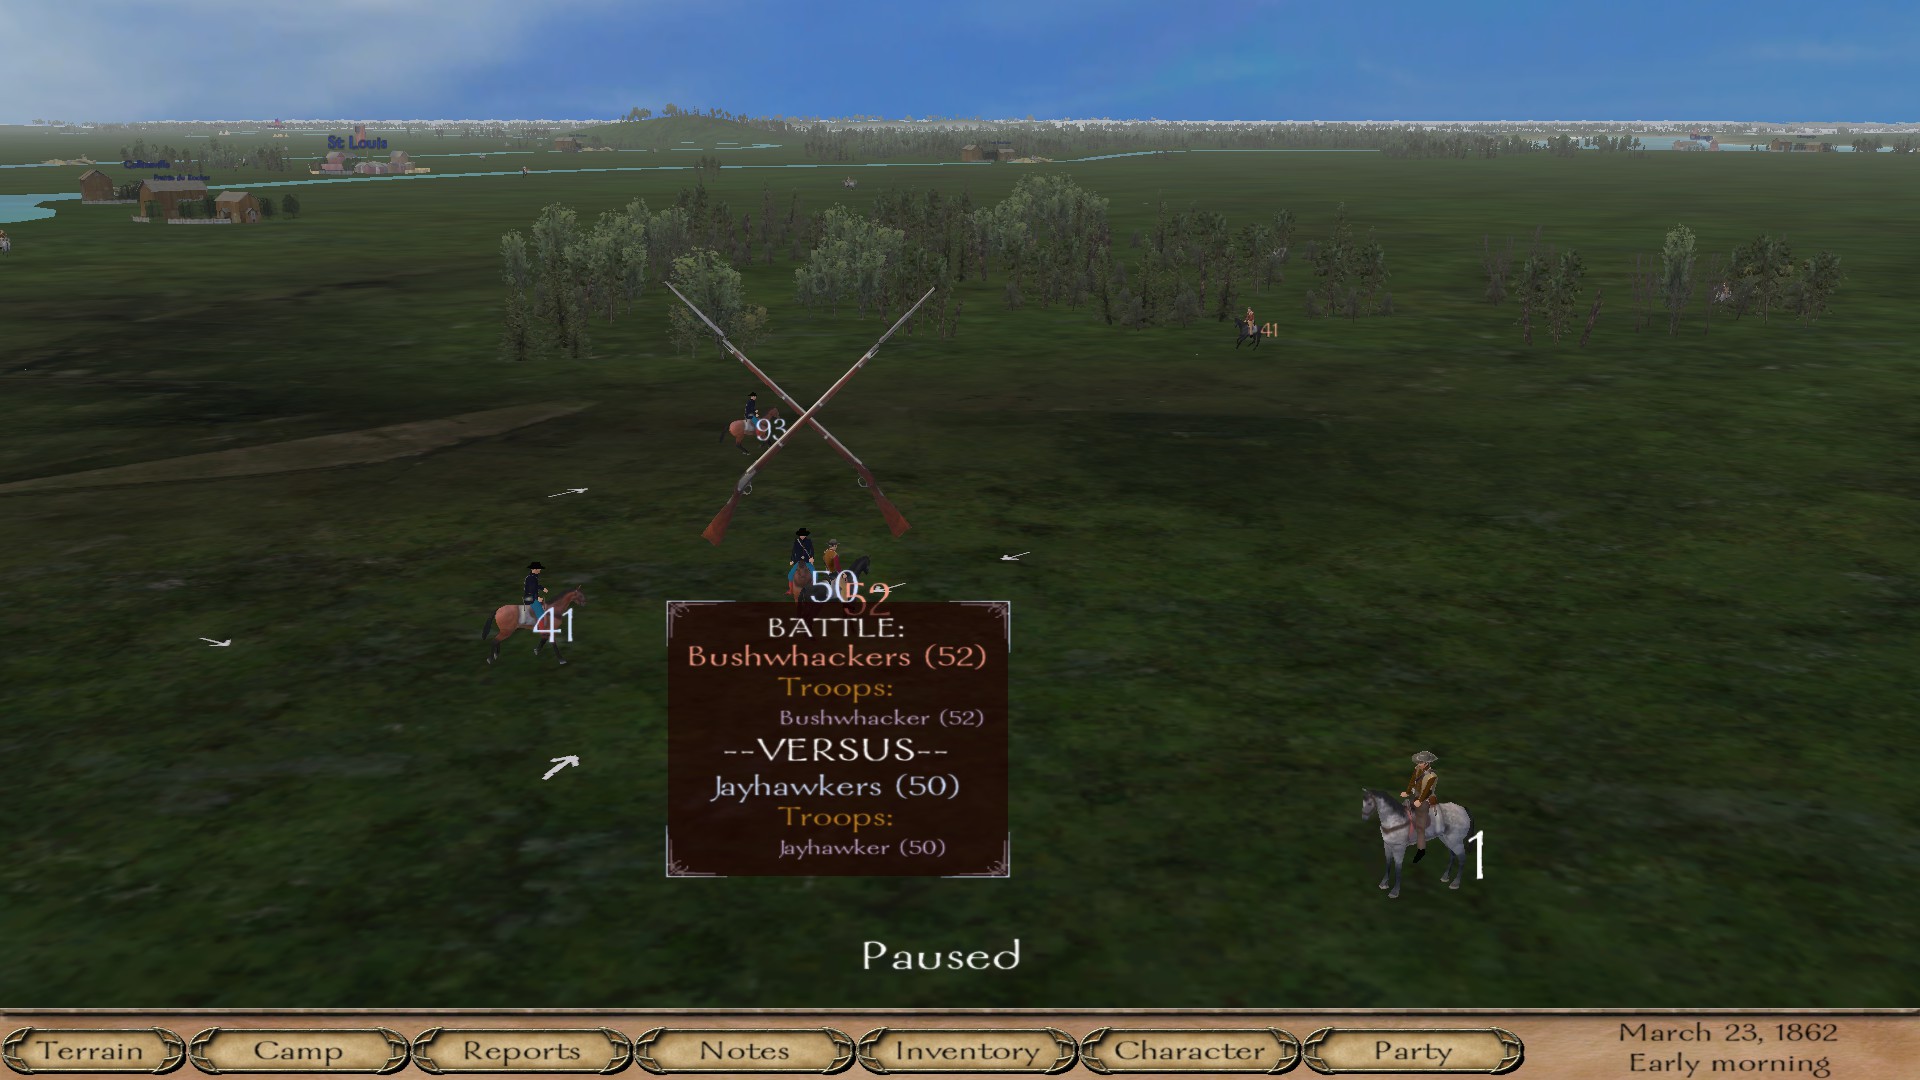
Bandit factions in the mod have undergone some significant changes in how they operate on the campaign map. All of the bandit parties are now grouped into new factions; Confederate partisans, Union partisans, Native American raiders, and outlaws. Foragers, Bushwhackers, Jayhawkers, and Guerillas, are assigned to the partisan factions. The Union and Confederate partisans will fight each other and other members of opposing factions, and the main Union and Confederate factions will not attack or be attacked by their own foragers and partisans. They will still attack civilians, as well as the player when they are not a member of a faction. Of course once the player joins a faction, they will become friendly with their own faction's partisans, and hostile with the partisans of the opposing factions. The Union and Confederate partisans will also have their own historical leaders that will spawn on the campaign map with their own parties, including James H. Lane, Daniel R. Anthony, and James Montgomery for the Jayhawkers, and William "Bloody Bill" Anderson, William Quantrill, and John S. Mosby for the Bushwhackers. These leaders will fight against opposing factions, and will also raid villages.
Looters and deserters are outlaws, and are hostile to all factions, including civilians. Native American Raiders are their own faction, and are likewise hostile to all factions and civilians. There are also parties of escaped slaves that will randomly spawn from Confederate territories and attempt to flee to the closest Union town. The escaped slaves will be attacked by Confederate factions and outlaws, and are neutral to everyone else. There are likewise parties of bounty hunters who will attempt to intercept the parties of escaped slaves. Keep in mind though that the number of parties of escaped slaves and bounty hunters is low, so they may be difficult to spot on the map, but they are definitely there and you will notice them travelling around from time to time.
You may also notice that there are new map icons. Me and madsci have made entirely new icons from scratch, replacing the icons of all the parties on the world map. We have even made it so that Union and Confederate deserters use separate icons, and they will also change depending on whether the deserters are infantry or cavalry. The player's icon will also change while they are part of a faction, depending on whether they are a general or an enlisted soldier, and whether they are mounted on horseback or not.
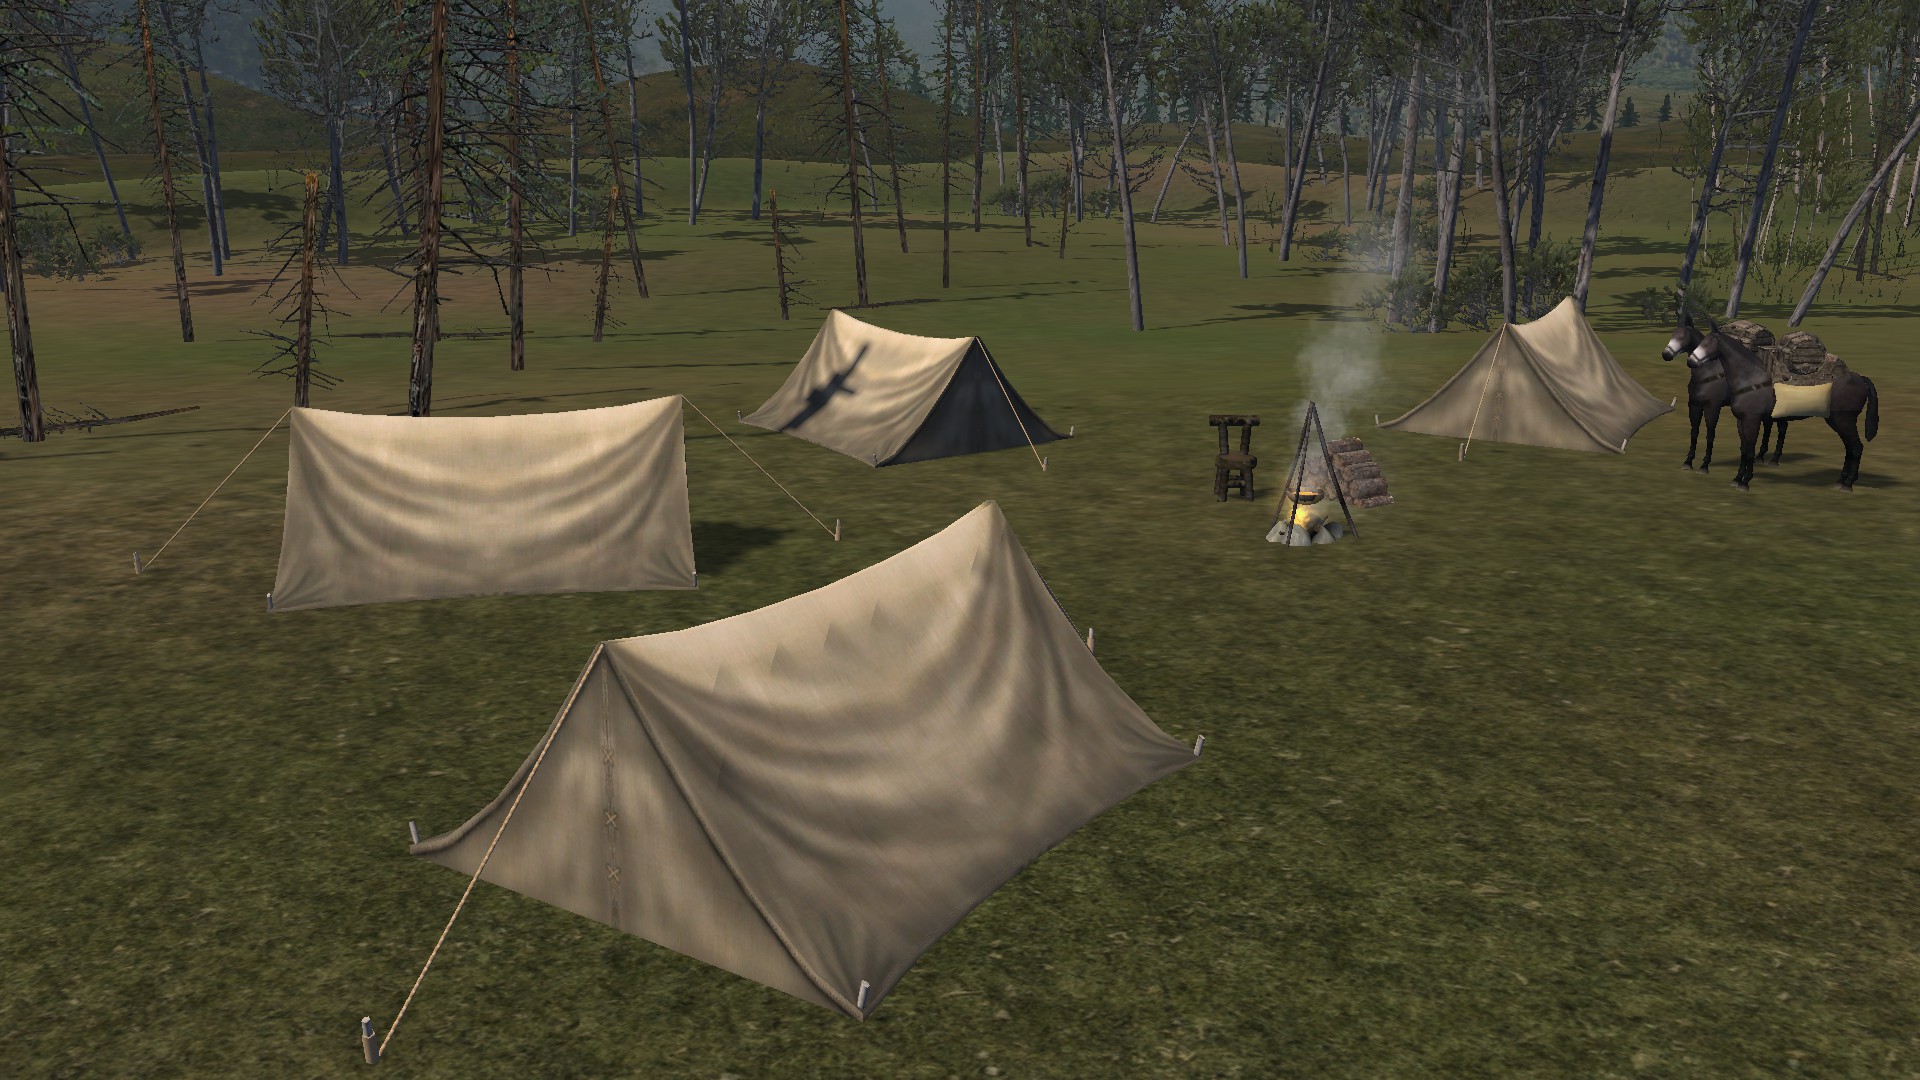
Player Camps
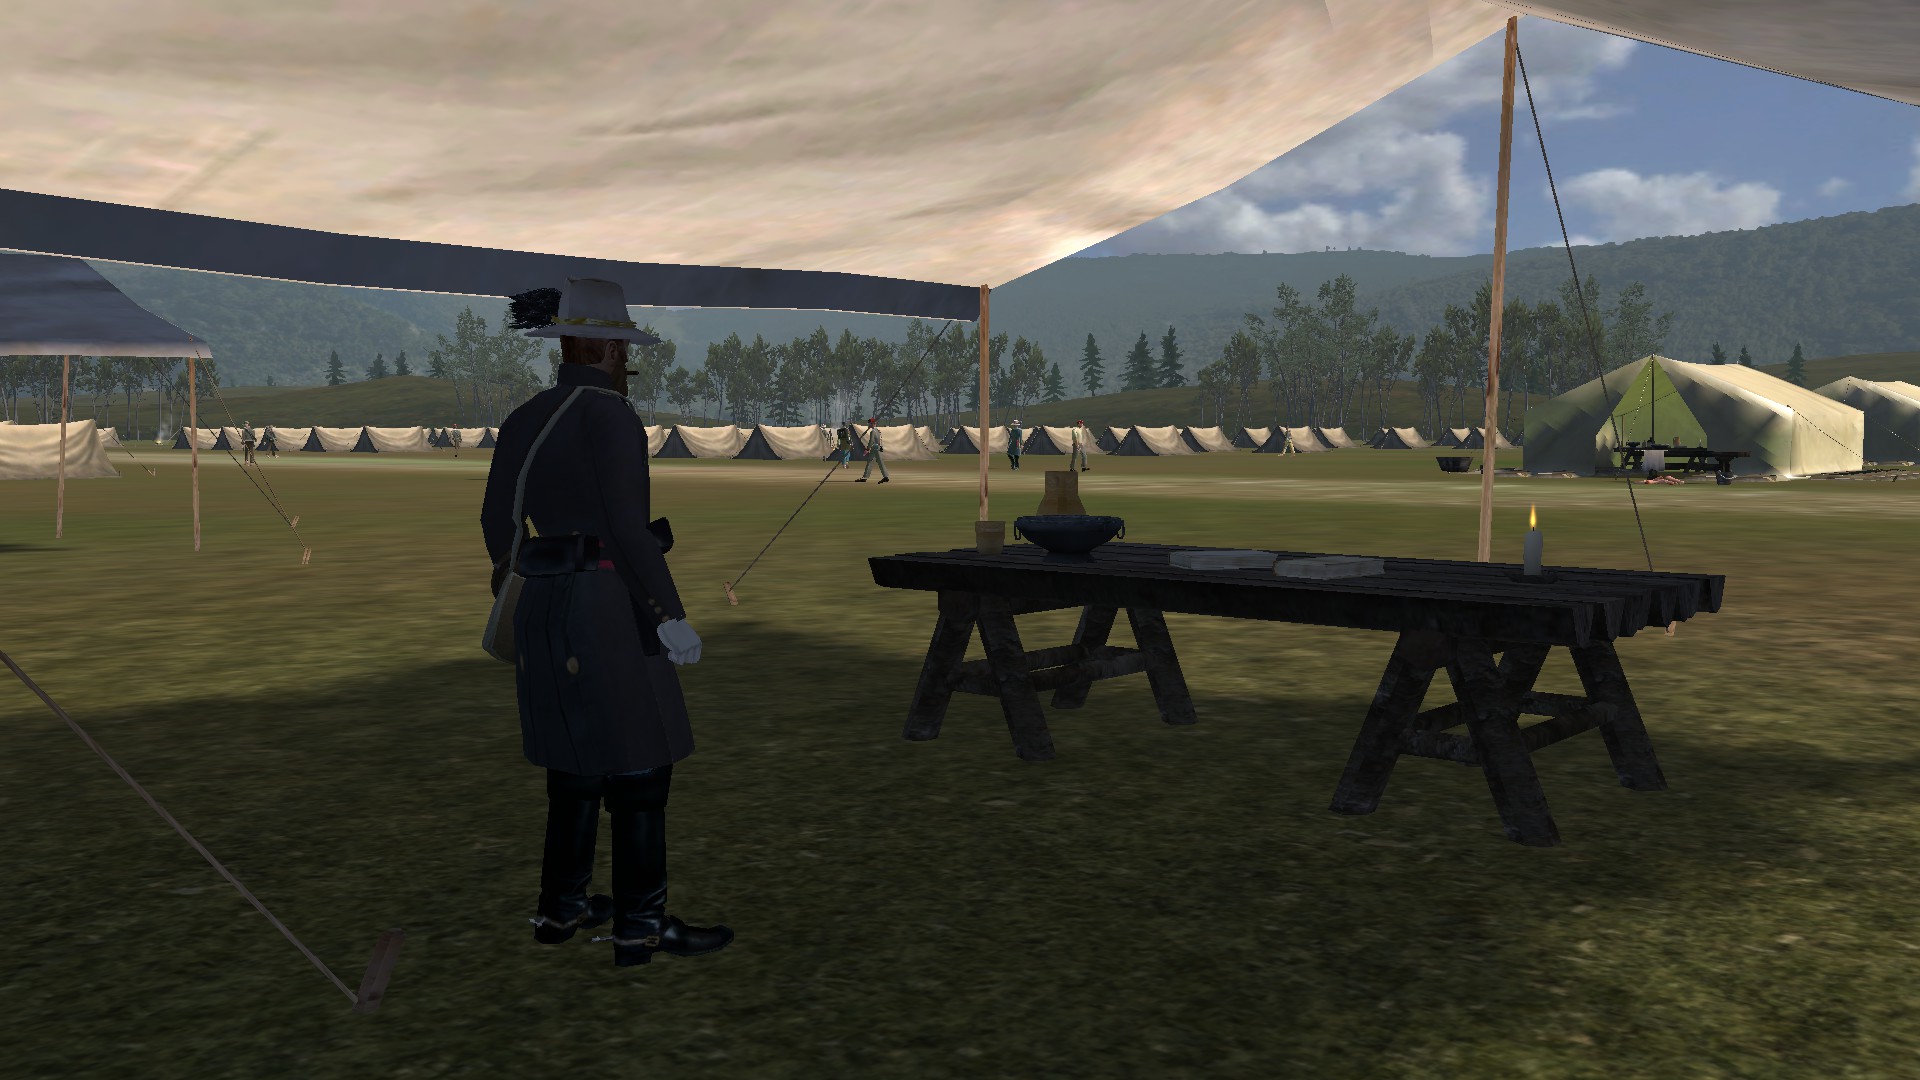
A somewhat minor feature, but one that should add a bit more depth and immersion to the mod, is the addition of the ability for the player to walk around their camp. There are three different camp scenes that are used depending on how many troops the player has in their party, and each of these three camp scenes are completely new and made from scratch. Soldiers in the player's party will spawn around the camps and walk around, with companions taking priority in the spawn list. Four of the soldiers that are spawned will not move, remaining in place around the camp fires. Any of the soldiers in your camp can be spoken to, and they will give you a simple greeting.
The smallest camp will appear when the player is alone or has up to 10 troops in their party.
When the player has between 10 - 50 troops in their party, the medium sized camp will appear.
And when the player has 50 or more troops in their party, then the largest camp will appear; one that truly befits an army.
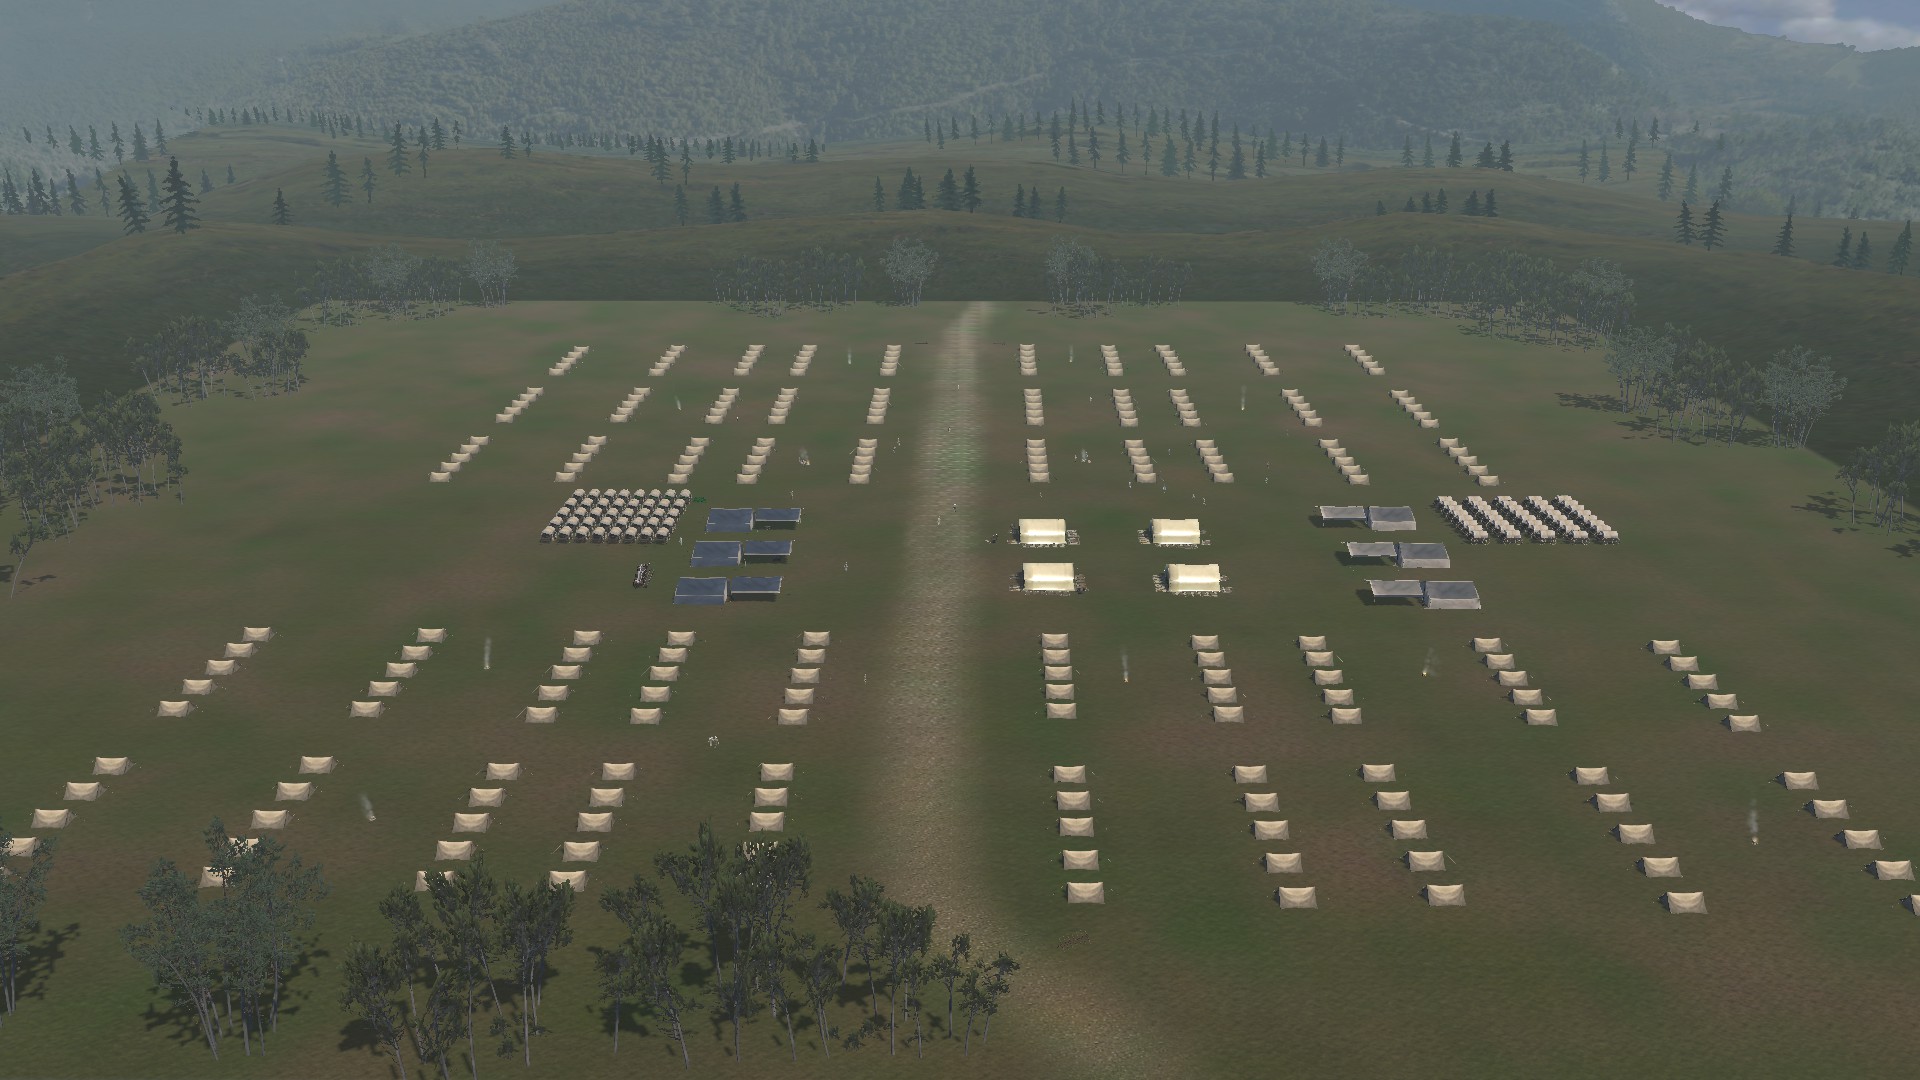
More detail will likely be added to this big army camp scene in the future. It's already fairly complete as it stands right now, but there are still some things here and there that I may want to throw in to make it feel more full and alive. Both the small and medium sized camps are also used as bandit lairs for the Union and Confederate partisan factions, replacing the old Viking style beach scenes and such that they used before.
Native American War Cry
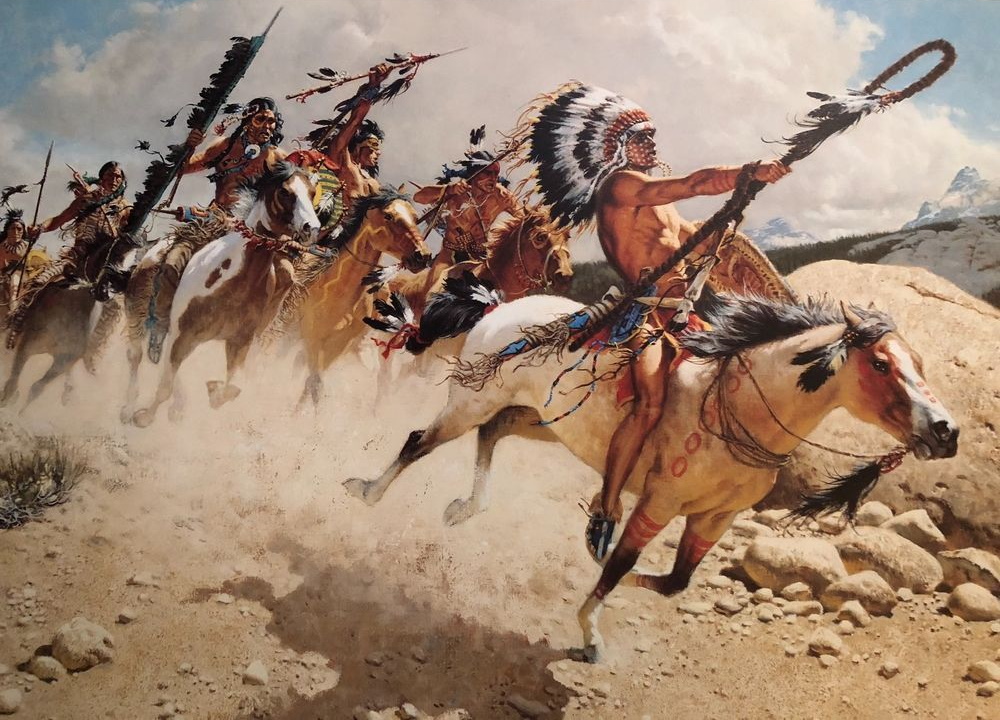
In the previous updates, we had added a war cry ability for both the Confederate and the Union factions, however we had also added a war cry for the Native American faction, but unfortunately there were some mistakes in the code that prevented it from working. Those mistakes have now been rectified, and the war cry ability for the Native Americans now functions properly. It works just the same as the other war cry ability for the Union and Confederates, where you can press the B key while in a battle and it will play the sound of the war cry. Remember, you must be a member of a faction to be able to use the war cry ability. You can watch the video below to see the new war cry in action.
Myself and madsci have worked very hard the last several months to bring you all this update, often working late into the night in order to make the most of our limited time. This last month especially we made a big effort to get everything done in time for Christmas, and just creating this article alone was a big effort. So, we will be taking a short time to rest and plan our next steps, and then come back to the mod later with fresh eyes. Rest assured that we still have plenty more to do going forward and although we have tackled a significant amount of things that needed to get done, the mod is still definitely not in a 100% finished state.
We will still be making a lot more changes and improvements, finishing up the remaining unfinished scenes, especially in the Native American territory, maybe add some new weapons and things like that. Some of the Union locations like Chicago may also be turned into cities, and perhaps more locations will be added as well to help fill up some of the large empty areas of the map. There could potentially still be bugs lurking somewhere in the mod, and if we find them, they'll get sorted out. Once all the major stuff is out of the way, then we might consider adding more complex features, if possible.
As always, if you find anything is wrong with the mod, or you need help, or have any suggestions, questions, or concerns, don't hesitate to leave a comment here on the Moddb page, or on the mod's discord server. Also if you think you could be of service to the mod's development and want to join the team, or to just volunteer to contribute in some way, you can get in contact with me and we'll take it from there.
That's all for now, I hope you all enjoy the mod! I wish you a very merry Christmas (or a happy holiday if you celebrate something else), and have a wonderful New Year!
Never stops amazing me how exhaustive the research and effort put into this mod really is, it's something one sees very rarely in Warband mods especially. God speed
Thank you, much appreciated! It'll only get better from here. :)
Great stuff! The best civil war mod for Warband there is! :)
Thank you, glad you like the mod. Have fun! :D
Please tell me how to use canons? My artillerymen are joining battle by feet
You must ensure that your artillery crews are always at the very top of your party list, do not give them any orders, make sure they are assigned to the artillery group, and always check after battles if you have lost crews or guns. If you have lost any, you will need to recruit more crews/guns from the foundries in the cities.