lately I've been receiving messages asking me how to use the map editor to view and / or make levels for ZBloody Hell, If you have already tried using the editor to make a new level you might notice that it can crash as soon as you load up ZBloody Hell resources, so I thought I should make a little guide to show how you can get around this issue and start mapping.
Summary:
- Required Tools.
- Preparation (How to fix loading crash).
- Making your own level.
- Viewing and / or Editing the default levels.
- Conclusion.
Required Tools:
- Ultimate Doom Builder
- SLADE3 (only required if you want to change sky, music and other level aspects, or view and edit the default levels).
- latest version of ZBloody Hell
Preparation (How to fix loading crash):
- Download and Install Ultimate Doom Builder.
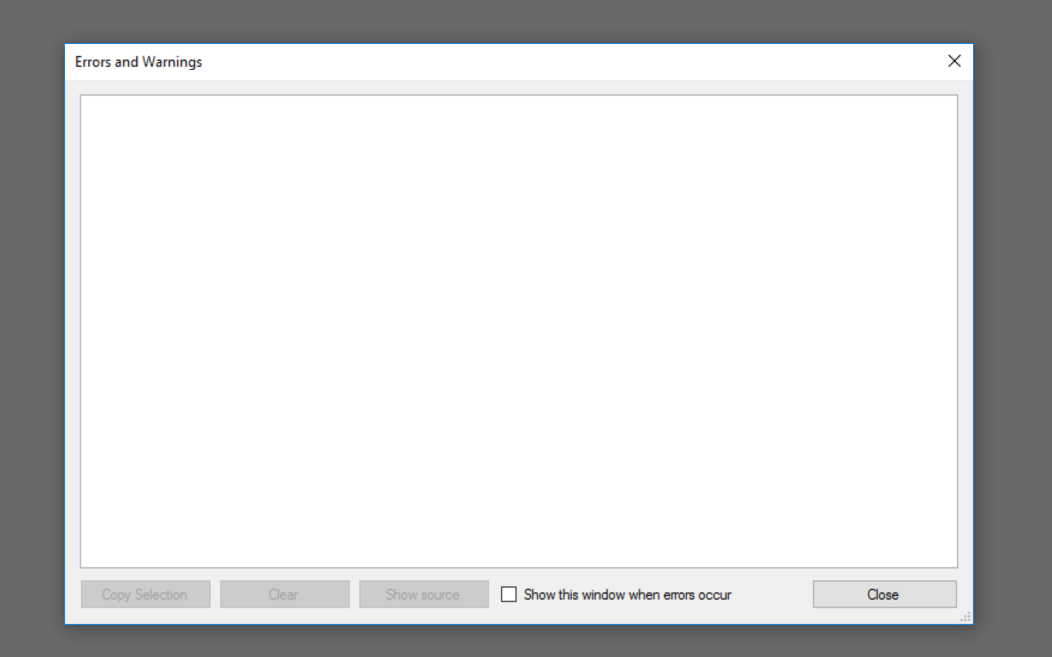
- Open it and Click Tools > Errors and Warnings.
- Uncheck "Show this window when errors occur", this is done to prevent crashes caused by missing Doom2.wad errors, since we don't need Doom2.wad we skip this errors window altogether.
Making your own level:
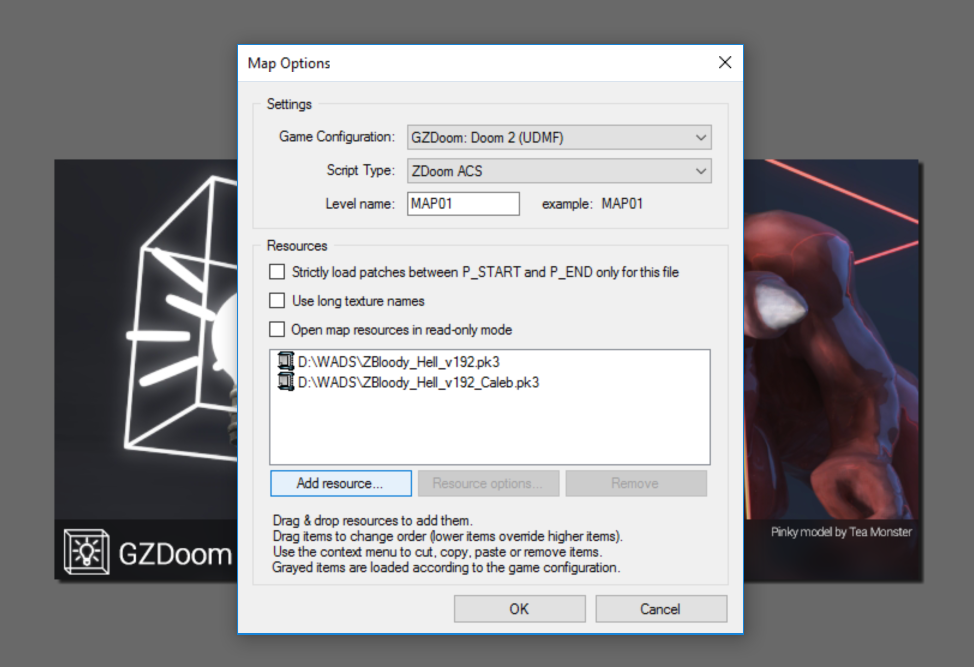
- Click on "File > New Map" and Choose the Format "GZDoom: Doom 2 (UDMF)"
- (Optional) Change the Level name to whichever you want, this is used to identify the slot of your map (eg: MAP01, E1M1, LVL01...etc)
- Click on "Add resource..." and select the tab "From PK3/PK7" and navigate to the folder where you have ZBloody Hell files and add them.
- Click "Ok" and Voila, you can now make your own level, look up some Doom and UDMF mapping tutorials on google for more in-depth details on the process if this is your first time making Doom maps.
If you want to take this one step further and also change the Music, Sky, Level title...etc read about MAPINFO on the ZDoom wiki.
Viewing and / or editing the default levels:
Sometimes you may want to just view some of the game's default levels to either edit them and add your own touch to them or just want to view them to look for actors or textures names to replace for a different kind of mod, this is how you do it.
- Download and Install SLADE3.
- Open it and Click "File > Open" and Navigate to the folder where you have ZBloody Hell.
- Double Click the core ZBloody Hell file (the one without the word "Caleb" or "x").
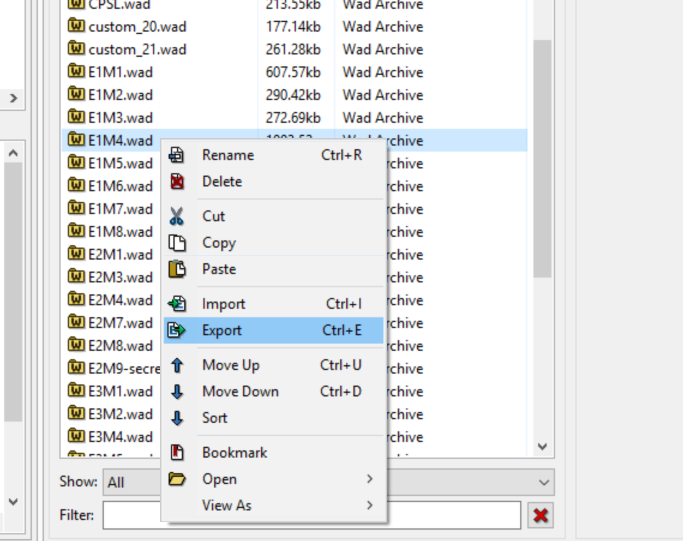
- Scroll down and Find the map you wish to view or edit.
- Right Click it and press "Export" and export it wherever you want.
You have now extracted one of the game maps, now it's time to open it using the map editor
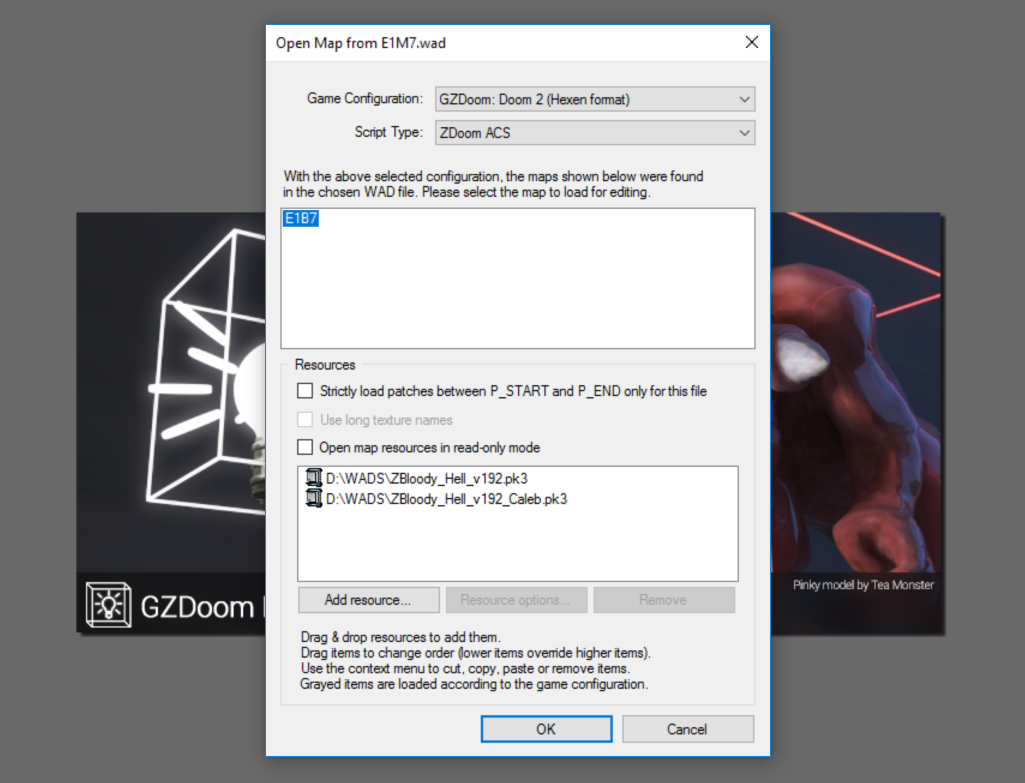
- Open Ultimate Doom Builder and Click File > Open Map...
- Locate the Map file you just extracted and double-click it.
- Select it from the Maps list.
- Click on "Add resource..." and select the tab "From PK3/PK7" and navigate to the folder where you have ZBloody Hell files and add them.
- Click "Ok" and there you go, you can now view the map and / or edit it however you see fit.
Conclusion:
And that's ZBloody Hell mapping in a nutshell, It's exactly the same as mapping for any other game running on the GZDoom engine, although the loading process can be troublesome to some people, Feel free to share your work with us in the addons section.