TUTORIAL for SoNER v1.02 and later
Note: Doing this may cause in-compatible checksums! If you're planning to play with your friends make sure to give them the altered textures so they're the same among the parties involved.
Step 1: You will need to open 4 of the following textures with your preferred Image Editing Software. (GIMP is used in the example)
All located in Textures folder
- Portraits_LARGE.tga
- Portraits_MEDIUM.tga
- Portraits_SMALL.tga
- Portraits_TINY.tga
Step 2: Take 4 samples of your Image with these sizes:
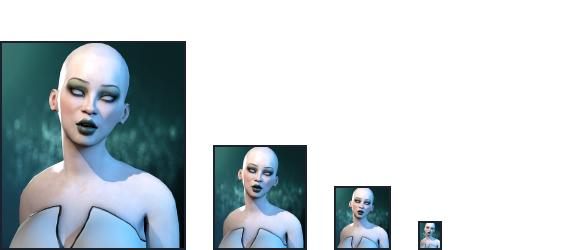
- LARGE goes to Portraits_LARGE.tga
- MEDIUM goes to Portraits_MEDIUM.tga
- SMALL goes to Portraits_SMALL.tga
- TINY goes to Portraits_TINY.tga
Step 3: Drag and drop the corresponding sized image into a placeholder or an already filled slot
Example: LARGE sample being placed in the Portraits_LARGE.tga texture
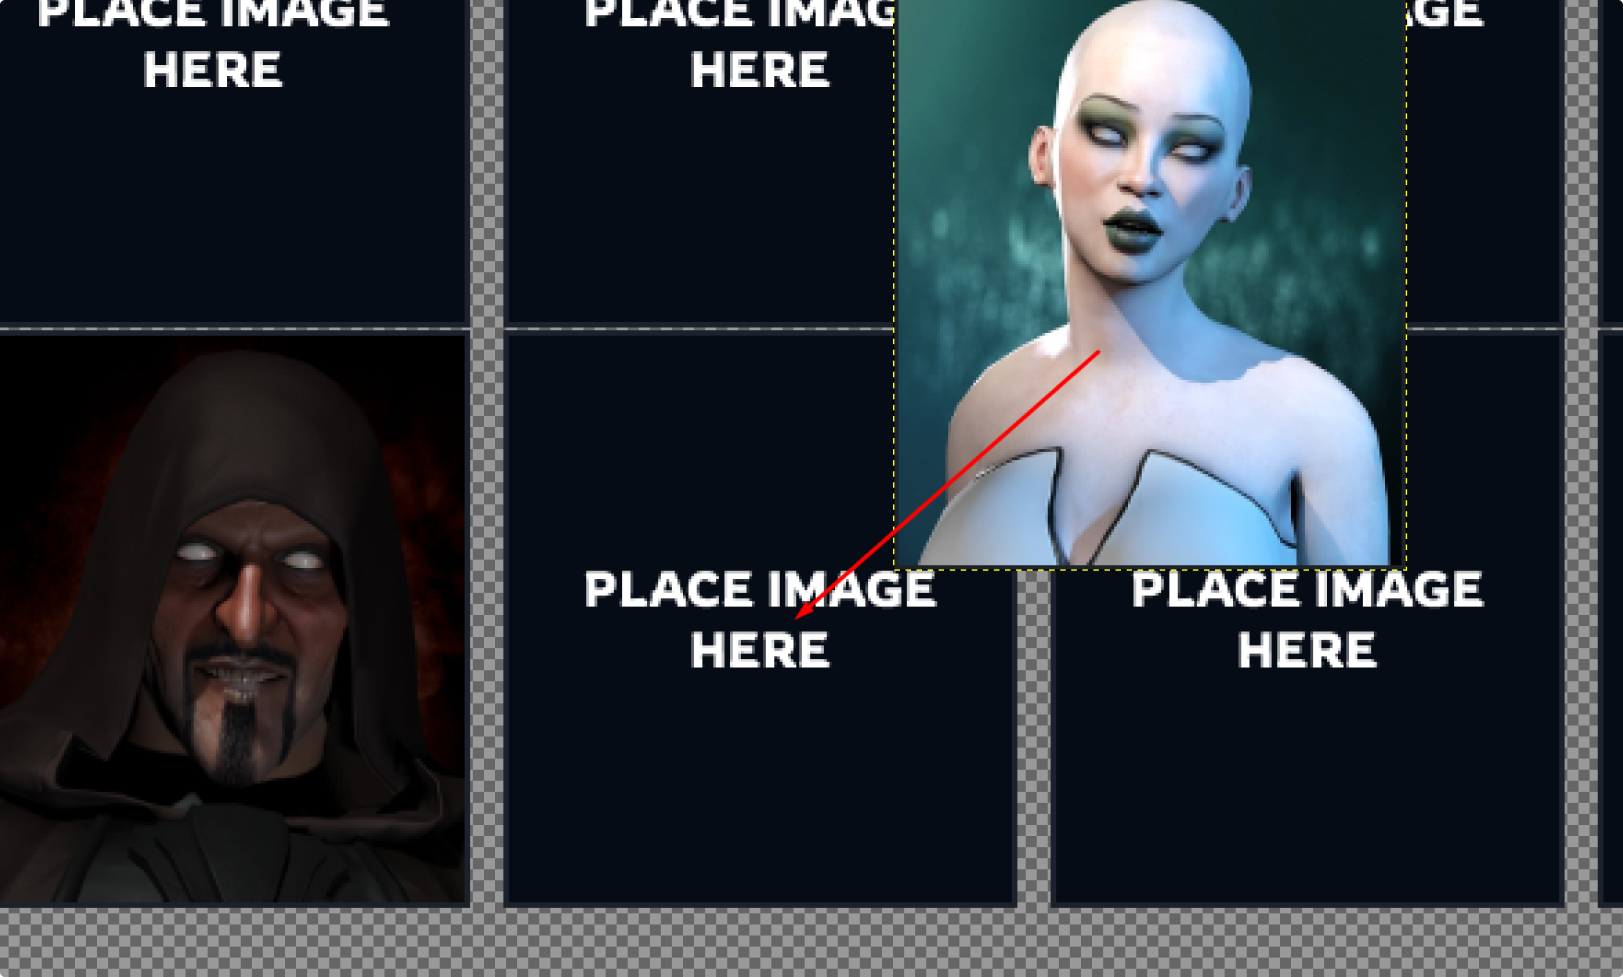
Repeat the same thing for the rest of the textures, Portraits_MEDIUM.tga, Portraits_SMALL.tga and Portraits_TINY.tga
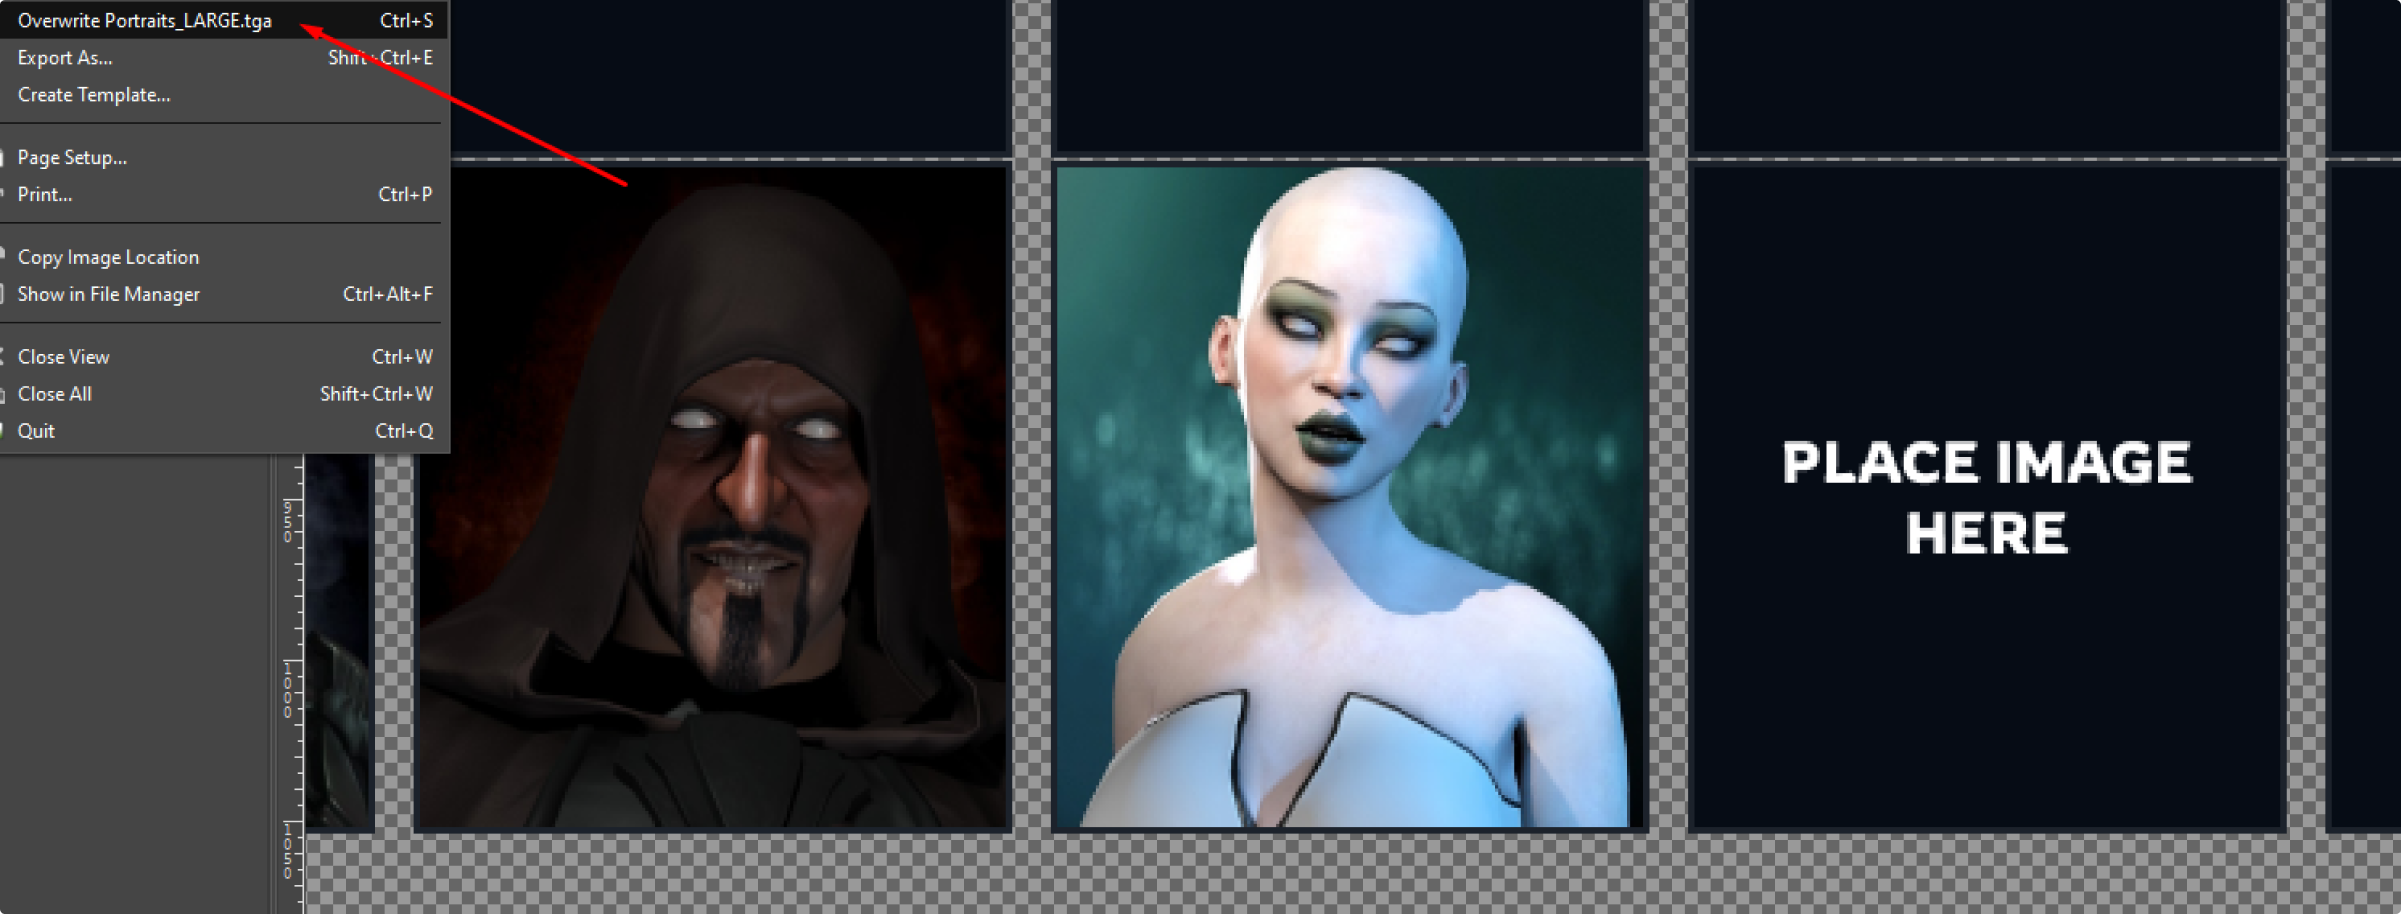
Step 4: Overwrite/Save all the textures (Ctrl + S)
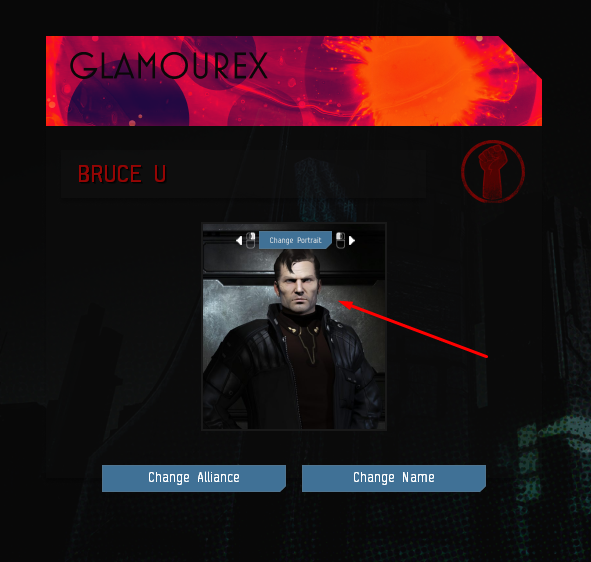
Step 5: To use your newly created Portrait go to the My Character section of the game and press the "Change Portrait" button until it appears on your screen