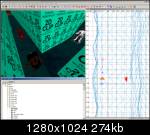
Mapping for HQ2 is almost like mapping for vanilla D3.
It's just a bit easier because:
- the camera always faces the same direction, so you don't have to map everything and performance are usually good even without optimizations.
- there are new entities that help you do to complex stuff without scripts (example: platforms moving along a path).
This first tutorial will show you how to create a simple map with weapons and enemies.
I'm assuming you are already familiar with the basics of Radiant mapping.
1) Run the editor
Launch D3 with the following settings:
+set fs_game hardqore2 +set developer 1 +set r_fullscreen 0 +set r_mode 7 +wait +wait +editor
Note that "r_mode" value identifies the resolution. Higher the value, higher the resolution:3 = 640x480, 4 = 800x600, 5 = 1024x768, 6 = 1152x864, 7 = 1280x1024 and 8 = 1600x1200.
Windows users can simply use the file "hq2_editor.bat", which can be edited in the same way with a text editor.
2) Create the geometry.
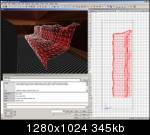
Let's create a simple boxy map, with a skybox texture and a terrain.
Note that the map is meant to be seen only from left to right (Top View).
3) Place the inital spawn point.
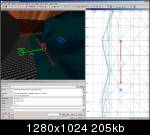
Place an "info_player_start" where you want the player to start, just like Doom3.The player will walk only on the plane (parallel to the Y-axis) defined by the origin of the info_player_start, as shown in the figure.The camera will always look at the player from the left.The camera is 350 units far from the player, so make sure there is enough space in between the player and the walls on the left.
Note: all of this this is true even if you set a bad angle on the info_player_start: in this case the angle will be ignored.
4) Test it!
At this point you can already run BSP and test your map to make sure player and camera positions are ok.
5) Place items.
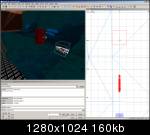
Simply place them in the map where you want to.Just remember to use item_* instead of weapon_* entities if you want rotating weapon pickups.
New items:
- item_extra_life: gives an extra life
- item_jetpack: enables jetpack
- item_armor_boots: enables double jump
6) Place enemies (This is the most important part of this tutorial!).
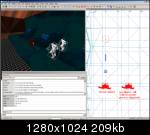
By default, every monster starts locked to the plane defined by its own origin, just like the player does. They can attack the player only if they are on the same plane, so you usually want to place them aligned with the info_player_start.However, once activated, they are able to walk to the enemy's position and to auto-lock on his plane.
This means you can place the monsters wherever you want...even on the backgorund or the foreground: once activated they will walk toward the player, will align themself with him and then will start attacking.
Monsters also have few new keys in the editor (scroll down the list!) to alter this behaviour, but you probably won't need to use them.
Tip1: the new key "skip_sight" will force the monster to skip the 'sight' animation and to attack asap.
Tip2: in any case, monsters don't attack when outside of the screen (that is, when they are more than 350 units far from the player).
7) 2D clip
2d_clip is a sort of "player_clip + monster_clip".You should always place big brushes of 2d_clip anywhere players and monsters shouldn't go.
You may wonder... if players and monsters are already locked on a plane, than what 2d_clip is for? It helps optimizing and compiling the map and makes the AI to behave better.It's usually very easy to place 2d_clip because the gameplay is usually on a straight line ;)
8) That's it!
Compile the map and check everything is ok.
I suggest you to use the "Wastedhate" map as reference to see how a more complex map is done.
On the other hans the "Playground" map shows you how to use all the new features of HQ2.
In order to open those maps with the editor you need to extract the *.map files from pak666.pk4/maps/hq2.
